
An Interest In:
Web News this Week
- April 24, 2024
- April 23, 2024
- April 22, 2024
- April 21, 2024
- April 20, 2024
- April 19, 2024
- April 18, 2024
Some of Our Sources
- Engadget
- Technology Review
- Joshua Blankenship
- Smashing Apps
- Crazy Leaf Design
- My Ink Blog
- Fudge Graphics
- Freelance Switch
- Design Modo
- Android Dissected
Help Webnuz
Referal links:
Building a Generative Image Bot with OpenAI, Telegram, FastAPI and Deta Space
You may have seen some of the amazing images generated by new AI services, like Midjourney and Open AI's DALLE 2.

Want to get in on the action? In this step-by-step guide, we'll build a personal Telegram bot that will let you use DALLE 2 from your phone.
When we're done, you'll have a fully functional bot capable of creating unique images from your own input. Your server will run and your images will be stored in your own personal cloud on Deta Space, where you can easily access and use them in other projects.
Let's get going.
Prerequisites
Before starting, out you will need the following, at a minimum:
- A Telegram Account
- An OpenAI Account
- A Deta Space Account (make sure to enable Developer Mode when signing up)
Optional:
- Additionally, youll want Python on your local machine, if you want to develop locally
Architecture
Architecturally, the bot is pretty simple:
- Interface: A personal Telegram bot will serve as your primary user interface, where youll send prompts and receive images.
- Generative Image Service: DALLE 2 (OpenAIs service for turning language into images) will turn the prompts into images.
- Server + State: In between, youll run a FastAPI server on Deta Space to bridge Telegram and DALLE 2. This server will save every image in a personal file store on Deta Drive.
Step 1: Creating Your Bot and Getting the Keys
The first step is to create the bot in Telegram and get the required keys from both Telegram and Open AI.
Telegram Bot Token
Search for BotFather in Telegram and start a conversation with it, by clicking the START button.
Type /newbot, and follow the prompts to set up a new bot with a name and username for your bot. BotFather will give you the bot token that you will use to authenticate your bot. Save this token somewhere safe; you will need it later.
Keep your token secure, it can be used anyone to control your bot.
Open AI API Key
Next, create an OpenAI account and get an OpenAI API key. This key will let your assistant generate an image with DALLE 2.
Step 2: Writing Your Bots Code
The server we'll write is fairly simple and will do two core things:
- Use incoming messages from Telegram to generate images with DALLE 2.
- Save the generated images to your personal cloud and send them back to Telegram.
The complete code is in this repository, and the core logic lives in the main.py file. The external Python libraries required are listed in the requirements.txt file.
Setup a Webhook with Telegram
Before Telegram can send our server a webhook on every message, it needs to know about our server. The /set_webhook route, when triggered, will configure the connection with Telegram. Once configured, Telegram will send events to our server's /open route.
The code assumes weve set the Bot Key as an environment variable in Deta Space (TELEGRAM). It also assumes it's running on Deta Space, as it grabs the server url from the Space environment. But well deploy the code to Deta Space and set the environment variables later.
Lets move onto the main logic of our bot.
Process Messages from Telegram
The first step for the core logic of the bot is to process an incoming message from Telegram as a prompt for the DALLE 2 API. The /open route in our server will handle this.
One thing to be aware of is that anyone can message our bot. But we dont want them to be able to generate and receive images. So well create a simple system to control who has access by checking the chat_id Telegram sends. Later on, we'll create an admin page that will let us add chat_ids to an authorized list.
Here's the relevant code that parses the incoming request and checks the chat_id against a list of authorized chat_ids:
from deta import Base, Drive# ... other codeCONFIG = Base("config")# ... other code@app.post("/open")async def http_handler(request: Request): incoming_data = await request.json() if "message" not in incoming_data: print(incoming_data) return send_error(None, "Unknown error, lol, handling coming soon") prompt = incoming_data["message"]["text"] chat_id = incoming_data["message"]["chat"]["id"] # ... other functionality authorized_chat_ids = CONFIG.get("chat_ids") # ... other functionality if authorized_chat_ids is None or chat_id not in authorized_chat_ids.get("value"): payload = {"text": "You're not authorized!", "chat_id": chat_id} message_url = f"{BOT_URL}/sendMessage" requests.post(message_url, json=payload).json() returnOne note: we assume that we've stored a list of authorized chat_ids in a Deta Base, Deta's database service. After we validate the chat_id, we can grab the message and use it as a prompt for DALLE 2 using a function get_image_from_prompt.
Generate Images with DALL-E 2
get_image_from_prompt is the function that sends the prompt to DALLE 2, via the openai Python library. It'll get an image as a response.
OPEN_AI_KEY = os.getenv("OPEN_AI")openai.api_key = OPEN_AI_KEYdef get_image_from_prompt(prompt): response = openai.Image.create( prompt=prompt, n=1, size="512x512", response_format="b64_json", ) if "error" not in response: return { "b64img": response["data"][0]["b64_json"], "created": response["created"], } return {"error": response["error"]["message"]}Using the defaults weve set, well get a 512x512 image response as base-64 encoded JSON. This code block assumes our server has the Open AI key from earlier, stored in its environment as OPEN_AI_KEY, but well set that later.
Now that we've got an image, we can save it and send it back to Telegram!
Save the images and send them back to Telegram
To save our image, we'll use Deta Drive, which will let us create a file store in our personal cloud. We can then send it the image back to our Telegram chat.
Both are done in the rest of the /open handler function from earlier, using a helper function save_and_send_img:
from deta import Base, Drive# ... other codePHOTOS = Drive("generations") # instantiate the Deta Drive# ... other codedef save_and_send_img(b64img, chat_id, prompt, timestamp): image_data = base64.b64decode(b64img) filename = f"{timestamp} - {prompt}.png" PHOTOS.put(filename, image_data) photo_payload = {"photo": image_data} message_url = f"{BOT_URL}/sendPhoto?chat_id={chat_id}&caption={prompt}" requests.post(message_url, files=photo_payload).json() return {"chat_id": chat_id, "caption": prompt}# ... other code@app.post("/open")def http_handler(request: Request): # ... other code open_ai_resp = get_image_from_prompt(prompt) if "b64img" in open_ai_resp: return save_and_send_img( open_ai_resp["b64img"], chat_id, prompt, open_ai_resp["created"] ) if "error" in open_ai_resp: return send_error(chat_id, open_ai_resp["error"]) return send_error(chat_id, "Unknown error, lol, handling coming soon")This function takes the base-64 encoded image and decodes it. Then it stores it to your Drive and sends it back to your Telegram bot.
Lastly, we'll talk about the management UI for your bot.
Creating a Management UI for your Bot
As the bot's owner, you'll want to know the bot's state, trigger the setup webhook with Telegram, and manage authorized chat_ids.
This is all done in a simple UI, declared in a single index.html file, with a bit of support from JS and CSS. This HTML file is served by the server in main.py via the /, /setup, and /authorize routes as a Jinja template.
Step 3: Running the Bot
Once you have written the code for your bot, you can deploy and run it out of your personal cloud in Deta Space.
Creating a Project in Deta Space
Before doing so, youll need to need to install and login to the Deta Space CLI. Then, ensure your local code has the server in your main.py file and dependencies in your requirements.txt file.
After you have the code, you can create your first Space Project. The CLI can bootstrap your project for Deta Space, if you haven't cloned the repository from GitHub.
In either case, you'll notice there is a Spacefile, which will tell Deta Space how to run your app. We'll want to ensure a few things about this Spacefile:
- First, that the
public_routesparameter is present, telling Deta Space to leave the/openroute open to the public (so Telegram can send it events). - Second, to set two environment variables under the
envparameter:TELEGRAMandOPEN_AI. We'll use these in our app to store the Telegram and Open AI keys, respectively.
The Spacefile also gives the app a name and sets an icon, among other things.
An example of a working Spacefile for our bot is here. But to make things easiest, it's recommended to clone the entire GitHub repository to bootstrap all the files.
Pushing Your Code and Setting Your Environment Variables
Once youve got your code ready and project created, you can push your local code to Deta Space with the Space CLI command space push. This will bundle your local code and deploy it as a usable app on Deta Space.
Once pushed, youll see a new icon in your Deta Space Canvas (the dashboard), which you'll see when you log in to Space. If you click the ..., then Settings, and then the Configuration tab, youll be able to set the environment variables.

Enter the Open AI API key and Telegram Bot Key from earlier and click Save.
Setting the Webhook & Chat ID
Now that youve added the environment variables, you can configure your assistant with the bot weve created in Telegram. Click your apps icon from the Deta Space Canvas (dashboard) to visit the bots admin panel. (On Deta Space, you are authenticated, so this view is only accessible to you).
If youve saved the Configuration Variables from the last step, it should show you the button to setup your webhook. Click the Setup Webhook button to do so.
One final step well have to do is add your own chat_id to the list of authorized users:
- Add your bot in Telegram as a contact via its username.
- Then talk to it with the command /chatid to get the
IDof your chat from your bot. - Third, Visit the the admin UI again, click the authorize button and then the add new chat id button.
- Finally, enter the
IDinto the input field and click submit.
You are now ready to generate images!
Running Your Assistant
Send your bot a message on Telegram, containing any prompt. Your bot should respond with the resulting image!

Accessing Your Photos
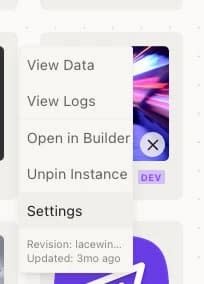
All the images you generate will be stored on your personal cloud in a Drive. You can view and download the photos, as well as program against them using the Deta Drive SDK. Click on the View Data option from the ... menu of your app, and then click the Drive tab to see everything you've got.


Other Options for Running Your Bot
You can install the app built in this tutorial in your own personal cloud in one click here. No coding is necessary, youll just need to:
- create a Telegram bot.
- set the Open AI and Telegram bot keys.
- visit the / route to configure everything before using the bot.
You can also run your assistant anywhere a uvicorn server will run, including locally for development. In the local case, youll need to use something like ngrok to tunnel your local host to an https url (and modify the DETA_SPACE_HOSTNAME variable in the code to grab the nrgok hostname).
Final Words
Congratulations youve got an AI assistant running in that can be accessed from your phone. It'll operate and store everything in your own cloud.
One idea for you to play with is to expose the image-generating function as an API, which you can use from a number of other apps (check out the API Keys on Deta Space).
But have fun generating all sorts of images. In the next part of our series, well be adding the ability to chat with our assistant, similar to ChatGPT stay tuned!
Special thanks to Bighneswar Parida for assistance with code + words.
Original Link: https://dev.to/deta/building-a-generative-image-bot-with-openai-telegram-fastapi-and-deta-space-8e2
Dev To
More About this Source Visit Dev To