
An Interest In:
Web News this Week
- April 14, 2024
- April 13, 2024
- April 12, 2024
- April 11, 2024
- April 10, 2024
- April 9, 2024
- April 8, 2024
Some of Our Sources
- Engadget
- Mashable
- Techcrunch
- Vandelay Design
- Noupe
- Fudge Graphics
- Web Design Ledger
- CSS Globe
- Hashedout
- The Verge
Help Webnuz
Referal links:
How to Make a Responsive HTML5 Bootstrap Landing Page Quickly
When you’re getting ready to launch a new website, a product, or a service, you need a dedicated place to send potential customers and clients. But, your website may not be ready to welcome new visitors yet. In those cases, an HTML5 landing page template is the perfect choice.
An HTML5 template is quick and easy to install. Unlike a CMS which may use a complex programming language, an HTML template is easy to edit even for beginners.
In this tutorial, I’ll explain the benefits of using HTML landing page templates and show you how to set one up. Don't worry: it's quick and painless.
Advantages of Using HTML Landing Page Templates
As I already mentioned, you can install and set up landing pages rather quickly. But, there are a few other benefits to using one:
- They are easy to customize with your content and preferred colors.
- Thanks to simpler code, they are lightweight, which means your landing page will load quickly.
- Finally, HTML templates don’t require additional maintenance or updates, so you don’t have to worry about losing precious pre-launch time.
Now that I’ve covered the benefits of HTML templates, let’s dive into the tutorial.
How to Use an HTML Landing Page Template
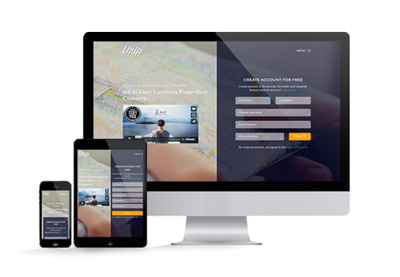
For the purposes of this tutorial, I’ll be using the Pure template. It’s a clean and minimal template that can be used for a variety of purposes and comes with a working contact form and MailChimp signup form.

In addition to the template, there are a few other tools you’ll need so you can modify the template and get your site live:
1. A Domain Name and a Hosting Company
Before you select a template for your landing page, you’ll need to purchase a domain name and sign up for a hosting plan. Nowadays, you can purchase a hosting package starting as low as $5/month and most hosting companies will provide you with the domain name free of charge when you sign up for their plan. Some hosting companies will offer unlimited space and bandwidth, and some will limit the available resources.
Make sure to do your research and read a few independent reviews about hosting companies that pique your interest. Seeing how satisfied their previous customers are can be a great indicator about the services offered and the quality of customer support.
2. An FTP Client
The next item on your list should be an FTP client. It will allow you to connect to your hosting server and upload the template files.
There are plenty of FTP clients that are available for various operating systems. A popular FTP platform that can be used on all platforms is FileZilla. It’s also free to download and use.
3. A Code Editor
You'll need a code editor to modify your template. Using a code editor will make it easier for you to find the code you need to edit since they use special syntax highlighting. You can use Notepad++ if you’re a Windows user or TextWrangler if you’re a Mac user. Another option is to use Sublime Text 3 which can be used on both Windows and Mac computers, as well as Linux, and offers a free trial.
4. The HTML Template & Content for Your Bootstrap Landing Page
Finally, you’ll need to purchase and download a landing page template and prepare the content that will go on your landing page. You can find many html landing page templates on Envato Elements that were designed specifically for landing pages. Once you find a template you like, purchase it and download it to your computer. Make sure to unzip the folder and save it somewhere where you can easily access it.
Gather all the images and text that you want to add to your landing page. Keeping it all in one place will make it easier to add it to the template as well as transfer the images to your server.
How to Customize Your HTML Landing Page Templates
With everything in place, it’s time to customize the template and add your information to it. Let’s start by getting familiar with the template’s structure.
1. The Structure of the Template
As mentioned before, I’m using the Pure HTML landing page template.
After unzipping the folder, you can see that the bootstrap landing page template contains several subfolders and a number of HTML files. Here’s what the structure looks like:
CSS. This folder contains CSS files that control which fonts and colors are used in the template as well as the overall layout of the page. You'll need to edit this file if you want to change the default styles.
Documentation. Here, you’ll find the documentation for the Pure template that explains how the template works and how to customize it.
Fonts. This folder has all the icon fonts
Img. The img folder holds all the background images used in the template
Js. The Javascript folder has all the Javascript code needed for the template to function properly. It provides extra functionality for toggling menus, validating forms, controlling animations. Usually, you won’t need to edit the files in this folder.
Php. This folder holds the PHP code needed for the contact form to function. You'll need to edit these files so that your contact and MailChimp form properly gather and submit information.
Sass. The sass folder contains all the variables for the stylesheets.
You’ll also notice several HTML files, which represent different demo versions of the HTML landing page templates. You can right-click or double-click each of the HTML files to open them in your preferred browser and see what they look like. When you’ve found the demo version that you like, close out all other tabs.

I’ll be working with the index-normal-scroll-countdown.html template throughout the rest of the tutorial.
2. Edit the HTML Files
Now that your chosen HTML landing page template is open in your browser, it’s time to replace the information with your own. The easiest way to do this is to understand which part of the code in the template needs to be modified. Let’s start by right-clicking on the first line of text below the counter and clicking on Inspect.
A new panel will show up at the bottom of your browser window. You’ll notice that it shows the HTML code that makes up our template on the left-hand side as well as the CSS that provides styles for the template on the right-hand side.

<p class="open-anim opacity-0">Before the launch, enjoy a <strong>Very Limited Opportunity</strong> by subscribing to our newsletter.<br>
Click on the next button to get more information about our project.</p>
To replace the dummy information in the template, all you need to know which tags contain the information you want to edit. Then, you can find those tags in the code editor and insert your own text.
Now that you know how to find code that needs editing, go back to the template folder, right-click on your chosen HTML file and select Open with, and choose the code editor you downloaded earlier. You should see the complete HTML code that makes up your template.
Scroll down the code editor until you find the same line of code we highlighted in the browser. It should be around line 75-76. Then, click inside the <p> tag, highlight the text and replace it with your own.

To edit the rest of the template, you can simply repeat the steps above until all the information you want is included.
You can also delete sections of the template if you don’t want them to appear. Similarly, you can also duplicate sections if you want to include more information. Simply select the part of the template starting with the opening tag and highlighting everything up to and including the closing tag for that part and either delete or copy and paste that section below.
When you’re done replacing the content, it’s time to replace the sample images with your own. To make this process easier, take a look at the image names in the template’s img folder and then name your images using the same names. Then, select all the placeholder images, delete them, and place your images in the img folder instead.
How to Customize the Appearance of Your HTML Landing Page Template
Now it’s time to tweak the appearance of your template and edit the styles in CSS. By default, the Pure template comes with different stylesheets for the dark and light version of the template:

To find out which stylesheet you need to edit, look at your HTML file in the code editor and search for the line that is similar to this:
<link rel="stylesheet" type="text/css" href="css/style.css" />
Go to your template’s folder and open the corresponding stylesheet in the code editor.
To see which line of code and style you need to edit, you can repeat the same process we used to edit the HTML.
In your browser, right-click on any element you want to style and select Inspect. Look to the right and you’ll see the styles used for that part of the template:

As you can see from the screenshot, the Inspector shows us the styles used for the paragraph text. Switch to the code editor and the stylesheet file. Scroll down until you find a line of code that begins with p.
Here, you can change the fonts used, the size of the font, as well as the color of the text.
If you want to change the background color of the template, look for the line of code that says body followed by curly brackets and then enter the HEX color code after
the part that reads background-color.
Don’t forget to save all the changes you’ve made by clicking on Save in your code editor.
1. Upload Your Files to the Server
After you have modified the template to your liking, you’ll need to upload it to your hosting server. Your hosting provider will email you with all the information you need to transfer files with FTP.
Launch your FTP program like FileZilla. You’ll notice the top bar where you can enter the server name, your username, and password. Using the information provided by your host, connect to your server by clicking on QuickConnect.
On the left-hand side of the FileZilla’s window, locate the folder with your template on your computer and click on it to expand it. Select all the files and folders and drag them over to the right side of the screen into the public_html folder.
Once all the files have been uploaded, open up your browser and enter your domain name. Congratulations, your site is now live!
2. Get More From Your Bootstrap Landing Page Template
A landing page can do wonders for your business or product as you’re gearing up for the launch. Here are a few tips that will help you get the most out of your HTML landing page templates and help you create hype:
What is a Landing Page? This tutorial will help you understand what a landing page is, how it can be used, and what makes a great landing page design.
A Smart Guide to Landing Page Optimization. In this tutorial, you’ll dive deeper into creating a well-designed landing page and learn how to optimize it for conversions
18+ Best Responsive HTML5 Landing Page Templates (2018). If you don’t know where to start when it comes to selecting a landing page template, this article will help you out. It features a collection of the best landing page templates with responsive designs
How to Write Landing Page Copy That Converts. The primary goal of every great landing page is to generate interest and convert visitors into leads and customers. But, that doesn’t happen without good copy. Use this article to improve yours and convince visitors to stick around.
Google Adwords Landing Pages—Is Yours Up to Scratch? If you plan on running a PPC campaign to your landing page, this article is a must-read.
To learn even more about HTML landing page templates or bootstrap landing page templates, review these tutorials:
 Landing Pages10 Best Bootstrap Landing Page Templates—With Responsive Designs
 Landing PagesFundamentals of Effective Landing Page Design
How to Use a Landing Page Template to Gather Leads
With the help of an HTML template, you can get your bootstrap landing page up and running quickly. Start by selecting one of our HTML landing page templates from Envato Elements or one of the bootstrap landing page templates from ThemeForest. Then, use our tutorial to guide you through the setup process.
Original Link:
Freelance Switch
More About this Source Visit Freelance Switch