
An Interest In:
Web News this Week
- April 29, 2024
- April 28, 2024
- April 27, 2024
- April 26, 2024
- April 25, 2024
- April 24, 2024
- April 23, 2024
Some of Our Sources
- BoingBoing
- Engadget
- Abduzeedo
- My Ink Blog
- Web Design Ledger
- CSS Globe
- Stylized Web
- Freelance Switch
- Web Resource Source
- Codrops
Help Webnuz
Referal links:
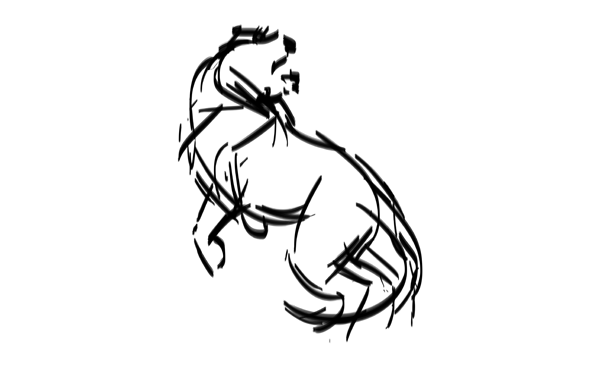
Drawing From the Shoulder vs. Drawing From the Wrist: Pros and Cons
The manual side of drawing seems to be a pretty simple thing. You just hold a pencil, push it onto the paper, and some marks are created. How to make these marks resemble something is another story, but it doesn't take a genius to at least initiate the process, right?
Most of us focus on the topic of drawing all the time without even considering the movement of the hand. If it's comfortable enough to create beautiful things, that's all you need. However, when you get into this, you'll see many experienced artists drawing in a weird way, with their hand hovering over the paper. They claim "drawing from the shoulder" is a superior way of drawing, and that "drawing from the wrist" is what only beginners do.
Recently I did a poll among my fans, and it turned out most of them use the wrist as the pivot for drawing, be it digitally or traditionally. Few of them said they used their elbow or shoulder.
So, is the majority doing it wrong? If so, why? Does changing the way you move your hand have any influence on the quality of your artwork? And are you really a worse artist if you're using your wrist?
What Is This All About?
Let's start from the very basics. To draw anything, you need to push a pencil onto some paper, and then move it. To move the hand holding the pencil you need to use a pivot of movement. There are four possible ones, all attached to the hand: the wrist, the elbow, the shoulder, and eventually the whole body. The farther from the hand, the lower the precision and the smoother the line.
Drawing From the Wrist
You use your wrist as a pivot when writing, and this movement is intuitively brought to drawing if you hold your pencil the same way as a pen. You can operate your pencil this way only on a very small surface, and often your elbow must be used to bring your hand any farther. This way of drawing allows for really slow, deliberate movements.

Drawing From the Elbow
You can use your elbow as a pivot when drawing something in a big format on your desk. This way your hand can move freely on all the surfaces without losing too much precision. In order to draw this way you don't need to hold your pencil as a pen—you can, and even should, hold it higher and more gently. You also should lead the strokes a bit faster.

Drawing From the Shoulder
You use this method when there's nothing to rest your wrist or elbow on. You shoulder rests on your body all the time, so you don't need any additional surface for it. This is what you do usually when you're writing/drawing on a blackboard, or on aneasel.

Drawing From the Whole Body
This method is used for huge surfaces, and you might have used it as a child, if you drew with chalk on a sidewalk. Here your arm stays stiff, and you move your whole body to drag your hand for a bigger distance. The grip doesn't matter, as it's impossible to get any precision here.

The Tool and the Movement
As you have probably already noticed, it's mostly about the size of your canvas. The smaller it is, the closer the pivot you use. However, there's more to it.
Pencil
The pencil is the most popular drawing tool. It's cheap and easy to use, and it also allows you to remove mistakes with an eraser. It may be surprising to discover that it's not the default drawing tool, and it comes with its own flaws not present in othertools.
First of all, a sharpened pencil is precise by default. A line drawn with it is just what it's meant to be and nothing else. Because of this you immediately see your mistakes, which may be quite frustrating for a beginner. You draw the first line, it looks bad, you try to fix it, and in the end you spend half an hour working on a few lines, without even touching the main subject of the drawing.
A sharpened pencil works best with the wrist, and that's how it's usually used. As a tool of precision, it requires deliberate movements from the start, even when you aren't sure about what you're drawing. It demands details right from the beginning, which makes it, when you think about it, a horrible tool for a beginner.

Charcoal
If you take drawing lessons, whether at school, on the Internet, or from a book, it's often required from you to use a charcoal to draw. And it usually turns out to be impossible to draw with. It can't be fully controlled, and it gives you fat lines you're unable to build details with.
This is because you bring the wrist movement to it, and charcoal is meant to be used with your elbow or shoulder. Yes, you can't draw details with it—this is very purpose of this method. With charcoal on a big surface you can render the motion, the flow, the rhythm of a line, instead of just making it resemble something. Therefore, it requires that you change not only your pivot, but also your whole way of thinking about what you're drawing.
If you don't have charcoal, you can also use chalk, or a crayon, or even a blunt pencil. The goal here is not to think about details, and to treat every line as a guide, not a command. To keep you from coming back to the sharpened-pencil method, hold the tool higher, so that it's impossible to draw detail with it even if you wanted. And, of course, keep your wrist stiff!

Ink
Ink seems like a less forgiving version of a pencil. You can draw details with it, but no mistakes are allowed! At least that's what it seems to you when you use it like apencil.
Ink (like all the similar mediums that give you slightly chaotic, non-erasable strokes) is best used with the elbow or shoulder. It doesn't allow short, overlapping lines, and thus forces you to create whole lines at once. This is how they get some character and style! It also teaches you how to use lines more sparingly, which will benefit your pencil drawings, too.
The Wrist vs. Shoulder War
It's quite discouraging to hear from an experienced artist that you're holding your pencil wrong. You may be told that "you must be a real master to draw from your wrist; it's definitely not for beginners" and that "drawing from the shoulder gives you expressiveness". You may observe professionals drawing and see that they even hold the pencil in a different way than you! But when you try to imitate them, you get tired easily and you draw even worse than before.
Let's look into this. The experience of the masters you may envy comes from years of practice. They're rarely young; usually they started their practice when graphics tablets and proper software were still a dream. They were doomed to traditional art, and they learned to make the best of it. They can use a variety of tools, not only a sharpened pencil on a small sheet of paper.
It has a few important consequences:
The Size of Your Paper
Imagine a life drawing lesson: a nude model and a group of students with huge canvases on their easels. They're holding pieces of charcoal and they sketch, obviously, from the shoulder. No sharpening, no erasing, pure drawing.
This is what's recommended to learn drawing. And it's great advice! But how can you scan such a big piece to digitize it? And when you still live with your parents, forget about easels, canvas, and charcoal—this looks like a total waste of money for someone who can't draw yet. Not to mention storing all these huge artworks!
So, here you are, with a pencil and a sheet of printer paper, observing a lesson of someone sketching lines longer than half of your desktop, and trying to imitate their movements. Let's be honest—you're doomed to fail. Their technique may be superior in terms of expressiveness and style, but you simply can't recreate it in your environment. And yes, your shoulder is going to hurt a lot if you try!
A Graphics Tablet
Generally, the bigger the tablet, the more expensive. It's obvious that most beginners use a cheap tablet, simply because they're not good enough to invest in costly equipment. And since it's also a small tablet, sometimes with the workspace even smaller than a sheet of a school notebook, there's no space for expressive movements of the elbow, not to mention the shoulder.
The good news is, there's no need to. Your wrist can be pretty expressive too, if you move it fast, and you can cross half of a huge canvas with very little movement, making the stroke smooth—just by using the Zoom function. In other words, start your pictures with a series of tiny thumbnail drawings. They're tiny, but so is your workspace, so they will work great together! Then you can gradually zoom in and add more details.

A Superior Technique of Drawing
So, is drawing from the elbow/shoulderreallysuperior? As in many cases, it depends. Each of the methods has its pros and cons, and sticking by one all the time just because you heard it's superior is silly!
Drawing From the Wrist
Pros
- You're extremely precise—you control the tool fully.
- You can easily draw the tiniest details.
- You can draw a whole picture on a small area.
- The result, if done properly, looks deliberate and clean.
Cons
- Your tool must stay sharp all the time.
- You control every little part of a line, so it's hard to draw it long and straight in one go.
- Every line is important, so if you don't know what you're drawing you'll probably end up with an "overlapping mess".
- You can't work on a bigger workspace.
- If you start a picture this way, it will likely look planned and lifeless.
- If you try to work faster and press harder, it's very easy to strain your wrist. With time it may even result in Carpal Tunnel Syndrome!
When to Use It?
- When you want to add details to a picture.
- When you want to fix something.
- When you have a small workspace.
- When you know exactly what you want to draw and you need precision for it.
Drawing From the Elbow/Shoulder
Drawing from the elbow is a compromise between the wrist and the shoulder, but it's more similar to the "shoulder style", so I'm putting it here.
Pros
- Your lines are expressive and full of style.
- You can work quickly and loosely.
- You don't need to focus on details—the picture looks quite finished with a fewlines.
- Your whole arm stays relaxed, so there's a lower risk of straining the wrist.
- You can draw long, straight lines and circles.
- You can use almost every tool for it, brush included.
Cons
- You can't fully control the lines.
- You can't draw details this way.
- You need to do it fast.
- A big workspace is required.
- The result looks more or less "sketchy".
When to Use It?
- When you want to start a picture without a precise idea.
- When you want to study, especially anatomy, poses, or shading.
- When you want to try a series of versions of one picture before going intodetails.
Conclusion
As you can see, in reality none of the techniques is superior, and the pros of one complement the cons of the other. I hope now you understand the difference, and you'll never feel bad again because someone says your technique is unprofessional. Keep using what's best for you at the moment, and don't be afraid to experiment!
Still, I need to add a fair warning. Your wrist is a very complex structure, with a bunch of nerves steering your fingers hidden inside it. When you need to draw faster (for example, when hatching), always try to relieve it and switch the pivot to an elbow, even if only for a while. You may temporarily lose some accuracy, but it's better than risking losing it forever!
Original Link:
TutsPlus - Design
More About this Source Visit TutsPlus - Design