
Some of Our Sources
- Technology Review
- Six Revisions
- Web Design Ledger
- CSS Globe
- Wal You
- Specky Boy
- Spyre Studios
- Freelance Switch
- Android Dissected
- Dev To
Help Webnuz
Referal links:
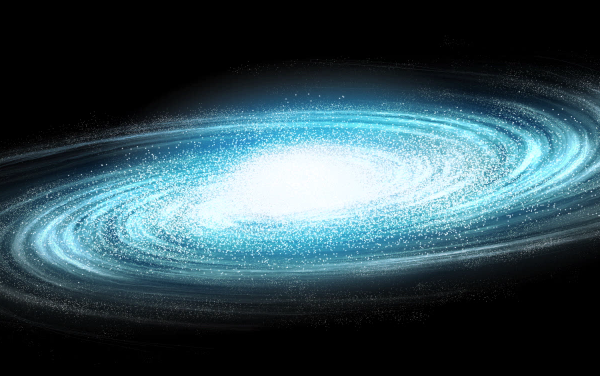
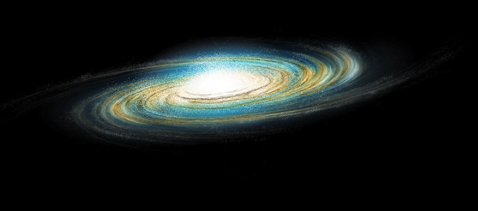
The Cosmos: Create a Spiral Galaxy
Step 1 – The Galaxy
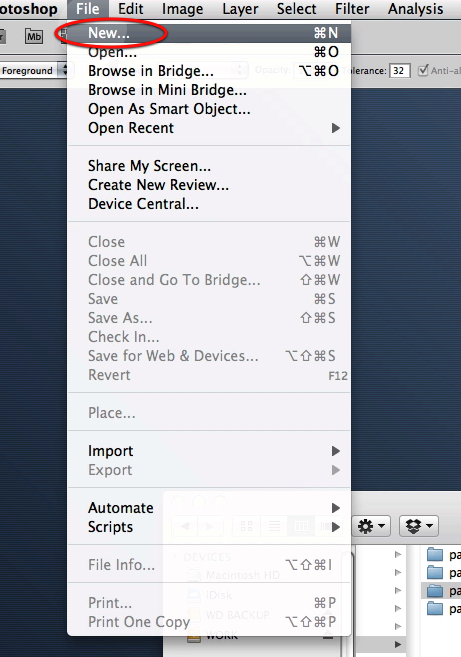
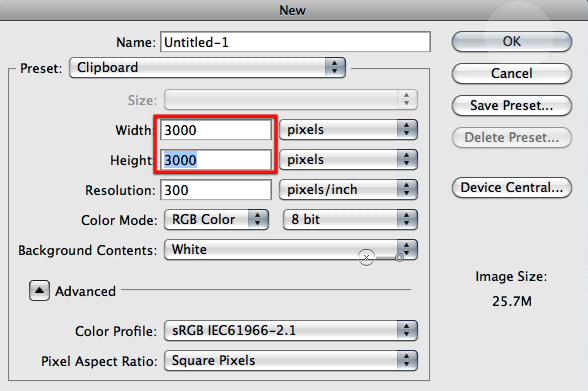
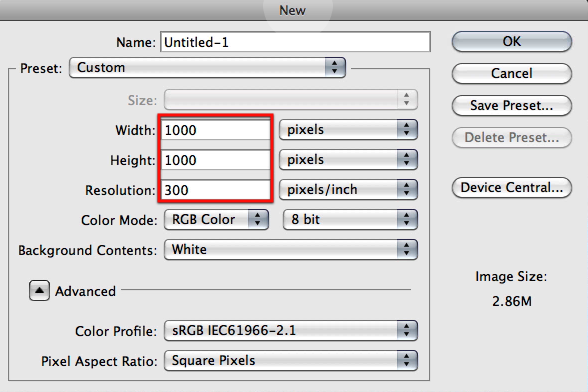
We will begin with the main feature of this image and the most important. This is a very long step because of all the settings and clicks you have to go through, but its not complicated its just a matter of following it and you will see soon enough how we will progress through it and how each steps provides us with valuable content. Let’s begin by creating a document where we will be generating the base for the galaxy not the main image document; so go ahead and create a new document with the settings as shown here.
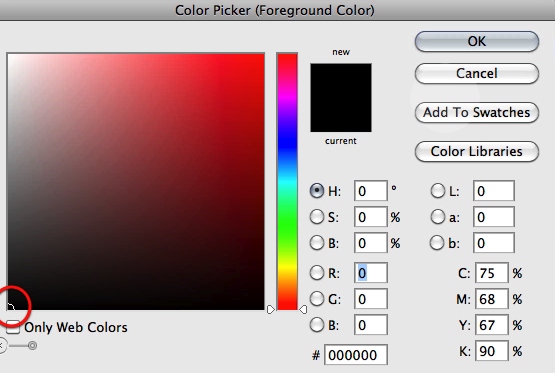
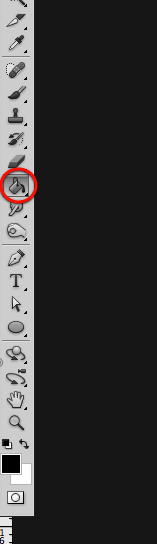
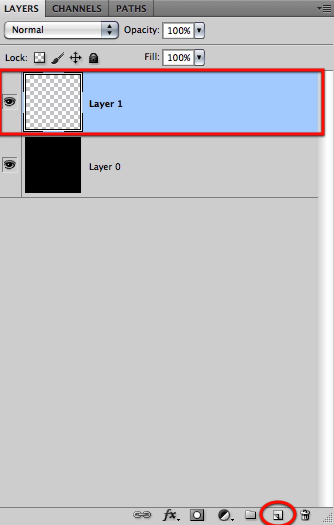
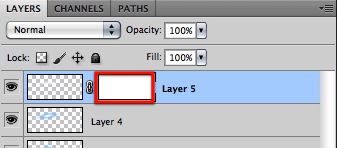
Now select black and fill in your canvas.
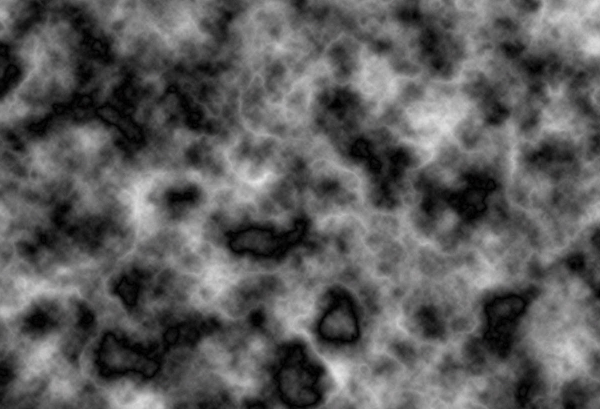
OK next create a new layer on top and go to the clouds filter and generate some.
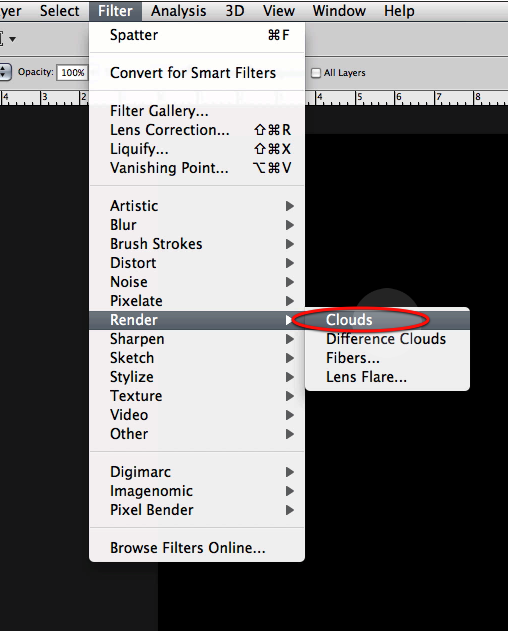
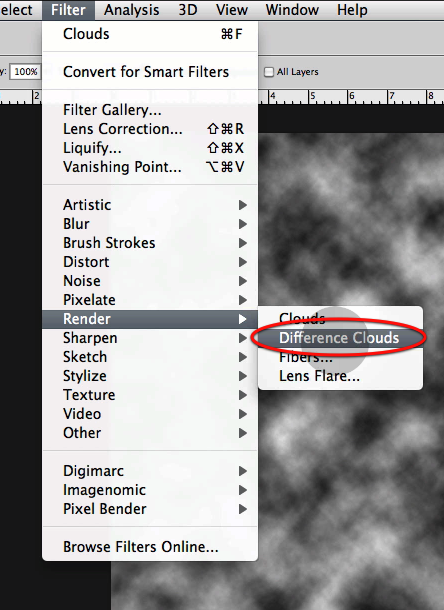
Then you will go to difference clouds and generate some on the same layer twice.
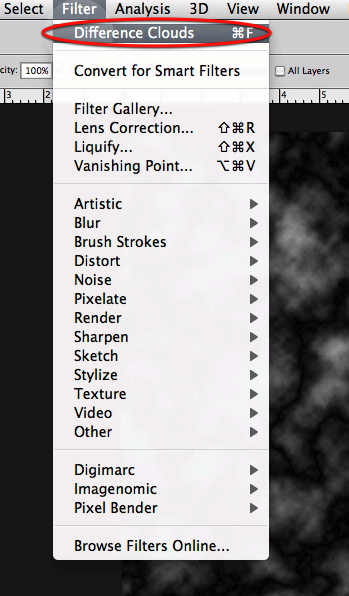
This is what you should get after these steps.
OK now let’s create another layer and fill it up with black.
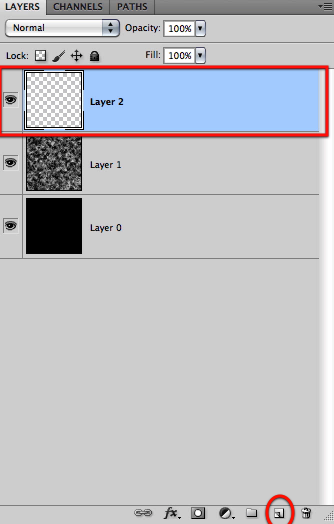
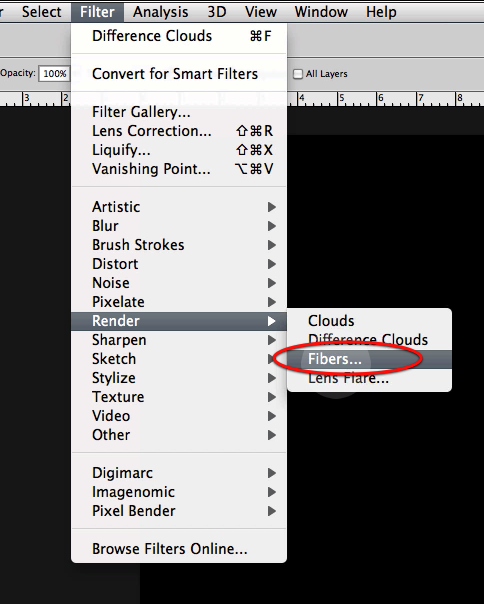
This time we will be using the fibers filter with the settings shown below.

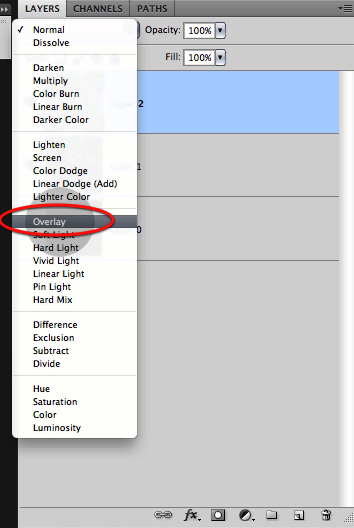
Now just setup this new layer to overlay so it mixes nicely with the clouds we did before.
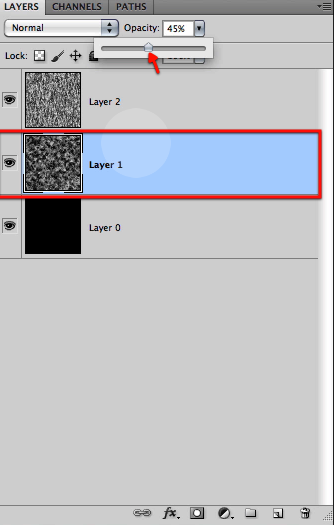
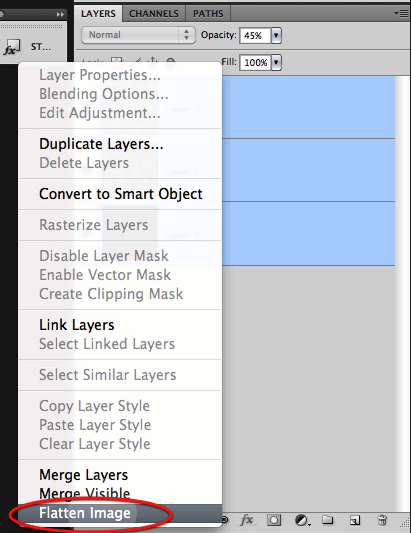
Next we will reduce the opacity of the cloud layer as shown to make the two blend even further, and then just flatten all the layers.
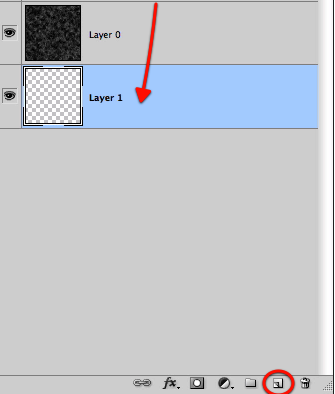
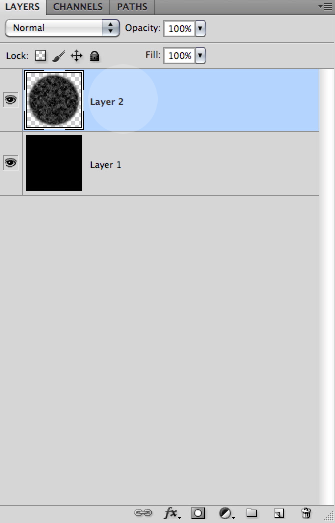
Now we will create a new layer, drag it to the bottom and fill it up with black.
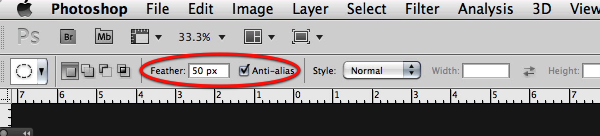
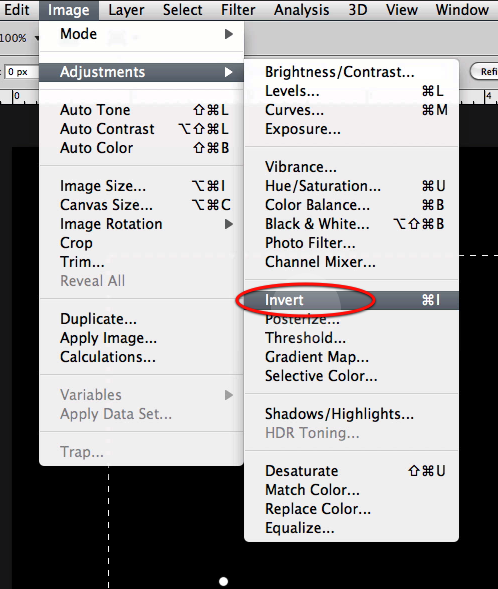
OK perfect, now we will have to define a big circular selection with a feather of about 50px over our texture.

Then you can either copy and paste it to a new layer or inverse it and delete what its outside to end up with a big soft circle of the texture we created.
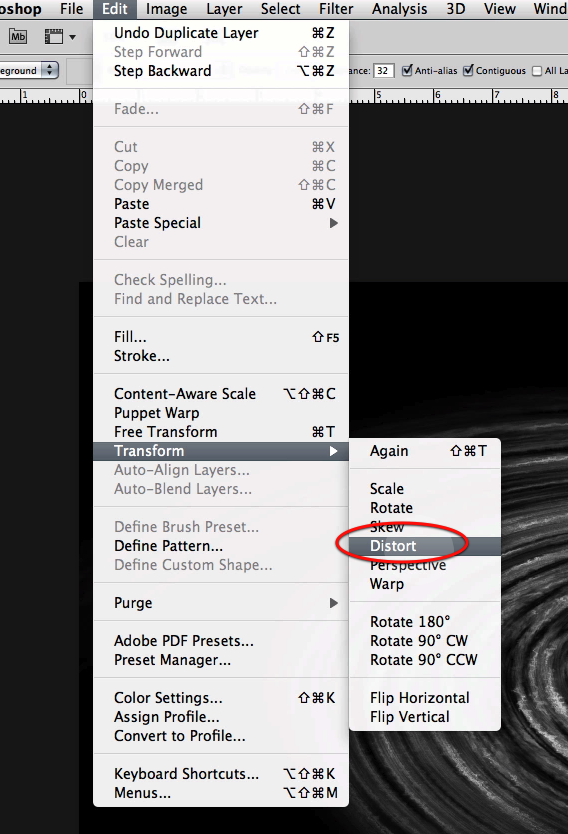
OK next up to give some twist and form to this we will apply the warp filter a couple of times with the twist option as shown below.
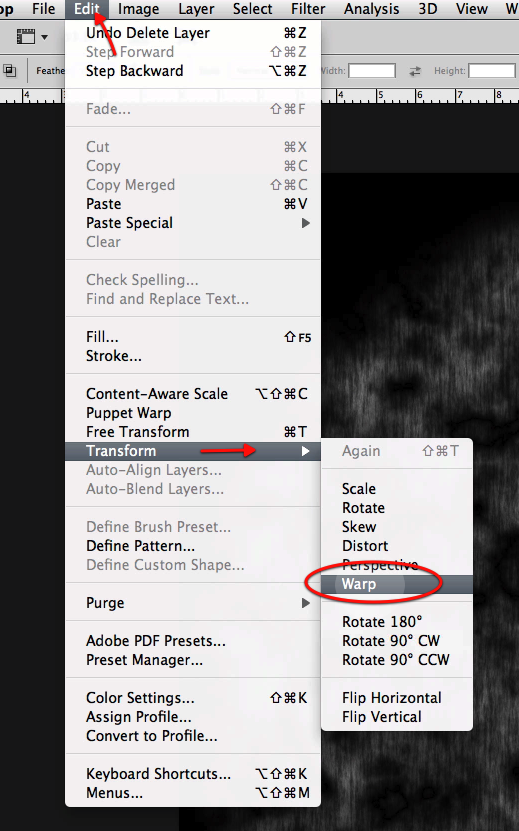
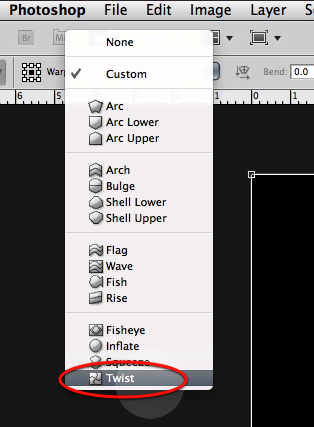
As soon as you select the twist option you will get its options in the top bar so let’s type 100 for the bend setting.
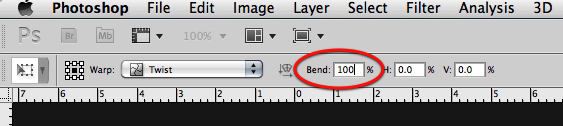
This is what you will see in your Photoshop screen, so hit apply and repeat the process once more.
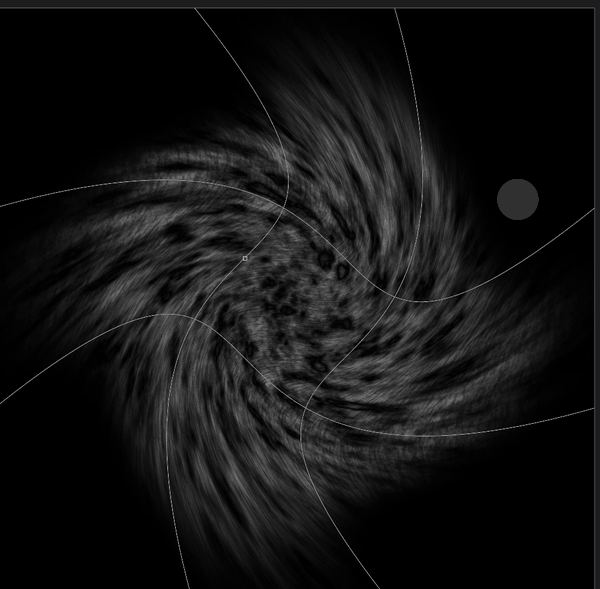
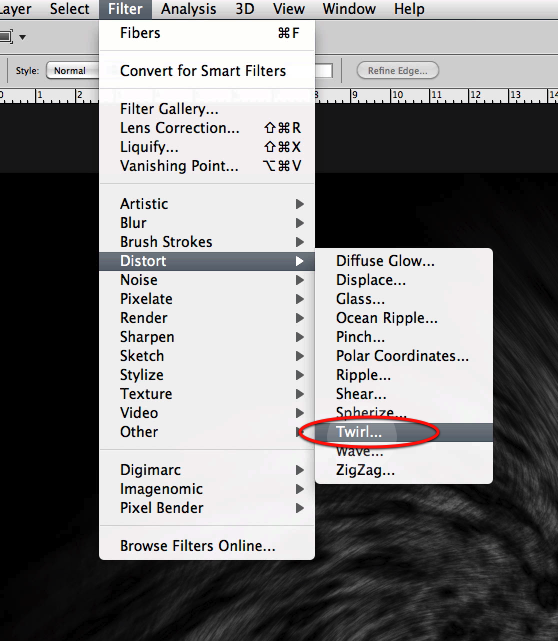
Once both warp distortions have been applied let’s use yet another filter; this time the twirl and use the settings shown below.

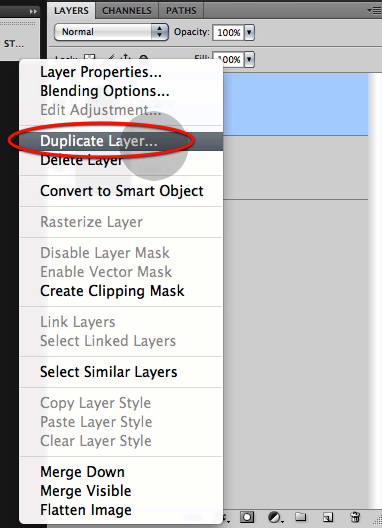
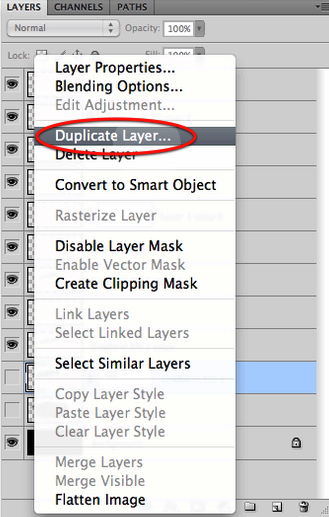
OK great now let’s duplicate the layer so we can add some more detail.
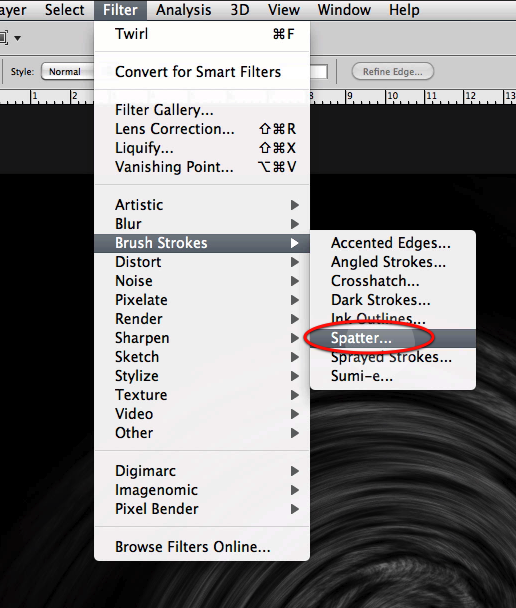
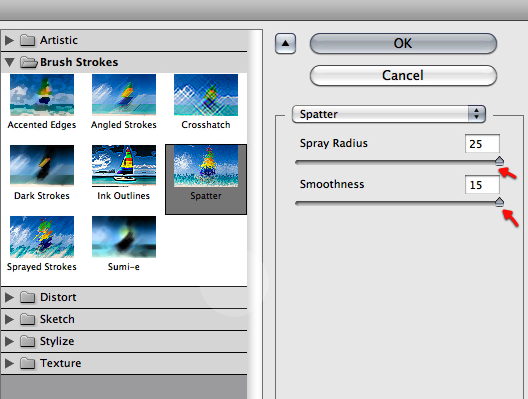
And in this new layer let’s apply a spatter filter with the settings shown here.
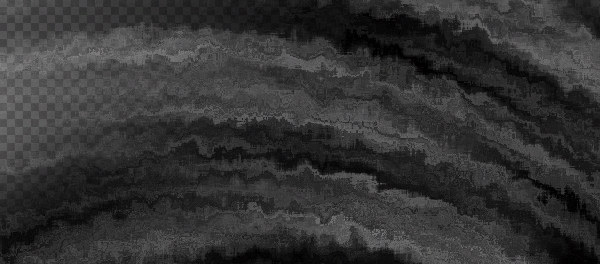
Here is what you will get from this last filter.
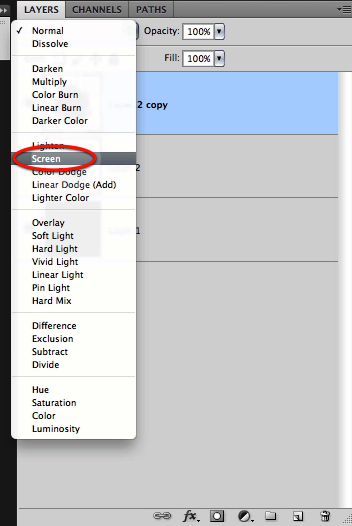
Now set this new effect to screen and reduce the opacity a bit to about 61%
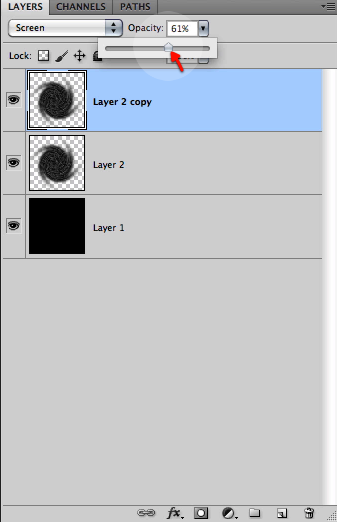
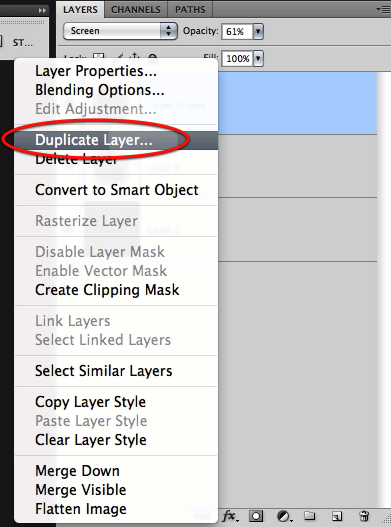
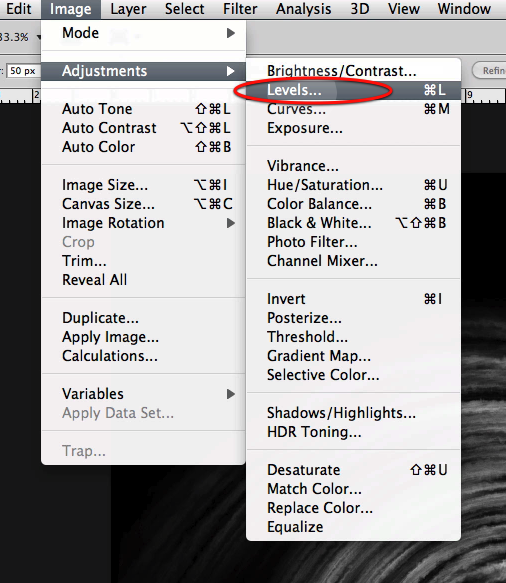
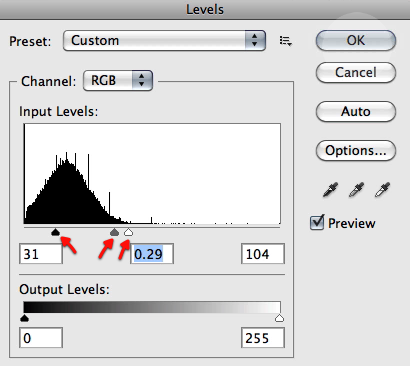
Very good now make a duplicate of this last layer and apply some levels to it as shown below, so we get nice intensified highlights.
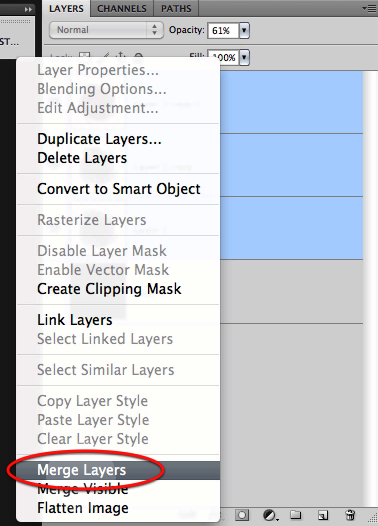
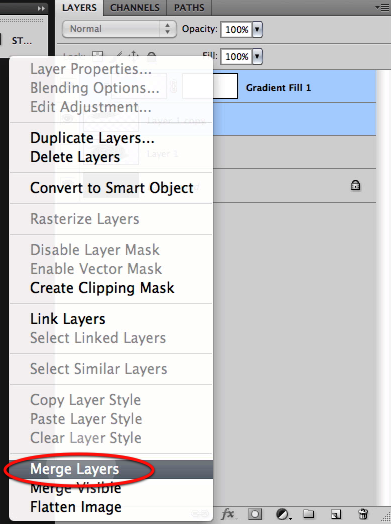
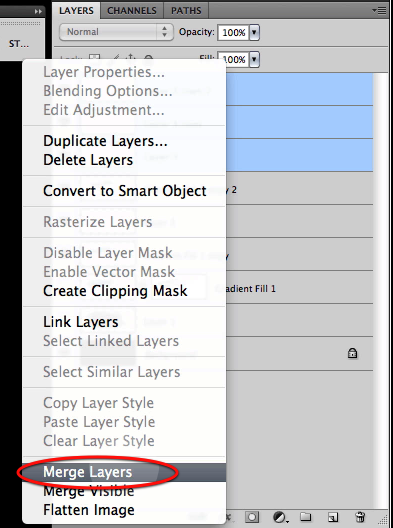
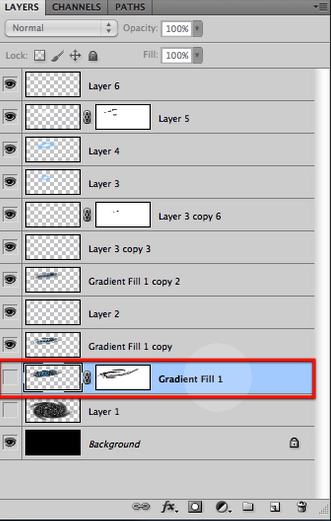
Perfect we are done with this filter bonanza, now select all the layers excluding the black background and merge them together.
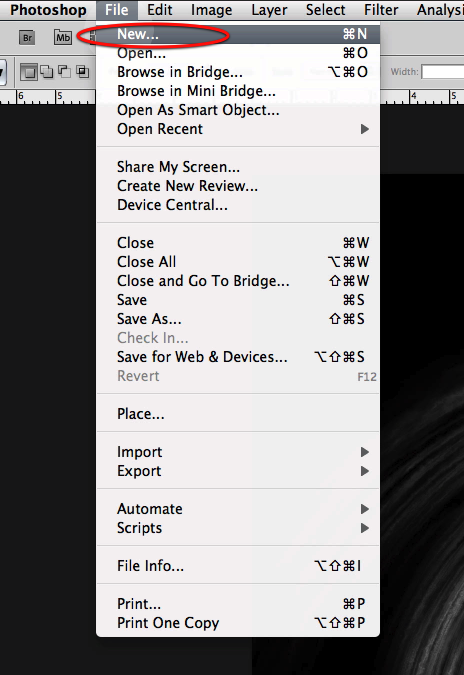
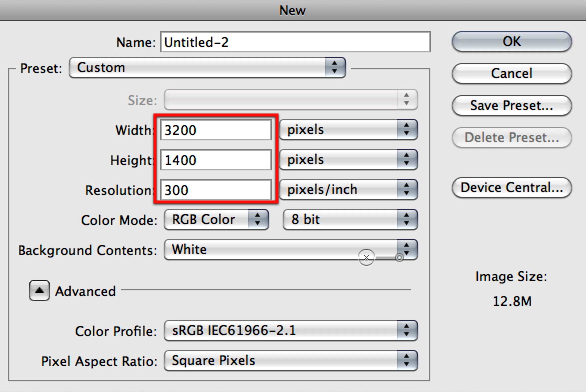
OK now we are ready to create the document for the image we will be working on, so select new file and create it with the settings below.
Now fill the canvas with black.
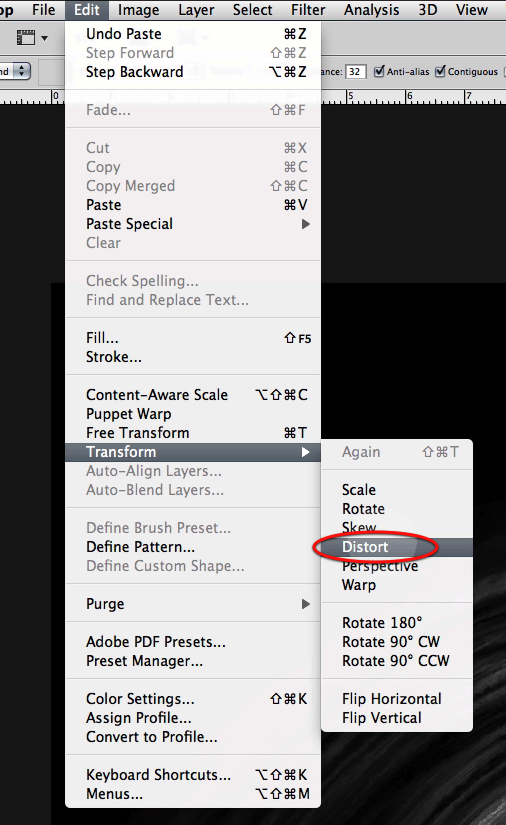
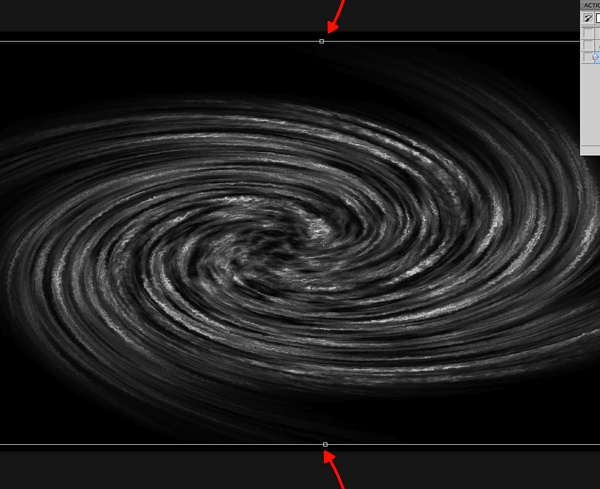
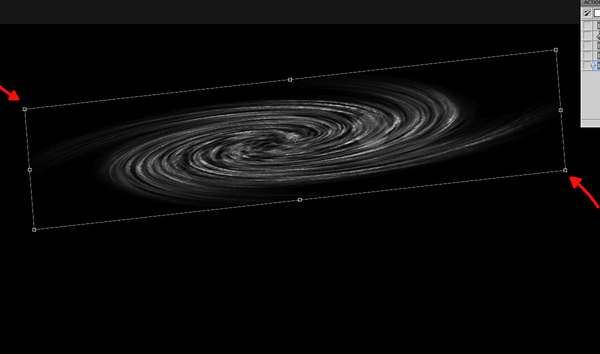
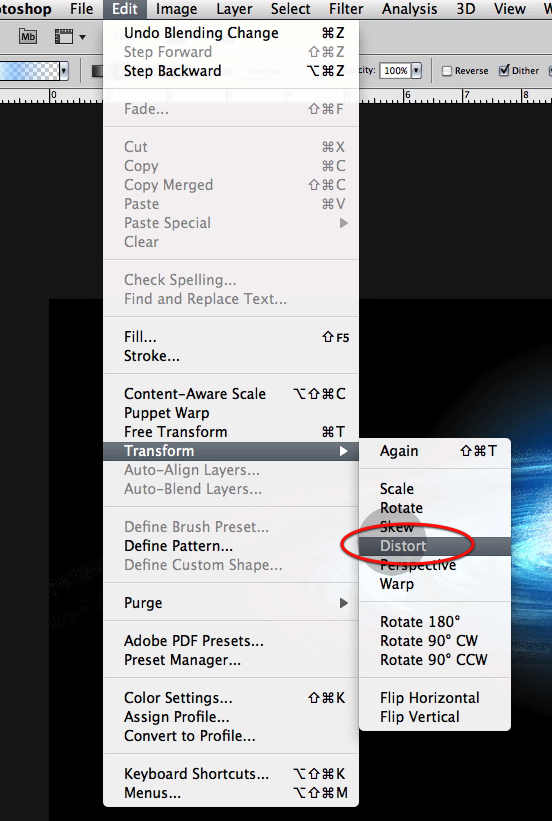
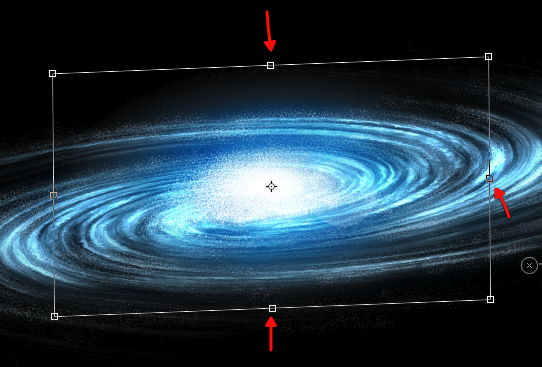
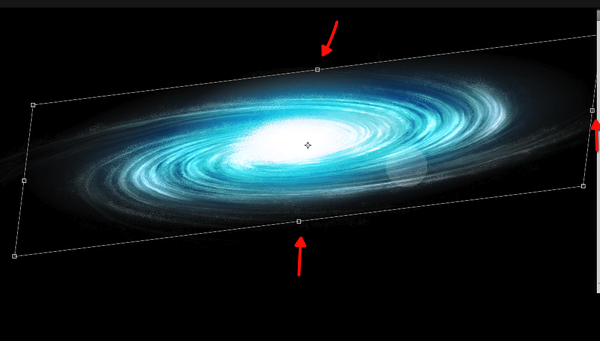
Next we will copy and paste our galaxy work on to this new document and in a new layer, then we will use the distort command so it fits inside the top and bottom boundaries of the new document as shown below.
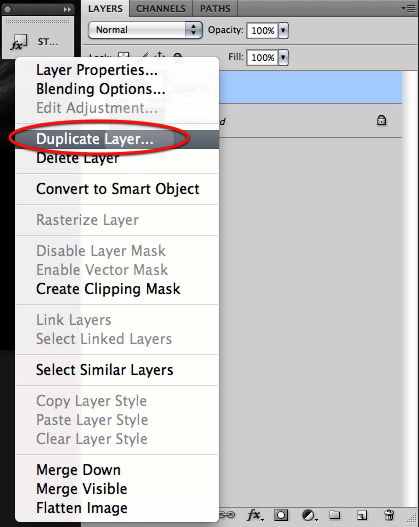
Before going any further let’s duplicate the layer and hide one of them by clicking on the visibility icon.

Then let’s distort the layer further as shown here so we get the appearance of perspective and also to adjust its size to what we want.
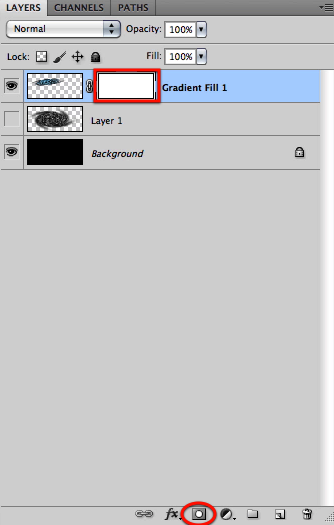
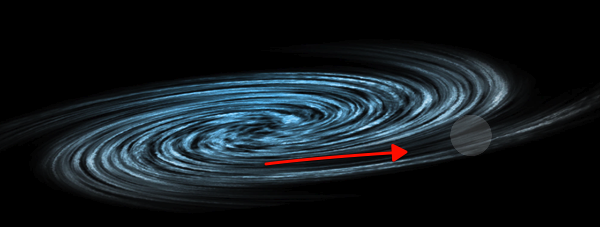
Once we have the image of the galaxy base setup let’s create on top of it a new gradient layer.
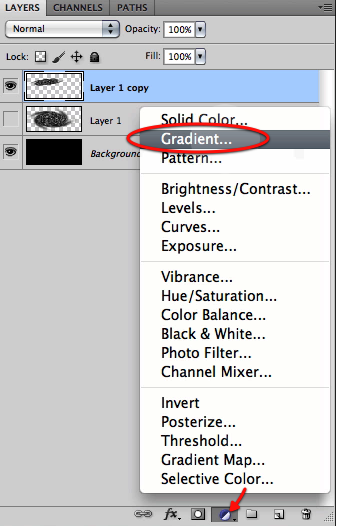
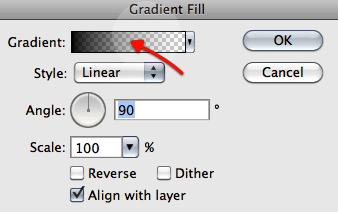
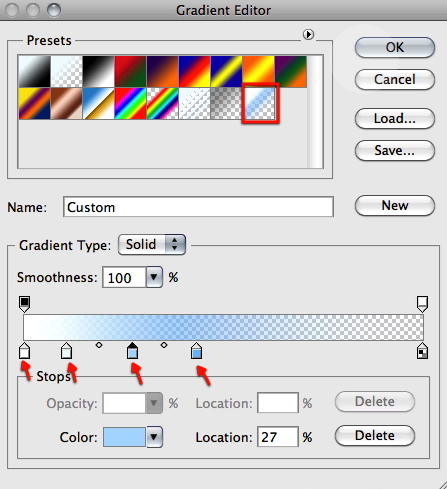
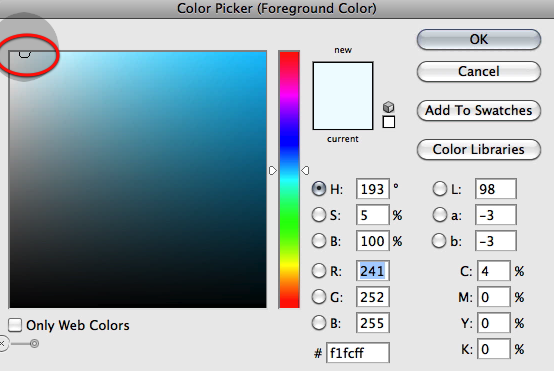
Let’s choose for the gradient a standard white to transparent gradient, and for the first color to the left let’s double click on it and select a blue color as shown below.
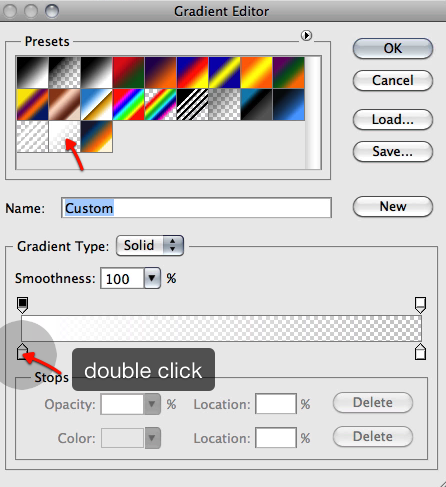
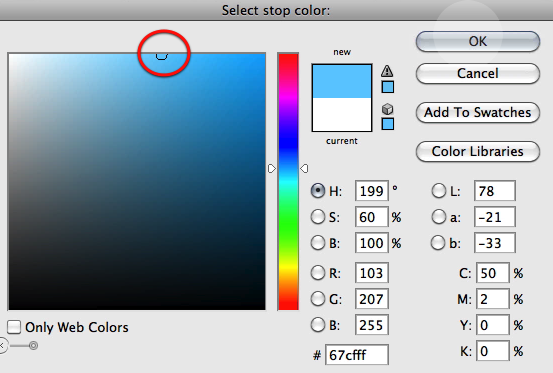
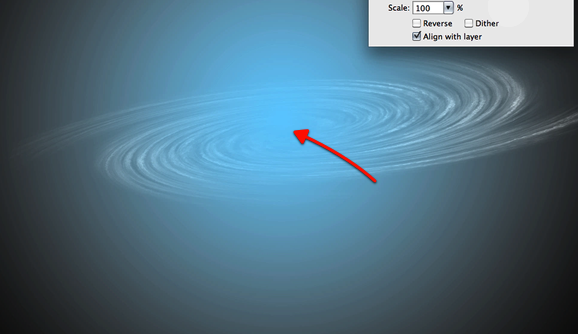
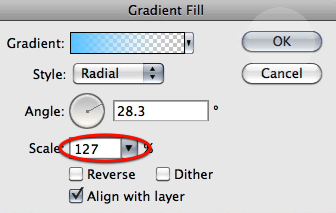
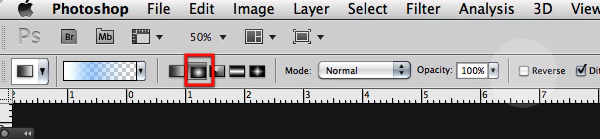
Now let’s setup the gradient to radial with an angle as shown here and while this dialog its open drag the center of the gradient to the center of the galaxy base.
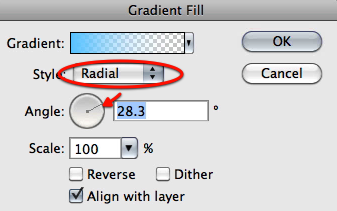
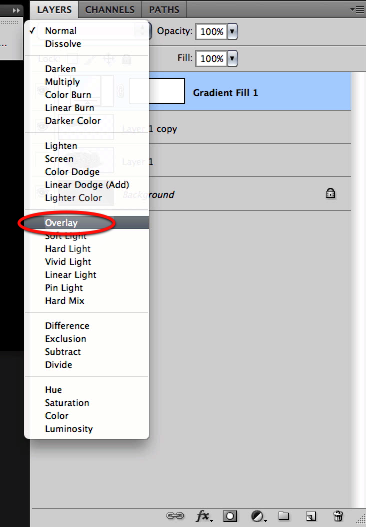
Then set the scale to 127 and click OK. And now set this layer mode to overlay.
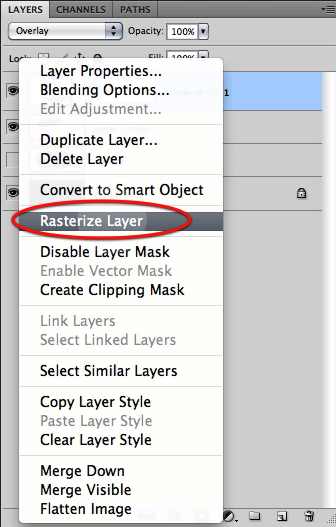
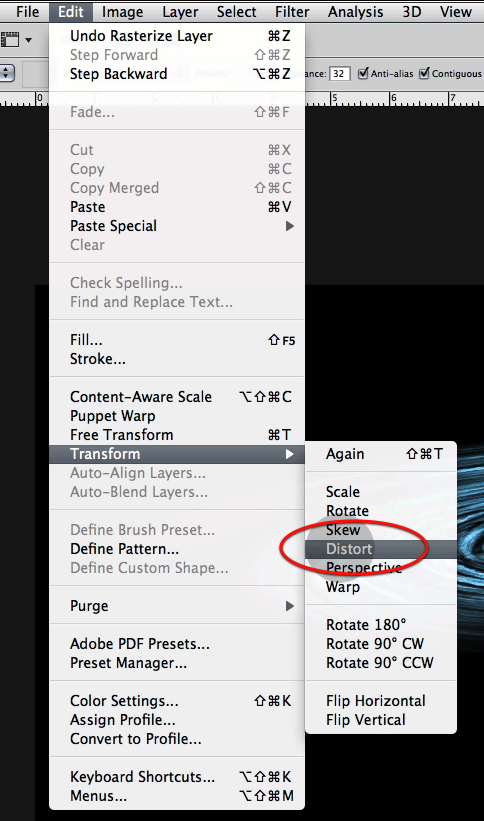
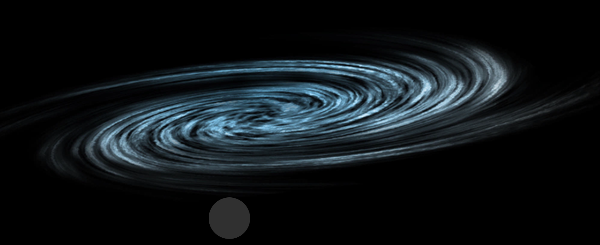
And now let’s distort the gradient layer itself to adjust its shape to our galaxy, so rasterize the layer and distort it as shown below.
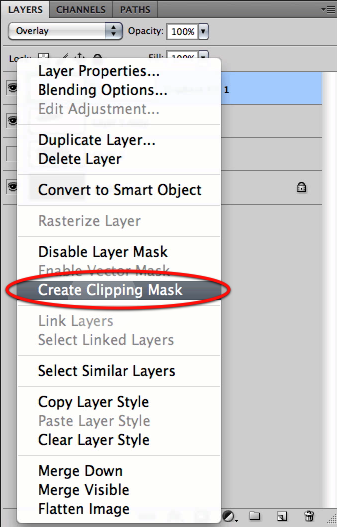
Next just create a clipping mask so the gradient affects only the galaxy base and then merge the two layers together.
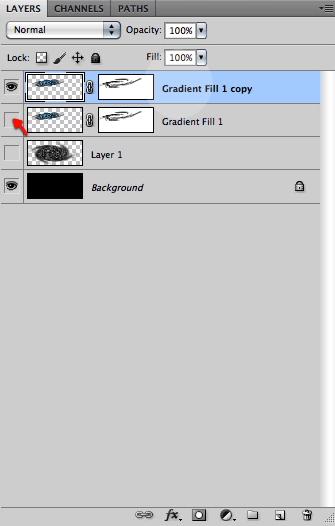
Now create a layer mask for the resulting layer.
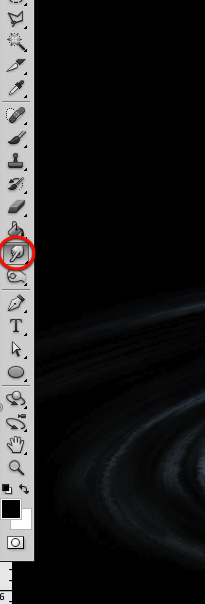
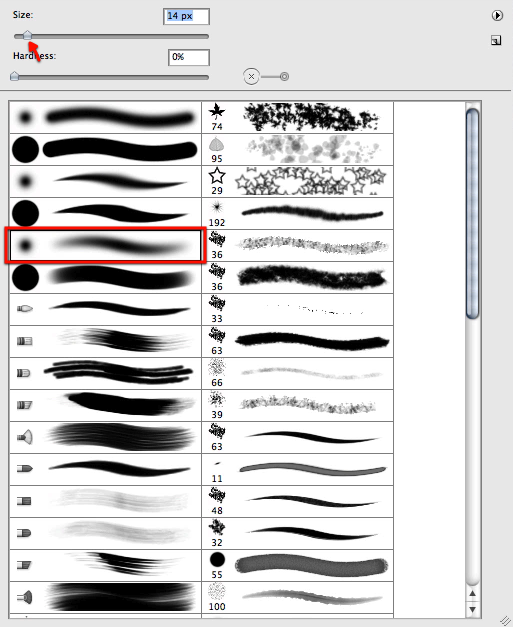
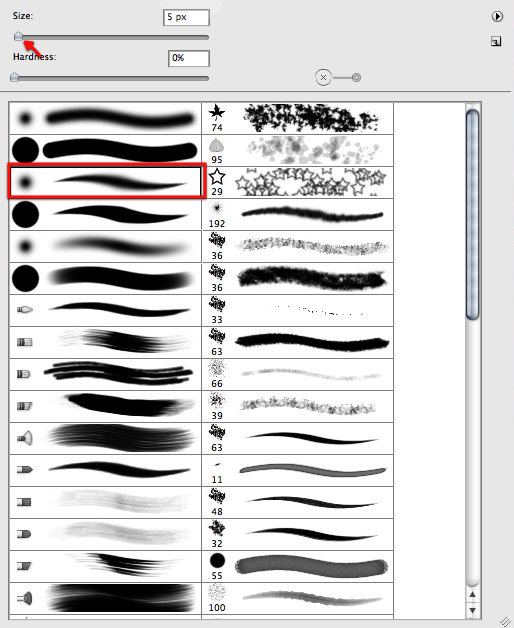
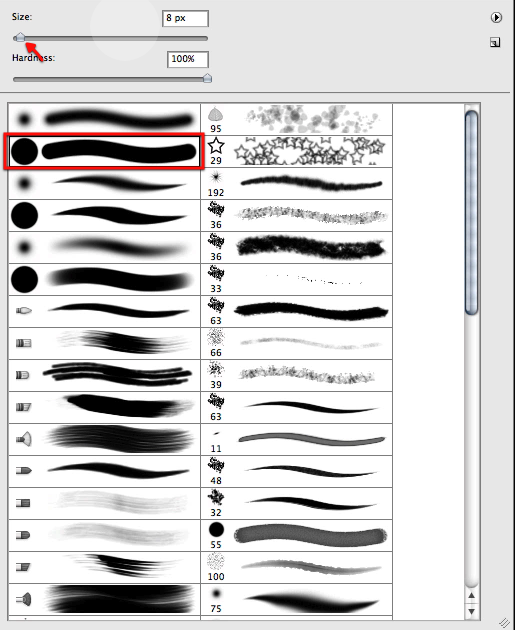
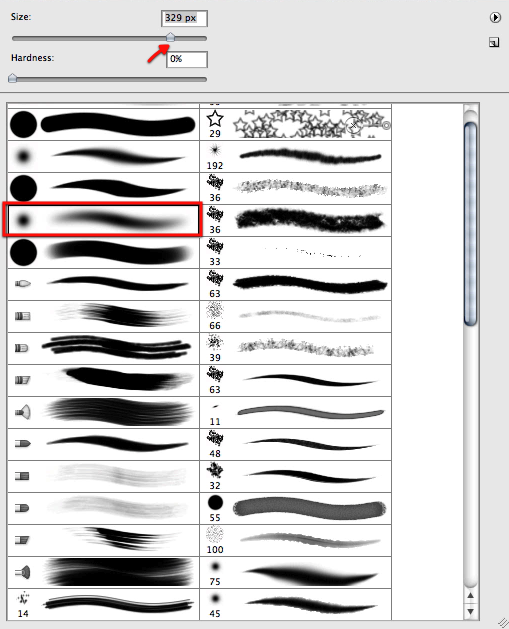
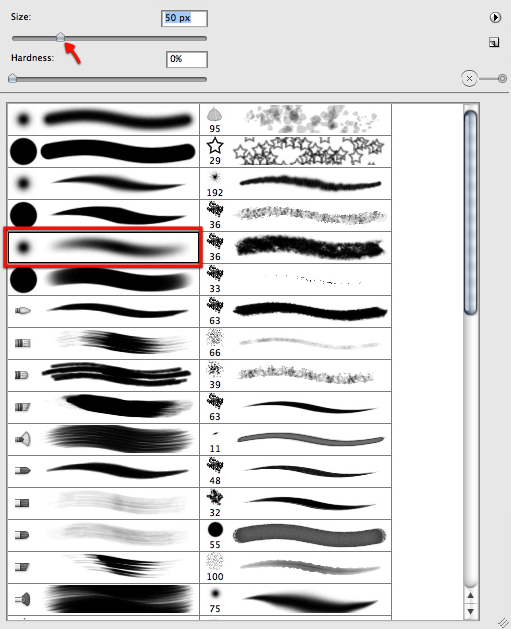
And to proceed we will select a soft brush as shown below.

Then we will mask off sections of the galaxy as shown here to make it more dynamic and less disk like.
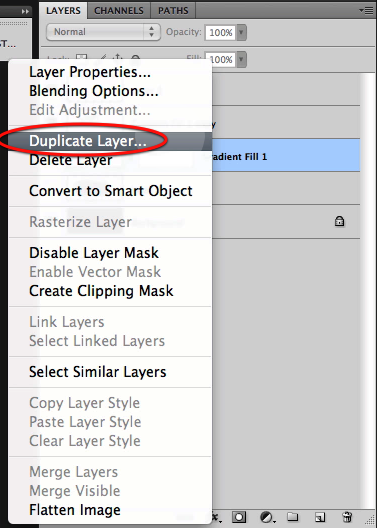
Now before we move on we will duplicate the galaxy layer once we are happy with the mask and hide the original for safe keeping.

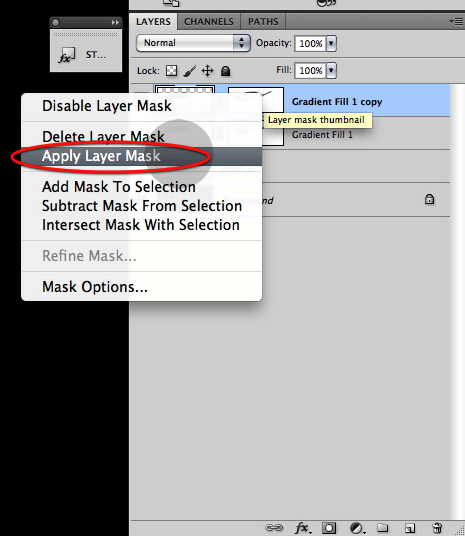
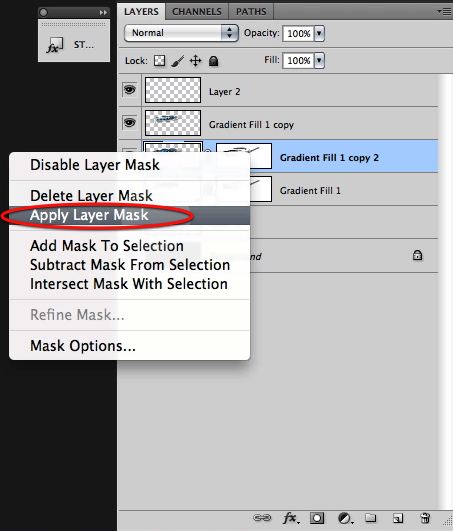
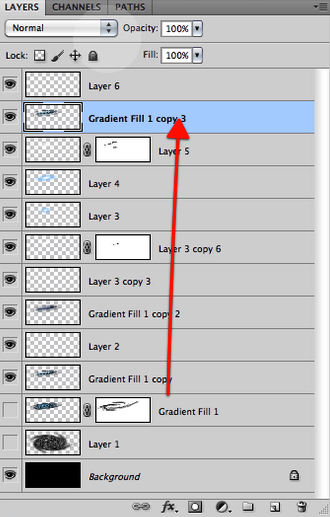
Then on the visible galaxy layer right click on the mask thumbnail and select apply layer mask.
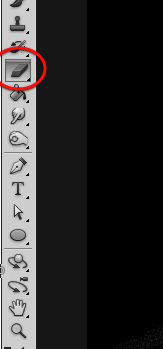
Now its time to start making this galaxy our own and unique at the same time so let’s go to our smudge tool and set the brush size as shown below.
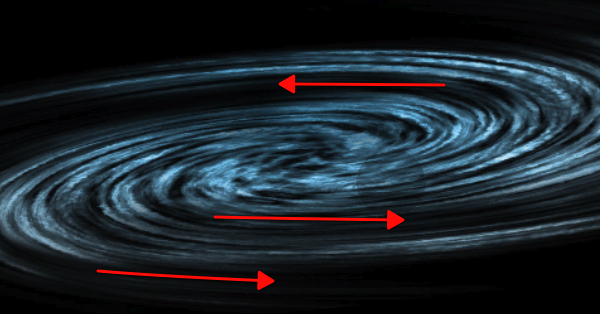
We will start smudging some new flow and features to it as shown here.
Then let’s reduce the size of the brush quite a bit and start working on more tiny detail all around the galaxy introducing new features and detail, but at the same time following the established flow.
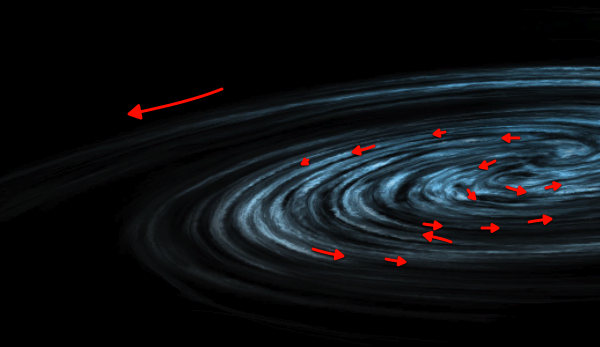
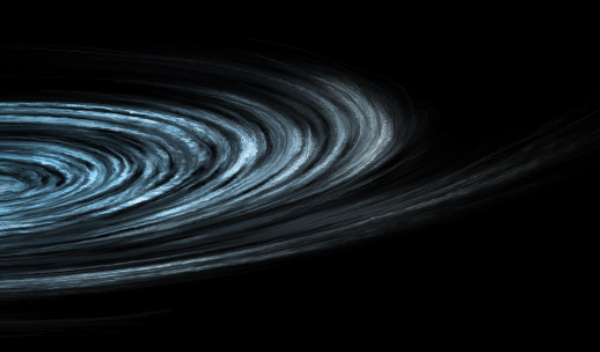
Here you can see what we are after by smudging our way through it, yet this is quite personal and its up to you how far we want to go here.
Next up let’s make a copy of our "safe" hidden layer, and once again apply the layer mask.
Now let’s bring this new layer copy all the way to the top.

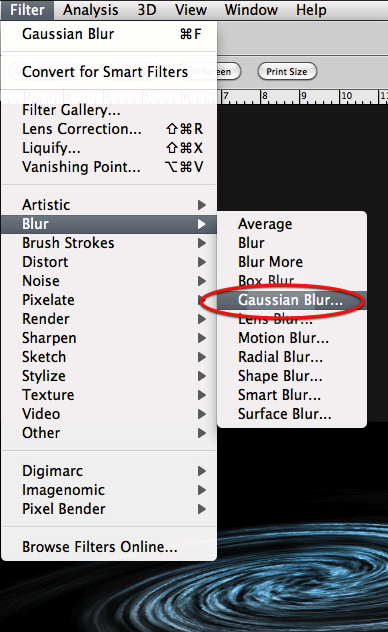
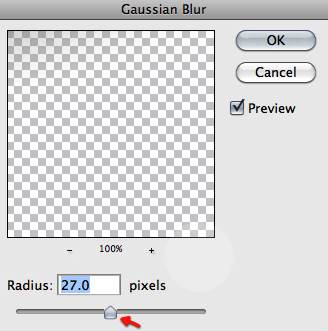
Then apply a Gaussian blur filter to this layer with the settings shown here so we get the results below.
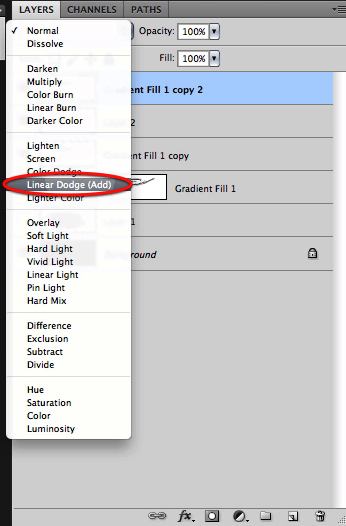
Also set this top layer to linear dodge.
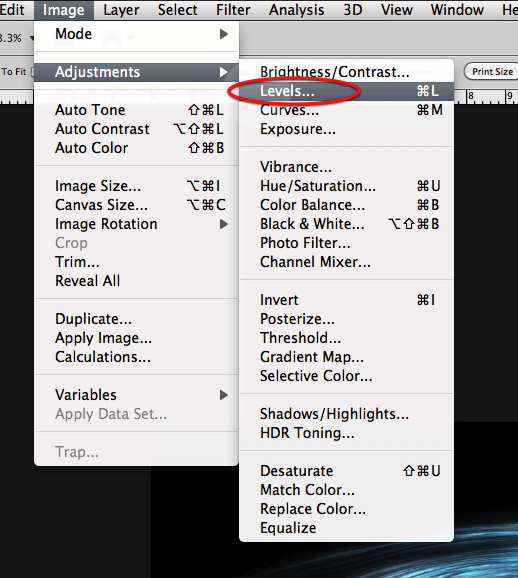
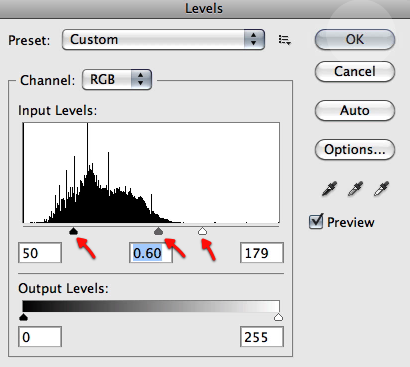
And let’s adjust the levels directly for this layer as shown here
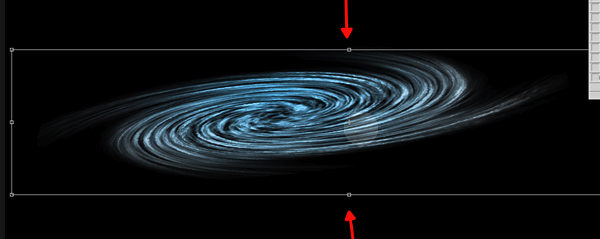
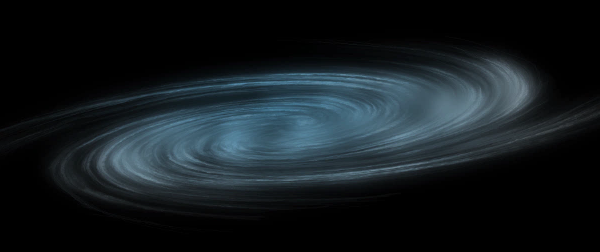
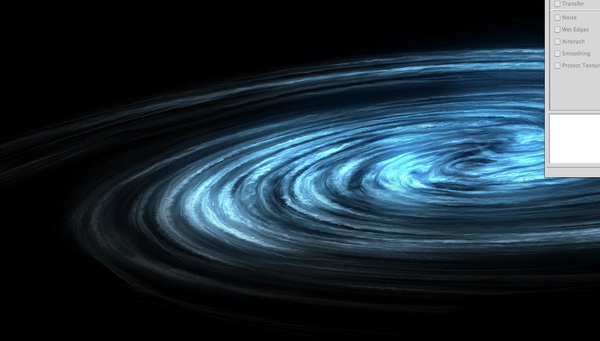
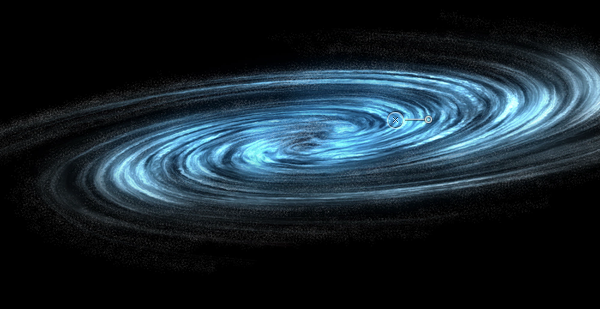
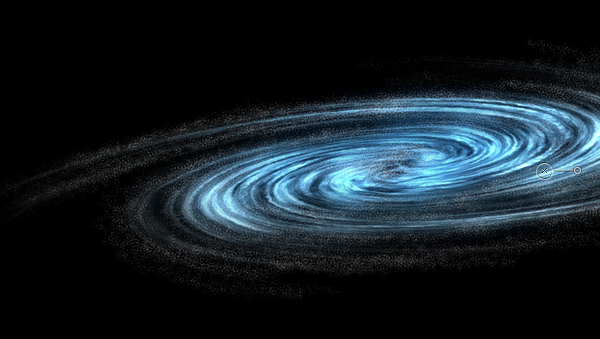
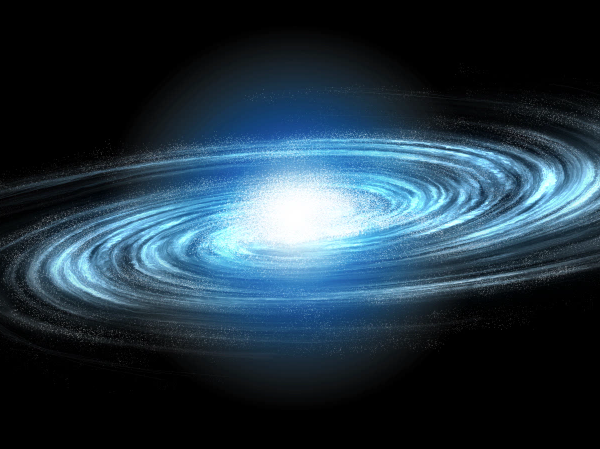
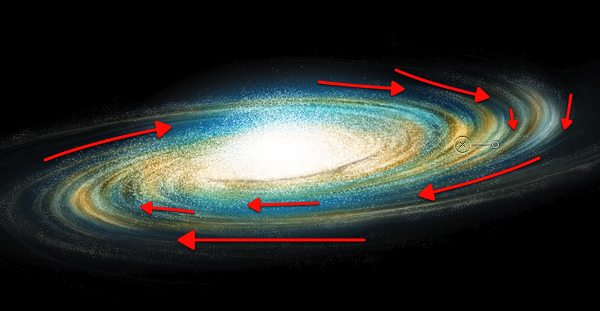
Here you can see the results of the process we have followed, looking quite nicely so far we have a detailed good looking galaxy base to work on.
Step 2 – Stars and Glow
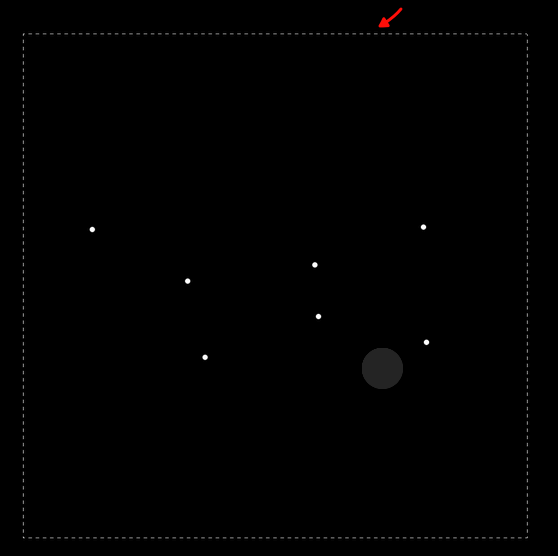
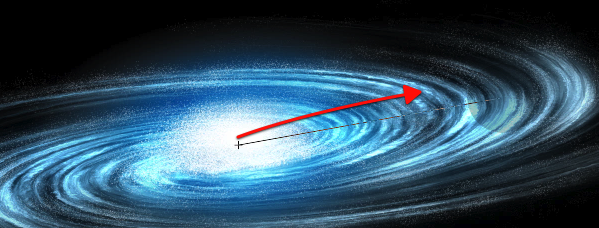
Now all galaxies are made up mostly of stars, of course every star has planets, yet what we visually see is the stars, hundreds of billions of stars. So to try and illustrate this we will need a special brush just for it that will help us paint all these stars without spending the rest of the decade making them. Let’s make a new document as shown here, and fill it with black.
Now with this brush here and with 100% white we will click some defined dots randomly spread like shown below.
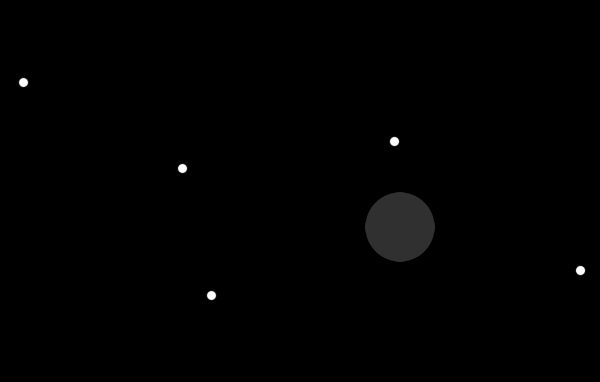
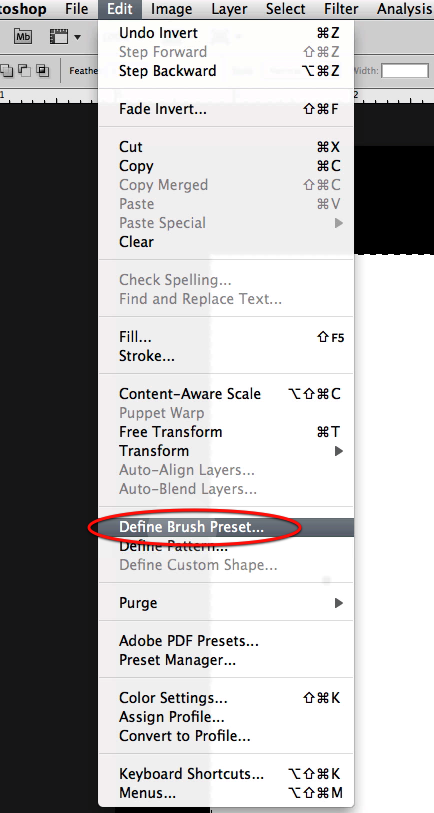
Now let’s drag a selection around these and invert the image so we get black dots on a white background.
Now just define the brush preset as shown here.

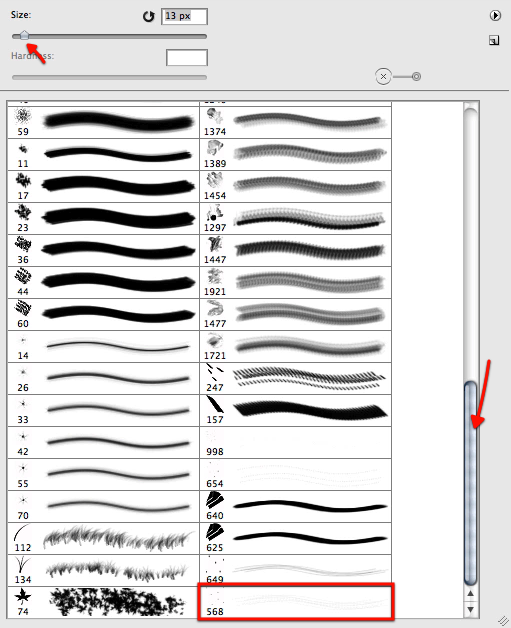
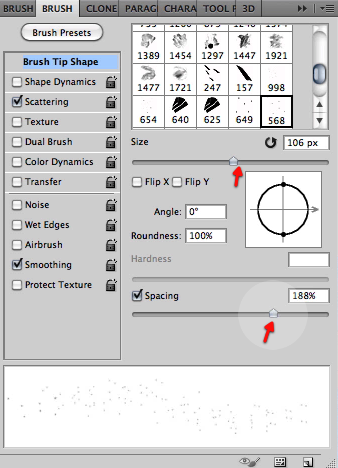
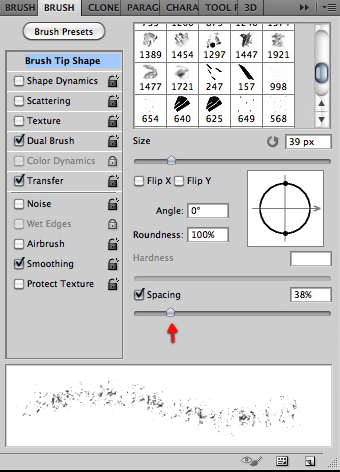
Now let’s go back to our image and scroll down the brush list to find the new brush. Now let’s setup the brush palette, first enabling scattering with the settings below.

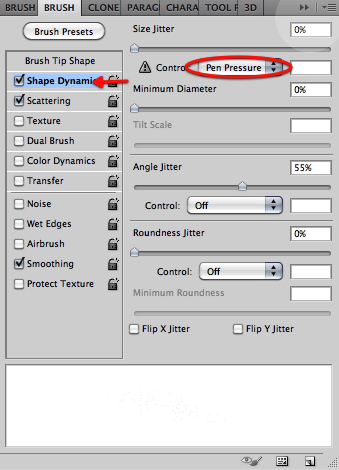
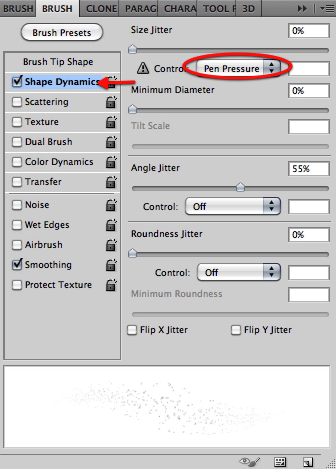
Then enable shape dynamics with the pen pressure option and in the brush tip shape section let’s adjust the settings as shown.
Now let’s reduce the size of the brush a bit and start painting some stars in a new layer as shown below, that follow the flow of our galaxy. Don’t mind the fait look they have now we will fix that in a second.
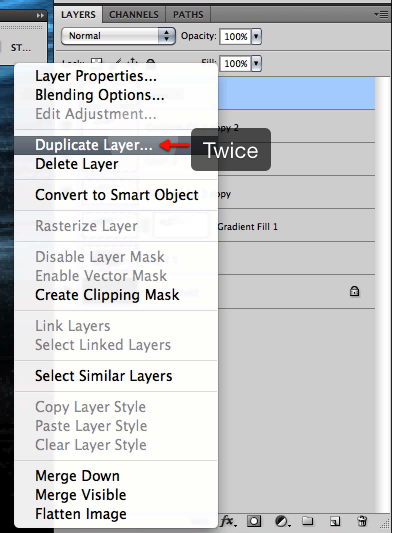
Once we have covered the galaxy let’s select the layer and duplicate it twice.

You can see here the look of the stars gets intensified, now grab all the layer copies and merge them together.
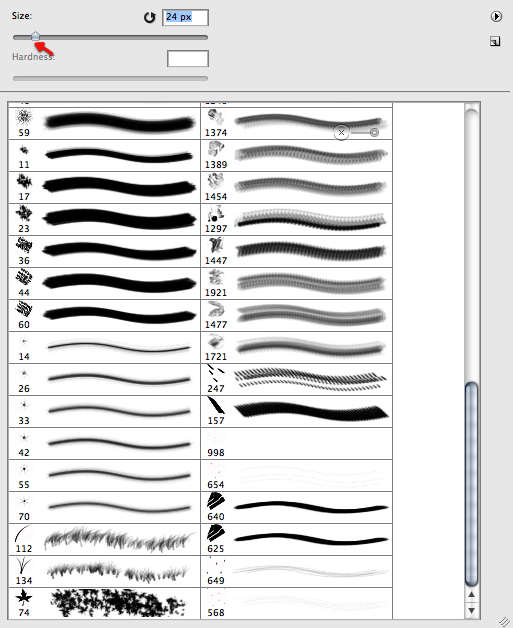
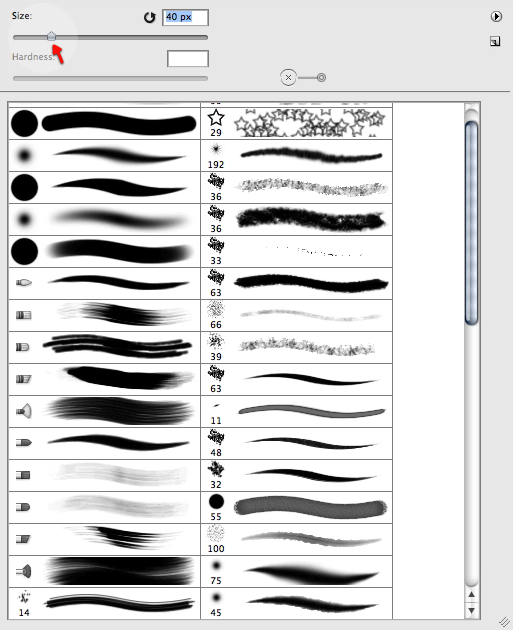
Now we will randomly erase some of our stars by using the eraser and selecting for it a brush as shown below.
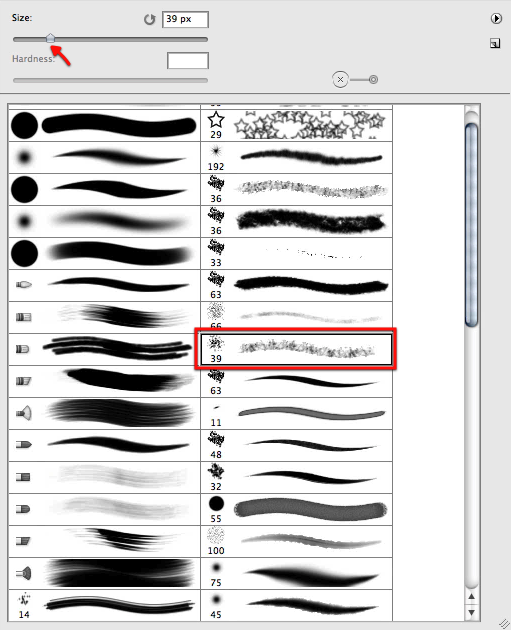
Now just adjust the settings below in the brush tip shape section.
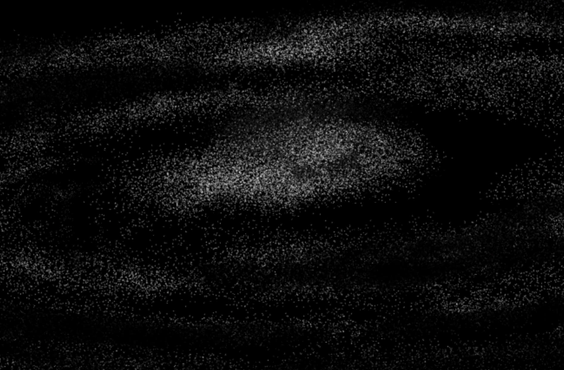
Once we are happy and made the stars randomly distributed, let’s duplicate the layer once more and merge them. My results are shown below, at this point you can erase a bit more if you like or if you see any patterns that never look good.
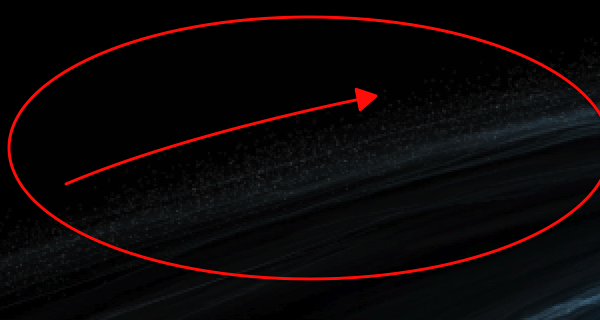
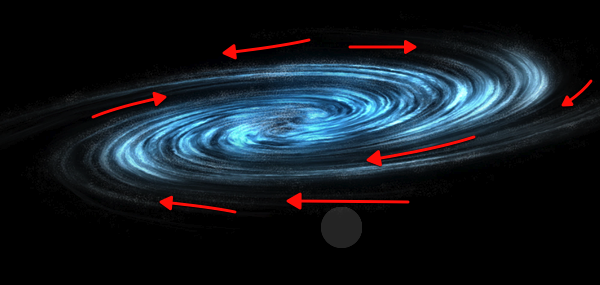
In this image you can see the flow we are trying to enhance and accentuate by eliminating some of the stars.
Now we will start working on the central nucleus of stars. Every galaxy has its most accumulated stars in the center so for this let’s make a new layer.
We will now increase the brush a bit to make the stars more evident, and start working on the center of the galaxy building up the nucleus. You can disable the rest of the galaxy layer so you can see more clearly what are you adding.
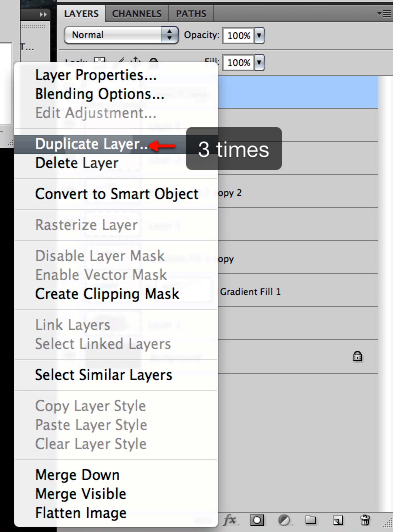
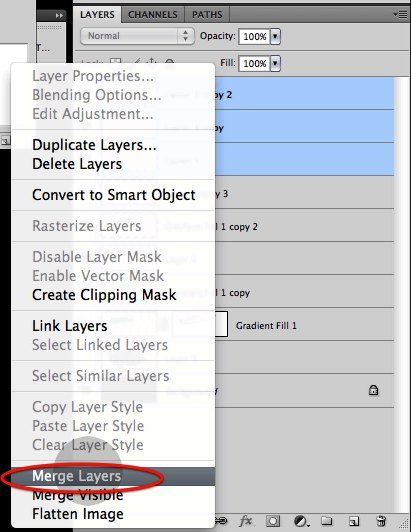
Once satisfied with what we have we will duplicate the layer 3 times and of course then merge them all.
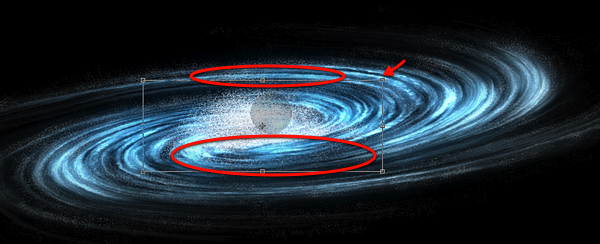
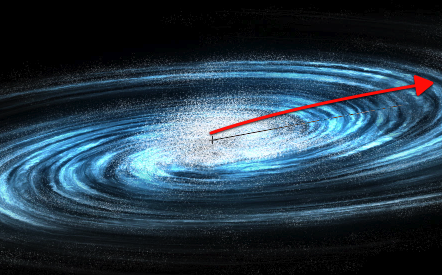
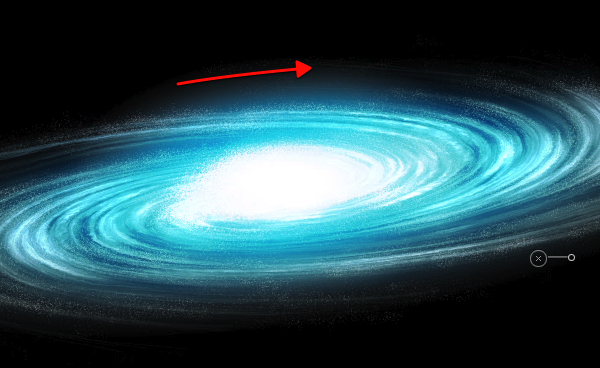
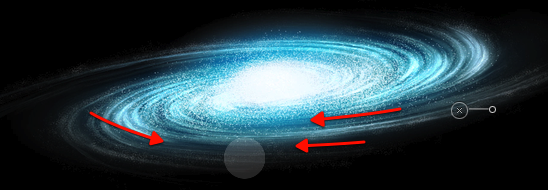
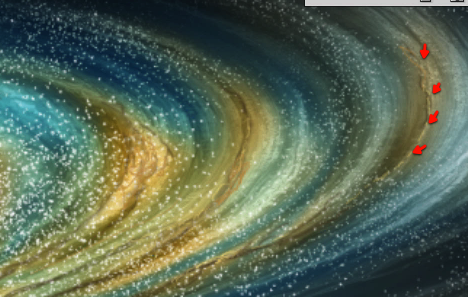
Now we can move scale and distort this layer in place plus I also erased some of it shown in red below.
Next up we will use the gradient tool and select the gradient I have included below and set it up to circular.
Now let’s drag this from the center of the galaxy as shown here.
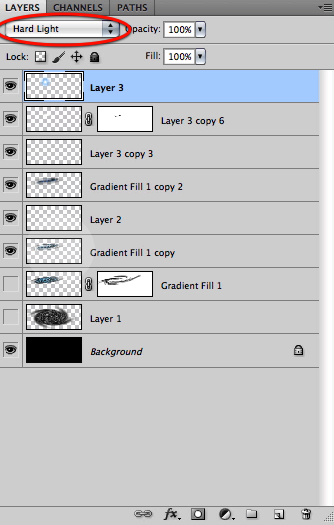
Now setup this layer mode to hard light and you can see the results below.
Now let’s distort this gradient a bit so it fits nicely in our galaxy center.
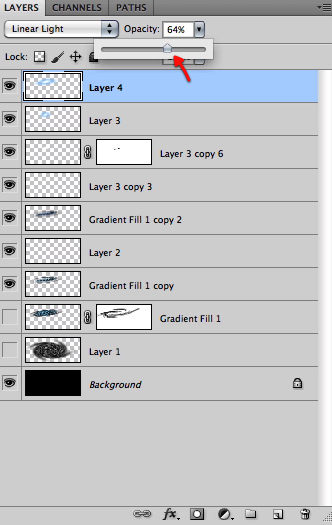
Now in a new layer let’s make another gradient, this time set the layer to linear light.
And also distort it into place.
Now if needed just soft erase any hard edges that the gradient gets.
Next just reduce this layer opacity to around 64%
OK then we will create a new layer on top and select an almost white blue color.
Select our custom star brush again and enable shape dynamics with the pen pressure setting enabled. Then paint a bunch of new stars to add to the center of the galaxy.
Now grab a soft brush of about 50px and create a layer mask on this latest layer.
Now with black selected just mask off this layer as shown here, again following the flow of our spiral galaxy.
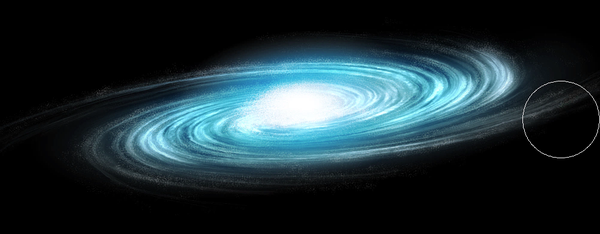
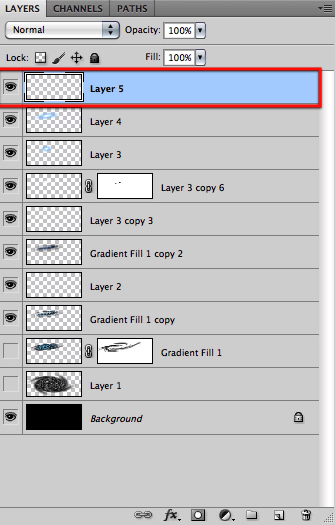
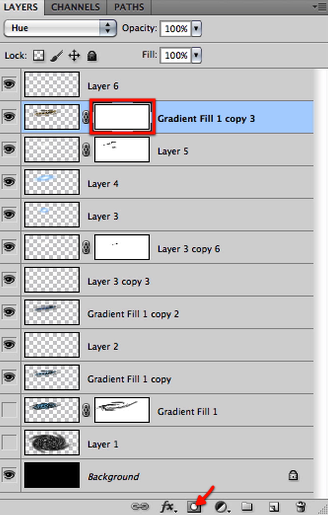
Great, now let’s make a duplicate of our original galaxy shape we have hidden
Right click on the layer mask and select "apply layer mask" then drag it all the way up below our last layer.
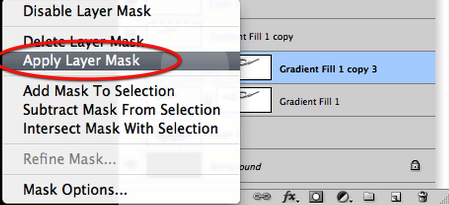
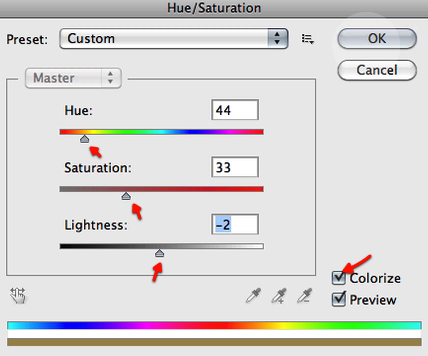
And set this layer mode to hue.
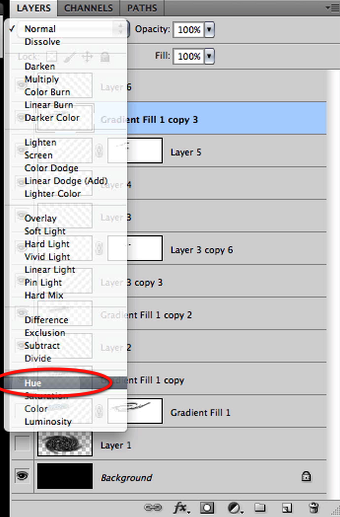
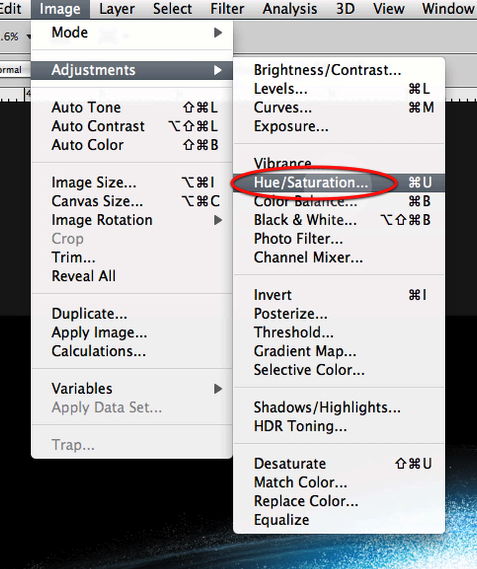
Now we will alter this layer color by setting up the hue saturation as shown below.
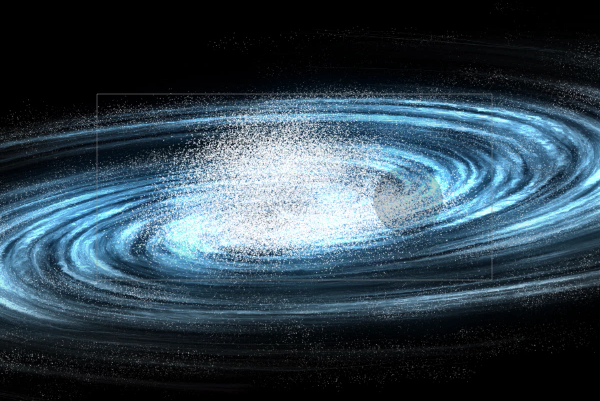
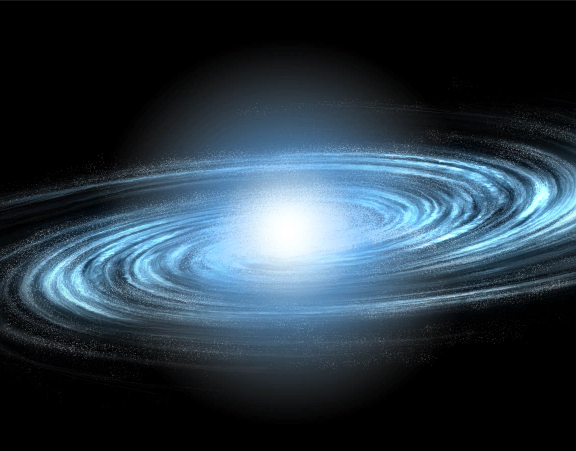
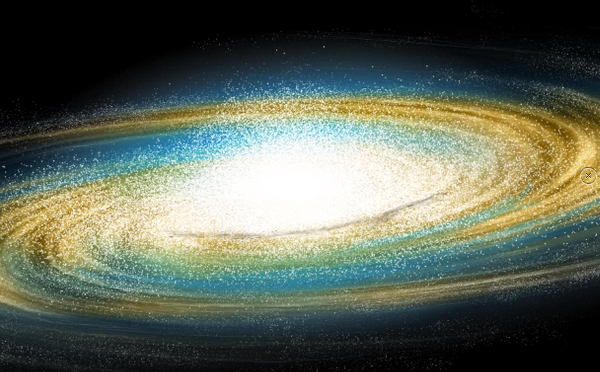
This is the result we get so far.
We will then add a layer mask here and make sure we have our soft brush still selected and at about 50px
Now mask off this layer influence as shown just leaving some streams of this golden yellow hue. Adapt the brush size if you need.
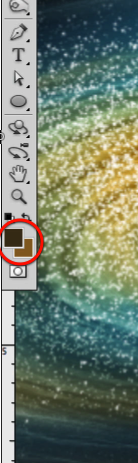
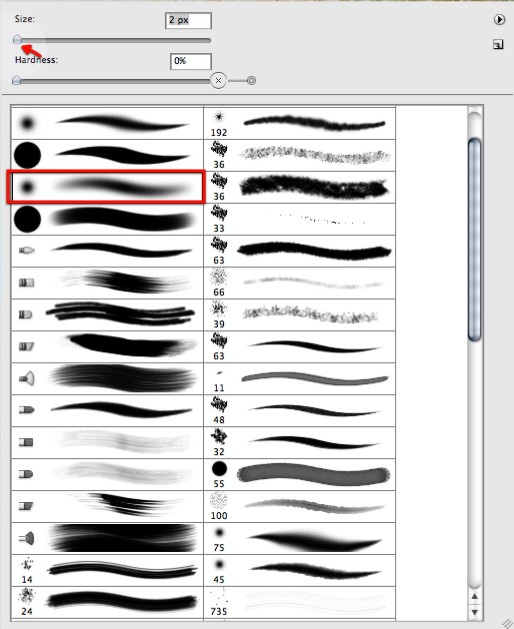
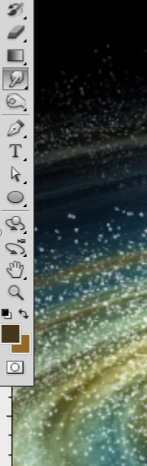
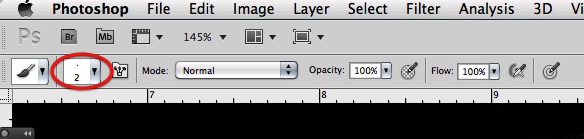
Now let’s select a dark brown as shown here, and make our brush very small about 2 or 1 px.
And then in a new layer let’s paint some dark matter streams as shown here.
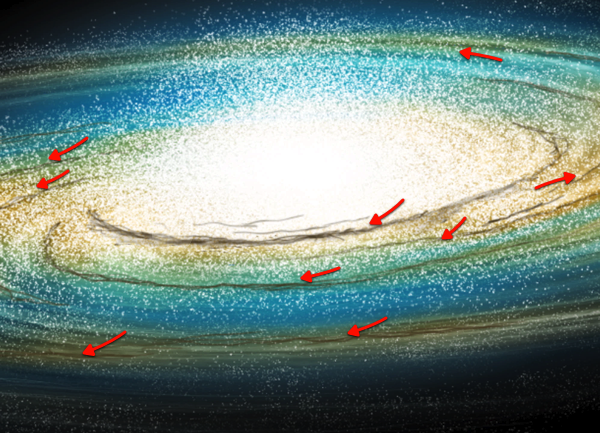
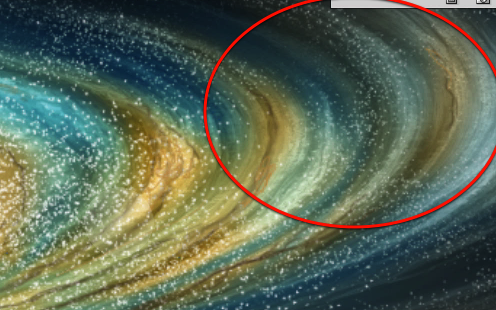
Now let’s grab the smudge tool, also with a very tiny brush as shown.
Let’s go around smudging our dark streams a bit, to eliminate the stroke look they have.
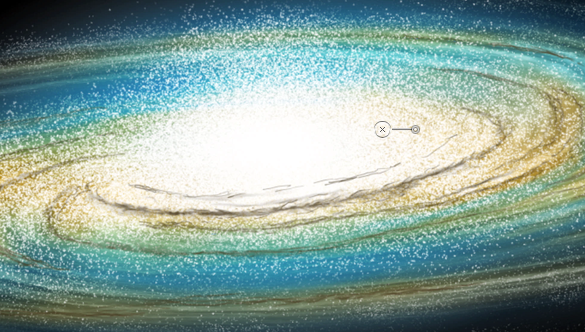
Next with our tiny brush still selected we will choose a bright yellow color as shown here and add a bit of highlights to the strokes we have been working on as shown below.

Perfect, we have reached the end of this step and these are the results we have so far.
Original Link: http://feedproxy.google.com/~r/psdtuts/~3/_Brsk7YpCSQ/
TutsPlus - Design
More About this Source Visit TutsPlus - Design