
Some of Our Sources
- Engadget
- Technology Review
- Just Creative
- The Logo Smith
- Vandelay Design
- You The Designer
- Reencoded
- Wal You
- Spyre Studios
- Daily Now
Help Webnuz
Referal links:
How to Use Google Slides in 2020 (Quick Start Guide)
As presentation tools go, PowerPoint and Keynote get all the press. Google Docs is often mentioned as a great Word alternative. There are tons of tips about how to use Google Sheets. But Google Slides barely gets mentioned. That's a shame since it's a very good presentations tool and it's free.

You may be thinking, "what is Google Slides?" In this Google Slides tutorial we answer that question. I'll teach you how to create a presentation in Google Slides and walk you through the benefits of using the tool.
Also, for a helpful companion to this Google Slides tutorial, download our helpful eBook: The Complete Guide to Making Great Presentations. It's available for FREE with the Tuts+ Business Newsletter. Learn how to write, design, and deliver the perfect presentation.
What Is Google Slides?
Maybe you've been hearing about Google Slides, but you aren't sure how it differs. What is Google Slides used for, and how does it differ from other apps?
There are many differences between Google Slides and traditional presentation apps. Here are three key principles to keep in mind when you're learning Google Slides:
It's still relatively new. PowerPoint was built in the 90's. Google Slides is a browser-first experience that set the tone for how powerful apps that live inside your web browser can be.
It's connected. Because Google Slides is a browser-based app, it hooks into other web-connected services. That means collaboration and connecting to other apps is easy.
It's simplified. Google is a company that focuses on simplifying user experience. It's easy to use any of their apps so that tasks like learning how to use Google Slides is easy.
If you want to learn more about how to use Google Slides, we've got a guide that's right for you. It helps you learn how to access Google Slides and provides a complete Google Slides guide for beginners:

Now let's jump into this tutorial to learn more about what Google slides is and learn how to start using it.
Step 1. Get Started Using Google Slides
Google Slides is Google's flagship presentation app that lives inside the browser as a part of Google Drive. Basically, think of Slides as Google Doc's presentation tool. It's completely free—the only requirement to use is to have a Google account.
Due to being a free web app, Google Slides isn't as full featured as desktop apps like Microsoft PowerPoint and Keynote. But it makes up for a lack of aesthetic features by boasting very strong collaboration features—if not the best.
The learning curve for Google Slides is also much lower than that of a full-featured desktop app. That's because it hosts the most essential of features and gets rid of most of the fluff.
Learn more about the details of what Google Slides is and its advantages:
If you'd like to see a deeper comparison between PowerPoint, Keynote, and Google Slides, refer to these articles:
 PresentationsPowerPoint vs. Keynote vs. Google Slides: What Is the Best Presentation Software?
 PresentationsShould Google Slides Replace PowerPoint in Your Workflow?
Let's look at how to use Google Slides to make your presentation, as it's a great choice of online presentation software to work with:
Step 2. Create a New Presentation in Google Slides
Once you've signed into your Google Account, head to Google Drive. There, create a Google presentation by clicking New > Google Slides > Blank Presentation. You'll be redirected to a new page with a blank presentation.

1. Format a Google Slides Presentation
The first step in creating a new presentation is configuring how it looks. So, let's take a look at the Themes sidebar that pops up upon creating a presentation.
Google Slides comes preloaded with different themes for slides. While most of them aren't as aesthetically pleasing as those found in desktop apps—especially those found in the latest version of Keynote—they're functional. Plus, there's a good selection of many kinds of basic Google presentation themes available.
The Themes sidebar appears on the right side of your blank presentation. Use the scroll bar to move through the various themes available.

If none of the basic themes in Google Slides suit your needs, you've got plenty of extra options.
You can find dozens of beautiful new Google Slides themes at Envato Elements, which are made by professional designers.

Or, browse through our collection of pay-as-you-go best-selling presentation themes from Graphic River to find those that are trending. You can also find some of the best designs featured in this article:
Moreover, you may upload an original
theme to Google Slides by pressing the Import theme button on
the launcher. The Import theme window
appears. Use a theme from a previous presentation, drag a theme onto
the Import theme window from your
computer, or Select a file from your
computer.

Google
supports uploads up to 50MB in .ppt, .pptx, .pptm, .ppsx, .pot, .potx, .odp, and
Google Slides formats.
Once you've selected the theme, determine the Google Slides aspect ratio of your slides. From File > Page setup, there are the options of Standard 4:3, Widescreen 16:9, Widescreen 16:10, and Custom.
Select the aspect ratio that best fits the screen you'll be using when you present the Google Docs slideshow. Typically, the standard Google Slides aspect ratio is best if the Google presentation is being projected. The widescreen aspect ratio is best suited if you're presenting with a computer or widescreen TV.

Click OK once you're settled with the theme and aspect ratio of your presentation. For this Google Slides tutorial, I'll use the Paperback theme and the 16:9 aspect ratio.
Note: Themes and aspect ratios may be changed later on by clicking Slide > Change theme.
Learn more about working with customizing Google Slide slide formats and designs in Google Slides:
.jpg)
I recommend renaming your presentation once you've decided on the initial theme. To do so, click on Untitled presentation in the top left corner of the screen, and type in a new name.

Step 3. Navigate Google Slides
Let's look at how to use Google Slides tools. Google Slides works much like desktop presentation applications. The left sidebar of Google Slides displays the slides that you've made, and the body of the screen displays the slide you're currently working on.
.jpg)
For our purposes, the first slide will be the title slide. To add a title, click where it says to and type in the title of the Google presentation. You may also add a subtitle or leave it blank. Fields left blank won't show in the final presentation, so you don't have to delete the extra elements.
.jpg)
When selecting text, new options appear in the toolbar above. The icons on the center of the toolbar allow for editing the appearance of the text box, such as background color and a border. The icons on the right side allow for editing the appearance of the text itself, such as typeface, font size, color, and styles like bold, underline, and italic.
.jpg)
1. Add & Delete Slides
Once you're happy with the appearance of the title slide, you can add more to your presentation. To add new slides, click the + button on the upper left side of the screen. This creates a new slide with a Title and Body layout.
.jpg)
Delete slides by selecting the slide and clicking Edit > Delete. Or right-click on the slide thumbnail in the sidebar and clicking Delete slide. Or simply press the Delete key while the slide is selected.
2. Add Text
The new slide will be an information slide. Add a title that's relevant to the information that you'll put on your slide.
As for the body text, you'll want to do some more formatting. It's a presentation, after all, and long paragraphs detract from the effectiveness of the body of the slide. Click the body text box to reveal text options, then click More to reveal more text options. This allows you to create a bulleted list.
.jpg)
Now that the body is formatted correctly, add information to the slide. Given you haven't researched the topic the presentation is about, Google Slides has an in-app researching tool accessible via Tools > Explore.
The Explore sidebar allows you to Google search in-app. You may also filter the search to only include material
from the Web, Images, or Google Drive.
Using the See all results on Google link
at the bottom of the sidebar sends you to a full Google search window. Preview the links right from the sidebar and insert links directly into the Google presentation right from the sidebar itself.
.jpg)
Add the information you'd like to display to your slides. Presentation notes may be added in the field at the bottom for easy access to more information without cluttering your slides.
Learn more about working with text in Google Slides:
.jpg)
3. Add Media
The next slide will be a slide with media elements. Since media will be added to this slide, the default layout won't be the best fit. For this slide, click the arrow button next to the + button, and select a different layout for the slide, most preferably one from the bottom row. I'll use Caption.
.jpg)
Click the arrow button next to the "+" button to view extra layouts.
Tip: Google Slides layouts may be altered later using the Layouts button in the toolbar.
Let's look at how to use Google Slides to add images to your presentation. To add an image, click the Image button in the toolbar, or go to Insert > Image.
There are several ways to add images to your presentation. Upload your own image from your hard drive, your Google+ account, or Google Drive. Take a picture using a webcam. Or search Google, LIFE magazine photo archives, or stock photos in the Insert image panel.
.jpg)
Note:
When downloading images, pay attention to any intellectual property restrictions.
For example, below the Stock images search the words "Results shown are available
for personal or commercial use only in Google Drive, and may not be
independently redistributed or sold" display.
Once you find the image you like, click on it and press Select (from archives or stock images). Or click Open (from the Upload option) to insert it into the Google presentation. There, the image may be resized and rotated to your liking.
.jpg)
Learn more about how to add other types of media to Google Slides presentations:
.jpg) Google SlidesHow to Add YouTube Video to Google Slides Presentations
Google SlidesHow to Add YouTube Video to Google Slides Presentations.jpg) Google SlidesHow to Add Music & Sound to Google Slides Presentations
Google SlidesHow to Add Music & Sound to Google Slides Presentations
4. Add Animations
To spice up your presentation a bit, Google Slides hosts a few different animations you can use for both slide elements and transitions between slides.
Here's how to use Google Slides to add animations to your presentation. Add a transition by clicking on the Transition button in the toolbar. An Animations sidebar will appear, and from there you can customize the animations in your Google presentation.
The Slide menu controls animations between slides. There are six transition options available. Pick one from the drop-down menu. Then choose the speed at which the transition occurs using the Slow-Fast slider beneath the drop-down menu.
The slider displays the transition length as you adjust it to your liking. Transitions may last between zero to five seconds.
.jpg)
Tip: Easily apply transitions between all slides by clicking the Apply to all slides button in the Animations sidebar.
Individual objects on slides can be animated, too. Select an object on the slide by clicking on it, then press Select an object to animate in the Animations sidebar.
.jpg)
Select an animation style from the first drop-down menu. The second drop-down menu controls the toggling of individual animations. Animations may be toggled manually by selecting the On click option. Or start one automatically by selecting the After previous or With previous options. Animation speed is controlled by a Slow-Fast slider.
.jpg)
To preview your animations, press Play.
Learn more about how to work with animations and slide transitions in Google Slides:
.jpg)
Step 4. Collaboration
Now we cover how to use Google Slides collaboration features, which are top-notch to work with. Since it's a web app, it's easy to invite people to join the presentation and work on it together in real time, no matter where your peers may be located.
To collaborate, click the blue Share button in the right corner of the screen. The Share with others a screen will pop up and offer different ways to share the presentation. If
you click the Get shareable link icon
(it looks like a chain), Google generates a link for your presentation that can be shared with people via Mail, Google+, Facebook, or Twitter.
You can also invite people to the document your Google presentation by entering their email addresses (or, if they're in your contacts, their names) in the People field. Click
the Advanced link in the lower right
of the screen to view all the sharing options.
.jpg)
The presentation can be opened to the public further by clicking the Change link under the Who has access field. The
Link sharing window displays. There, the presentation may be made available for Anyone with the link or made totally public by clicking Public on the web. These options differ from Specific people because no one needs to sign into their Google account to view the presentation.
.jpg)
Restrict the powers of collaborators by selecting either Can view, Can comment, or Can edit options from the Can view drop-down menu.
Once you're happy with the collaboration settings, click the Save button on the Link sharing window. Next, click the Done button on the Sharing
settings window. You may now begin collaboration in real time.
Learn more about collaborating on Google Slides presentations:
.jpg)
Step 5. Present Your Google Slides Presentation
Now that you've finished the presentation, click the Present button to show off what you've got.
.jpg)
If you're presenting somewhere without internet access, you may export the presentation as a .pptx file by clicking File > Download As > Microsoft PowerPoint.
Now that we've covered what is Google Slides, as well as how to use Google Slides, you can see that it makes it easy to create web-based Google presentations. By using Google Slides you may lose some desktop app features, the in-app information and photo search engines, strong collaboration tools, and ubiquity of the application make the app a strong competitor to the traditional presentation app.
5 Quick Slide Design Tips for Google Slides Presentations in 2020
Your next slide deck deserves to stand out. To ensure it does, follow these quick design tips to build amazing Google Slides presentations of your own:
1. Use Focused Layouts
When you think about how to use Google Slides, consider the purpose of your presentation. You want your audience to stay engaged as you walk them through your idea.
In slide design, that means building clear and concise slide layouts. They’re more visually appealing, and they help viewers stay focused.

2. Play Background Music
What is Google Slides used for? Building amazing slide decks. But remember, your visuals are just one part of the equation. For the full effect, consider adding music to your slides. It’s an excellent way to set the mood for your presentation.
Check out our fully featured tutorial on adding music to Google Slides presentations:
3. Choose Larger Fonts
When you design your Google Slides presentation, always factor in where you’ll be sharing it. If you’re presenting in a large room, it’s key to use large, bold fonts that are easy to read. Fine print clutters a slide and can be a struggle for your audience.

4. Add an Image Background
Your slide background might not be something you consider a design feature. But in fact, it’s easy to control and customize. An image background brings new life and character to any slide. With the custom features inside Google Slides, import background images in a flash.
Want to add an image background of your own? We’ve prepared a complete tutorial:
.jpg)
5. Use Colorful Designs
Let’s face it: many slide decks can be bland and boring. One way to overcome that is with bold, bright colors.
Colorful designs capture attention and deliver energy. Besides, colorful designs can be tailored to match your branding. They set the stage for a successful and engaging presentation.

5 Google Slides Presentation Trends for 2020
You’ve learned how to start Google Slides presentation projects of your own. But to succeed, you need to capitalize on the latest style trends for 2020. This Google Slides guide will introduce you to five of the latest trends, helping you build a winning deck:
1. Avoid Data Overload
Data overload: it’s a mistake guaranteed to lose your audience. Overcome it with the creative use of infographics.
These are stunning visuals that combine information and graphics to form compelling illustrations. Far from boring, they’re engaging and help bring clarity to complex ideas.

2. Engage Audiences with Video
In your Google Slides introduction, you don’t have to do all the talking. Plus, engage other voices and share them with your audience. Do it by adding a YouTube video to your Google Slides presentation. It only takes a few clicks.
We’ve created a screencast (and an illustrated tutorial) to get you started today:
3. Showcase Your Apps With Device Mockups
Often, you might want to show off your app or website inside your Google Slides presentation. You could use a simple screenshot, but in 2020 that isn’t enough.
Now, you should turn to device mockups, 3D representations of actual devices. They’re easy to create and deliver lifelike previews of your digital world.

4. Minimal Use of Animations
When used properly, animations are stylish transitions between slides, concepts, and ideas. But when overused, they’re annoying distractions that disturb and distract your audience.
The key is to use animations sparingly. It’s also best to use simpler designs instead of flashy cinematic effects.
Ready to start animating your Google Slides decks? Head over to our complete tutorial:
5. Highlight Key Points With Icons
What is a Google slide without an illustration or two? Perhaps flat and a bit dull. Icons are a quick way to fix that.
Icons help you call out key points, add visual interest, and direct audience focus to certain areas of a slide. They’re fun and easy to add, especially with pre-built premium templates.
How to Quickly Customize Google Slides Templates
When you're working with custom Google Slides presentations, you might be wondering how to use templates. Even though templates already have most of the design elements prepared, in this section you'll see how to customize them to your liking. Skip most of the hard work of learning how to use Google Slides when you use templates.
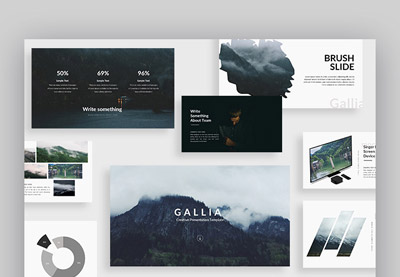
If you need a professional presentation theme, browse through our best Google Slides themes on Envato Elements or GraphicRiver to find a great design. They're robust, packed with loads of design features, beautiful graphics, and made to work with quickly.
In this section, we'll learn how to make a Google Slides presentation with a template. We'll use the Yukee Google Slides presentation from Envato Elements. Let's dive in.
1. The Welcome Slide

Google Slides presentations need strong openings to set the stage. Use a welcome slide, like slide 6 in our template, to do just that.
When it comes to welcome slides, less is more. It might be showing on a screen as your audience files into the auditorium or meeting room, so you'll want a simple slide that's easy to read. In our case, this slide provides the perfect solution.
On this slide, it's easy to type over the text placeholders. Just click in the text box on your Google slide and type over the text with what you want to show. In my case, I also increased the font size because I wanted it to be readable at distance.
Finally, it's time to replace the image. This Google Slides presentation makes use of slick and fancy image masks that take your standard images and re-shape them into custom shapes. Right-click and choose Replace Image, then browse to your logo or image to fill in the mask. That's it!

2. The Team Slide

Nearly every Google Slides presentation benefits from showing the team that contributed to the idea. It builds a sense of camaraderie and shows your audience that you appreciate your collaborators.
Slide 22 is an outstanding slides design that fits the bill perfectly. All you've got to do is type over the text placeholders, filling in your team's details with a few key points.
Finally, it's time to replace the imagery. Right click on the images, then chose Replace Image and browse to your team's headshots or other professional photos. In just a couple of minutes, you've customized your Google Slides presentation to spotlight your key contributors.

3. The Device Mockup Slide

Running an app or web-based company? You can't miss out on the opportunity to include a device mockup slide. This popular slide design that you'll find in many Google presentations can help your audience picture how an app works.
Slide 35 is the perfect way to do that in our template. Again, it's the same simple steps as you saw in prior designs: type over text and replace the image. On the right side, use the key points to explain the value proposition and key features.
It's also worth noting when you adjust those value points, you can use other icons included with the template to better represent your ideas. The template includes more icons in the download that you can use for your idea. Just drag and drop them onto the browser window to add them.
After these simple tweaks, your app mockup is perfect for sharing your new idea!

Learning how to make Google Slides presentations successfully is all about using templates as a head start. Skip the crash course in graphic design. Instead use Google Slides templates and tutorials to launch your presentation to success.
For more great templates to customize, check out these helpful resources:
 Presentations18+ Best Google Slides Presentation Themes (Premium Templates to Download in 2020)
 Google SlidesHow to Create Google Slides Presentations Using Cool (Customizable) Themes
Learn More About Using Google Slides (Tutorials & Resources on Tuts+)
To learn even more about how to use Google
Slides, we've got some great material in our Google Slides Ultimate Tutorial Guide. Sample some of the best Google Slides tutorials at the links below:
- PresentationsShould Google Slides Replace PowerPoint in Your Workflow?
 PresentationsHow to Convert PowerPoint (PPT) to Google Slides Presentations on Import
 Google SlidesHow to Create Professional Google Slideshows for Business Presentations
Download Our Free PDF eBook on Making Great Presentations
Even though it helps to know how to use Google Slides, it' even more helpful to understand general presentation principles. We've got the perfect complement to this tutorial, that'll help you learn how to write, design, and deliver great presentations.
Download The Complete Guide to Making Great Presentations for FREE with a subscription to the Tuts+ Business Newsletter. Get your ideas formed into a powerful presentation that'll move your audience.

Make a Great Presentation in 2020 With Google Slides
There many quick tips, professional workflows, and useful tips to help you make a great presentation with Google Slides. It's time to fire it up and get started! Why not choose a Google Slides presentation template today and get started?
If you've got any further questions or suggestions about Google Slides, feel free to leave a comment below.
Editorial Note: This
post was originally published in 2014. It's been comprehensively revised to
make it current, accurate, and up to date by our staff—with special assistance
from Laura Spencer and Andrew Childress.
Original Link: https://business.tutsplus.com/tutorials/getting-started-with-google-slides--cms-21359
Freelance Switch
More About this Source Visit Freelance Switch