
Some of Our Sources
- The Logo Smith
- Smashing Apps
- Vandelay Design
- Fuel Your Creativity
- Wal You
- Freelance Switch
- Web Resource Source
- Android Dissected
- Daily Now
- The Verge
Help Webnuz
Referal links:
How to Draw an Octopus Step by Step
The theme of this tutorial is drawing an octopus; we’ll base it on the anatomy of this mollusc but also bring some stylization into our artwork.
I’ll show you an easy way to create a pencil sketch from scratch, and then we’ll explore the step-by-step process of drawing with ink liners. We'll also learn to use dots and mix artistic techniques to our advantage!
What You Will Need
- A sheet of drawing paper
- A graphite pencil (I recommend using an HB type)
- An eraser
- An ink liner number 0.2
- An ink liner number 0.1
- An ink liner number 0.05

1. How to Draw an Octopus With a Graphite Pencil
Step 1
I draw a slightly curved core line; it will help us to mark the positioning of the figure.

Step 2
I outline the rough shape of the head. Then I add an oblong shape where the eyes are located.
According to this foreshortening, one side of the octopus is more visible to the viewer than another.

Step 3
I add the framework of the limbs. An octopus has eight arms that can be divided into four pairs.
Now I mark only the arms that are visible in the foreground, just to keep the process as simple as possible. We’ll add the hidden arms later.

Step 4
I draw the eyes. They are large, enclosed in a capsule, and have a slit-shaped pupil.

Step 5
I draw the fold of the aperture at the side of the head.

Step 6
I add the siphon; it resembles a funnel. An octopus uses a siphon for respiration and locomotion.
Now we are ready to proceed to drawing the tentacles, or the arms. This topic needs additional explanations, so I'll see you in the next section!

2.How to Draw Tentacles
Step 1
It's worth mentioning that, according to Wikipedia, the correct name for the limbs of an octopus is "arms", not "tentacles". But since it is a commonappellation, I'll be using "tentacles" now and then throughout the tutorial.
I draw the first pair of arms, keeping the lines smooth and soft.

Step 2
To draw the inner parts of the tentacles correctly, we need to keep in mind the principles of perspective.
The foreshortening defines how much of the interior surface we see; the image below illustrates this concept.
We’ll dwell upon drawing the suckers (the round elements that cover the interior surfaces of the arms) just in the next step.

I add the inner parts of the first pair of arms.

Step 3
The stylized form of a sucker resembles a bowl with a hollow central cavity.
The principles of perspective are applicable here, too: the point of view defines how we see the object. For example, if we have an overhead view of a sucker, we’ll see onlythe top plane with the cavity and no sides.

Each arm has two rows of suckers. Depending on the species, the suckers can be placed in a parallel or a staggered order.

I add the suckers to the first pair of the arms. The suckers get smaller towards the end of the limb, so just mark the smallest ones without adding many details.

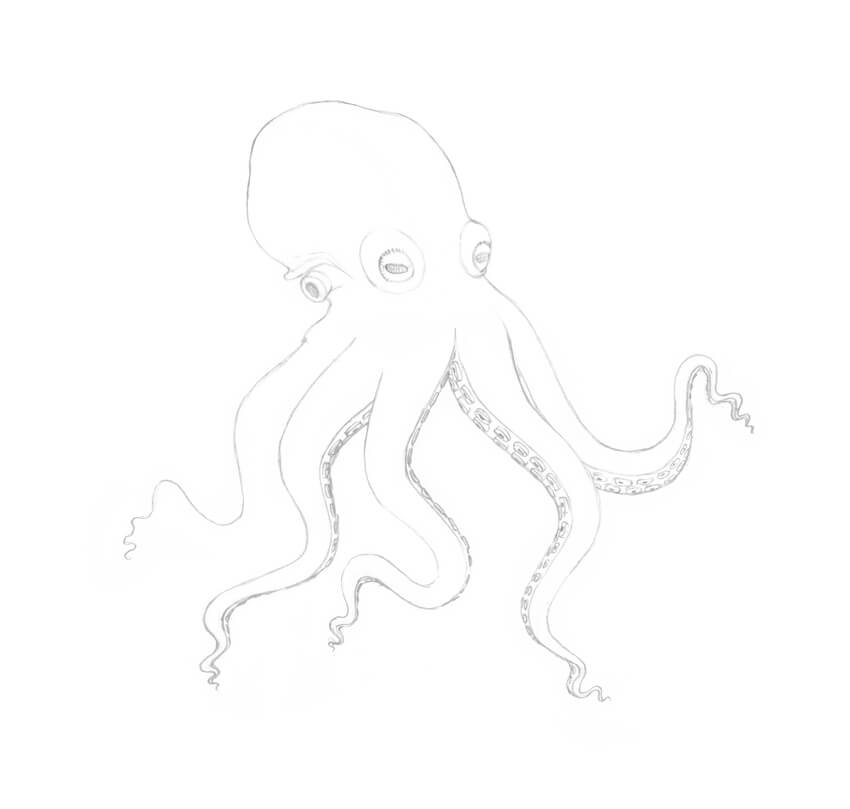
Step 4
I draw the second pair of arms and then add the inner sides.

Step 5
I add the suckers to the second pair of arms.
Step 6
I draw the remaining tentacle of the third pair. Then I add the inner surface and the suckers, just as we did in the previous examples.

Step 7
I draw the second arm from the third pair; it is hidden behind one of the arms in the foreground.

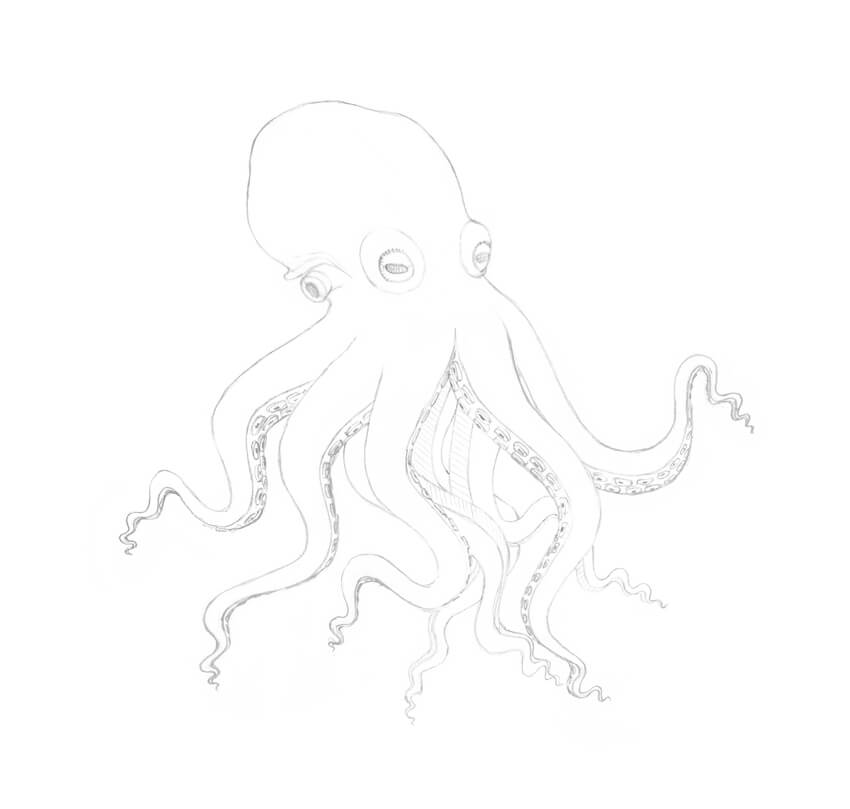
Step 8
I add the fourth arm pair. Use your imagination and artistic flair to find the best direction for these arms; it’s important to keep the balance of the figure.
I applied light pencil hatching to the inner parts of the limbs just for your reference.
Step 9
As a final addition to this pencil sketch, I draw the suckers.
I clean my drawing with the eraser. It's important to make sure that all unnecessary pencil lines are removed before proceeding to any additional artistic tool.
The sketch is ready for inking!

3.How to Draw With Ink Liners
Step 1
Before we begin inking our octopus drawing, let’s try some warm-up exercises and practice making dots on the paper.
Dotwork (also known as stippling) is a great artistic technique; it’s a perfect choice for creating beautiful textures.
Draw a sample of dotwork that consists of two parts. Use the 0.2 ink liner for the left one and the 0.1 liner for the right one.

Step 2
Create a line, using only dots. The speed of drawing influences the accuracy of the individual dots within the line.
The 0.2 ink liner is a great tool for this exercise.

Step 3
The goal of the next exercise is to make a gradation of value. With the 0.2 ink liner, create a sample with an increasing density of ink dots.

4.How to Draw an Octopus With Ink Liners
Step 1
With the 0.2 ink liner, I create the main contours.
To make the drawing more interesting, I use a dotted line in addition to a traditional continuous outline.
Step 2
I add dots to the sides of the octopus, using the 0.2 ink liner. I also darken the pupils and mark the darker places of the figure.
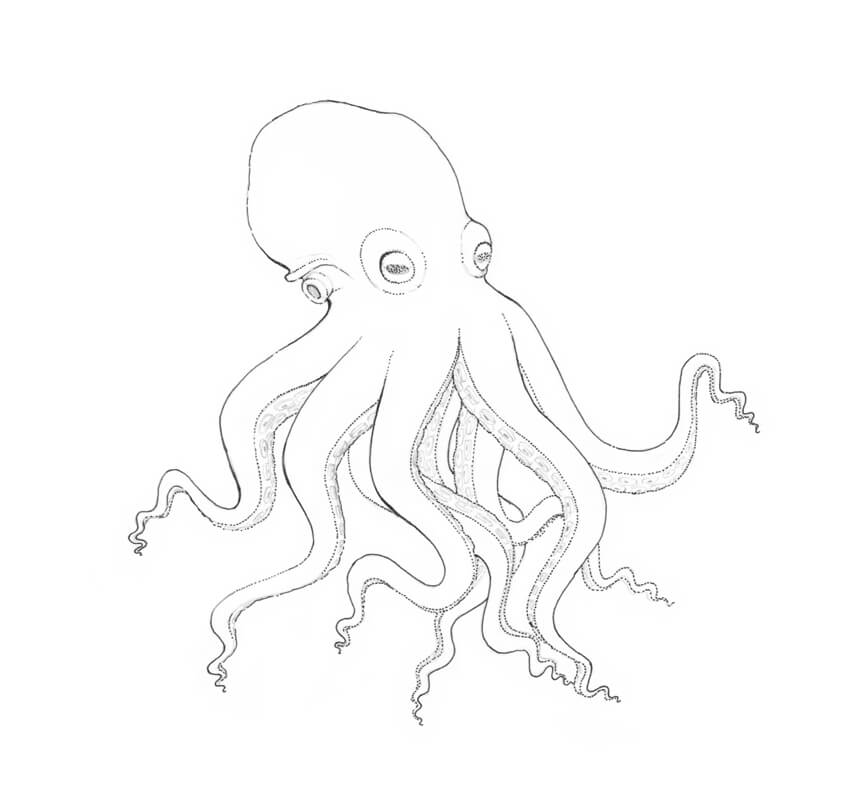
Step 3
With the 0.1 ink liner, I add a layer of dots to the drawing.

Step 4
I add dots to the back arms of the octopus, using the 0.1 ink liner. To create the core shadows of the arms, you can place dots closer to each other.

Step 5
I outline the suckers, using the 0.05 liner, and also add dots to the eyes to make them more three-dimensional.
Step 6
With the 0.2 liner, I add another layer of dots to the sides of the octopus, giving the drawing more contrast and making it more three-dimensional.
I create a pattern of the skin, applying the groups of dots to the head and arms. Approximately five dots per group is the way to go.

Step 7
I make the contours of the drawing a bit thicker, using the 0.2 ink liner.

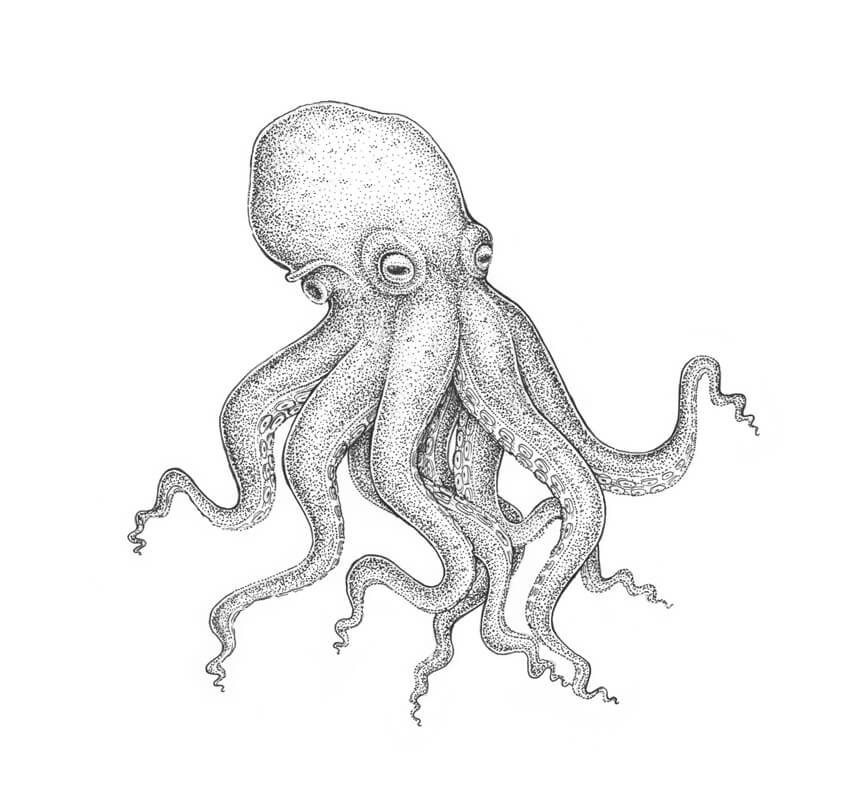
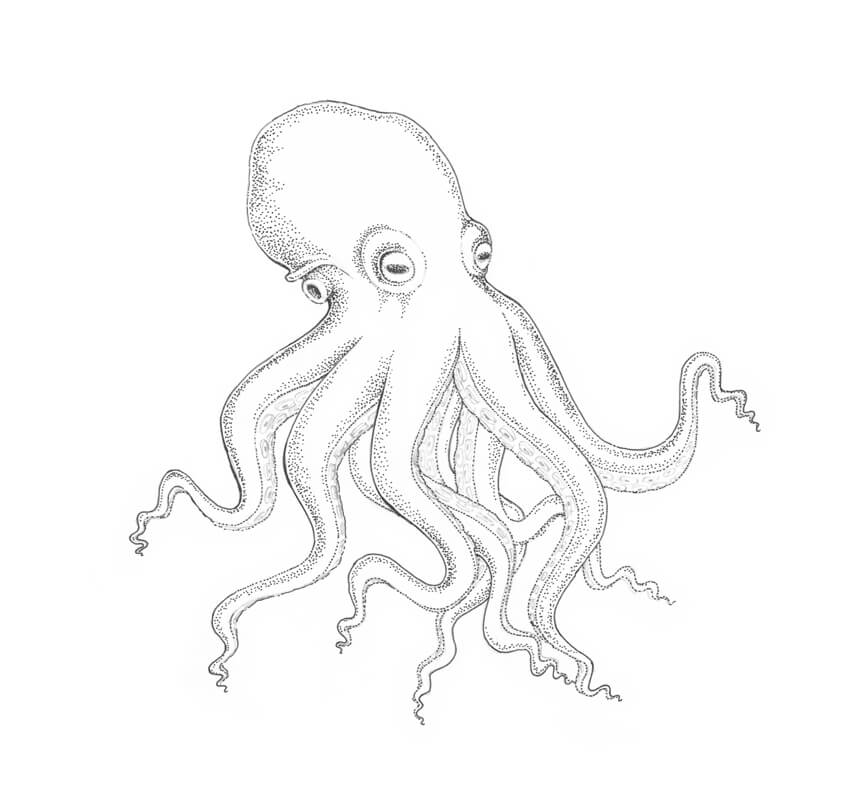
Step 8
The ink drawing is complete!
As a finishing touch, I apply pencil hatches to the sides of the octopus, creating soft transitions from shadow to light. This combination of artistic techniques makes the drawing more unique and interesting.

Your Drawing Is Complete
Congratulations! You’ve created a beautiful artwork; I hope you enjoyed both the process and the result.
I wish you much success in drawing with pencils and ink. Have fun capturing the unique charm of the wonderful world of animals and nature!

Original Link:
TutsPlus - Design
More About this Source Visit TutsPlus - Design