An Interest In:
Web News this Week
- April 29, 2024
- April 28, 2024
- April 27, 2024
- April 26, 2024
- April 25, 2024
- April 24, 2024
- April 23, 2024
How to Create a Card Suits Pattern in Adobe Illustrator

In the following steps you will learn how to create, save and use a card suits pattern in Adobe Illustrator.
For starters, you will learn how to set up a simple grid and how to create the four card suit symbols using basic vector shape building techniques. Moving on, you will learn how to create and save a simple pattern. Finally, you will learn how to apply your pattern and how to adjust it using the Transform effect.
For more inspiration on how to adjust or improve your final pattern, you can find plenty of resources atGraphicRiver.
1. How to Create a New Document and Set Up a Grid
Hit Control-N to create a new document. Select Pixels from the Units drop-down menu, enter 850 in the width and height boxes, and then click theAdvanced button. Select RGB for the Color Mode, set the Raster Effects to Screen (72 ppi), and then clickCreate Document.
Enable the Grid (View > Show Grid) and the Snap to Grid (View > Snap to Grid). You will need a grid every 5 px, so simply go to Edit > Preferences > Guides > Grid, enter 5 in the Gridline every box and 1 in the Subdivisions box. Try not to get discouraged by all that grid—it will make your work easier, and keep in mind that you can easily enable or disable it using theControl-"keyboard shortcut.
You can learn more about Illustrator's grid system in this short tutorial from Andrei Stefan: Understanding Adobe Illustrator's Grid System.
You should also open the Info panel (Window > Info) for a live preview with the size and position of your shapes. Don't forget to set the unit of measurement to pixels from Edit > Preferences > Units. All these options will significantly increase your work speed.

2. How to Create the Clubs Symbol
Step 1
Pick the Rectangle Tool (M) and focus on your Toolbar. Remove the color from the stroke and then select the fill and set its color to black (R=137 G=147 B=150). Move to your artboard and simply create a 20 x 10 px rectangle—the Grid and the Snap to Grid should make this easier.
Return to your Toolbar and replace the existing fill color with a random yellow. Switch to the Ellipse Tool (L), create two20 px circles, and place them exactly as shown in the second image.

Step 2
Using the Move Tool (V), select all the shapes made so far, open the Pathfinder panel (Window > Pathfinder), and click the Minus Front button. Select the resulting shape and simply hit Control-C to copy it.

Step 3
Return to your Toolbar and set the fill color to black. Pick the Ellipse Tool (L), create three20 px circles, and place them exactly as shown in the first image. Switch to the Rectangle Tool (M), create a 10 px square, and place it as shown in the second image.
Select all the shapes made so far, click the Unite button from the Pathfinder panel, and then hit Control-8 to turn the resulting shapes into a compound path. This will be your clubs symbol.

3. How to Create the Spades Symbol
Step 1
Using the Ellipse Tool (L), create a 40 x 50 px shape and make it black. Switch to the Rectangle Tool (M), create a 40 x 25 px shape, fill it with a random yellow, and place it as shown in the second image. Select both shapes and click the Minus Front button from the Pathfinder panel.
Focus on the top side of your resulting shape and pick theAnchor Point Tool (Shift-C). Simply click that top anchor point and drag those handles as shown in the third image.

Step 2
Keep focusing on the shape made in the previous step. Pick the Direct Selection Tool (A), select the bottom anchor points, and drag those handles as shown in the first image.
Move to the top anchor point, hold the Alt key, and drag those handles as shown in the second image.

Step 3
Using the Ellipse Tool (L), create two20 px circles, and place them exactly as shown in the first image. Make sure that both shapes are selected and turn them into a compound path (Control-8).
Switch to the Rectangle Tool (M), create a 40 x 10 px shape, and place it as shown in the second image. Select this rectangle along with the compound path made a few moments ago, and then click the Minus Front button from the Pathfinder panel.

Step 4
Select the two shapes highlighted in the first image and click the Unite button from the Pathfinder panel. Simply hit Control-V to paste the shape copied several steps ago. Place this new shape as shown in the second image.
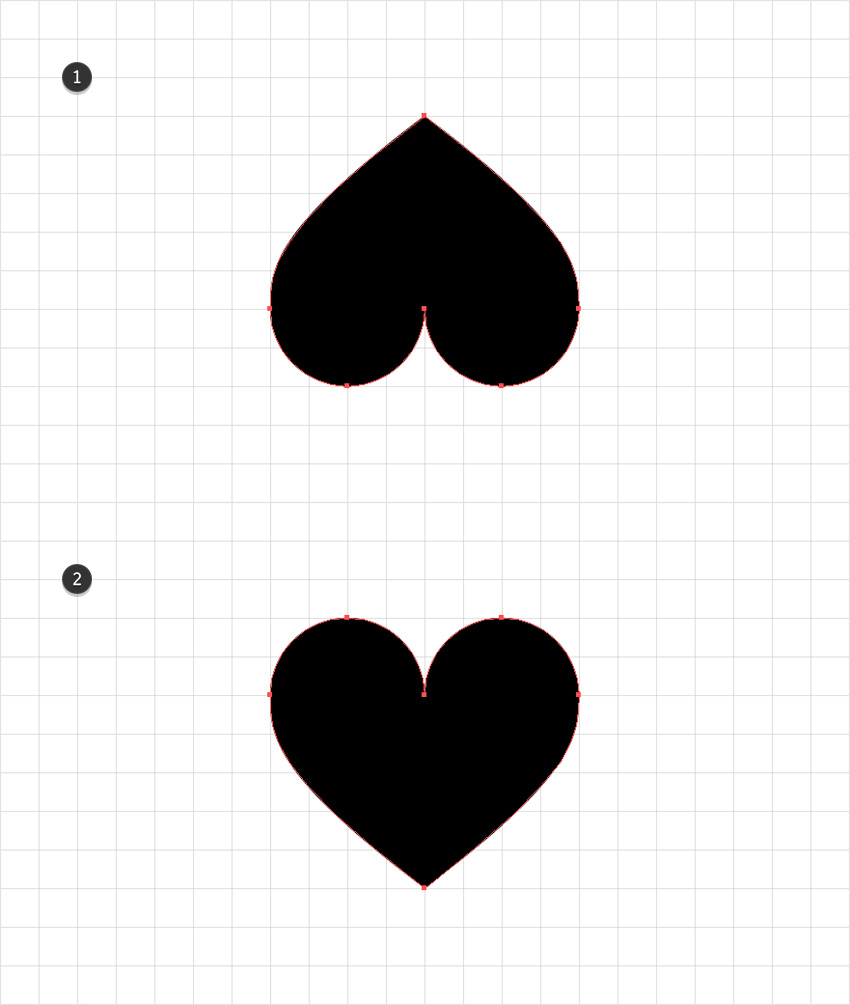
Reselect your flipped heart shape (highlighted in the third image) and copy it (Control-C). Select the two shapes that make up your spades symbol and turn them into a compound path (Control-8).

4. How to Create the Hearts Symbol
Step 1
Paste that flipped heart shape (Control-V) and rotate it 180 degrees.

Step 2
Keep focusing on your heart shape and pick the Direct Selection Tool (A). Select the bottom anchor point and drag it 5 px down. Next, select the two handles and drag them as shown in the third image. The resulting shape will be your hearts symbol shape.

5. How to Create the Diamonds Symbol
Pick the Rectangle Tool (M), create a 40 px square, fill it with black and go to Object > Path > Add Anchor Points. Keep focusing on this shape and switch to the Delete Anchor Point Tool (-). Simply click the four corners of your square to remove them. The resulting shape will be your diamonds symbol shape.

6. How to Create and Save Your Pattern
Step 1
Using the Rectangle Tool (M), create a 200 x 100 px shape, fill it with a random red, and lower its Opacity to about 30%.

Step 2
Bring your symbol shapes to front (Shift-Control-]) and place them as shown in the following images.

Step 3
Select the diamonds and the hearts shapes and replace the existing fill color with R=220 G=40 B=20.

Step 4
Reselect that red rectangle and remove the color from the fill. Select this rectangle along with the four symbol shapes and simply drag them into the Swatches panel (Window > Swatches) to save them as a pattern.

7. How to Apply and Adjust your Pattern
Step 1
Using the Rectangle Tool (M), create a 610 px square, and fill it with R=240 G=240 B=240.

Step 2
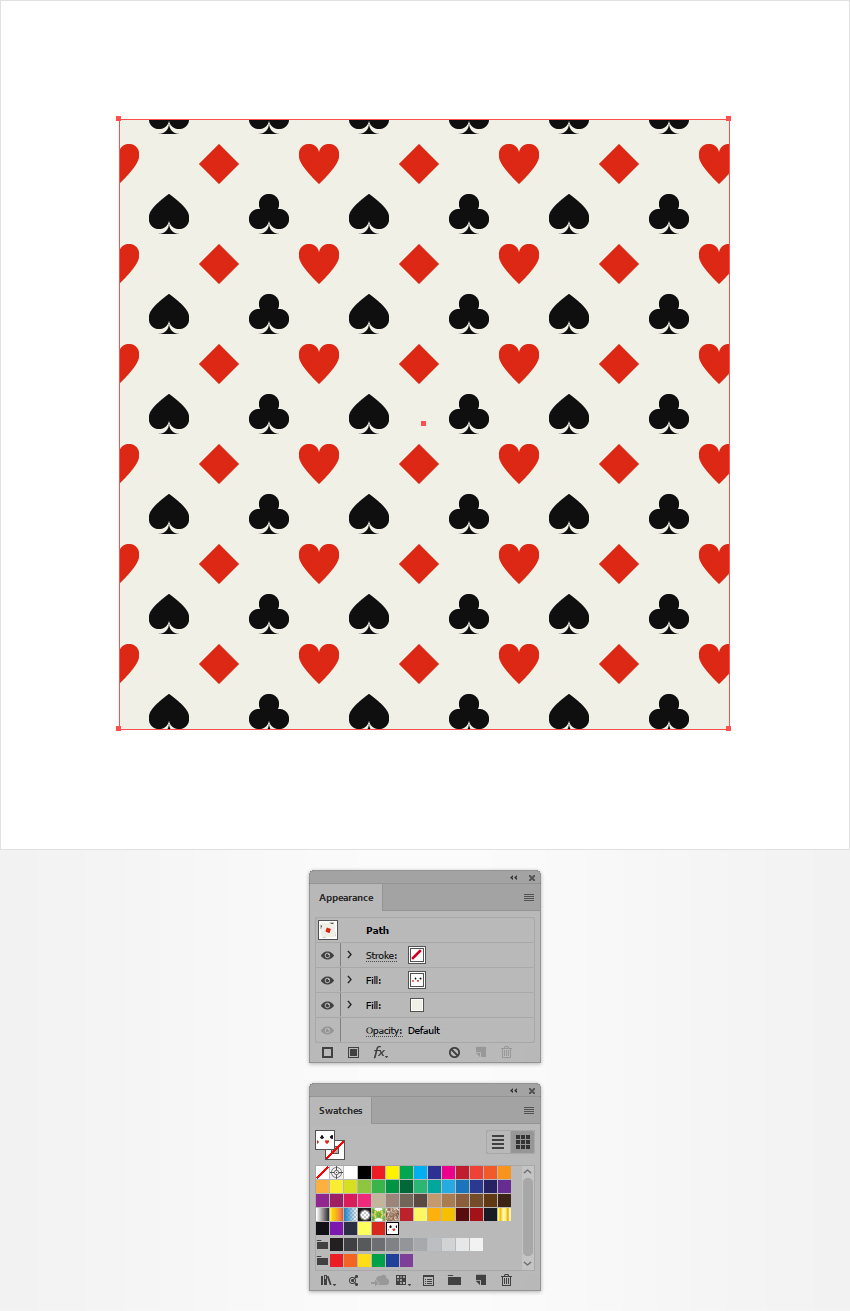
Make sure that your large square is still selected and add a second fill using the Add New Fill button. Select this new fill and simply apply your pattern from the Swatches panel.

Step 3
Finally, here's a simple technique that you can use to adjust your pattern. Make sure that your large square is still selected, and keep focusing on the Appearance panel. Select that patterned fill and go to Effect > Distort & Transform > Transform.
Drag both Scale sliders to 50%, set the Angle to 25 degrees, and be sure that only the Transform Patterns box is checked before you click that OK button. This is a live effect, meaning that you can always return to the Appearance panel, click this effect, and adjust the attributes as you wish.

Congratulations! You're Done!
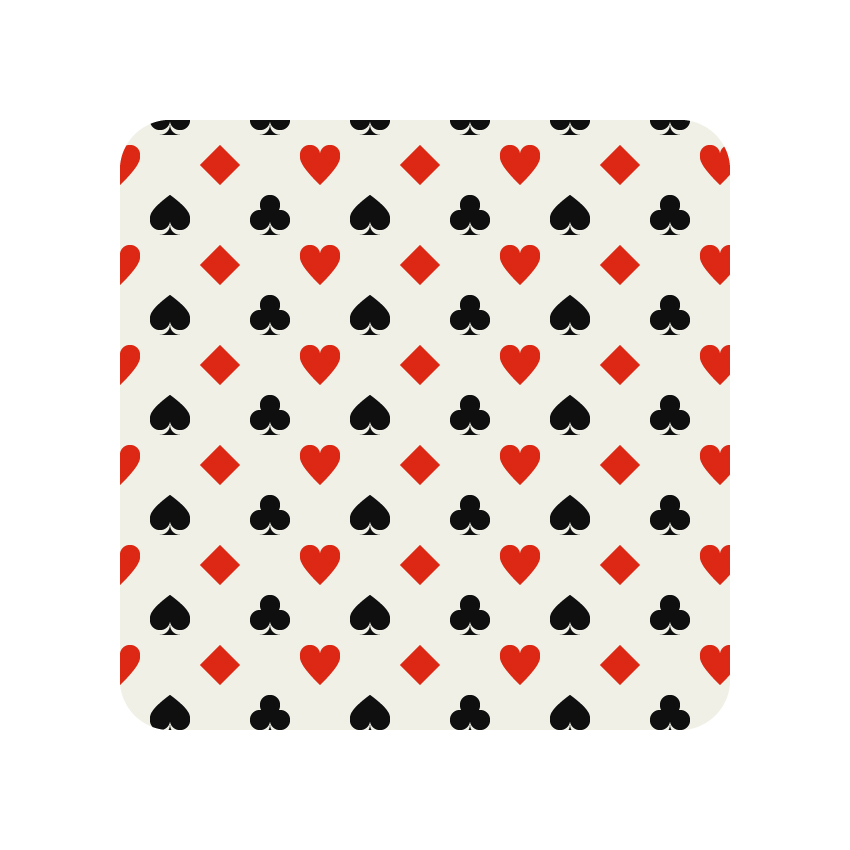
Here is how it should look. I hope you've enjoyed this tutorial and can apply these techniques in your future projects.
Feel free to adjust the final design and make it your own. You can find great sources of inspiration atGraphicRiver, with interesting solutions to improve your design.

Original Link:
TutsPlus - Design
 TutsPlus+ is a blog/Photoshop site made to house and showcase some of the best Photoshop tutorials around.
More About this Source Visit TutsPlus - Design

