
Some of Our Sources
- Techcrunch
- Creative Curio
- Noupe
- CSS Globe
- Line 25
- 24 Ways
- Android Dissected
- Android Headlines
- Willems Lab
- The Verge
Help Webnuz
Referal links:
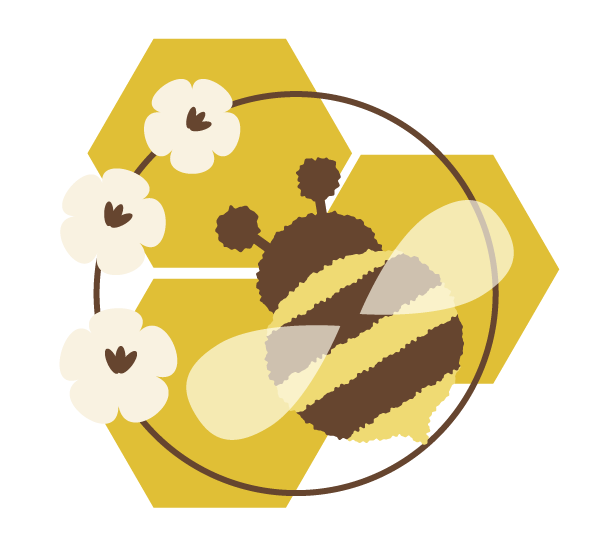
How to Create a Honeybee on a Honeycomb in Adobe Illustrator

"According to all known laws of aviation, there is no way that a bee
should be able to fly. Its wings are too small to get its fat little
body off the ground. The bee, of course, flies anyway. Because bees
don't care what humans think is impossible." (quote from Bee Movie).
In this tutorial, you will learn how to create a stylish illustration with a honeybee, honeycomb, and flowers. Seems as if you'll need to drawa lot,
right? But you won't, because you will create everything using basic
shapes which are already installed in Adobe Illustrator and will
apply few effects like Roughen and Pucker& Bloat.
You
will also learn how to make a sharp corner on an ellipse and how to
move anchor points. You will use the Scissors Tool to cut a path and cut
unneeded parts using the Pathfinder panel. I will also show you how to
make the wings transparent.
I was surprised by the number of beautiful animal vectors onEnvato Market. Why not get some inspiration from these creative illustrations?
1.Create the Bee
Step 1
The size of your new document doesn't matter—you just need to create a new
one. Let's start by creating the body of our bee. Be sure to have the
stroke color deleted and set up the fill color (the color code shown
below). Using the Ellipse Tool (L) and while holding down the Shift key,
create a circle. You need to hold the Shift key to draw an even circle.
Keeping it selected, go to Effect > Warp > Arc Upper. Then expand this shape (Object > Expand Appearance).

Step 2
In this step, we need to combine two shapes: the one that we just
created and a triangle. These shapes together will make up the body of
the bee. To draw a triangle, you will use the Polygon Tool.After you
click on the art board, a new dialogue window will pop up. Enter 3 Sides
and any Radius.
Place those two shapes together as you see in the image
below. Select them both and press the Unite button on the Pathfinder
panel (Window > Pathfinder). You just made one shape from two shapes
(warped circle and triangle).
To make this new shape look a bit fluffy like the real bee, let's apply
the Roughen effect. Go to Effect > Distort and Transform > Roughen
and apply the options you see below.

Step 3
Add a brown ellipse using the Ellipse Tool (L), and place it behind the
body. It's the head of the bee. You probably already have the rough
effect on the head. If not, keep the head selected and apply the
Roughen effect with the same options as you did for the body (Effect
> Distort and Transform > Roughen).
Your options may vary—it depends on how big the head is.

Step 4
Take the Rectangle Tool (M) and, using the same fill color as for the
head, add a tiny rectangle. Place it on the left side of the head and
rotate it a little bit to the left. This rectangle is already roughened, but we don’t need the
roughening effect. To delete the rough effect, on the Appearance panel
(Window > Appearance), grab the word “Roughen" and move it to the trash
icon. Then add a tiny circle on top of it. We
just created one antenna of the bee.
Let's create another antenna: select the one that you just created, andright-click> Transform > Reflect. Check Axis Vertical,
Angle 90 degrees and press Copy. The right antenna is done too.
Now we need to add the Roughen effect just for the circles, using the same options as you
did for the body and head. Expand every shape which has the rough
effect (Object > Expand Appearance).

Step 5
Let's add some stripes.
When you create a rectangle now using the Rectangle Tool (M), it will
already have the rough effect. Place it over the bee's body. Holding the
Shift and Alt keys together, move it down, and you will notice that now
you have two rectangles. Always remember to expand the Roughen effect.
Next, we need to cut those rectangles. But first, create a copy of the
body (Control-C, Control-F), and then cut it (Control-X) and place over the
body (Control-F). At the moment we have two bodies, one over the other.
The first one we leave as it is, and the second will be the cutter for
the rectangles.
Now select the upper body, which will be the cutter, and
those two rectangles. Go to the Pathfinder panel and press the Crop
button. Your image should look like below. You can also clean up the
excess rectangles: select them, and go to Object > Path > Clean Up...
Be sure to have all options checked in the new dialogue window, and then
press OK.

Step 6
On to the wings. Draw an ellipse. You will need to get a sharp corner
with the help of the Convert Anchor Point Tool (Shift-C). Click on the
left anchor point. Then take the Direct Selection Tool (A) and select
the top and bottom anchor points. Shift them to the right. One wing is
done.

Step 7
Place the wing on the right side of the bee's body. While keeping it
selected, right-click> Transform > Reflect. Remember
what you did to get the second antenna? We'll repeat everything—a new
dialogue window will appear, and then you check off Axis Vertical, Angle 90
degrees and press Copy. Shift it to the left, and the left wing is done.
Do you have the Transparency panel open? If not, go to Window >
Transparency. Select the two wings and make Blending Mode Screen and
lower the Opacity to 70%. Now the wings should be transparent.

2. Create the Honeycomb
Step 1
Hit the Polygon Tool and click on your art board. Enter 3 Sidesin the
new dialogue window, and press OK. While holding down the Alt key (for
making a copy), drag this polygon down diagonally. You should get a copy.
Create a third polygon using the same method.

Step 2
Place your honeybee over the polygons and tilt it slightly to the left.

3. Create the Flowers
Step 1
We need the Polygon Tool again. Once you have it, create a polygon with 5
Sides. After that, go to Effect > Distort & Transform > Pucker
& Bloat and set the slider to 40%. Voilà! This is our flower.
Set a brown fill color (which we used for the head and stripes of the
bee) and create three tiny ellipses on the flower. Group the whole
flower (right-click > Group).

Step 2
Make two more copies of the flower and place them as shown below.

Step 3
Set a brown stroke color with no fill and draw a circle. Make a thick stroke on the Stroke panel. Place it behind the flowers.
Step 4
In this step, you can arrange the flowers nicely over the brown stroke
circle. Take the Scissors Tool (C) and click on the circle, as marked in
the image below.

Delete the right part of the circle by pressing the Delete button on
your keyboard and you should get the same image as below. You can also
checkRound Cap on the Stroke panel.

Step 5
Take the Arc Tool and add two more little twigs on top. That's the branch for our flowers.

Step 6
The next thing we're going to do is to create a simple bud. Make sure to
have the stroke color deleted and set a brown fill color. Remember the
wings we created for the bee? Take a copy of a wing and place it as shown in
the second image. Select both shapes and press the Minus Front button in
Pathfinder. Add an ellipse behind with the same fill color as we did
for the flowers by using the Eye Dropper Tool (I). That's the bud.

Step 7
Create two more buds and place them on top of the branch.

4. Create the Background
Step 1
Using the Rectangle Tool (M) and while holding down the Shift key (to create an even shape), draw a square.

Step 2
Place the background behind everything that you created before. And that's it, dear beekeepers!

Awesome Work, You're Done!
You did a great job! You created an illustration with a honeybee using just a few basic shapes. You've learned how to use the Roughen effect and how to
cut shapes using the Scissors Tool.
You used the Polygon Tool a lot
too—creating a triangle, hexagon, and pentagon. Now you even know how to
make a shape transparent and how to cut a shape using another one as a
cutter. I can tell you that you are good at it. Thank you for sticking
with me through the whole process!
Original Link:
TutsPlus - Design
More About this Source Visit TutsPlus - Design