
Some of Our Sources
- Engadget
- TutsPlus - Code
- You The Designer
- Creative Curio
- Inspiredology
- Specky Boy
- Spyre Studios
- Web Resource Source
- Codrops
- Hashedout
Help Webnuz
Referal links:
How to Draw Deer Antlers Step by Step


In this tutorial, we’ll draw a pair of antlers—a beautiful element from the world of nature. We’ll start with a graphite pencil sketch, designing the typical structure of deer antlers from scratch. Then we’ll create an illusion of texture and complete our drawing using ink liners.
But first, let’s talk about the difference between horns and antlers. It’s always useful to learn more about the object you’re going to draw!
Horns, on the other hand, are two-part structures. They are found on members of the Bovidae family, which includes species as diverse as cows, sheep, goats, and even antelopes and gazelles. Both males and females may have horns, and the size and shape of horns vary from species to species. With rare exceptions, horns are never branched and never shed. In many species, horns never stop growing throughout an animal's life.
What You Will Need
To complete this project, you'll need the following equipment:
- a graphite pencil (I recommend using an HB or B type)
- an eraser
- an ink liner number 0.05
- an ink liner number 0.1
- an ink liner number 0.2
- a sheet of drawing paper


1. How to Draw Antlers With a Graphite Pencil
Step 1
I outline the border of the skull, just for our reference, and then add a core line.


Each antler grows from an attachment point on the skull called a pedicle. I mark the foundations of the antlers, using oval shapes.


Step 2
I draw the framework of the horns. We’ll start with simple forked structures and add more elements later. Antlers often have a slight asymmetry and non-typical tines, so don’t strive for absolute perfection.
Draw the antlers simultaneously, because if you draw just one and then copy and flip it digitally, your artwork won’t look natural.


Step 3
I draw the contours of the longest parts of the antlers, also known as the main beams or antler stems.


Step 4
I draw the short transitional parts; they join the branches with the antler stems.
As you can see in the image, I add the oval shapes to these parts, as if we’re looking at the antlers in a cross-section. Thinking about the forms in this manner helps to make the drawing more realistic.


I draw the branch growing from the main beam.


Step 5
I add two shorter branches to the antler stems; let's agree that they are not equal.


Step 6
I draw the curved branches that are facing the viewer.


To emphasize the direction of these branches, I add a border between their sides. Now the front branches look more credible.


Step 7
I draw the short branches in the lower part of the antlers. Another name for these elements is the brow tines.


Step 8
I refine the contours of the antlers, making the lines smoother. Now you can add some new tines or creative features if you wish.
It’s time to erase the unnecessary pencil lines.


Step 9
Let’s add some texture to the base part of the antlers (it is called a burr, or coronet). The coronet has a distinctive pattern, resembling a set of outgrowths.


Step 10
I draw long graphite lines, marking the texture of the main beam and the branches. The texture here is much smoother than on the coronet part.


2. How to Draw Antlers With Ink Liners
Step 1
I outline the main contours of the antlers, using the 0.2 ink liner.


Step 2
With the 0.1 ink liner, I add the lines to create a texture. You can find a sample of this hatching in the image below.


Step 3
I add some shadows to the texture, applying groups of short horizontal hatches. Our goal here is to reveal the contours of the texture.


Step 4
With the 0.05 liner, I add contour hatching to the sides of the main beam and branches. The drawing looks more three-dimensional!


Step 5
With the 0.1 liner, I increase the contrast in my drawing, adding more short hatches and dots to the core shadows.


You're Done With Your Deer Antlers Drawing!
Congratulations! Now you know how to draw antlers. I hope you enjoyed both the process and the result.
I wish you much success in drawing with graphite pencils and ink. Have fun capturing the unique charm of the wonderful world of animals and nature.


5 Amazing Deer Antler Drawings Turned Into Logos (From Envato Elements)
If you enjoyed drawing deer antlers and don't know what to do with those sketches, you can always make a logo out of them!
We gathered some deer antler drawings that were made into great logos for you to check out. You can also go to Envato Elements to find thousands of creative assets like logos, fonts, illustrations, and graphics for a small monthly fee. Subscribe and get unlimited downloads!
1. Simple Deer Antlers Drawing Logo (AI, EPS)
Are you looking for a sleek and minimalist logo that evokes the elegance of deer? Look no further than this simple deer antlers logo. It's a must-have design element if you want to boost your business image or just add a touch of quality to your next project.
2. Dark Deer Antler Outline Logo (AI, EPS, JPG, PDF, PNG)
Here's an antlers drawing that was turned into a versatile logo. The best thing about this modern design is the choice of dark and white versions, which will go perfectly with any of your design projects. Why settle for a generic logo when you can have one that genuinely expresses your brand's spirit?
3. Jump Deer Logo With Slogan (AI, EPS, PDF, PNG, PSD)
If you're more into color, you'll love this deer logo in different shades of blue. This logo is available in a variety of file formats, making it simple to edit and include in your branding. It also includes a placeholder for your brand's slogan.
4. Modern Dancing Deer Antler Outline (AI, EPS, JPG, PDF)
Antlers indicate vitality and power in some cultures, whereas deer represent gentleness and intellect. If you're trying to add one of these features to your logo, you might want to consider using this minimal deer antler outline logo. It includes a very simple design that would work with any brand.
5. Cool Deer Antler Outline Logo (AI, EPS)
Featuring an elegant deer on a rocky cliff, this design is all about strength and power. With its bold outline and attention to detail, it's the perfect choice for any business or organization that wants to convey a sense of confidence and courage. Download the file and give it a try!
Discover More Tutorials on Envato Tuts+
If you found our step-by-step deer antlers drawing tutorial helpful, you may be interested in learning more. Here on Envato Tuts+ we have a variety of tutorials to help you improve your art and design skills. Check them out:
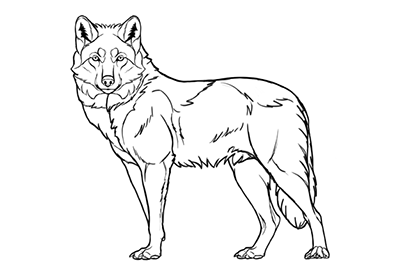
 How to Draw a Wolf Step by Step


 How to Draw Trees
 How to Draw a Unicorn Step by Step
 How to Draw a Super Cute Kitten Step by Step
 How to Draw a T-Rex Dinosaur
 How to Draw a Pig
 How to Draw a Sheep


 How to Draw a Dalmatian Dog
Original Link: https://design.tutsplus.com/tutorials/how-to-draw-antlers-step-by-step--cms-30130
TutsPlus - Design
More About this Source Visit TutsPlus - Design