
An Interest In:
Web News this Week
- April 29, 2024
- April 28, 2024
- April 27, 2024
- April 26, 2024
- April 25, 2024
- April 24, 2024
- April 23, 2024
Some of Our Sources
- Engadget
- Joshua Blankenship
- Pearsonified
- The Logo Smith
- TutsPlus - Design
- Creative Curio
- FanExtra - PSD
- Reencoded
- Design Modo
- TechPowerUp
Help Webnuz
Referal links:
Dockerize a Python application
Dockerize a Python application - Intro
In this article, we will see how to dockerize a simple Python application.
If you prefer a video version, you can find it here:
All the code is available in the video description: https://youtu.be/zGP_nYmZd9c
Prerequisites
- Docker installed on your machine
- A Python application (we will use one by cloning a repository)
Clone the GitHub repository
Clone the GitHub repository
git clone https://github.com/patrickloeber/ml-deployment.gitNow step into the ml-deployment/docker-flask/app directory
cd ml-deployment/docker-flask/app/apiNow open this directory in your favorite editor. If you are using VS Code, you can do this by typing
code .Since the repository is already the final version, if you want to follow along, delete the 2 files in the app/api directory:
- Dockerfile
- docker-compose.yaml
An alternative is to leave them as they are and just keep reading :)
Docker
When you open the project, you should have something like this:
We will create:
- a Dockerfile
- a docker-compose.yml file
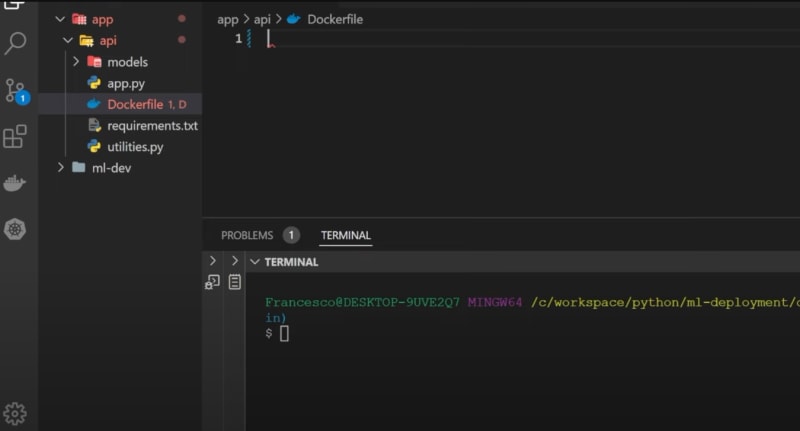
Dockerfile
Create a file called Dockerfile in the app directory. This file will contain the instructions to build the Docker image.
FROM python:3.8COPY requirements.txt .RUN pip install -r requirements.txtRUN python -c "import nltk; nltk.download('omw-1.4'); nltk.download('wordnet')"COPY . .EXPOSE 5000CMD ["flask", "run", "--host=0.0.0.0", "--port=5000"]Explanation of the Dockerfile:
FROM python:3.8: Use the Python 3.8 image from Docker HubCOPY requirements.txt .: Copy therequirements.txtfile from the current directory to the Docker imageRUN pip install -r requirements.txt: Install the dependencies from therequirements.txtfileRUN python -c "import nltk; nltk.download('omw-1.4'); nltk.download('wordnet'): Download the WordNet corpusCOPY . .: Copy all the files from the current directory to the Docker imageEXPOSE 5000: Informs to use the port 5000CMD ["flask", "run", "--host=0.0.0.0", "--port=5000"]Run the Flask application
Docker Compose
Create a file called docker-compose.yml in the root directory. This file will contain the instructions to run the services (in this case just one).
version: "3.7"services: mlapp: container_name: mlapp image: francescoxx/mlapp ports: - "5000:5000" build: context: . dockerfile: DockerfileExplanation of the docker-compose.yml:
version: "3.7": Use the version 3.7 of the Docker Compose file formatservices:: The services to run (in this case just one)mlapp:: The name of the servicecontainer_name: mlapp: The name of the container. It doesn't have to be the same as the service name but it's convenient.image: francescoxx/mlapp: The name of the image to use. replacefrancescoxxwith your dockerhub username or change the name hereports:: The ports to exposebuild:: The instructions to build the image: the context (the current directory) and the Dockerfile to use
Build and run the application
To run the application, you can use the following command:
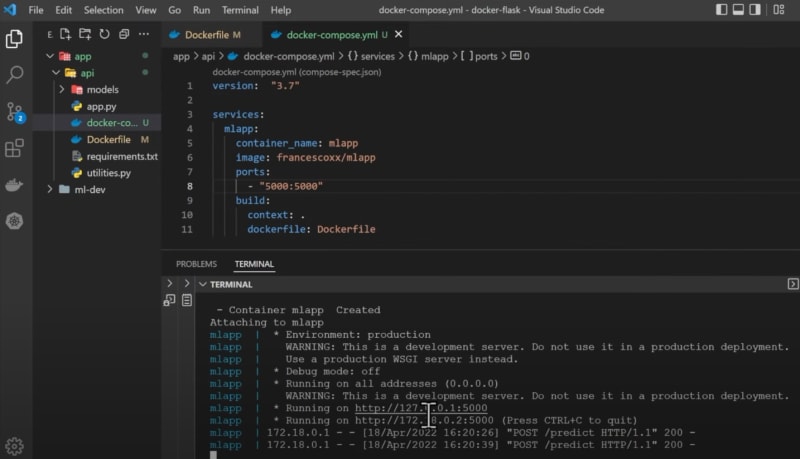
docker compose upNote: in case you get an error and you want to run this command again, you can use docker compose up --build to rebuild the image.
If you see something like this, it means that the application is running: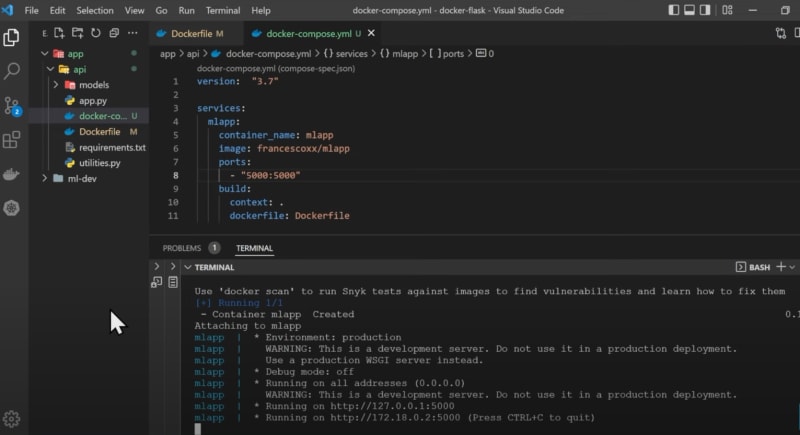
Test the application
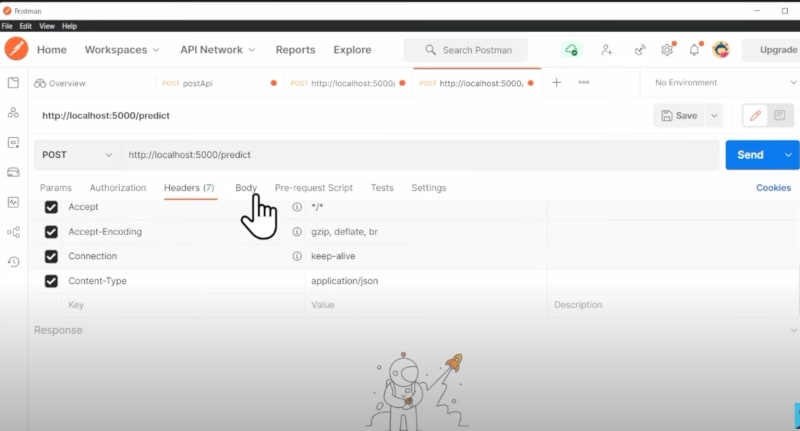
This application is a simple Flask application that returns the sentiment of a text. Let's test if that works with Postman.
We will make 2 simple test with:
- positive text
- negative text
Test 1
Make a POST request to http://localhost:5000/predict with the following body (be sure to have as a header Content-Type: application/json):
{ "text": "May the force be with you"}You should get the following response:

Test 2
Make a POST request to http://localhost:5000/predict with the following body (be sure to have as a header Content-Type: application/json):
{ "text": "I hate you"}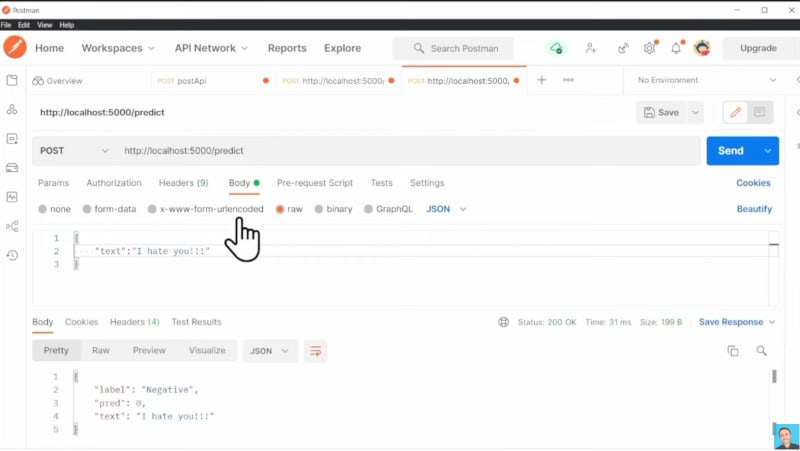
This does work. You can also check the logs of the container to see what's happening:
Push the image to Docker Hub
Last thing we can do is to push the image on Dockerhub. To do that, you need to create an account on Docker Hub. Then, you can push the image with the following command:
replace francescoxx in the docker-compose.yml file with your Docker Hub username!
docker compose pushThis will take a while, but after that, you can check your Docker Hub account and you should see the image there:

Conclusion
In this tutorial, we have seen how to:
- create a Docker image for a Python application
- run the application with Docker Compose
- push the image on Docker Hub.
You can check the 2 videos below for a video version:
First video by Patrick Loeber!
That's all.
If you have any question, drop a comment below.
Original Link: https://dev.to/francescoxx/dockerize-a-python-application-1olg
Dev To
More About this Source Visit Dev To