
An Interest In:
Web News this Week
- April 15, 2024
- April 14, 2024
- April 13, 2024
- April 12, 2024
- April 11, 2024
- April 10, 2024
- April 9, 2024
Some of Our Sources
- TutsPlus - Code
- Six Revisions
- Abduzeedo
- Vandelay Design
- Naldz Graphics
- Reencoded
- Freelance Switch
- Codrops
- Willems Lab
- TechPowerUp
Help Webnuz
Referal links:
How to Use Electron.js for Building Desktop Applications with JavaScript, HTML, and CSS
TABLE OF CONTENTS
I. Introduction
II. Prerequisites
III. Setting up the Development Environment
IV. Creating the User Interface
V. Building the Application Logic
VI. Packaging and Distributing the Application
VII. Debugging and troubleshooting
VIII. Conclusion
INTRODUCTION
Hey there fellow humans! As a front-end web dev I'vealwaysbeenfascinatedbytheinternalworkingsofdesktopapps. And can you blame me? The idea of crafting a file interface or desktop homepage with code is like a big brain puzzle just waiting to be solved. So naturally, I decided to dive deeper into the world of desktop development and feed my craving for knowledge.
During my research, I discovered Electron JS, an open-source framework that enables developers to build desktop apps using web development technologies. The framework runs on Chromium and Node.js and supports JavaScript, HTML, and CSS. The best part? It allows developers to build cross-platform desktop applications that function on Mac, Windows, and Linux operating systems. This blew my mind! So I did what any normal developer would do: I tinkered with the newly discovered technology!
This article covers everything you need to know about Electron JS, from building a fully functional desktop application to packaging and distributing it to the public. Whether you're new to desktop application development or looking to expand your skills, this article is a valuable resource for you. By the end of it, you'll have a solid understanding of how to use Electron JS to create and distribute your own desktop applications.
PREREQUISITES
To easily follow this article, it is recommended that you already know the following;
- HTML
- CSS
- JavaScript
SETTING UP THE DEVELOPMENT ENVIRONMENT
To get started, you will need a code editor. I will be using VSCode editor, but you can use any editor that you're comfortable with. Follow these steps to set up your environment;
I. Install Node.js and npm (Node Package Manager) on your machine, if they aren't already installed. You can download them from the official Node.js website.
II. Create a new directory called text-editor for your project and navigate to it using your terminal. Copy the code below to do this.
mkdir text-editorcd text-editorIII. Initialize a new Node.js project using NPM by running the following command:
npm initIV. After entering the command, you will be prompted to answer a few questions about your project, such as the name, version, and description. When prompted for the entry point of your application, enter main.js. You can press enter to accept most of the default values for the questions.
V. Install Electron as a development dependency using the following command:
npm install --save electron electron-dialog --save-devThis command installs Electron JS and saves it as a dependency in your package.json file.
VI. Create a new file called main.js in your project directory. This will be the main entry point for your application. Use the code below to do this.
touch main.jsVII. Add the following code to your main.js file to create a new Electron window and load a basic HTML file:
const electron = require('electron');const app = electron.app;const BrowserWindow = electron.BrowserWindow;function createWindow() { let win = new BrowserWindow({ width: 800, height: 600 }); win.loadFile('index.html');}app.on('ready', createWindow);This code imports the electron module from the Electron package, creates a new Electron window with a set height and width, and loads an HTML file called index.html.
VIII. Create a new file called index.html in your project directory and add the basic HTML code below:
<!DOCTYPE html><html> <head> <meta charset="UTF-8"> <title>Text Editor</title> </head> <body> <h1>Hello World!</h1> </body></html>Your folder structure should look like this:

IX. Update your package.json file with the script below.
"scripts": { "test": "echo \"Error: no test specified\" && exit 1", "start": "electron ." },This script tells npm to start the Electron application by running the electron command and passing in the current directory "." as an argument.
X. Start your Electron application using the following command:
npm startThis command will spin up your application and load the index.html file you created earlier on the screen. If all goes well, your screen should display "Hello world" like the image below.
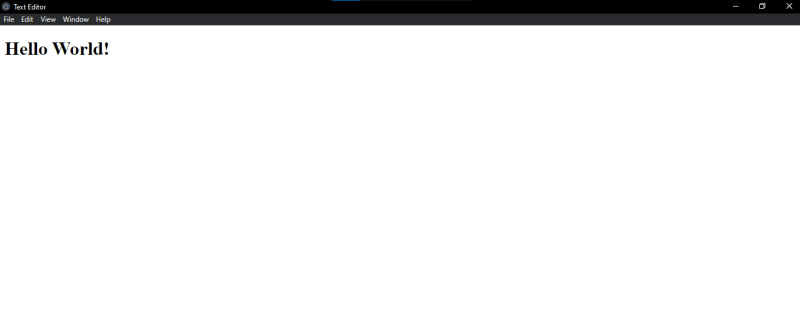
In the next section we will build the user interface for the text editor application.
CREATING THE USER INTERFACE
The user interface for this application will be a simple text area field with additional functionalities associated with text editors. By the end of this project, you will be able to create and save a new file, edit, copy, paste, add shortcuts and highlight text in your editor. Let's get started.
I. Add a text area and buttons to your index.html file by updating your code to the following:
<!DOCTYPE html><html> <head> <meta charset="UTF-8" /> <title>Text Editor</title> </head> <body> <div class="wrapper"> <textarea id="editor" cols="60" rows="25"></textarea> <div class="button-container"> <button id="openBtn">Open</button> <button id="saveBtn">Save</button> </div> </div> <script src="./renderer.js"></script> <link rel="stylesheet" href="style.css" /> </body></html>II. Create a style.css file in the root directory and add the following code to handle the styling:
body{ background: #202020; color: white; display: flex; width: 100%; height: 100%; place-items: center;}.wrapper{ width: 50%; margin: 0 auto;}.button-container{ display: flex; margin-top: 10px; gap: 15px;}#editor{ background-color: #3e3e3e; color: white;}button{ padding: 10px; color: white; background-color: rgb(10, 185, 164); border-radius: 10px; outline: none; cursor: pointer;}button:hover{ background-color: rgb(7, 220, 195);}III. Create a new file called renderer.js in the same directory as main.js, and add the following code to handle the button click event:
const { ipcRenderer } = require("electron");const editor = document.getElementById("editor");const openBtn = document.getElementById("openBtn");const saveBtn = document.getElementById("saveBtn");openBtn.addEventListener("click", () => { ipcRenderer.send("open-file-dialog");});saveBtn.addEventListener("click", () => { const content = editor.value; ipcRenderer.send("save-file-dialog", content);});ipcRenderer.on("open-file", (event, filePath, fileContent) => { editor.value = fileContent;});A basic Electron.js architecture requires two major files called main.js and renderer.js. The renderer.js file sends string messages like the "open-file-dialog" in the code above. The message is received in the main.js file, and event handling for the message will be carried out. The ipcRenderer sends messages to the main.js file to handle the opening and saving of files.
IV. In the main.js file, add the event handling function for opening and saving files:
const { dialog, ipcMain } = require("electron");const path = require("path");const fs = require("fs");ipcMain.on("open-file-dialog", (event) => { dialog .showOpenDialog({ properties: ["openFile"], }) .then((result) => { if (!result.canceled) { const filePath = result.filePaths[0]; const fileContent = fs.readFileSync(filePath, "utf-8"); ipcRenderer.send("get-file", fileContent); event.reply("open-file", filePath, fileContent); } }) .catch((err) => { console.log(err); });});ipcMain.on("save-file-dialog", (event, content) => { dialog .showSaveDialog({ properties: ["createDirectory"], }) .then((result) => { console.log('saved') if (!result.canceled) { console.log('saved result') const filePath = result.filePath; fs.writeFileSync(filePath, content, "utf-8"); event.reply("save-file", filePath); } }) .catch((err) => { console.log(err); });});This code uses the ipcMain handler to call the "file opening dialog" on your desktop. It then sends a message to the renderer.js file with the file content gotten from the newly opened file.
V. Update the createWindow function to add web preferences to Electron window. This allows Electron.js to access the window object for DOM manipulation:
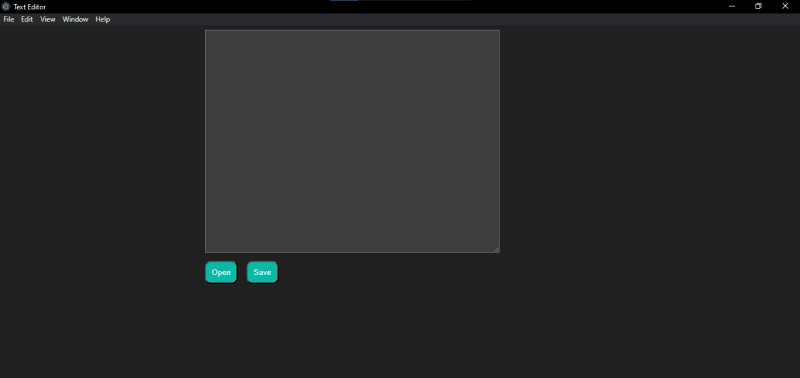
function createWindow() { let win = new BrowserWindow({ width: 800, height: 600, webPreferences: { nodeIntegration: true, contextIsolation: false, }, }); win.loadFile("index.html");}app.on("ready", createWindow);}With these changes, your Electron application should now have the basic functionalities of a text editor. In the next section we are going to build up on these functionalities to add additional features such as formatting options (e.g., bold, italic, underline), syntax highlighting, auto-complete, and search and replace functionality.
Your Application should currently look like the image below
ADDING FORMATTING FEATURES
What's a text editor without the ability to format text? In this section, you are going to be adding formatting functionality to the project.
Text bolding
To add this feature to this application, you need to add a button to the interface to trigger the event. In your index.html file, update the code by adding the following:
<body> <div class="wrapper"> <textarea id="editor" cols="60" rows="25"></textarea> <div class="button-container"> <button id="openBtn">Open</button> <button id="saveBtn">Save</button> <button id="bold-btn"><b>B</b></button> </div> </div> <script src="./renderer.js"></script> <link rel="stylesheet" href="style.css" /> </body>The newly created button will be used as bold button. To do this, in the renderer.js file, add an event listener for the bold button and update the text area accordingly:
const boldBtn = document.getElementById('bold-btn');boldBtn.addEventListener('click', () => { const start = editor.selectionStart; const end = editor.selectionEnd; const selectedText = editor.value.substring(start, end); const boldText = `<b>${selectedText}</b>`; const newText = editor.value.substring(0, start) + boldText + editor.value.substring(end); editor.value = newText;});This code listens for the click event on the bold button, gets the selected text in the text area, wraps it in a <b> tag to make it bold, and updates the text area with the new text.
Syntax highlighting
To implement an advanced feature like syntax highlighting, you are going to need an external library called Prism.js. Here's how to use it:
I. Update your index.html file with the Prism library.
<script src="https://cdn.jsdelivr.net/npm/[email protected]/prism.js"></script><link href="https://cdn.jsdelivr.net/npm/[email protected]/themes/prism-okaidia.min.css" rel="stylesheet"/>This code adds the prism.js library to the HTML file, so as to make it accessible in the project.
II. In your renderer.js file, update your code by using the Prism.highlight() method to apply syntax highlighting to your text editor:
editor.addEventListener('input', () => { const code = editor.value; const highlightedCode = Prism.highlight(code, Prism.languages.javascript, 'javascript'); editor.innerHTML = highlightedCode;});This code listens for input events on the text editor, gets the code in the editor, uses Prism.js to highlight the code with JavaScript syntax, and then updates the editor with the highlighted code.
III. To check your highlighted code, create an empty paragraph in your index.html file:
<p id="paragraph"></p>IV. Add the highlighted code inside the paragraph:
editor.innerHTML = highlightedCode; paragraph.innerHTML = highlightedCode;Your editor should look like the image below.

Autocomplete
To include autocomplete functionality in this project, you are going to need another Javascript library called Ace.js. To get started;
II. Add the Ace.js library to your HTML file:
<head> <script src="ace.js"></script></head>III. In renderer.js file, create an Ace editor instance and add auto-complete functionality to it:
const editor = ace.edit('editor');editor.setOptions({ enableBasicAutocompletion: true, enableSnippets: true, enableLiveAutocompletion: true,});const langTools = ace.require('ace/ext/language_tools');const completer = { getCompletions: function(editor, session, pos, prefix, callback) { const completions = [ {value: 'foo', score: 1000}, {value: 'bar', score: 1000}, {value: 'baz', score: 1000}, ]; callback(null, completions); }};langTools.addCompleter(completer);This code creates an Ace editor instance, sets options for auto-completion, adds a completer object with a list of possible completions, and adds the completer to the editor. When the user types in the editor, the completer will show a list of suggestions based on the user's input.
Undo and Redo
The ability to undo and redo actions will always come in handy in any text editor. To the following code to your renderer.js file;
const editor = document.getElementById('editor');const undoStack = [];const redoStack = [];editor.addEventListener('input', () => { undoStack.push(editor.innerHTML);});function undo() { if (undoStack.length > 1) { redoStack.push(undoStack.pop()); editor.innerHTML = undoStack[undoStack.length - 1]; }}function redo() { if (redoStack.length > 0) { undoStack.push(redoStack.pop()); editor.innerHTML = undoStack[undoStack.length - 1]; }}document.addEventListener('keydown', (event) => { if (event.ctrlKey && event.key === 'z') { event.preventDefault(); undo(); } else if (event.ctrlKey && event.key === 'y') { event.preventDefault(); redo(); }});Copy and paste
This is another feature that is very important in any editor. You can quickly add this feature by adding the following code in the renderer.js file.
const copyButton = document.getElementById('copy-button');const pasteButton = document.getElementById('paste-button');copyButton.addEventListener('click', () => { const selection = window.getSelection(); const range = document.createRange(); range.selectNodeContents(editor); selection.removeAllRanges(); selection.addRange(range); document.execCommand('copy'); selection.removeAllRanges();});pasteButton.addEventListener('click', () => { const selection = window.getSelection(); const range = document.createRange(); range.selectNodeContents(editor); selection.removeAllRanges(); selection.addRange(range); document.execCommand('paste'); selection.removeAllRanges();});This JavaScript code sets up copy and paste buttons that use the document.execCommand() method to copy and paste text from the editor. The code first selects the entire contents of the editor using a Range object and the window.getSelection() method. It then adds the range to the selection, calls the document.execCommand() method with the appropriate command ('copy' or 'paste'), and removes the range from the selection.
Find and Replace:
In this sub-section we will be adding the find and replace feature in the text-editor. This feature will allow the user to enter a key word and replace all occurrences of that word with a new word.
To do this, in your index.html code, add the following;
<div> <input type="text" id="find-input" placeholder="Find..."> <input type="text" id="replace-input" placeholder="Replace..."> <button id="find-button">Find</button> <button id="replace-button">Replace</button></div>This code will create two input fields for the find and replace texts. It will also create two buttons to trigger the find and replace features.
In your renderer.js file, add the following;
const editor = document.getElementById('editor');const findInput = document.getElementById('find-input');const replaceInput = document.getElementById('replace-input');const findButton = document.getElementById('find-button');const replaceButton = document.getElementById('replace-button');findButton.addEventListener('click', () => { const searchText = findInput.value; const searchRegex = new RegExp(searchText, 'g'); const editorContent = editor.innerHTML; const highlightedContent = editorContent.replace(searchRegex, `<span class="highlight">${searchText}</span>`); editor.innerHTML = highlightedContent;});replaceButton.addEventListener('click', () => { const searchText = findInput.value; const replaceText = replaceYou have successfully built a text editor from scratch using HTML, CSS and javascript. In the next section, we are going to go through how to package and distribute the text editor application to make it available to the public.
PACKAGING AND DISTRIBUTION
To package and distribute the Electron text editor application for all platforms, you can use the Electron Packager tool. This tool allows you to package the application for multiple platforms including Windows, macOS, and Linux. Here are the steps to package and distribute the application:
I. Install the Electron Packager tool as a dev dependency in the project using npm:
npm install electron-packager --save-devII. Add the script below in your package.json file:
"scripts": { "package": "electron-packager . --platform=all --arch=all --out=release-builds"}III. Run the package script using the following command:
npm run packageThis command will create a new directory called release-builds in the project root directory, which will contain the packaged application for all platforms.
The packaged application can now be distributed to users. For example, the developer can create an installer for Windows using the NSIS tool or create a disk image for macOS using the hdiutil command. The packaged application can also be uploaded to a distribution platform such as the Mac App Store or the Microsoft Store.
Code-signing the application for security
Code signing is the process of digitally signing the application with a digital certificate to ensure the authenticity and integrity of the application. Code signing helps users to verify that the application comes from a trusted source and has not been tampered with.
To perform code signing on the text editor application, follow these steps:
I. Obtain a code signing certificate from a trusted certificate authority (CA) such as Comodo, DigiCert, or GlobalSign. Read more on getting a code signing certifcate here.
II. Create a file called electron-builder.yml in the root directory of the project and add the following code to it:
appId: com.example.myappproductName: My Appwin: publisherName: My Company target: nsis signingHashAlgorithms: ['sha256'] certificateFile: path/to/certificate.pfx certificatePassword: mypasswordmac: category: public.app-category.developer-tools identity: My Company entitlements: path/to/entitlements.plist entitlementsInherit: path/to/entitlements.plistIII. Replace the appId, productName, publisherName, certificateFile, and certificatePassword with the appropriate values.
IV. For macOS users, create an entitlements file (.plist) that specifies the permissions the application needs to run. Learn more about entitlements files here. If the text editor application needs access to the microphone for some reason, add the following code to the entitlements file:
<?xml version="1.0" encoding="UTF-8"?><!DOCTYPE plist PUBLIC "-//Apple//DTD PLIST 1.0//EN" "http://www.apple.com/DTDs/PropertyList-1.0.dtd"><plist version="1.0"><dict> <key>com.apple.security.device.microphone</key> <true/></dict></plist>IV. Run the command below to build and sign the application:
electron-builder --mac --win --publish never --config electron-builder.ymlThis command will build the application for macOS and Windows, sign it with the code signing certificate, and create a distribution package.
Following the steps above will ensure that your application has been digitally signed and secure for distribution.
Up next, we will discuss how to distribute the application in app stores.
DISTRIBUTION TO APP STORES
Mac OS
Distributing the Electron text editor application through app stores is a great way to reach a wider audience and increase the application's visibility. Here are the steps to distribute the application through app stores:
I. Register as a developer with the app store of your choice. For example, if you want to distribute the application on the Mac App Store, you need to register as an Apple Developer.
II. Generate the necessary certificates and provisioning profiles for the app store.
III. Build the application using the appropriate build configuration for the app store. On the Mac App Store, you need to build the application using the mas configuration. Make sure the following code is present in the electron-builder.yml file:
appId: com.example.myappproductName: My Appmac: target: mas entitlements: path/to/entitlements.plist entitlementsInherit: path/to/entitlements.plistIV. Submit the application for review on the app store. The review process usually takes several days or weeks. Follow these steps to submit your application
V. Once the application is approved, it will be available for download on the app store. Users can search for the application by name, or browse the app store's categories to find it.
VI. Maintain the application by releasing updates and bug fixes as needed. App stores typically provide tools to manage application updates and user feedback.
Windows OS
Distributing the application on windows OS can be done using the Microsoft app store. Follow these steps to distribute your application;
I. Register for a Microsoft Partner Center account and create a developer account. Follow this link to learn all about the partner program.
II. Generate a code signing certificate using a tool like OpenSSL or Visual Studio. This certificate will be used to sign the application package. Refer to the sub-section about code signing above.
III. Create a Windows app package by using the msix configuration in the electron-builder.yml file. Use the code below:
appId: com.example.myappproductName: My Appwin: target: msix certificateFile: path/to/certificate.pfx certificatePassword: passwordIV. Sign the app package with the code signing certificate using the SignTool utility. Use the following code:
signtool sign /a /t http://timestamp.digicert.com /f path/to/certificate.pfx /p password MyApp.msixV. Submit the app package to the Microsoft Store through the Microsoft Partner Center portal. The app will undergo a review process before being published.
Linux OS
The Linux OS distributes their application using the Snap store. Follow these steps to get started on the distribution:
I. Create a snap package for the application by using the snap configuration in the electron-builder.yml file. Use the code below:
appId: com.example.myappproductName: My Applinux: target: snapII. Install the Snapcraft CLI tool and run the snapcraft command in the application directory to create a snap package. Use the code below:
sudo snap install snapcraft --classicsnapcraftIII. Upload the snap package to the Snap Store using the Snapcraft CLI tool. Use the code below:
snapcraft loginsnapcraft push myapp_1.0_amd64.snap --release=edgeIV. The application will undergo automated tests before being published to the Snap Store. Once published, users can find and install the application from the Snap Store.
DEBUGGING AND TROUBLESHOOTING
Debugging is an important part of the software development process. A framework or library is not useful if it cannot be easily debugged and Electron applications are no exception. Luckily, the debugging process in an Electron application is fairly straight-forward mostly because they are not using a new technology. Follow the steps below to debug and troubleshoot Electron applications :
- Use the developer tools: Electron provides a powerful set of developer tools that can help you debug and troubleshoot your application. You can open the developer tools by pressing
Ctrl+Shift+IorCmd+Option+I. The developer tools include a console, a debugger, and other tools that can help you identify and fix issues in your code. - Check the application logs: Electron applications generate log files that can provide valuable information about errors and exceptions. You can view the logs by opening the console or by using a tool like
electron-log. - Use the remote debugger: The remote debugger allows you to debug your application from a separate process or machine. To use the remote debugger, you need to start your Electron application with the
--remote-debugging-portflag, and then connect to it using a tool like Chrome DevTools. - Check the system requirements: Electron applications have certain system requirements, such as specific versions of Node.js and Chromium. Make sure that your application is running on a supported platform and that all dependencies are installed correctly.
- Use error handling and logging: Proper error handling and logging can help you identify and troubleshoot issues in your code. Make sure that your application handles errors gracefully and logs relevant information about errors and exceptions.
CONCLUSION
In this user guide, we have made a deep dive into the Electron JS framework, and successfully built a fully functional text-editor in the process. We covered the basics of setting up a development environment for creating a text editor desktop application using Electron JS. We also explored more advanced features such as implementing keyboard shortcuts, using third-party libraries and frameworks, and packaging and distributing the application to various app stores.
As with any software development project, debugging and troubleshooting are essential parts of the process. We have discussed some tips and techniques for debugging and troubleshooting Electron applications, including using the developer tools and checking the application logs.
Overall, Electron JS is a versatile and powerful framework that can be used to create a wide range of desktop applications. With the knowledge and skills gained from this user guide, you can confidently create your own desktop applications using Electron JS and take advantage of its many features and benefits. Happy coding!
Original Link: https://dev.to/bellatrick/how-to-use-electronjs-for-building-desktop-applications-with-javascript-html-and-css-4kpn
Dev To
More About this Source Visit Dev To