
An Interest In:
Web News this Week
- April 3, 2024
- April 2, 2024
- April 1, 2024
- March 31, 2024
- March 30, 2024
- March 29, 2024
- March 28, 2024
Some of Our Sources
- Slashdot
- Web Designer Wall
- Joshua Blankenship
- Smashing Magazine
- Abduzeedo
- Spyre Studios
- Freelance Switch
- Codrops
- Android Headlines
- Hashedout
Help Webnuz
Referal links:
Empowering Digital Creators: A Technical Guide on How to Create an NFT (Digital Collectible) to say Thank You
Lets walk through the process of creating a digital collectible (or NFT) on Ethereum using Infura and Truffle.
Introduction
For years, creators have been at the mercy of platforms. Historically these platforms have not only taken 50% (or more) of a creators revenue, but they have also locked down the communications between creators and their fans.
In this article well look at a way to bypass this centralized control and connect with fans without an intermediary. Using Infura, Ethereum/Smart Contracts, and Next, well create an app that allows creators to accept tips from fans and then directly reward those fans with your own Thank You NFT (non-fungible token) and digital collectible that can be displayed, traded, sold, and collected.
Its a great way to reward fansand to keep the control in the hands of the creators! Lets start building.
What Were Building
This tutorial is divided into two parts.
In the first part, well walk through a step-by-step guide and deploy a smart contract using Solidity, Infura, and Truffle that will create the digital collectible on the Ethereum Blockchain Goerli test network. (Well use the test network to save on costsbut it can easily be deployed to mainnet when you are ready.)
In the second part, well deploy a Next app that interfaces with our contract. It will allow anyone in the world to donate money (using a MetaMask wallet) in exchange for the Thank You collectible. This collectible can be bought, sold, and traded on popular NFT marketplaces such as OpenSea.
If you need an intro to any of these concepts, or a primer on how to code in Solidity, ConsenSys has a good collection of beginner tutorials.
Part 1: Build the Smart Contract with Infura and Truffle
Step 1: Install npm and Node
We will build our project using Node and npm. In case you don't have these installed on your local machine, you can do so here.
To ensure everything is working correctly, run the following command:
$ node -vIf all goes well, you should see a version number for node.
Step 2: Sign Up for an Infura Account
In order to deploy our contract to the Goerli network (and eventually to a mainnet), we will need an Infura account. Infura gives us access to RPC endpoints that, in turn, allow for fast, reliable, and easy access to the blockchain of our choice (in our case, Ethereum).
Sign up for a free account here. Once youve created your account, navigate to the dashboard and select Create New Key.

For network, choose Web3 API and name it Thank You NFT.
Once you click on Create, Infura will generate an API key for you and give you RPC endpoints to Ethereum, L2s, and non-EVM L1s (and their corresponding testnets) automatically.
For this tutorial, we are only interested in the Ethereum Goerli RPC endpoint. This URL is of the form https://goerli.infura.io/v3/API KEY
Step 3: Create a MetaMask Crypto Wallet and Get goerliETH from a Faucet
In order to deploy our contract, we are required to have a wallet with enough tokens to pay for gas. Gas is used to pay for transaction fees on Ethereumin this case, the deployment of our contract to the blockchain. On mainnet, you would need the cryptocurrency ETH. But since we are deploying on a testnet, we can use goerliETH - which is free.
In case you havent already, install the MetaMask extension on your favorite browser and follow the instructions carefully to set up your new wallet. MetaMask is the most popular and easy-to-use self-custodial digital wallet in the world.
As part of the setup, you will be given a 12-word mnemonic to keep your wallet safe (as well as to generate private keys for your wallets). Keep this handy. We will need it in a later step.
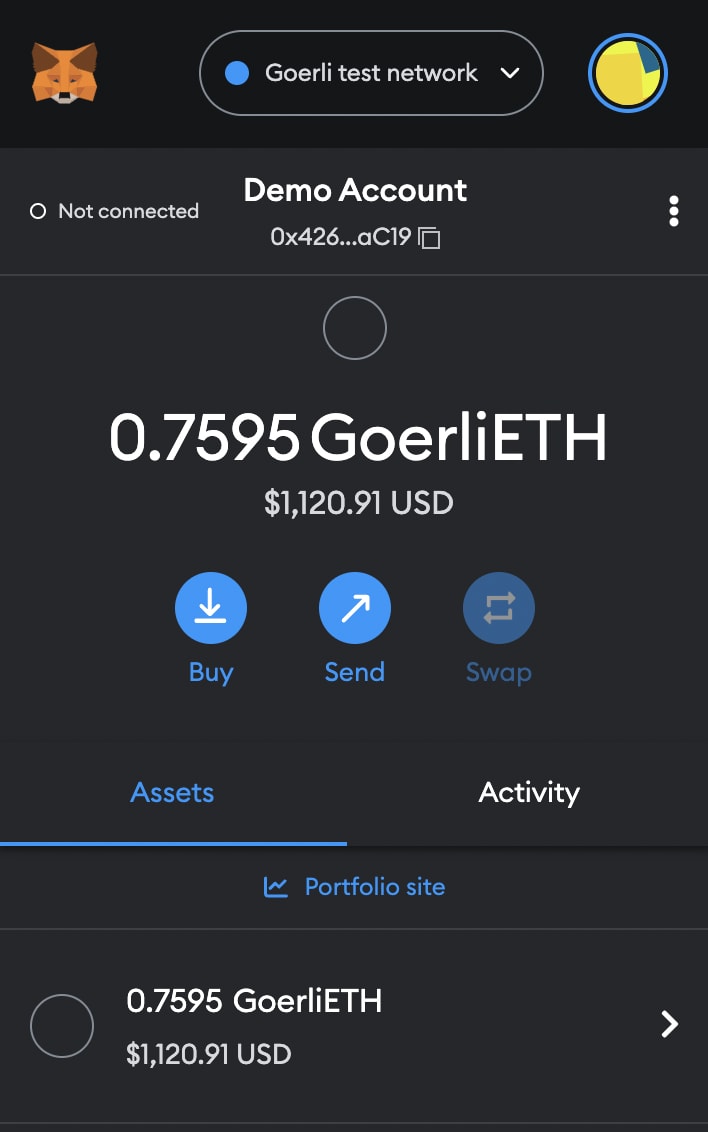
Finally, acquire some test goerliETH tokens from the Infura faucet. Once this is done, you should be able to see a small amount of goerliETH in your MetaMask wallet when you switch to the Goerli test network.
Step 4: Create a Node Project and Install Dependencies
Let's set up an empty project repository by running the following commands:
$ mkdir ty-nft && cd ty-nft$ npm init -yWe will be using Truffle, a world class development environment and testing framework for EVM smart contracts, to build and deploy our smart contract. Install Truffle by running:
$ npm install save truffleWe can now create a bare-bones Truffle project by running the following command:
$ npx truffle initTo check if everything works properly, run:
$ npx truffle testWe now have Truffle successfully configured. Next, lets install the OpenZeppelin contracts package. This package will give us access to the ERC-721 base implementation as well as a few helpful additional functionalities. ERC-721 is the open standard that defines how to build NFTs on Ethereum.
$ npm install @openzeppelin/contractsTo allow Truffle to use our MetaMask wallet, sign transactions, and pay gas fees on our behalf, we will need another package called hdwalletprovider. Install it by using the following command:
$ npm install @truffle/hdwallet-providerFinally, in order to keep our sensitive wallet protected and RPC endpoint information safe, we will use the dotenv package
$ npm install dotenvStep 5: Create your NFT Collection
Now lets create the smart contract that controls our NFT creation. Open the project repository in your favorite code editor (e.g. VS Code). In the contracts folder, create a new file called ThankYouNft.sol.
(quick note - ConsenSys/Infura just released a new NFT API that makes creating NFTs really easy and can replace some of these steps)
Were going to write an ERC-721 contract that has the following functionality:
- The ability for anyone to mint an NFT in exchange for a donation amount (greater than or equal to a certain minimum).
- The ability for the owner (or creator) to withdraw any money sent to the contract as a donation.
- The SVG image and associated metadata of all Thank You NFTs stored on-chain.
Add the following code to ThankYouNft.sol.
// SPDX-License-Identifier: MITpragma solidity ^0.8.9;import "@openzeppelin/contracts/token/ERC721/ERC721.sol";import "@openzeppelin/contracts/token/ERC721/extensions/ERC721Enumerable.sol";import "@openzeppelin/contracts/token/ERC721/extensions/ERC721URIStorage.sol";import "@openzeppelin/contracts/access/Ownable.sol";import "@openzeppelin/contracts/utils/Counters.sol";import "@openzeppelin/contracts/utils/Base64.sol";import "@openzeppelin/contracts/utils/Strings.sol";contract ThankYouNft is ERC721, ERC721Enumerable, ERC721URIStorage, Ownable { using Counters for Counters.Counter; Counters.Counter private _tokenIds; // Define a Donation object struct Donation { uint id; uint amount; address donor; string donorName; } Donation[] donations; constructor() ERC721("Thank You NFT", "TYN") {} // Donate money and mint thank you NFT function mintThankYou(string memory donorName) public payable { require(msg.value >= 0.001 ether, "Smallest donation is 0.001 ETH"); string memory metadata = generateMetadata(_tokenIds.current(), donorName); donations.push(Donation(_tokenIds.current(), msg.value, msg.sender, donorName)); _mintSingleNft(metadata); } // Generate NFT metadata function generateMetadata(uint tokenId, string memory donorName) public pure returns (string memory) { string memory svg = string(abi.encodePacked( "<svg xmlns='http://www.w3.org/2000/svg' preserveAspectRatio='xMinyMin meet' viewBox='0 0 350 350'>", "<style>.base { fill: white; font-family: serif; font-size: 25px; }</style>", "<rect width='100%' height='100%' fill='orange' />", "<text x='50%' y='40%' class='base' dominant-baseline='middle' text-anchor='middle'>", "<tspan y='40%' x='50%'>Thank You for Donating!</tspan>", "<tspan y='50%' x='50%'>", donorName, "</tspan></text></svg>" )); string memory json = Base64.encode( bytes( string( abi.encodePacked( '{"name": "Thank You NFT #', Strings.toString(tokenId), '", "description": "A token of thanks for donating!", "image": "data:image/svg+xml;base64,', Base64.encode(bytes(svg)), '", "attributes": [{"trait_type": "Donor", "value": "', donorName, '"}]}' ) ) ) ); string memory metadata = string( abi.encodePacked("data:application/json;base64,", json) ); return metadata; } // Mint a single NFT with on-chain metadata function _mintSingleNft(string memory _tokenURI) private { uint newTokenID = _tokenIds.current(); _safeMint(msg.sender, newTokenID); _setTokenURI(newTokenID, _tokenURI); _tokenIds.increment(); } // Get tokens of an owner function tokensOfOwner(address _owner) external view returns (uint[] memory) { uint tokenCount = balanceOf(_owner); uint[] memory tokensId = new uint256[](tokenCount); for (uint i = 0; i < tokenCount; i++) { tokensId[i] = tokenOfOwnerByIndex(_owner, i); } return tokensId; } // Withdraw ether donations made function withdraw() public payable onlyOwner { uint balance = address(this).balance; require(balance > 0, "No ether left to withdraw"); (bool success, ) = (msg.sender).call{value: balance}(""); require(success, "Transfer failed."); } // The following functions are overrides required by Solidity. function _beforeTokenTransfer(address from, address to, uint256 tokenId, uint256 batchSize) internal override(ERC721, ERC721Enumerable) { super._beforeTokenTransfer(from, to, tokenId, batchSize); } function _burn(uint256 tokenId) internal override(ERC721, ERC721URIStorage) { super._burn(tokenId); } function tokenURI(uint256 tokenId) public view override(ERC721, ERC721URIStorage) returns (string memory) { return super.tokenURI(tokenId); } function supportsInterface(bytes4 interfaceId) public view override(ERC721, ERC721Enumerable) returns (bool) { return super.supportsInterface(interfaceId); }}Make sure the contract is compiling correctly by running:
npx truffle compileStep 6: Update Truffle Config and Create a .env File
Create a new file in the projects root directory called .env and add the following contents:
INFURA_API_KEY = "https://goerli.infura.io/v3/<Your-API-Key>"MNEMONIC = "<Your-MetaMask-Secret-Recovery-Phrase>"Next, lets add information about our wallet, the Infura RPC endpoint, and the Goerli network to our Truffle config file. Replace the contents of truffle.config.js with the following:
require('dotenv').config();const HDWalletProvider = require('@truffle/hdwallet-provider');const { INFURA_API_KEY, MNEMONIC } = process.env;module.exports = { networks: { development: { host: "127.0.0.1", port: 8545, network_id: "*" }, goerli: { provider: () => new HDWalletProvider(MNEMONIC, INFURA_API_KEY), network_id: '5', } }};Step 7: Deploy the Contract
Let us now write a script to deploy our contract to the Goerli blockchain.
In the migrations folder, create a new file called 1_deploy_contract.js and add the following code:
// Get instance of the NFT contractconst nftContract = artifacts.require("ThankYouNft");module.exports = function (deployer) { // Deploy the contract deployer.deploy(nftContract);};Were all set! Deploy the contract by running the following command:
truffle migrate --network goerliIf all goes well, you should see output (containing the contract address) that looks something like this:
Starting migrations...======================> Network name: 'goerli'> Network id: 5> Block gas limit: 30000000 (0x1c9c380)1_deploy_contract.js==================== Deploying 'ThankYouNft' ----------------------- > transaction hash: 0x0a4fabe13a2c62e335486dc8359eecbe8b1432e5ab7a162e6bd9a167036cdcd4 > Blocks: 2 Seconds: 33 > contract address: 0x4EBC03568822c4Af39ca02002C3771Ae4e8bb3ED > block number: 8641567 > block timestamp: 1678616928 > account: 0xc361Fc33b99F88612257ac8cC2d852A5CEe0E217 > balance: 0.734846151579135017 > gas used: 4108239 (0x3eafcf) > gas price: 29.254126274 gwei > value sent: 0 ETH > total cost: 0.120182942469771486 ETH > Saving artifacts ------------------------------------- > Total cost: 0.120182942469771486 ETHSummary=======> Total deployments: 1> Final cost: 0.120182942469771486 ETHYou can search for your contract address on Goerli etherscan and see it live.

Congratulations! Youve successfully deployed the contract to Goerli.
Now lets deploy a Next frontend that interfaces with the contract and allows anyone to call the mintThankYou function to make a donation and mint the digital collectible for themselves.
Part 2: The Frontend
Step 1: Download Boilerplate Code and Install Dependencies
We already have a boilerplate repository available for you to download. This implements certain standard functionality such as connect wallet.
Download or clone the repository from here: https://github.com/rounakbanik/ty-nft-frontend
Next, open the repository in your terminal and run:
npm installThis will install all necessary dependencies and set up a Next app for you.
Step 2: Add ABI File and Constants
Open this repository in your favorite code editor and create a new folder called contracts.
Go back to the repository in Part 1 and copy the ThankYouNft.json file available in the build folder, then paste it in the aforementioned contracts folder. This is the contract ABI (basically, the interface) which will be important while invoking functions on it.
Next, create a folder called data and in it, create a file called constants.js with the following information:
const apiKey = "<-- INFURA API KEY >";const ownerAddress = "<-- Wallet address >";const contractAddress = "<-- Address of deployed NFT contract from Part 1 >";export { apiKey, ownerAddress, contractAddress }Step 3: Populate the index.js File
We can now write the crux of our app in the index.js file, which will enable creating NFTs.
Once users have connected their wallet to our app, they will be able to see a form where theyll be asked to input their name and donation amount. Once they do this, they can initiate the donation and NFT mint process.
Add the following code:
// Standard Next and CSS importsimport Head from "next/head";import { Fragment, useState, useEffect } from "react";import styles from "../styles/mainpage.module.css";import { useRouter } from "next/router";// Imports from the constants.js fileimport { apiKey, contractAddress } from "@/data/constants";// Wagmi import for connected wallet infoimport { useAccount } from "wagmi";// Ethers for invoking functions on smart contractimport { ethers } from 'ethers';// Contract ABI importimport contract from '@/contracts/ThankYouNft.json';// Extract ABI from the ABI JSON fileconst abi = contract.abi;export default function Home() { // Standard Next router definition const router = useRouter(); // Get connected wallet address and connection status const { address, isConnected } = useAccount(); // Donor name const [donorName, setDonorName] = useState(null); // Tip amount const [amount, setAmount] = useState(null); // Page mounting info to prevent hydration errors const [hasMounted, setHasMounted] = useState(false); // Minting state const [isMinting, setIsMinting] = useState(false); // Flag to check if minting has succeeded const [success, setSuccess] = useState(false); // Form error message const [formError, setFormError] = useState(null); // Mounting fix to avoid hydration errors useEffect(() => { setHasMounted(true); }, []); // Do not render until entire UI is mounted if (!hasMounted) return null; // Redirect to Connect page if wallet is not connected if (!isConnected) { router.replace('/connect'); } // Handlers for form inputs const amountHandler = (e) => { setAmount(e.target.value); } const nameHandler = (e) => { setDonorName(e.target.value); } // Mint function invoked when form is submitted const mintNft = async (e) => { e.preventDefault(); setFormError(false); // Basic check for correctness of data if (donorName.length === 0 || parseFloat(amount) < 0.001) { console.log("Incorrect form input"); setFormError(true); return; } try { // Get MetaMask Ethereum instance const { ethereum } = window; if (ethereum) { // Reset states setIsMinting(true); setFormError(false); setSuccess(false); // Define provider, signer, and an instance of the contract const provider = new ethers.providers.Web3Provider(ethereum); const signer = provider.getSigner(); const nftContract = new ethers.Contract(contractAddress, abi, signer); // Call the mint function console.log("Initialize payment"); let nftTxn = await nftContract.mintThankYou("Satoshi", { value: ethers.utils.parseEther('0.001') }); console.log("Mining... please wait"); await nftTxn.wait(); console.log(`Mined, see transaction: https://goerli.etherscan.io/tx/${nftTxn.hash}`); // Set final states setIsMinting(false); setSuccess(true); setDonorName(null); setAmount(null) } else { console.log("Ethereum object does not exist"); } } catch (err) { // Something wrong has happened. Set error and minting states setIsMinting(false); setFormError(true); console.log(err); } } return ( <Fragment> <Head> <title>Tip and Mint a Thank You NFT!</title> </Head> <div className={styles.jumbotron}> <h1>Tip and Mint a Thank You NFT!</h1> {/* Main Form */} <form onSubmit={mintNft} className={styles.mint_form}> <input type="text" id="name" name="name" placeholder="Your Name" onChange={nameHandler} value={donorName} /> <input type="number" id="amount" name="amount" min={0.001} placeholder="Donation Amount in ETH (min 0.001 ETH)" onChange={amountHandler} value={amount} step={0.001} /> <button type="submit"> Tip </button> </form> {/* Helpful messages for end user to know what's going on */} {isMinting && <p>Your NFT is minting...</p>} {success && <p>Thank you for your donation! Check out your NFT on OpenSea!</p>} {formError && <p>Something went wrong! Try again.</p>} </div> </Fragment> )}Were all set! Lets deploy this app to localhost by running:
npm run devOnce you connect your wallet and complete the minting process, you should see a success message at the bottom that looks something like this.

You now have your own NFT! You can now search for your wallet address or the contract address on the NFT platform OpenSea. This will allow you to view your NFT and the corresponding collection.

Conclusion
Digital Collectibles (NFTs) have massive potential to revolutionize the creator economy and put the power directly into the hands of the creators and their fans.
Using the app that we built with the ConsenSys suite (Infura, Truffle, and MetaMask), creators can get tips from around the world, withdraw those amounts at any time, not pay commissions, and create a digital collectible that directly connects them with their fans.
And this was just a start! Check out more information on Ethereum, smart contracts, and the digital collectible/NFT world.
Original Link: https://dev.to/mbogan/empowering-digital-creators-a-technical-guide-on-how-to-create-an-nft-digital-collectible-to-say-thank-you-cd
Dev To
More About this Source Visit Dev To