An Interest In:
Web News this Week
- April 2, 2024
- April 1, 2024
- March 31, 2024
- March 30, 2024
- March 29, 2024
- March 28, 2024
- March 27, 2024
How To Create a Screen Sharing Application With JavaScript
Have you ever wondered how hard or easy it would be to create your own screen-sharing application?
In this article, we will show you how to create a screen-sharing application with JavaScript via the Screen Capture API
and its getDisplayMedia() technique. This will allow us to capture half or all of a screen and share it with other
users throughout a WebRTC conference session.
Initial Steps:
- Create a new project in your favorite IDE.
- Setup HTML boilerplate code
- Add JavaScript code
- Deploy Live server
Create a new project in your favorite IDE
I'm going to be using VScode for this tutorial. Feel free to use the editor of your choice. Let's go ahead and set up
our html code.
HTML:
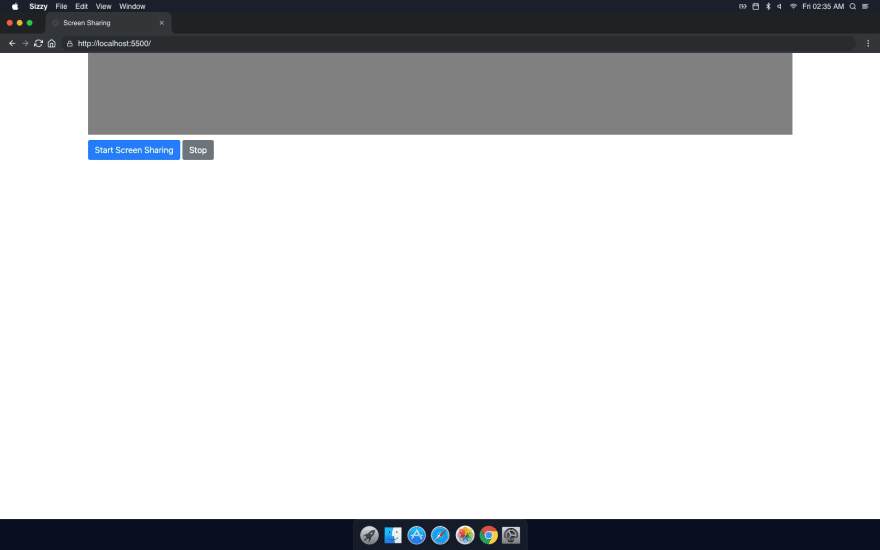
<!DOCTYPE html><html><head> <meta charset="utf-8"> <meta name="viewport" content="width=device-width, initial-scale=1"> <title>Screen Sharing</title> <link rel="stylesheet" href="https://stackpath.bootstrapcdn.com/bootstrap/4.3.1/css/bootstrap.min.css"></head><body> <div style="width:80%;background: grey;margin: auto;"> <video id="video" autoplay playsinline muted></video> </div> <div style="width:80%;margin: auto;padding-top:10px ;"> <button class="btn btn-primary" id="start"> Start Screen Sharing</button> <button class="btn btn-secondary" id="stop"> Stop</button> </div></body></html>Start your live-server and open the index.html file in your browser. You should see a page that looks like this:
JavaScript:
Next, we need to add some JavaScript code to our index.html file. Go ahead and add your script tags to the body section
of your index.html file and add the following code:
const videoElem = document.getElementById("video"); const startElem = document.getElementById("start"); const stopElem = document.getElementById("stop"); // Options for getDisplayMedia() var displayMediaOptions = { video: { cursor: "always", height: 1000, width: 1200 }, audio: false }; // Set event listeners for the start and stop buttons startElem.addEventListener("click", function (evt) { startCapture(); }, false); // Stop the screen capture stopElem.addEventListener("click", function (evt) { stopCapture(); }, false); // Start the screen capture async function startCapture() { try { videoElem.srcObject = await navigator.mediaDevices.getDisplayMedia(displayMediaOptions); dumpOptionsInfo(); } catch (err) { // Handle error console.error("Error: " + err); } } // Stop the stream function stopCapture(evt) { let tracks = videoElem.srcObject.getTracks(); tracks.forEach(track => track.stop()); videoElem.srcObject = null; } // Dump the available media track capabilities to the console function dumpOptionsInfo() { const videoTrack = videoElem.srcObject.getVideoTracks()[0]; console.info("Track settings:"); console.info(JSON.stringify(videoTrack.getSettings(), null, 2)); console.info("Track constraints:"); console.info(JSON.stringify(videoTrack.getConstraints(), null, 2));}Test the Application
Now we can go ahead and test our application. Open the index.html file in your browser and click on the start button to
initialize the screen capture.
Click on a screen and you should see the video stream of the screen you clicked on. You can also click on the stop
button to stop the screen capture.
Full Code:
<!DOCTYPE html><html><head> <meta charset="utf-8"> <meta name="viewport" content="width=device-width, initial-scale=1"> <title>Screen Sharing</title> <link rel="stylesheet" href="https://stackpath.bootstrapcdn.com/bootstrap/4.3.1/css/bootstrap.min.css"></head><body> <div style="width:80%;background: grey;margin: auto;"> <video id="video" autoplay playsinline muted></video> </div> <div style="width:80%;margin: auto;padding-top:10px ;"> <button class="btn btn-primary" id="start"> Start Screen Sharing</button> <button class="btn btn-secondary" id="stop"> Stop</button> </div> <script type="text/javascript"> const videoElem = document.getElementById("video"); const startElem = document.getElementById("start"); const stopElem = document.getElementById("stop"); // Options for getDisplayMedia() var displayMediaOptions = { video: { cursor: "always", height: 1000, width: 1200 }, audio: false }; // Set event listeners for the start and stop buttons startElem.addEventListener("click", function (evt) { startCapture(); }, false); stopElem.addEventListener("click", function (evt) { stopCapture(); }, false); async function startCapture() { try { videoElem.srcObject = await navigator.mediaDevices.getDisplayMedia(displayMediaOptions); dumpOptionsInfo(); } catch (err) { console.error("Error: " + err); } } function stopCapture(evt) { let tracks = videoElem.srcObject.getTracks(); tracks.forEach(track => track.stop()); videoElem.srcObject = null; } function dumpOptionsInfo() { const videoTrack = videoElem.srcObject.getVideoTracks()[0]; console.info("Track settings:"); console.info(JSON.stringify(videoTrack.getSettings(), null, 2)); console.info("Track constraints:"); console.info(JSON.stringify(videoTrack.getConstraints(), null, 2)); } </script></body></html>Original Link: https://dev.to/anthonys1760/how-to-create-a-screen-sharing-application-with-javascript-4h6j
Dev To
 An online community for sharing and discovering great ideas, having debates, and making friends
More About this Source Visit Dev To


