
An Interest In:
Web News this Week
- April 26, 2024
- April 25, 2024
- April 24, 2024
- April 23, 2024
- April 22, 2024
- April 21, 2024
- April 20, 2024
Some of Our Sources
- Slashdot
- Techcrunch
- Simplebits
- TutsPlus - Code
- Noupe
- My Ink Blog
- Reencoded
- Android Dissected
- Dev To
- Hashedout
Help Webnuz
Referal links:
Install an Apache Web-Server on EC2 using IAC
In this tutorial I will give you a guided walk-through on how to install an Apache Web Server on an EC2 Linux Instance using EC2 user data. All resources will be provisioned by CloudFormation (IAC). With that being said, let's get straight into it.
Define our parameters to be used in our CloudFormation Stack.
---Parameters: AppName: Type: String Description: Enter the name of your resource you are creating. Default: ApacheWebServer Stage: Type: String Description: Enter the staging environment of you resource. Default: devWe then define our resources. The resources that we need are, a SSH Key, an EC2 Instance and a Security Group.
Resources: ## Our EC2 SSH Key SSHKey: Type: 'AWS::EC2::KeyPair' Properties: KeyName: !Join ['-', [!Ref AppName, 'key-pair', !Ref Stage] ] ## EC2 Instance MyInstance: Type: AWS::EC2::Instance Properties: ImageId: ami-009d6802948d06e52 InstanceType: t2.micro KeyName: !Ref SSHKey SecurityGroups: - !Ref SSHSecurityGroup # we install our web server with user data UserData: Fn::Base64: | #!/bin/bash -xe yum update -y yum install -y httpd systemctl start httpd systemctl enable httpd echo "Hello World from user data" > /var/www/html/index.html Tags: - Key: Name Value: !Ref AppName - Key: Environment Value: !Ref Stage # Our EC2 security group SSHSecurityGroup: Type: AWS::EC2::SecurityGroup Properties: GroupDescription: SSH and HTTP SecurityGroupIngress: - CidrIp: 0.0.0.0/0 FromPort: 22 IpProtocol: tcp ToPort: 22 - CidrIp: 0.0.0.0/0 FromPort: 80 IpProtocol: tcp ToPort: 80Note: The key take away here is the block of code we wrote for user data. We are using "Fn::Base64" followed by a vertical pipe to pass an entire bash script to the instance. The vertical pipe is used so the script can be recognized as one string.
Complete Template File
---Parameters: AppName: Type: String Description: Enter the name of your resource you are creating. Default: ApacheWebServer Stage: Type: String Description: Enter the staging environment of you resource. Default: devResources: ## Our EC2 SSH Key SSHKey: Type: 'AWS::EC2::KeyPair' Properties: KeyName: !Join ['-', [!Ref AppName, 'key-pair', !Ref Stage] ] ## EC2 Instance MyInstance: Type: AWS::EC2::Instance Properties: ImageId: ami-009d6802948d06e52 InstanceType: t2.micro KeyName: !Ref SSHKey SecurityGroups: - !Ref SSHSecurityGroup # we install our web server with user data UserData: Fn::Base64: | #!/bin/bash -xe yum update -y yum install -y httpd systemctl start httpd systemctl enable httpd echo "Hello World from user data" > /var/www/html/index.html Tags: - Key: Name Value: !Ref AppName - Key: Environment Value: !Ref Stage # Our EC2 security group SSHSecurityGroup: Type: AWS::EC2::SecurityGroup Properties: GroupDescription: SSH and HTTP SecurityGroupIngress: - CidrIp: 0.0.0.0/0 FromPort: 22 IpProtocol: tcp ToPort: 22 - CidrIp: 0.0.0.0/0 FromPort: 80 IpProtocol: tcp ToPort: 80Upload CloudFormation Stack to the console.
First, navigate to the directory where you have your template file stored. You can use the below terminal command to upload your stack to AWS.
aws cloudformation deploy --template-file <TEMPLATE NAME> --stack-name <STACK NAME> --profile <AWS PROFILE NAME>If the stack was uploaded successfully, you should see this message "Successfully created/updated stack - ".
Navigate to AWS Console
If you are in the console, go to EC2 Dashboard, you should see the instance you created. Select the instance and click on connect. Connect to the instance using EC2 Instance Connect.

Inspect Cloud Init Logs
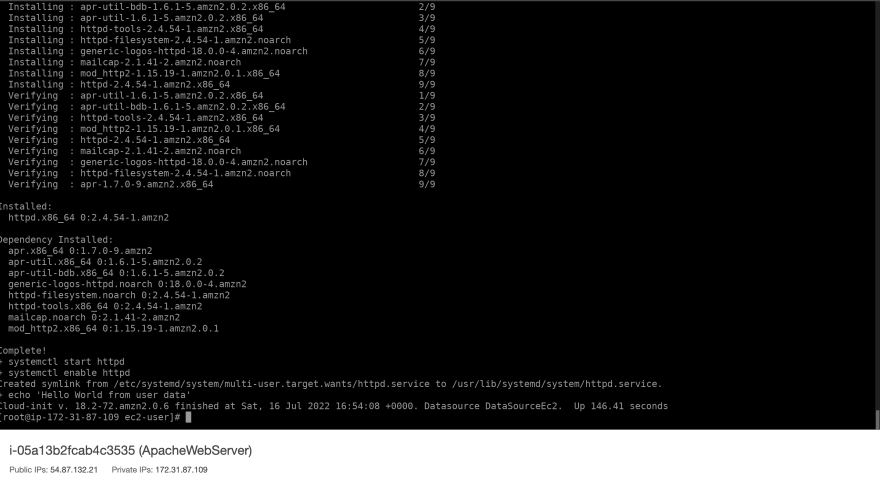
Now we are going to inspect the logs to view the scripts that ran when the instance was booted up.
First, we need root privileges. Execute the following command so we can have root privileges in our instance.
sudo su Second, we're gonna run the command to view the actual log files.
cat /var/log/cloud-init-output.logNow you should be able to see a complete list of logs from the scripts that were executed.
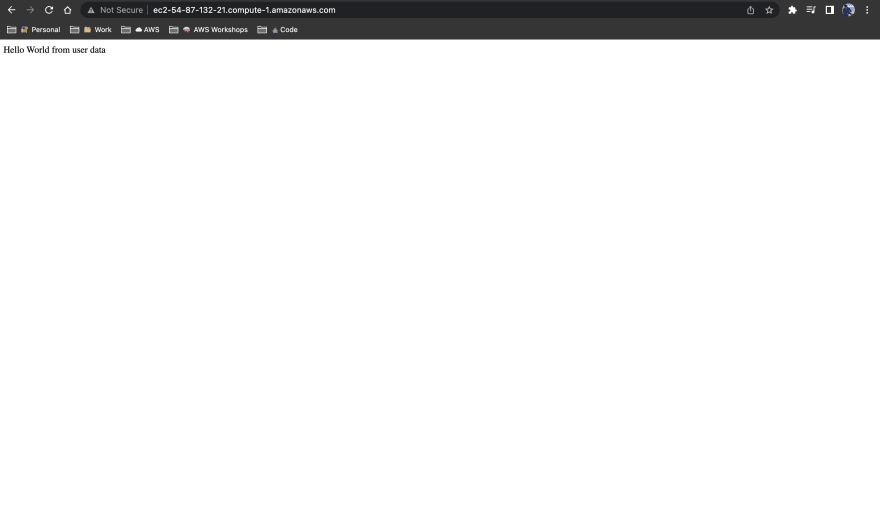
Lastly, to test that our web server is properly hosting our html web page. You can copy the public DNS of the instance, paste it in your web browser. By doing this you should be able to access the web page we created.
That's it, we successfully provisioned an EC2 instance and installed an Apache Web Server on it using user-data. Now, the last step is to clean up all the resources that were used.
Clean Up Resources
In your terminal execute the following command. Since, we created our resources using CloudFormation by deleting the stack, all resources that were in the stack will be deleted as well.
aws cloudformation delete-stack --stack-name <STACK NAME>This was just a small demonstration of what you can accomplish with EC2 user data. Please feel free to explore beyond this tutorial and add extra features.
I do hope this tutorial was useful for you. Stay curious, keep learning, and keep building. Thank you.
Original Link: https://dev.to/giyoungjr/install-an-apache-web-server-on-ec2-using-iac-2gkb
Dev To
More About this Source Visit Dev To