
An Interest In:
Web News this Week
- April 2, 2024
- April 1, 2024
- March 31, 2024
- March 30, 2024
- March 29, 2024
- March 28, 2024
- March 27, 2024
Some of Our Sources
- Mashable
- Smashing Magazine
- Abduzeedo
- You The Designer
- Fuel Your Creativity
- Fudge Graphics
- Web Design Ledger
- Freelance Switch
- Hashedout
- The Verge
Help Webnuz
Referal links:
How to ETL with AWS Glue and Amazon Glue Studio to transform your data - Part 1
How do you clean data quickly?
Real world data is very dirty - from startups, consulting, construction, government and insurance, the first use case for cloud adoption could be how to integrate data and make it clean. The journey to cloud is a long transformation project demonstrating the different data analytics life cycle maturity of customers from descriptive, prescriptive and predictive.
Different organizational structures will determine if there are budgets and therefore headcount for data engineers available to prepare data for analytics and machine learning which is the future state.
If an organization does not have FTE for data engineers, data scientists and business analysts may complete ETL (extract, transform and load) jobs to clean and transform small datasets using various tools such as Tableau Prep, Alteryx, Microsoft Power Query.
Learning Outcomes
In the AWS Management console, you will learn:
Create IAM permissions to use multiple AWS services
Use AWS Glue and AWS Glue Studio to clean and prepare your data for analytics
Create an external table using AWS Athena
Create visualizations to draw business insights using Amazon QuickSight

What is Amazon Glue?
Amazon Glue is a serverless data integration service which means that you do not need to preconfigure servers in advance for ETL jobs for cloud data warehouse Amazon Redshift or an Amazon S3 data lake.
Data Engineer and Developers: Glue Studio may use a visual editor to create an ETL job which renders a Python script and schedule ETL jobs. AWS Glue may be used to add crawlers to identify the schema of datasets, create a database and table from data stored in an AWS S3 bucket location.
Data Scientists: AWS Glue DataBrew is a tool for visual data preparation that may be used to normalize data such as changing date formats, view distribution, create logical statements and inspect the data quality of missing values.
Business Analysts: May use all three services AWS Glue DataBrew, Glue Studio and Glue for different business use cases for their stakeholders.
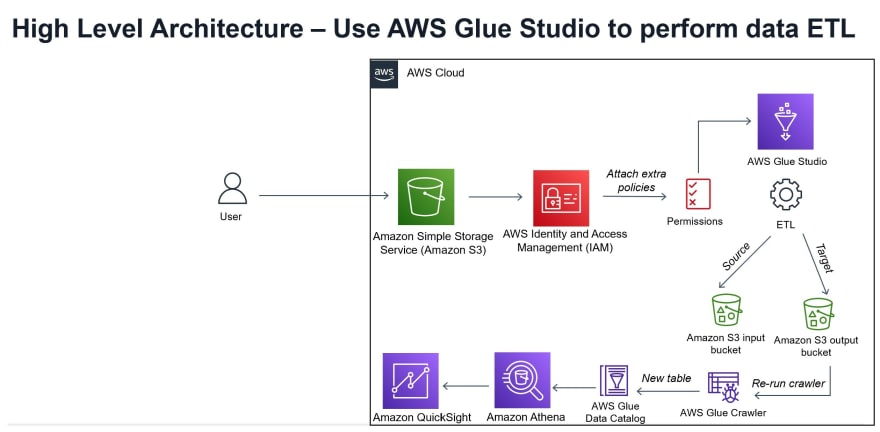
AWS Glue - High Level Architecture
a) AWS Glue - create a unified catalog to access data from data stores
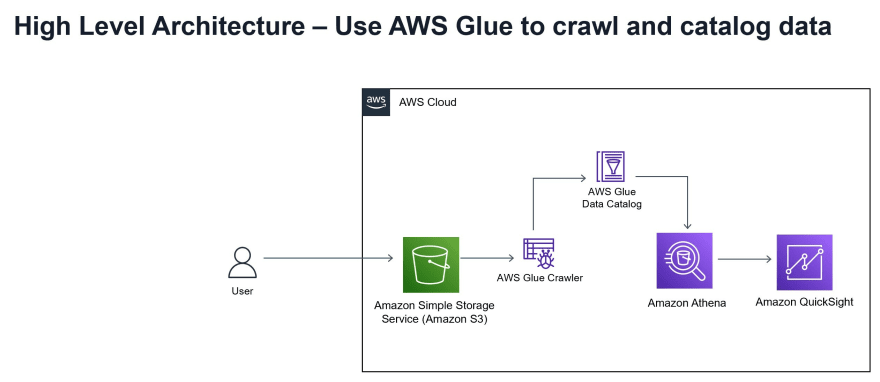
b) AWS Glue Studio - monitor ETL jobs without coding
Tutorial: Getting started in ETL with AWS Glue
Pre-requisites
- The recommended reading for this tutorial is based on the AWS Skill Builder course Getting started with Glue
Step 1: Read the blog Create an AWS account
Step 2: Read the blog Create IAM access for Administrator
Step 3: To run a AWS Glue ETL job, use AWS Glue Studio, Amazon Athena and Amazon QuickSight you will need to attach additional policies to the role for permissions to access these AWS Services.
Step 4: To run an ETL job using AWS Glue you will need to read the official AWS documentation and follow the steps listed below to Create an IAM Role
to create a role 'AWSGlueServiceRole ' which can access the crawler and create a role for ETL jobs:
a) Sign in to the AWS Management Console and open the IAM console at https://console.aws.amazon.com/iam/.

Click on the left hand-side for Users. There will be an existing administrator role.
b) In the left navigation pane, choose Roles.
c) Choose Create role.
d) For role type,find and choose Glue, and choose Next: Permissions.

e) On the Attach permissions policy page, choose the policies that contain the required permissions. E.g. AWSGlueServiceRole for general AWS Glue Studio and AWS Glue permissions and the AWS managed policy AmazonS3FullAccess for access to Amazon S3 resources.
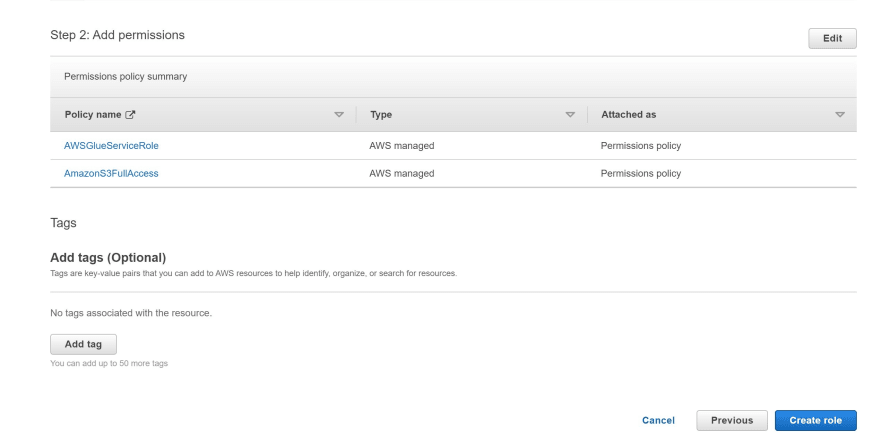
f) Add additional policies as needed for additional data stores or services.
g) Choose Next: Review.
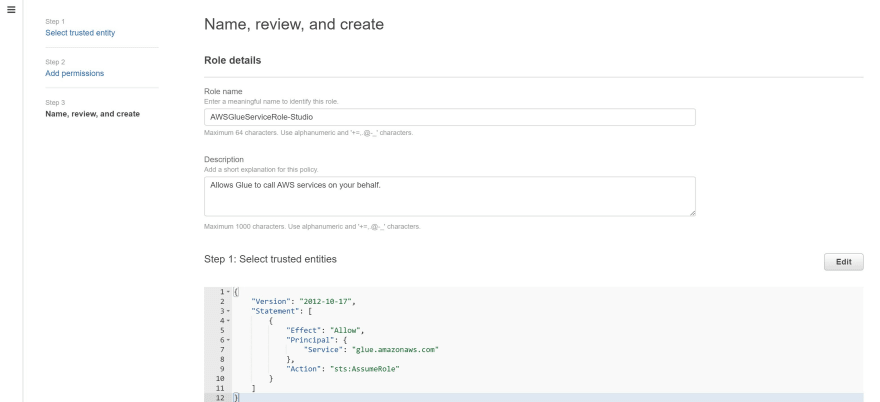
h) For Role name, enter a name for your role; for example, AWSGlueServiceRole.

i) Choose Create Role to finish creating the role.
Step 5: Read the AWS documentation and follow the steps Set up IAM permissions for AWS Glue Studio to create a Glue Studio role.
a) Sign in to the AWS Management Console and open the IAM console at https://console.aws.amazon.com/iam/.
b) In the navigation pane, choose Policies.
c) In the list of policies, select the check box next to the AWSGlueConsoleFullAccess. You can use the Filter menu and the search box to filter the list of policies.
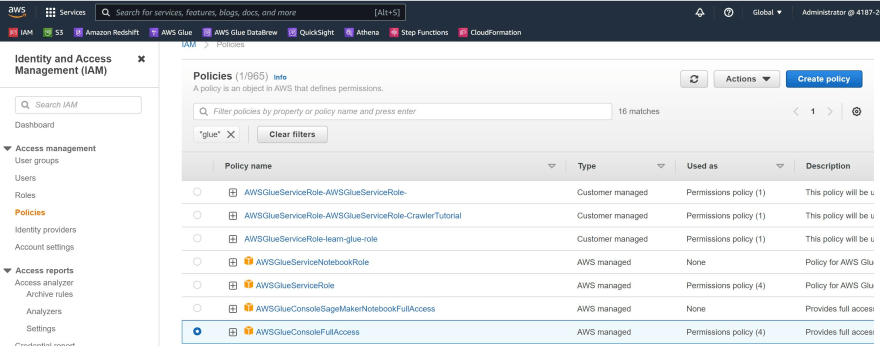
d) Choose Policy actions, and then choose Attach.
Repeat the previous steps to attach additional policies to the user.
Give the role a name e.g.AWSGlueServiceRole-Studio
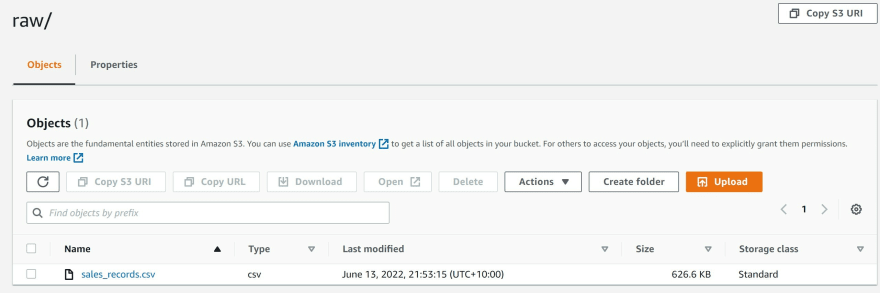
Step 5: Download the sales_records.csv file from the course Getting Started with AWS Glue in AWS Skillbuilder.

Step 6: Create an Amazon S3 bucket and upload the csv file for sales_records.csv
You can read the blog to Create an Amazon S3 bucket
a) In the search bar type 'S3'.

b) Click Create bucket
c) Under Bucket name provide details e.g. learn-glue-
d) Create a folder and name it 'sales-data'
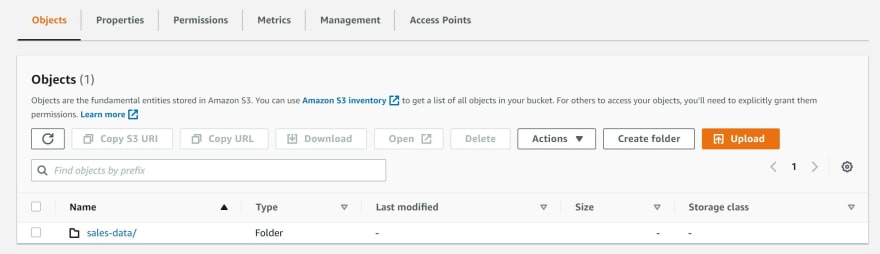
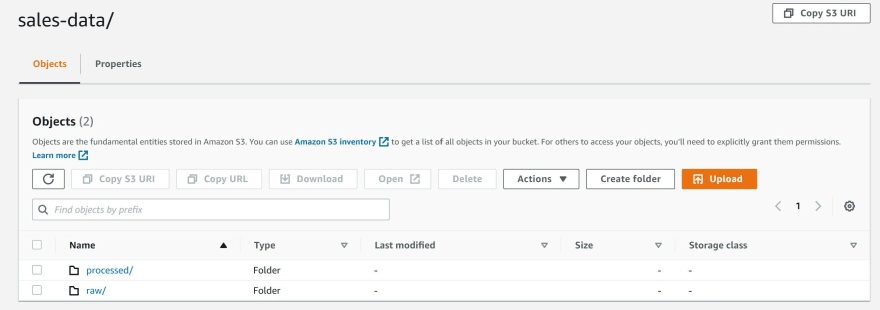
e) Within the sales-data folder, create two sub-folders and name them 'raw' and 'processed'.
f) Upload the sales_records.csv into the S3 bucket in the folder named 'raw'.
g) Type the word 'Glue' in the search bar to navigate to AWS Glue

(Note: follow the recommended steps from AWS Skill Builder course 'Getting Started with Glue') link
h) Click 'Crawlers' from the menu on the left.
Click Add Crawler

i) Name the crawler 'learn-glue-crawler' and click Next.

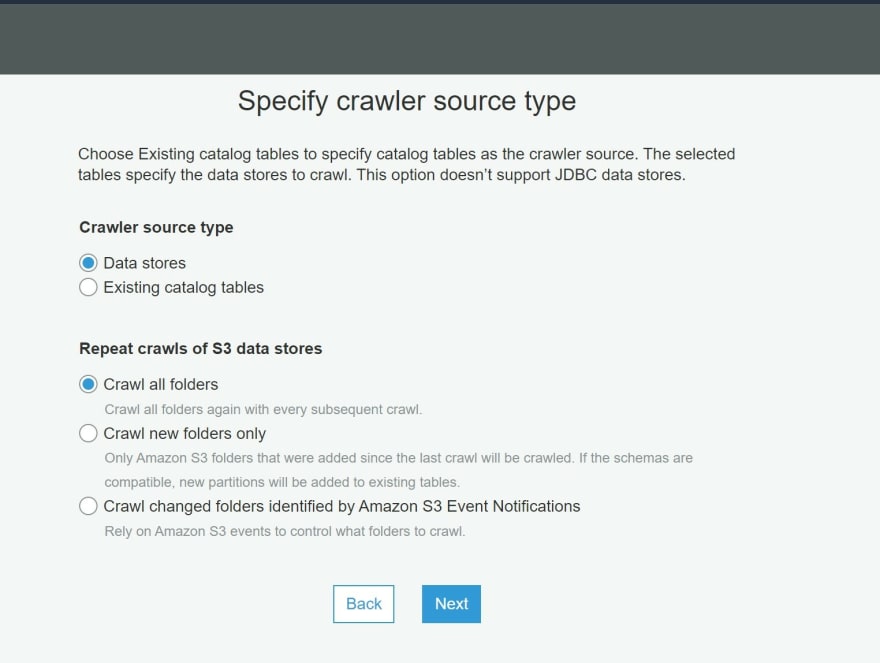
j) Select the options data stores and crawl all folders within S3 buckets.Click Next.
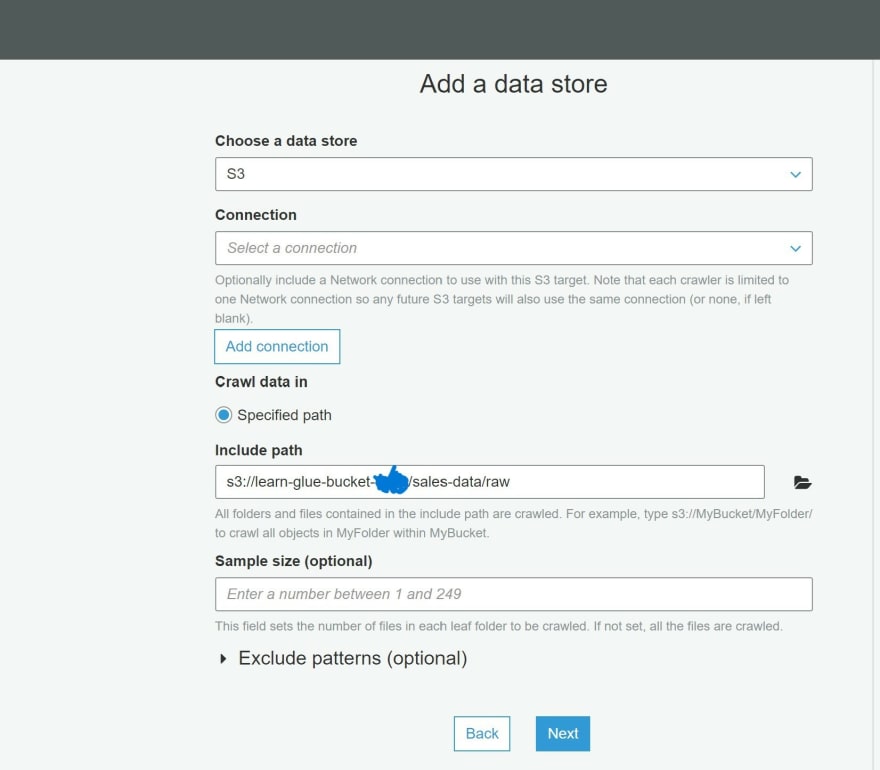
k) Navigate to your S3 bucket for the saved sales_records data and search for the path for raw folder.
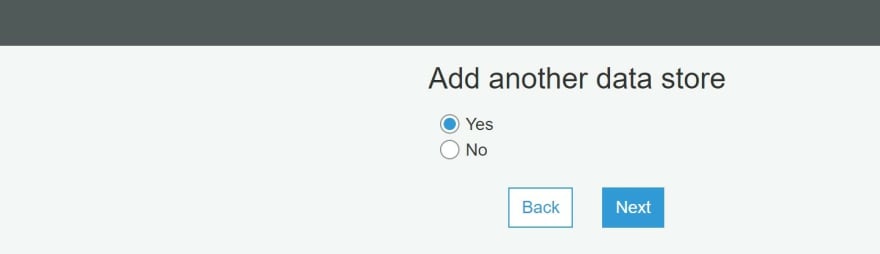
l) Click Yes to create another data store.
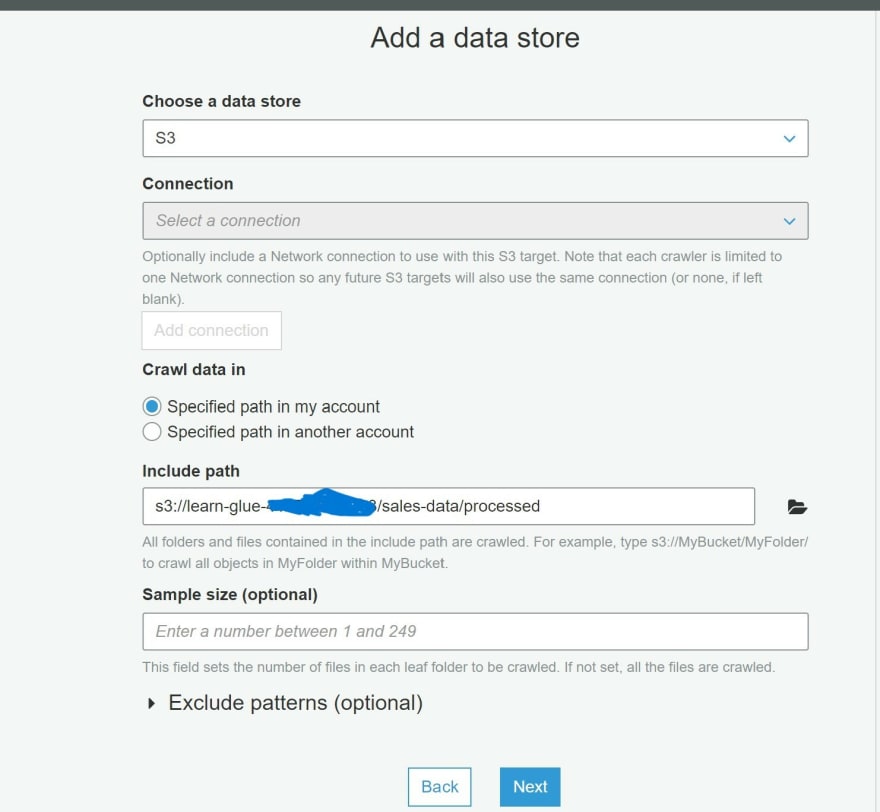
m) Under the specified path details, navigate to the S3 bucket related to the processed folder.
n) Additional data stores will not be created. Click No and Next.
o) Select Create an IAM role and name it 'learn-glue-role'
p) Schedule to run the crawler on-demand.

q) Click Add database and name the database 'Sales-data' and click Next.

r) Inspect the details entered and click Finish.
s) Click 'learn-glue-crawler' and Run Crawler.


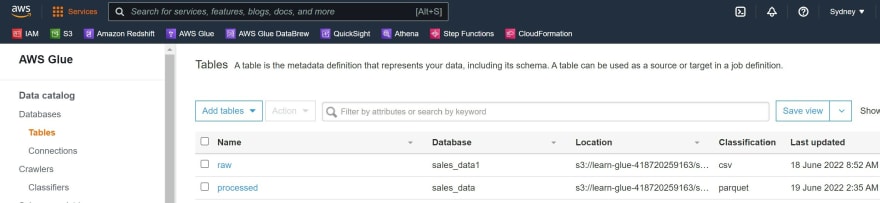
t) After the crawler has completed with a status of 'ready', click on the menu on the left Table and you will see a table created called raw.

Tutorial 2: Getting started with ETL using AWS Glue Studio Note: This tutorial is based on this link
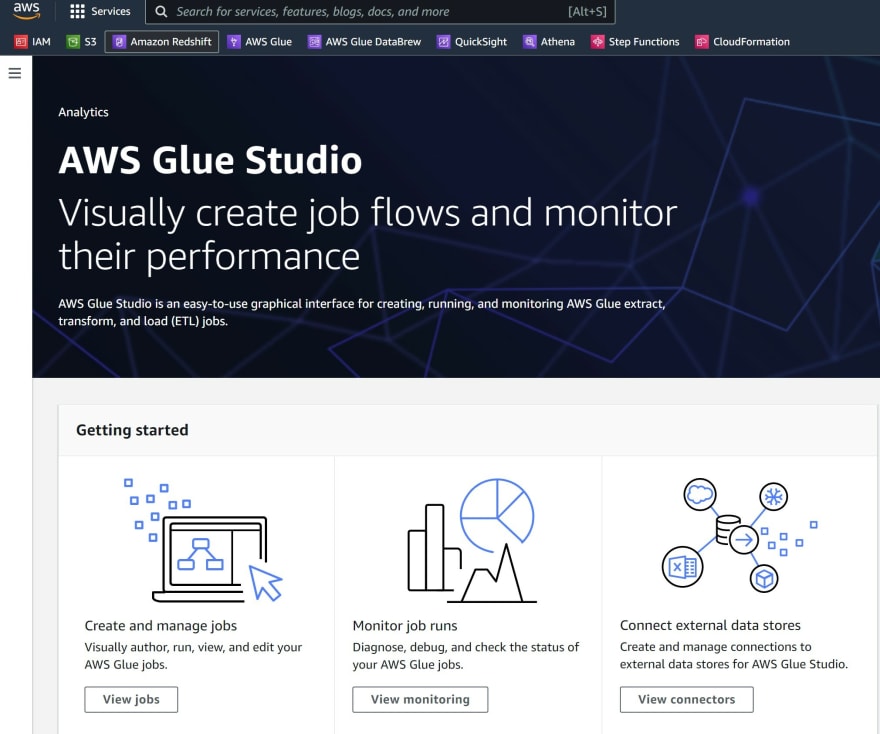
Step 1: On the search bar type 'Glue Studio' to navigate to AWS Glue Studio.
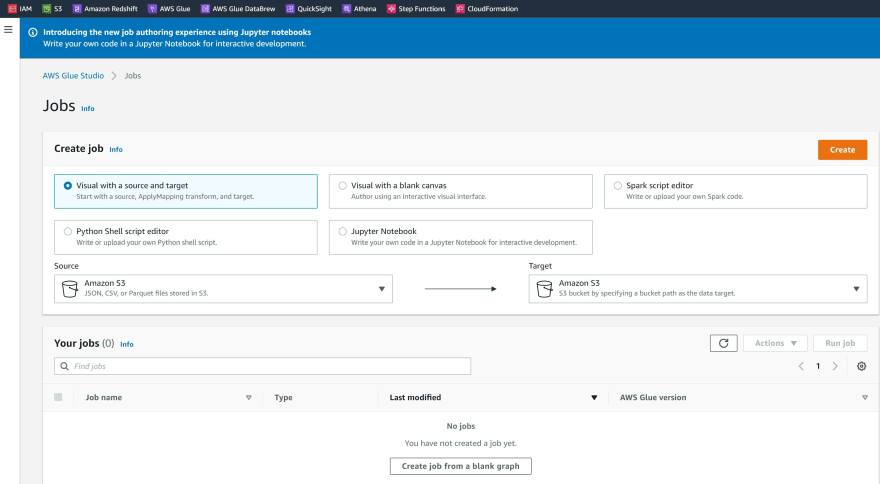
Step 2: Click on View Jobs
Step 3*: Select the option **Visual with a source and target* and click Create.
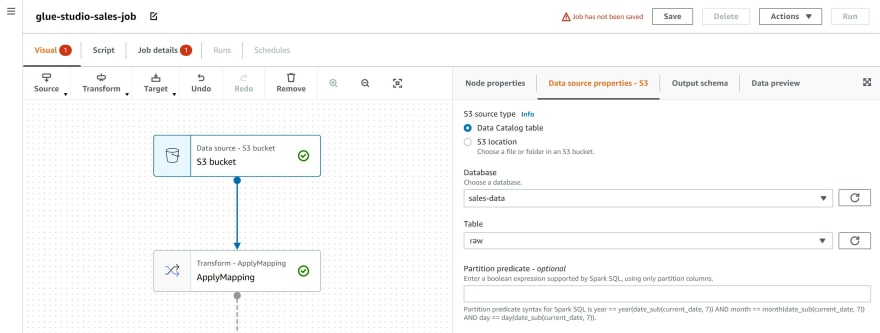
Step 4: Under the S3 bucket node, select the option Data catalog, select the table 'raw'.
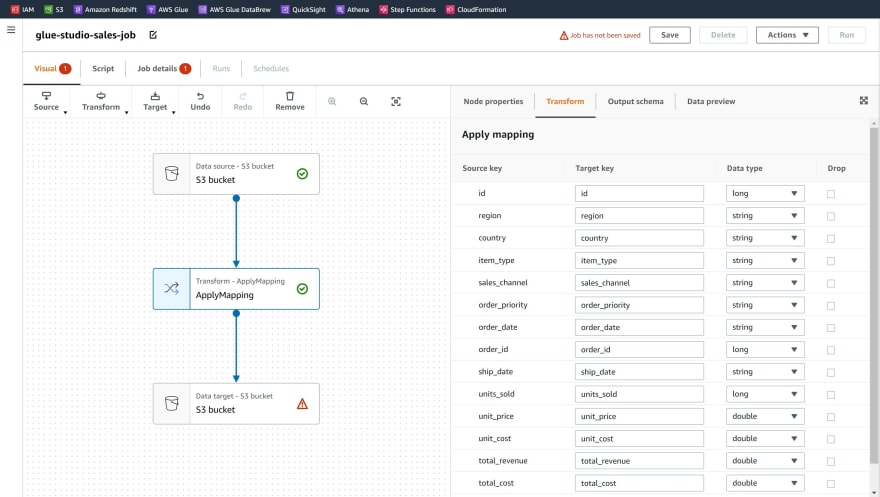
Choose Apply Mapping node.
Step 5: Click on the tab Output Schema, you can preview the variables within the dataset and you can drop variables and change data types.
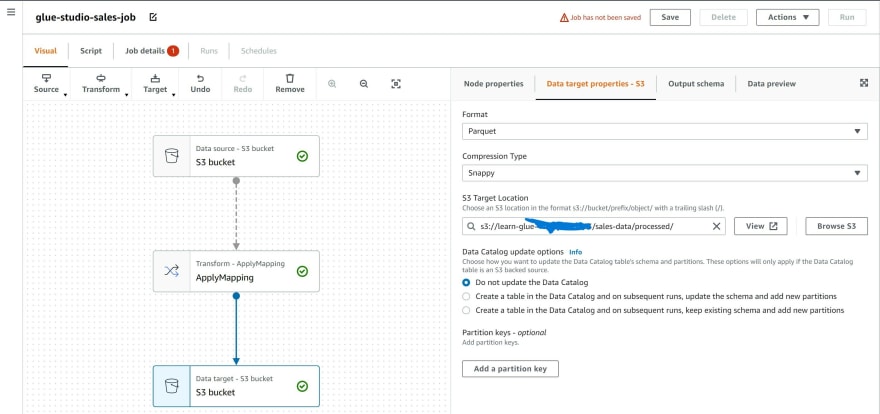
Step 6: Click on node Data target - S3 bucket. Under the drop-down selections choose Format as Parquet, Compression Type as Snappy and the S3 path for the 'processed' folder.
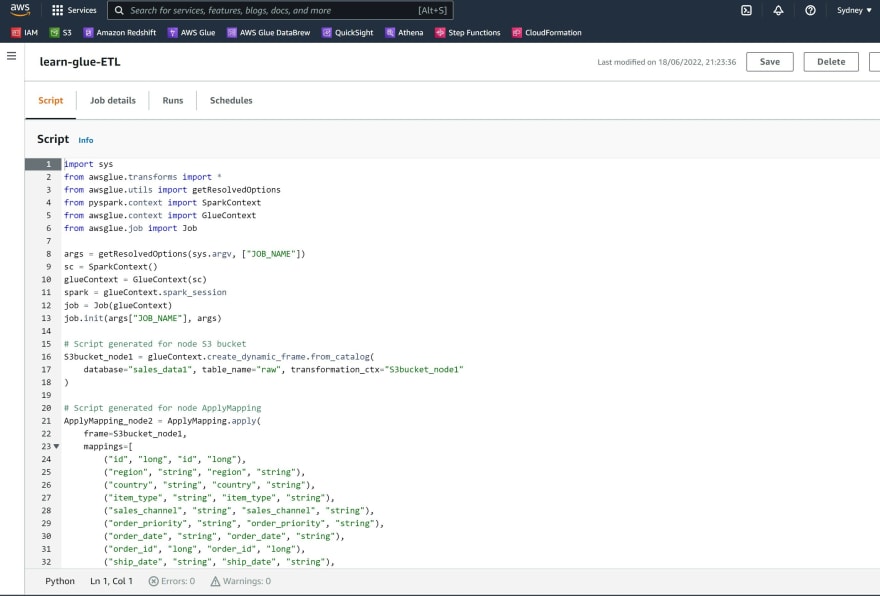
Step 7: Navigate to the tab 'Script' and you may inspect the Python script that was generated from the visual ETL editor. This script can be downloaded.
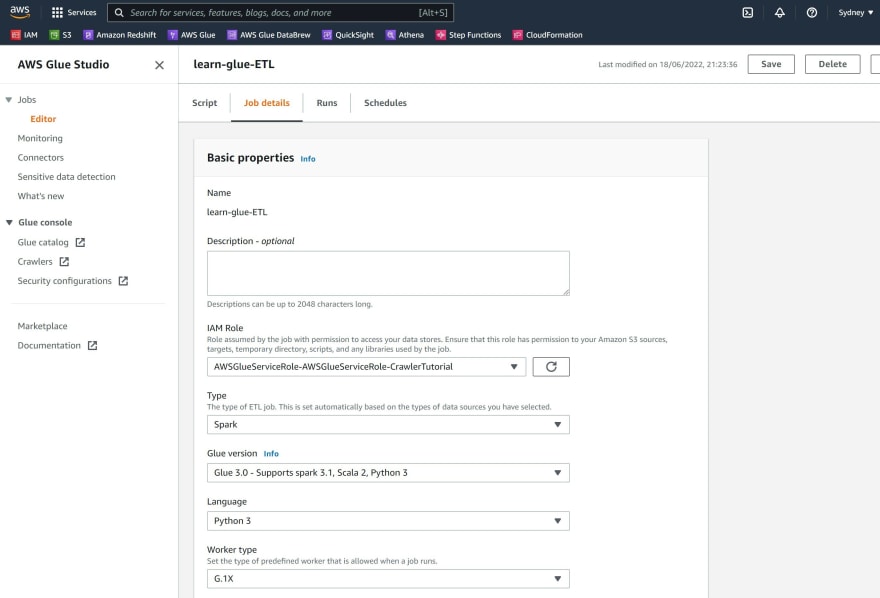
Step 8: Click on the tab 'Job Details', provide a name for the job and a description for the data transformation. Change the number of workers to 2.
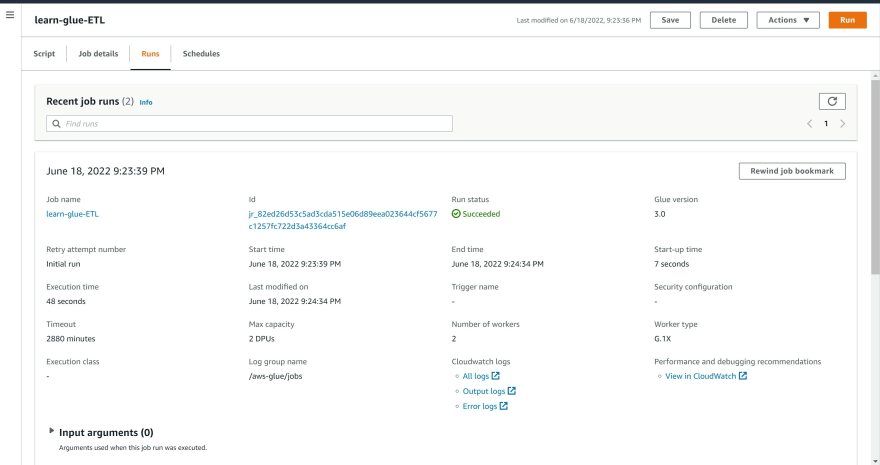
Step 9: Click Save and run the ETL job.

Step 10: The ETL job will take a few minutes to run and will change to a status of 'Succeeded'.
Step 11: Navigate to the AWS Glue console and select Crawlers on the left hand menu and re-run the'learn-glue-crawler' and after the status is 'ready' click on Table to inspect a 'processed' table in the Data catalog.
Tutorial 3: Use AWS Athena to create an external table and create business insights using Amazon QuickSight
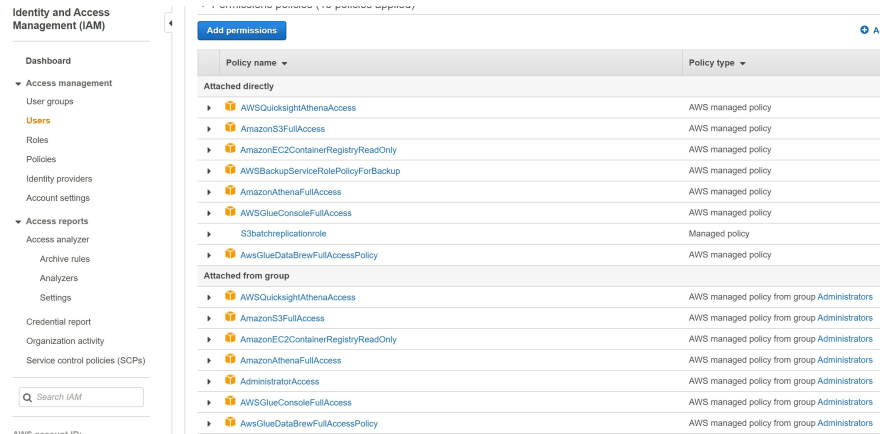
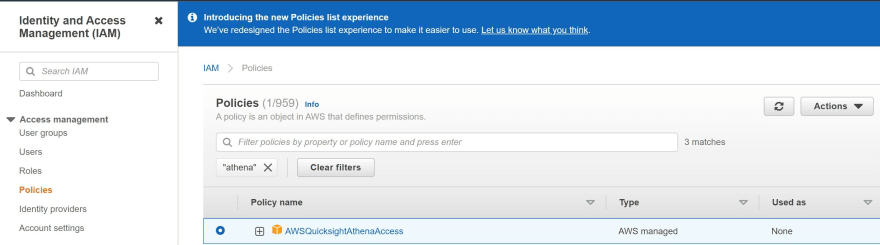
Step 1: Type 'IAM' in the search bar to navigate to Identity and Access Management (IAM).

Step 2: Manually attach the two policies 'AmazonAthenaFullAccess' and 'AWSQuicksightAthenaAccess' managed policies to the existing IAM administrator user link

Step 3: Review the policies for:
- Amazon Athena
- Amazon QuickSight
- AWS Glue
- AWS Glue DataBrew
- AWS Glue Studio
- Amazon S3
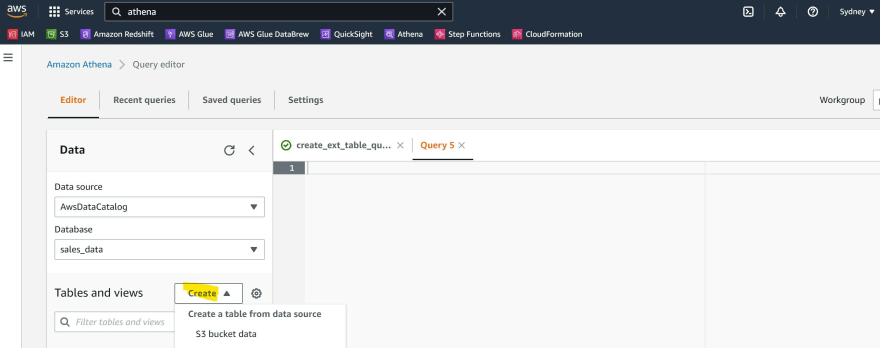
Step 4: Type in the search bar 'Athena'

Step 5: Click Create and select the option to create a table from S3 bucket location
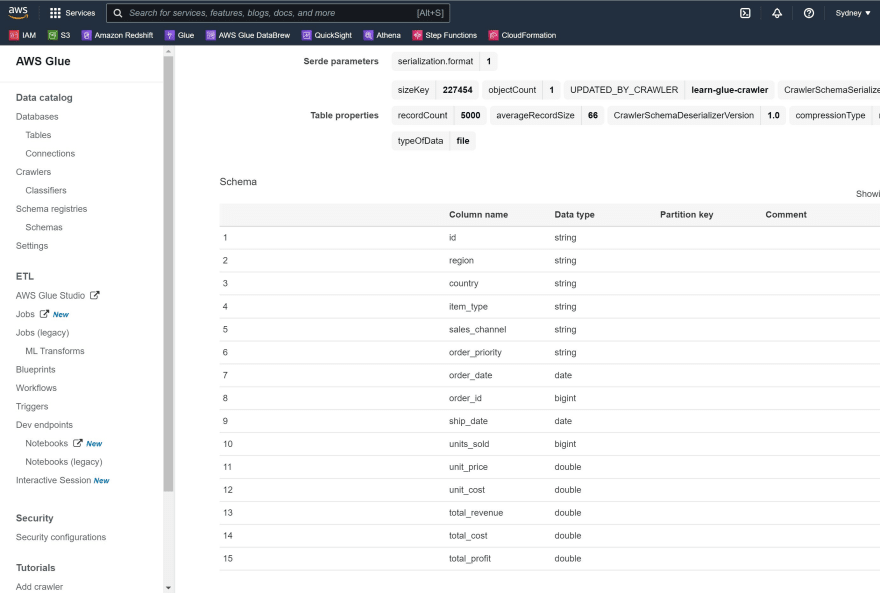
Step 6 Open a second tab of AWS Glue and navigate to Tables and inspect the schema of the 'processed' table.
Step 7: Create a database from this link
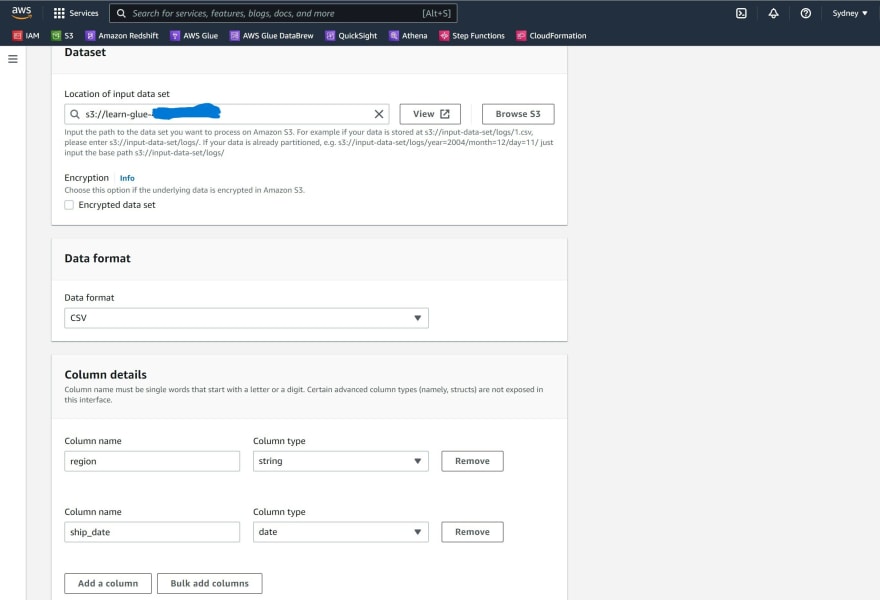
Provide the following details:
a) Create a table name
b) Under Database Configuration, select the option 'Create a database' and provide a database name.
c) Dataset - provide the S3 bucket path for the 'processed' folder
d) Select the data format 'csv'.
e) Enter the column details and their data type.
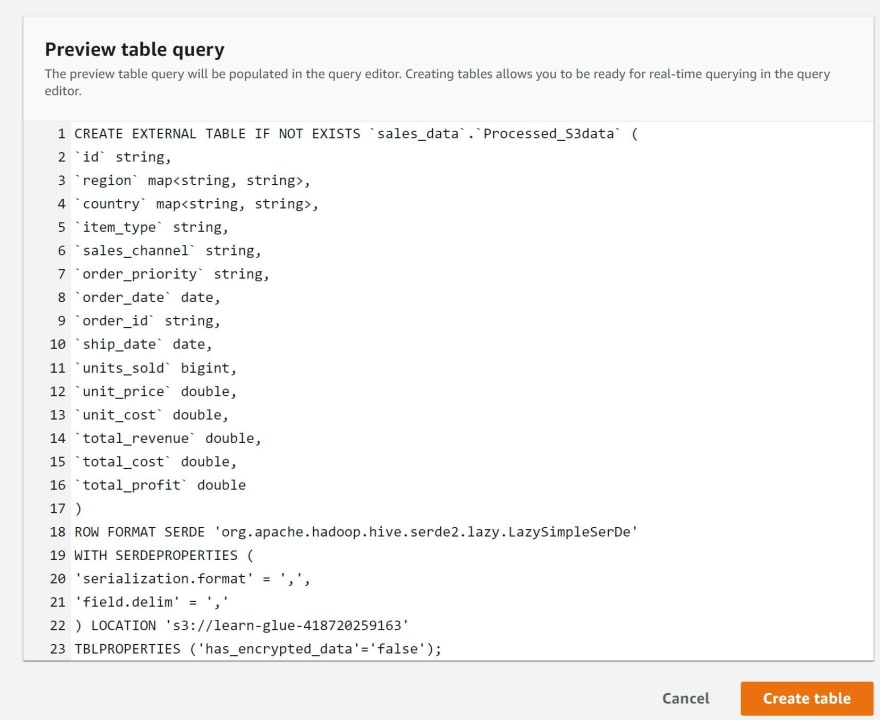
f) Preview the SQL code generated for table and click Create table
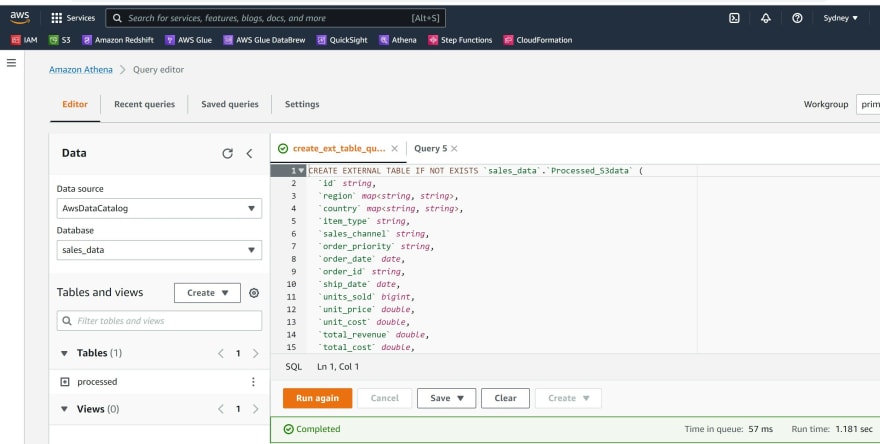
g) Save the query
Step 8: Create dashboards using Amazon QuickSight
a) Check that you have the correct policy attached to IAM for Amazon QuickSight.
b) Navigate to the search bar and type 'QuickSight'

c) Create a QuickSight account
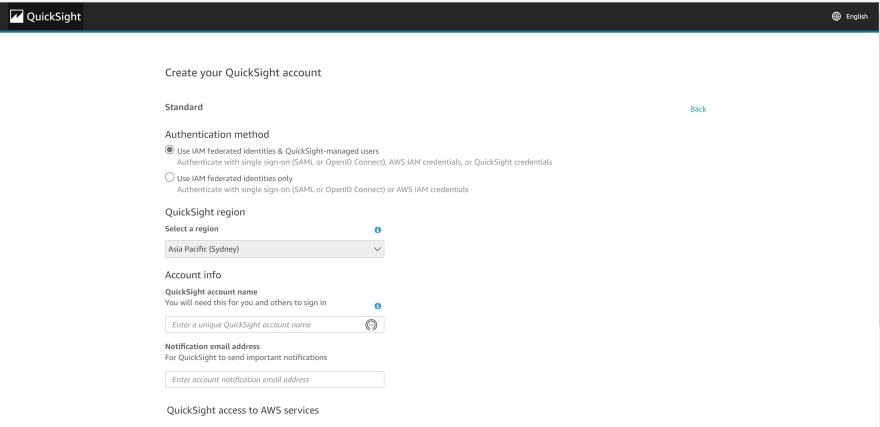
d) Select an appropriate support plan

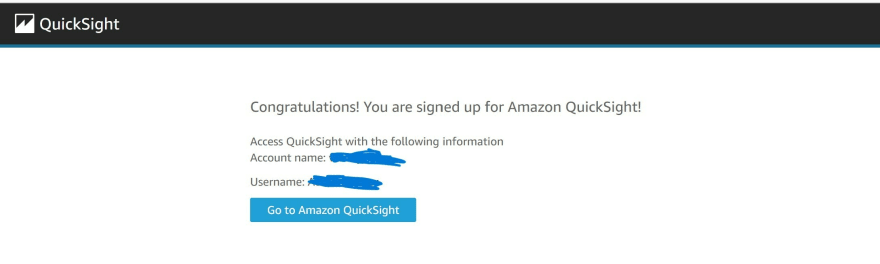
e) You will receive a confirmation after completing the sign-up process.
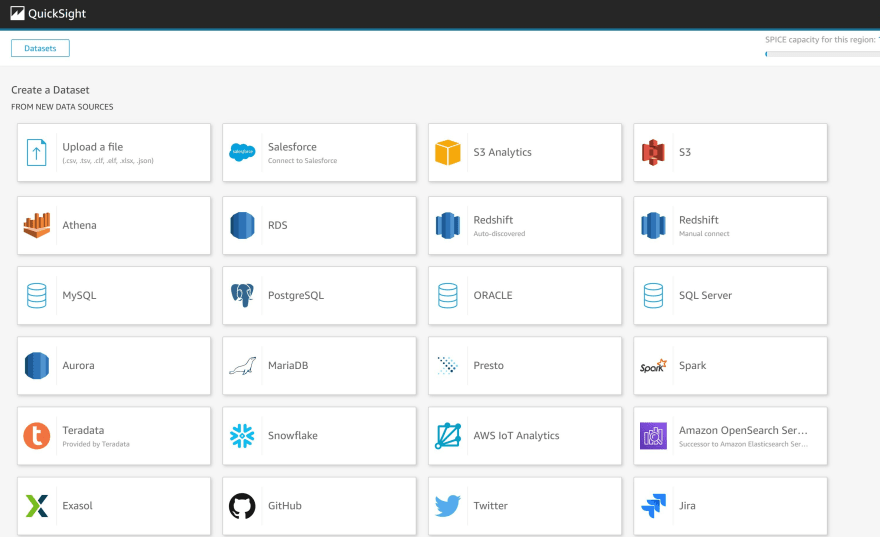
f) Click New dataset

g) Click on the data source Athena
h) Click on the data catalog and select the 'processed sales' table from Athena

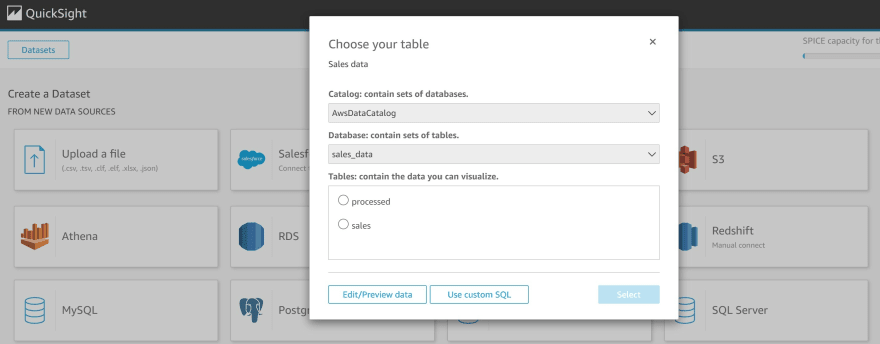
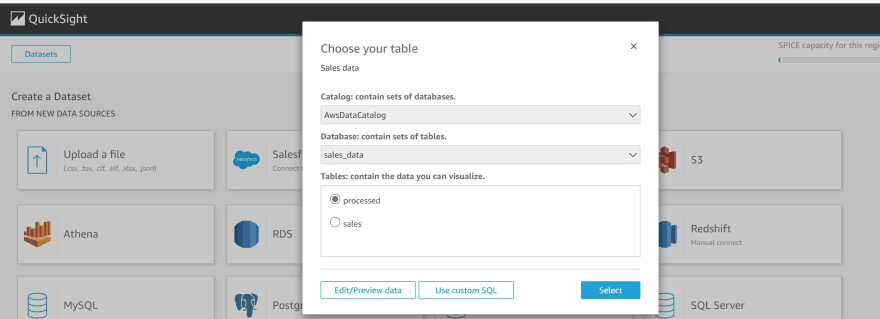
i) Click Visualize to finish creating the data set
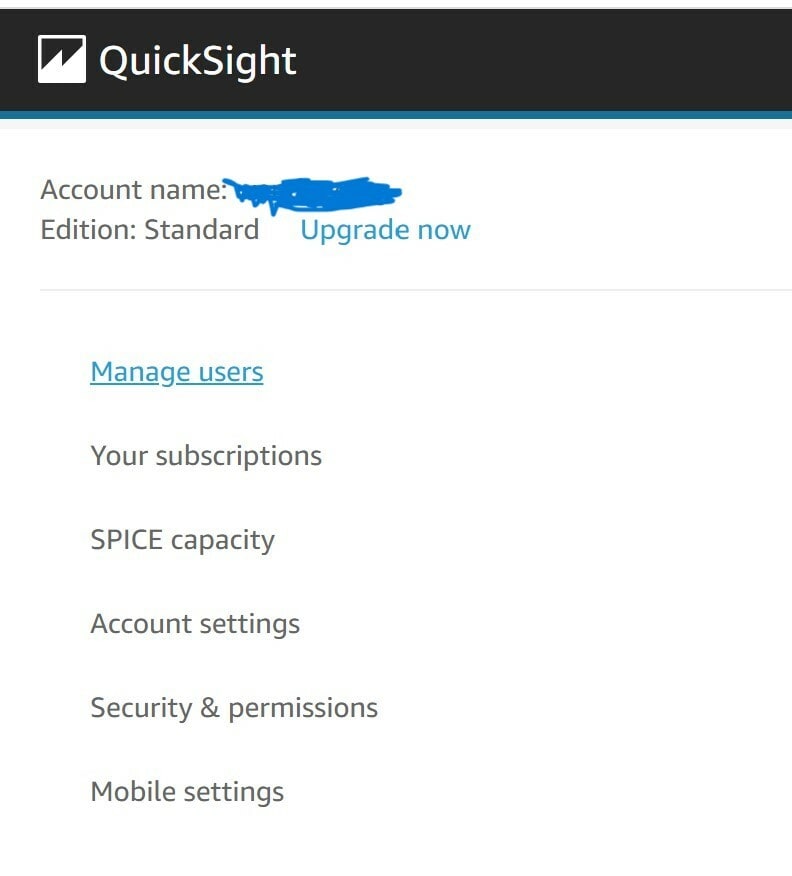
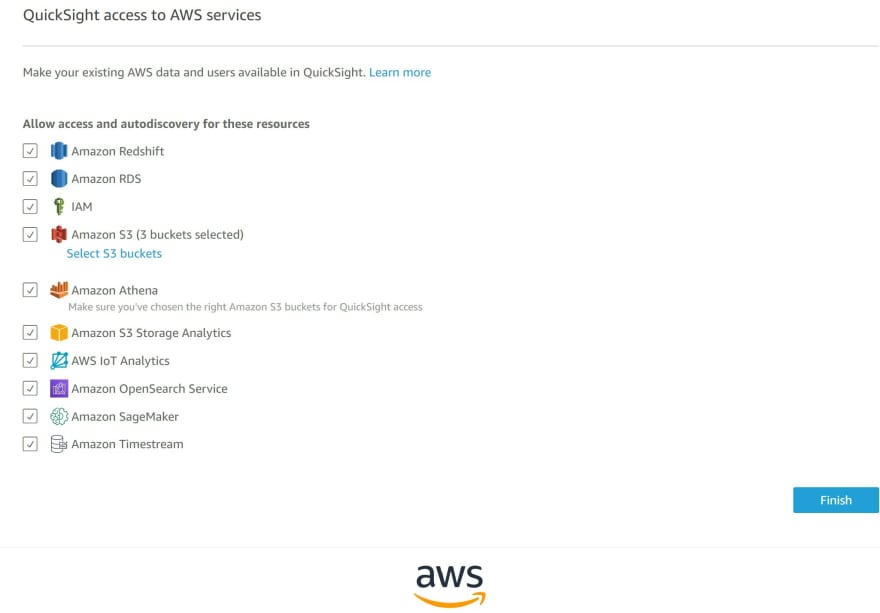
j) If you need to trouble-shoot to connect AWS Athena table to Amazon QuickSight, navigate to your Amazon account on the right-handside and click Manage QuickSight then click Security and Permissions
Click manage
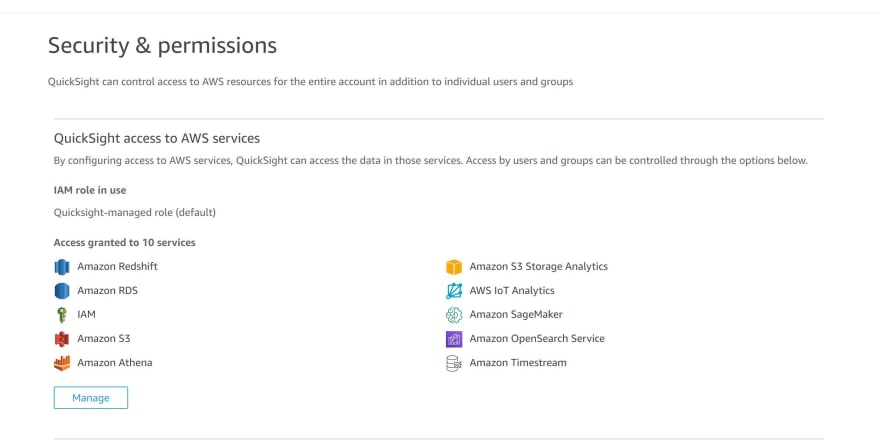
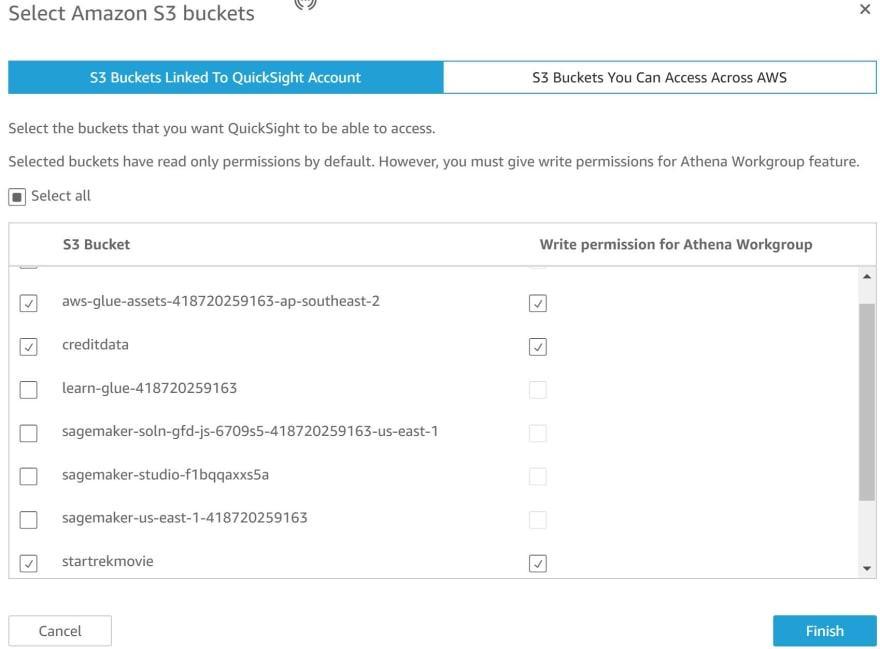
Ensure you check the boxes that relate to the connection to the S3 bucket
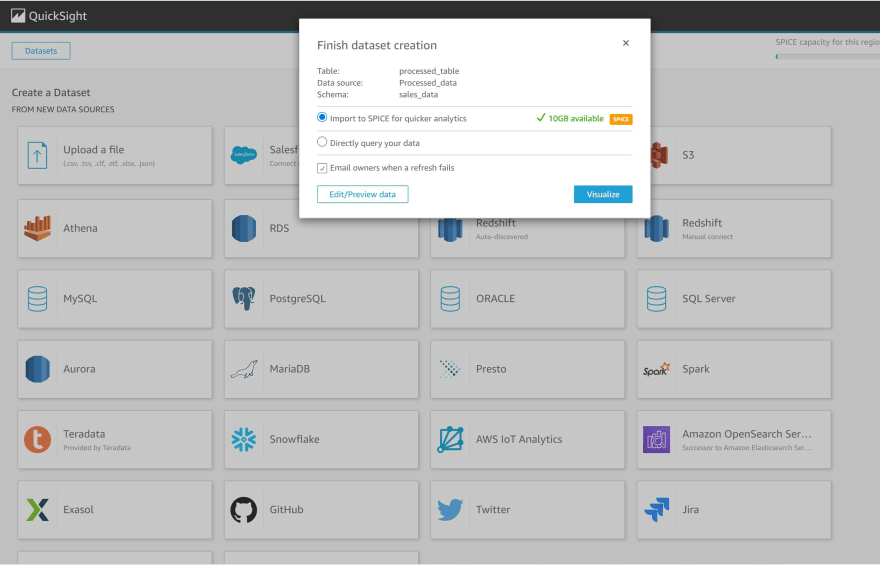
k) Data is successfully imported using SPICE

l) Click new analysis to commence creating visuals for your dashboard
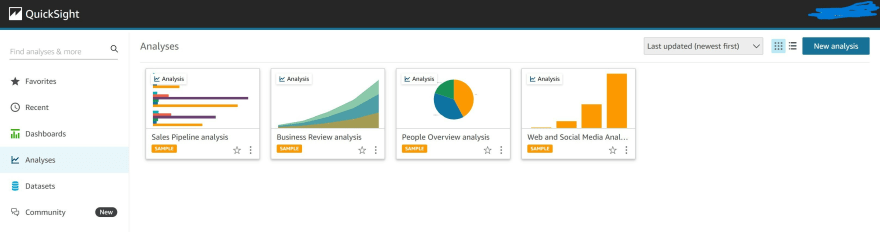
m) Create your dashboard, publish it and share the analysis.

Happy Learning !!!
Next Tutorial: How to ETL with AWS Glue and Amazon Glue Studio to transform your data - Part 2
In this next tutorial it will describe ETL using AWS Glue with your own dataset
References
Original Link: https://dev.to/aws-builders/how-to-etl-with-aws-glue-and-amazon-glue-studio-to-transform-your-data-328b
Dev To
More About this Source Visit Dev To