
An Interest In:
Web News this Week
- April 20, 2024
- April 19, 2024
- April 18, 2024
- April 17, 2024
- April 16, 2024
- April 15, 2024
- April 14, 2024
Some of Our Sources
- Mashable
- TutsPlus - Code
- Six Revisions
- Fuel Your Creativity
- Web Designer Depot
- Fudge Graphics
- Line 25
- 24 Ways
- Freelance Switch
- Hashedout
Help Webnuz
Referal links:
Build a GraphQL app in Node.js with TypeScript and graphql-request
Written by Hussain Arif
In this article, you will build a full-stack app using GraphQL and Node.js in the backend. Meanwhile, our frontend will use the graphql-request library to perform network operations on our backend. We will cover the following steps:
- Why use graphql-request and TypeScript?
- Building our server
- Project initialization
- Creating our database
- Defining our schema
- Creating resolvers
- Configuring our server
- Creating mutations
- Building our client
- Creating query variables
- Performing queries
- Performing mutations
Why use graphql-request and TypeScript?
Whenever developers build a GraphQL server using Apollo, the library generates a frontend which looks like so: 
This interface allows users to make query or mutation requests to the server via code. However, lets address the elephant in the room: it doesnt look very user friendly. Since the frontend doesnt feature any buttons or any helpful interface elements, it might be hard for many users to navigate around your app. Consequently, this shrinks your user base. So how do we solve this problem?
This is where graphql-request comes in. It is an open source library which lets users perform queries on a GraphQL server. It boasts the following features:
- Lightweight This library is just over 21 kilobytes minified, which ensures your app stays performant
- Promise-based API This brings in support for asynchronous applications
- TypeScript support
graphql-requestis one of many libraries which allows for TypeScript. One major advantage of Typescript is that it allows for stable and predictable code
For example, look at the following program:
let myNumber = 9; //here, myNumber is an integermyNumber = 'hello'; //now it is a string.myNumber = myNumber + 10; //even though we are adding a string to an integer,//JavaScript won't return an error. In the real world, it might bring unexpected outputs.//However, in Typescript, we can tell the compiler..//what data types we need to choose.let myNumber:number = 39; //tell TS that we want to declare an integer.myNumber = 9+'hello'; //returns an error. Therefore, it's easier to debug the program//this promises stability and security. In this article, we will build a full-stack app using GraphQL and TypeScript. Here, we will use the apollo-server-express package to build a backend server. Furthermore, for the frontend, we will use Next and graphql-request to consume our GraphQL API.
Building our server
Project initialization
To initialize a blank Node.js project, run these terminal commands:
mkdir graphql-ts-tutorial #create project folder cd graphql-ts-tutorial npm init -y #initialize the appWhen thats done, we now have to tell Node that we need to use TypeScript in our codebase:
#configure our Typescript:npx tsc --init --rootDir app --outDir dist --esModuleInterop --resolveJsonModule --lib es6 --module commonjs --allowJs true --noImplicitAny truemkdir app #our main code foldermkdir dist #Typescript will use this folder to compile our program.Next, install these dependencies:
#development dependencies. Will tell Node that we will use Typescriptnpm install -d ts-node @types/node typescript @types/express nodemon#Installing Apollo Server and its associated modules. Will help us build our GraphQL#servernpm install apollo-server-express apollo-server-core express graphqlAfter this step, navigate to your app folder. Here, create the following files:
-
index.ts: Our main file. This will execute and run our Express GraphQL server -
dataset.ts: This will serve as our database, which will be served to the client -
Resolvers.ts: This module will handle user commands. We will learn about resolvers later in this article -
Schema.ts: As the name suggests, this file will store the schematics needed to send data to the client
In the end, your folder structure should look like so: 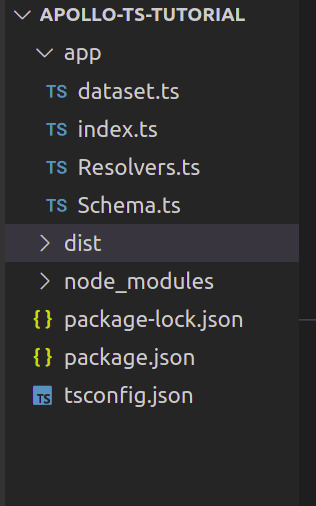
Creating our database
In this section, we will create a dummy database which will be used to send requested data. To do so, go to app/dataset.ts and write the following code:
let people: { id: number; name: string }[] = [ { id: 1, name: "Cassie" }, { id: 2, name: "Rue" }, { id: 3, name: "Lexi" },];export default people;- First, we created an array of objects called
people - This array will have two fields:
idof typenumber, andnameof typestring
Defining our schema
Here, we will now create a schema for our GraphQL server.
To put it simply, a GraphQL schema is a description of the dataset that clients can request from an API. This concept is similar to that of the Mongoose library. To build a schema, navigate to the app/Schema.ts file. There, write the following code:
import { gql } from "apollo-server-express"; //will create a schemaconst Schema = gql` type Person { id: ID! name: String } #handle user commands type Query { getAllPeople: [Person] #will return multiple Person instances getPerson(id: Int): Person #has an argument of 'id` of type Integer. }`;export default Schema; //export this Schema so we can use it in our projectLets break down this code piece by piece:
- The
Schemavariable contains our GraphQL schema - First, we created a
Personschema. It will have two fields:idof typeIDandnameof typeString - Later on, we instructed GraphQL that if the client runs the
getAllPeoplecommand, the server will return an array ofPersonobjects - Furthermore, if the user uses the
getPersoncommand, GraphQL will return a singlePersoninstance
Creating resolvers
Now that we have coded our schema, our next step is to define our resolvers. In simple terms, a resolver is a group of functions that generate response for a GraphQL query. In other words, a resolver serves as a GraphQL query handler.
In Resolvers.ts, write the following code:
import people from "./dataset"; //get all of the available data from our database.const Resolvers = { Query: { getAllPeople: () => people, //if the user runs the getAllPeople command //if the user runs the getPerson command: getPerson: (_: any, args: any) => { console.log(args); //get the object that contains the specified ID. return people.find((person) => person.id === args.id); }, },};export default Resolvers;- Here, we created a
Queryobject that handles all the incoming queries going to the server - If the user executes the
getAllPeoplecommand, the program will return all the objects present in our database - Moreover, the
getPersoncommand requires an argumentid. This will return aPersoninstance with the matching ID - In the end, we exported our resolver so that it could be linked with our app
Configuring our server
Were almost done! Now that we have built both our schema and resolver, our next step is to link them together. In index.js, write this block of code:
import { ApolloServer } from "apollo-server-express";import Schema from "./Schema";import Resolvers from "./Resolvers";import express from "express";import { ApolloServerPluginDrainHttpServer } from "apollo-server-core";import http from "http";async function startApolloServer(schema: any, resolvers: any) { const app = express(); const httpServer = http.createServer(app); const server = new ApolloServer({ typeDefs: schema, resolvers, //tell Express to attach GraphQL functionality to the server plugins: [ApolloServerPluginDrainHttpServer({ httpServer })], }) as any; await server.start(); //start the GraphQL server. server.applyMiddleware({ app }); await new Promise<void>((resolve) => httpServer.listen({ port: 4000 }, resolve) //run the server on port 4000 ); console.log(`Server ready at http://localhost:4000${server.graphqlPath}`);}//in the end, run the server and pass in our Schema and Resolver.startApolloServer(Schema, Resolvers);Lets test it out! To run the code, use this Bash command:
npx nodemon app/index.ts This will create a server at the localhost:4000/graphql URL.
Here, you can see your available schemas within the UI: 
This means that our code works! All of our GraphQL queries will go within the Operation panel.
To see it in action, type this snippet within this box:
#make a query:query { #get all of the people available in the server getAllPeople { #procure their IDs and names. id name }}To see the result, click on the Run button:  We can even search for a specific entity via the
 getPerson query:
query ($getPersonId: Int) { #the argument will be of type Integer getPerson(id: 1) { #get the person with the ID of 1 name id }}
Creating mutations
In the GraphQL world, mutations are commands that perform side effects on the database. Common examples of this include:
- Adding a user to the database When a client signs up for a website, the user performs a mutation to save their data in their database
- Editing or deleting an object If a user modifies or removes data from a database, they are essentially creating a mutation on the server
To handle mutations, go to your Schema.ts module. Here, within the Schema variable, add the following lines of code:
const Schema = gql` #other code.. type Mutation { #the addPerson commmand will accept an argument of type String. #it will return a 'Person' instance. addPerson(name: String): Person }`;Our next step is to create a resolver to handle this mutation. To do so, within the Resolvers.ts file, add this block of code:
const Resolvers = { Query: { //..further code.. }, //code to add: //all our mutations go here. Mutation: { //create our mutation: addPerson: (_: any, args: any) => { const newPerson = { id: people.length + 1, //id field name: args.name, //name field }; people.push(newPerson); return newPerson; //return the new object's result }, },};- The
addPersonmutation accepts anameargument - When a
nameis passed, the program will create a new object with a matchingnamekey - Next, it will use the
pushmethod to add this object to thepeopledataset - Finally, it will return the new objects properties to the client
Thats it! To test it out, run this code within the Operations window:
#perform a mutation on the servermutation($name: String) { addPerson(name:"Hussain") { #add a new person with the name "Hussain" #if the execution succeeds, return its 'id' and 'name` to the user. id name }}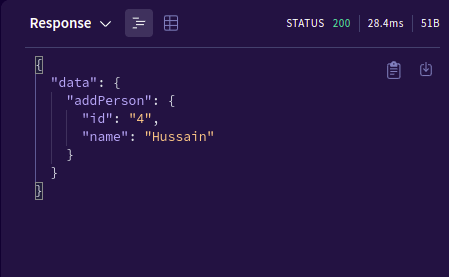 Lets verify if GraphQL has added the new entry to the database:
query { getAllPeople { #get all the results within the 'people' database. #return only their names name }}
Building our client
We have successfully built our server. In this section, we will build a client app using Next that will listen to the server and render data to the UI.
As a first step, initialize a blank Next.js app like so:
npx create-next-app@latest graphql-client --tstouch constants.tsx #our query variables go here.To perform GraphQL operations, we will use the graphql-request library. This is a minimal, open source module that will help us make mutations and queries on our server:
npm install graphql-request graphqlnpm install react-hook-form #to capture user inputCreating query variables
In this section, we will code our queries and mutations to help us make GraphQL operations. To do so, go to constants.tsx and add the following code:
import { gql } from "graphql-request";//create our queryconst getAllPeopleQuery = gql` query { getAllPeople { #run the getAllPeople command id name } }`;//Next, declare a mutationconst addPersonMutation = gql` mutation addPeople($name: String!) { addPerson(name: $name) { #add a new entry. Argument will be 'name' id name } }`;export { getAllPeopleQuery, addPersonMutation };- In the first part, we created the
getAllPeopleQueryvariable. When the user runs this query, the program will instruct the server to get all the entries present in the database - Later on, the
addPersonmutation tells GraphQL to add a new entry with its respectednamefield - In the end, we used the
exportkeyword to link our variables with the rest of the project
Performing queries
In pages/index.ts, write the following code:
import type { NextPage, GetStaticProps, InferGetStaticPropsType } from "next";import { request } from "graphql-request"; //allows us to perform a request on our serverimport { getAllPeopleQuery } from "../constants"; import Link from "next/link";const Home: NextPage = ({ result, //extract the 'result' prop }: InferGetStaticPropsType<typeof getStaticProps>) => { return ( <div className={styles.container}> {result.map((item: any) => { //render the 'result' array to the UI return <p key={item.id}>{item.name}</p>; })} <Link href="/addpage">Add a new entry </Link> </div> );};//fetch data from the serverexport const getStaticProps: GetStaticProps = async () => { //the first argument is the URL of our GraphQL server const res = await request("http://localhost:4000/graphql", getAllPeopleQuery); const result = res.getAllPeople; return { props: { result, }, // will be passed to the page component as props };};export default Home;Here is a breakdown of this code piece by piece:
- In the
getStaticPropsmethod, we instructed Next to run thegetAllPeoplecommand on our GraphQL server - Later on, we returned its response to the
Homefunctional component. This means that we can now render the result to the UI - Next, the program used the
mapmethod to render all of the results of thegetAllPeoplecommand to the UI. Each paragraph element will display thenamefields of each entry - Furthermore, we also used a
Linkcomponent to redirect the user to theaddpageroute. This will allow the user to add a newPersoninstance to the table
To test out the code, run the following terminal command:
npm run devThis will be the result:  Our GraphQL server even updates in real time.
Performing mutations
Now that we have successfully performed a query, we can even perform mutations via the graphql-request library.
Within your pages folder, create a new file called addpage.tsx. As the name suggests, this component will allow the user to add a new entry to the database. Here, start by writing the following block of code:
import type { NextPage, GetStaticProps, InferGetStaticPropsType } from "next";import { request } from "graphql-request";import { addPersonMutation } from "../constants";const AddPage: NextPage = () => { return ( <div> <p>We will add a new entry here. </p> </div> );};export default AddPage;In this piece of code, we are creating a blank page with a piece of text. We are doing this to ensure whether our URL routing system works.  This means that we used routing successfully! Next, write this snippet in your
 addpage.tsx file:
import { useForm } from "react-hook-form";const { register, handleSubmit } = useForm();//if the user submits the form, then the program will output the value of their input.const onSubmit = (data: any) => console.log(data);return ( <div> <form onSubmit={handleSubmit(onSubmit)}> {/*Bind our handler to this form.*/} {/* The user's input will be saved within the 'name' property */} <input defaultValue="test" {...register("name")} /> <input type="submit" /> </form> </div>);This will be the output: 
Now that we have successfully captured the users input, our last step is to add their entry to the server.
To do so, change the onSubmit handler located in pages/addpage.tsx file like so:
const onSubmit = async (data: any) => { const response = await request( "http://localhost:4000/graphql", addPersonMutation, data ); console.log(response);};- Here, were performing a mutation request to our GraphQL server via the
requestfunction - Furthermore, we also passed in the
addPersonmutation command to our request header. This will tell GraphQL to perform theaddMutationaction on our server
This will be the result: 
And were done!
Conclusion
Here is the full source code of this project.
In this article, you learned how to create a full-stack app using GraphQL and TypeScript. They both are extremely crucial skills within the programming world since they are in high demand nowadays.
If you encountered any difficulty in this code, I advise you to deconstruct the code and play with it so that you can fully grasp this concept.
Thank you so much for reading! Happy coding!
200s only Monitor failed and slow network requests in production
Deploying a Node-based web app or website is the easy part. Making sure your Node instance continues to serve resources to your app is where things get tougher. If youre interested in ensuring requests to the backend or third party services are successful, try LogRocket.
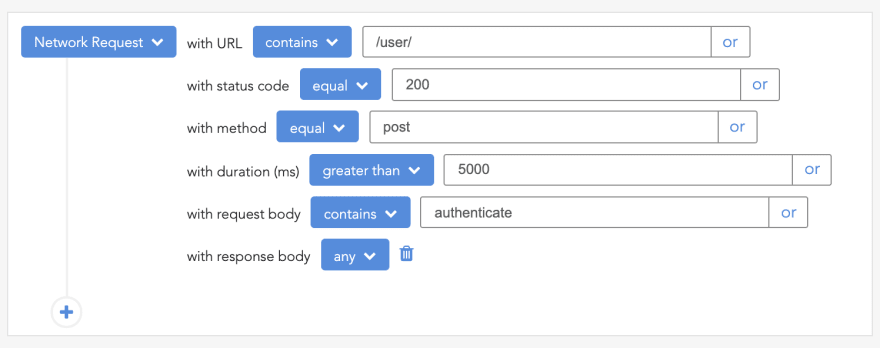
LogRocket is like a DVR for web and mobile apps, recording literally everything that happens while a user interacts with your app. Instead of guessing why problems happen, you can aggregate and report on problematic network requests to quickly understand the root cause.
Original Link: https://dev.to/logrocket/build-a-graphql-app-in-nodejs-with-typescript-and-graphql-request-l19
Dev To
More About this Source Visit Dev To