
An Interest In:
Web News this Week
- April 27, 2024
- April 26, 2024
- April 25, 2024
- April 24, 2024
- April 23, 2024
- April 22, 2024
- April 21, 2024
Some of Our Sources
- Techcrunch
- Team Treehouse
- Smashing Apps
- Creative Curio
- Naldz Graphics
- Reencoded
- Freelance Switch
- Web Resource Source
- Willems Lab
- Daily Now
Help Webnuz
Referal links:
Textual: The Definitive Guide - Part 2.
Greetings, everyone. In this article, we will pick up where we left off and continue our series on demystifying every aspect of Textual. In Part 1, we interacted with various Textual components such as views and widgets. In addition, we were able to customize the way these components are laid out on the terminal while retaining a very high level of abstraction working with fully-featured widgets. We also introduced the concepts of widget event handlers, watchers, and reactive attributes/properties, but we didn't elaborate much. And that's what we are going to focus on in this article.
To ensure that we are all on the same page, this tutorial assumes that you are already familiar with object-oriented programming. If not, consider reading one of the most comprehensive tutorials out there about this topic.
Spoilers ahead: By the end of this article, you will learn how to create a custom input field in Textual, as shown in the figure below.

Custom Input Fields.
Table Of Content (TOC).
- Events and Event Handlers
- Add Event Handlers To Custom Widgets
- Reactive Attributes
- Putting It All Together
- Wrapping Up
Events and Event Handlers
Go To TOC.
An event is a signal that something interesting has happened. It can be triggered by different actions such as clicking on a button, typing on the keyboard, or making a mouse movement. Events are used to control and respond to what the user does with their Input/Output devices.
In Textual, events are being fired all the time. What makes Textual interesting is the fact that it has an event dispatch and handling that are reasonable and not complicated. Moreover, Textual is asynchronous, which means it provides an event loop that your program executes when you call the run method on the main app. This method is constantly cycling through events such as keyboard entry and mouse motion, among many others. When something interesting happens, it does the necessary processing to ensure that your code knows the event has happened and has a chance to respond.
So if an event happens, an event handler responds to what happened. In Textual, event handlers are just functions that usually take one argument: the event that occurred. An event handler can react to changes in the state of an object.
Add Event Handlers To Custom Widgets
Go To TOC.
As with most Textual events, you can hook up event handlers in your program by implementing an on_<event_name> method. Let's start by creating an app.py file. Then add the following code definition:
from textual.app import Appfrom textual.widget import Widgetclass InputText(Widget): ...class MainApp(App): ...if __name__ == '__main__': MainApp.run()The second line of code imports the Widget class to create a custom widget by extending it. Inheritance is used to create a new subclass InputText from Widget with no extra logic.
If you now run python app.py or poetry run python app.py, it will behave the same way as the Basic Textual App Example of the previous article. Now, we are going to add custom logic to these classes.
The event handler is accessed as a property on the widget object with the on_ prefix. There are specific types of events for different widgets; for a button like a widget, the click event is kicked off by a mouse press.
Now let's add this event handler to our InputText widget.
import sysfrom textual.app import Appfrom textual.widget import Widgetclass InputText(Widget): def on_click(self) -> None: sys.exit(0)class MainApp(App): async def on_mount(self) -> None: await self.view.dock(InputText())if __name__ == '__main__': MainApp.run()As you can tell, we added an on_click and an on_mount event handlers to our classes. The latter was used to attach/dock the InputText widget to the terminal and make it visible. This event handler is kicked off when you first run your Textual app. Think of it as a pre-processing step to make the widgets ready for rendering. It is an async function since Textual is an asynchronous framework.
If you run this example, your terminal will look like the following:
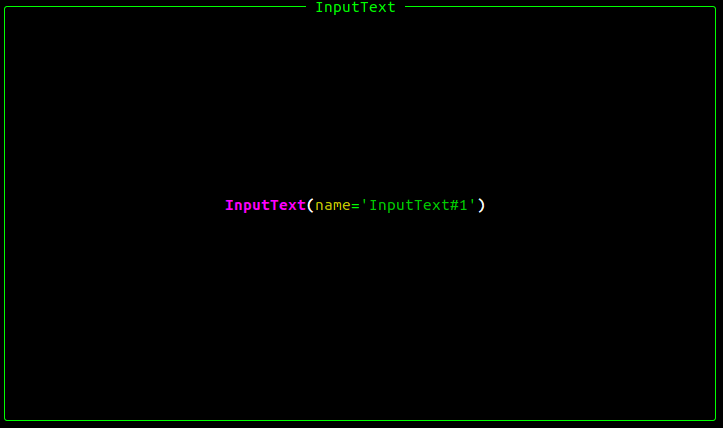
A raw rich panel.
As you can see, our InputText looks like a raw placeholder because, by default, widgets are rendered as rich panels. However, we will add some custom rendering capabilities by overriding this method.
Now, if you click anywhere on the widget, it will fire a click event which will trigger the on_click event handler. Then it executes the contents of that method sys.exit(0), which will cause our program to exit.
Everything behaves as expected. Now we need to change the rendering of this widget to simulate the concept of a text box where a user can type in the text. To do so, we will add the following render function:
import sysfrom rich.align import Alignfrom rich.box import DOUBLEfrom rich.console import RenderableTypefrom rich.panel import Panelfrom rich.style import Stylefrom rich.text import Textfrom textual.app import Appfrom textual.widget import Widgetclass InputText(Widget): def on_click(self) -> None: sys.exit(0) def render(self) -> RenderableType: renderable = Align.left(Text("", style="bold")) return Panel( renderable, title="input_text", title_align="center", height=3, style="bold white on rgb(50,57,50)", border_style=Style(color="green"), box=DOUBLE, )class MainApp(App): async def on_mount(self) -> None: await self.view.dock(InputText())if __name__ == "__main__": MainApp.run()
Custom input field.
Now, we need to allow the user to enter text into this widget which can be done by adding a Reactive attribute in the InputText class to store the value of the pressed keys on the keyboard and then render the value of that attribute on the widget. This is a good occasion to delve into the Textual concept of Reactive attributes/properties.
Reactive Attributes
Go To TOC.
Textual Reactive attributes/properties are somewhat magical. At their core, Reactive attributes are implemented using the concept of python discriptors. In Textual, properties have type-validating features using the validate_<attribute_name> notation. For instance, you can always be sure that a string is being stored for a given attribute that does not contain an integer value. Another example, you can ensure that a number is within a specific range. To illustrate this, let's take the following snippet of code:
import sysfrom rich.align import Alignfrom rich.box import DOUBLEfrom rich.console import RenderableTypefrom rich.panel import Panelfrom rich.style import Stylefrom rich.text import Textfrom textual.app import Appfrom textual.reactive import Reactivefrom textual.widget import Widgetclass InputText(Widget): # The property is created at the class level as an instance of the Reactive class. title: Reactive[RenderableType] = Reactive("") def __init__(self, title: str): super().__init__(title) self.title = title def validate_title(self, value) -> None: try: return value.lower() except (AttributeError, TypeError): raise AssertionError('title attribute should be a string.') def on_click(self) -> None: sys.exit(0) def render(self) -> RenderableType: renderable = Align.left(Text("", style="bold")) return Panel( renderable, title=self.title, title_align="center", height=3, style="bold white on rgb(50,57,50)", border_style=Style(color="green"), box=DOUBLE, )class MainApp(App): async def on_mount(self) -> None: await self.view.dock(InputText("input field"))if __name__ == "__main__": MainApp.run()If you run the above program, it will fail and throw the following exception:
AssertionError: title attribute should be a string.And that's because of the line await self.view.dock(InputText(4096)) that tries to instantiate the InputText class with an integer and assign that value to title at this line of code self.title = title. This line will trigger the validate_title function to run its inner code, making the program raise an AttributeError because, as you may know, an integer doesn't have a lower method. This way, you ensure that your attribute values are being validated before assignment.
Interestingly enough, Textual Reactive Attributes can fire events when their values change. This can be extremely useful, as you will see in subsequent articles. The fired event can be handled by implementing a watch_<attribute_name> method.
Let's introduce another attribute called content to store the keys being entered by a user using a keyboard. We need to figure out how to update the content field when the user presses a key. But first, let's add a handler responsible for that event called on_key. Textual takes care of all sorts of keys available on your keyboard.
import sysfrom rich.align import Alignfrom rich.box import DOUBLEfrom rich.console import RenderableTypefrom rich.panel import Panelfrom rich.style import Stylefrom rich.text import Textfrom textual import eventsfrom textual.app import Appfrom textual.reactive import Reactivefrom textual.widget import Widgetclass InputText(Widget): title: Reactive[RenderableType] = Reactive("") content: Reactive[RenderableType] = Reactive("") def __init__(self, title: str): super().__init__(title) self.title = title def on_key(self, event: events.Key) -> None: self.content += event.key def validate_title(self, value) -> None: try: return value.lower() except (AttributeError, TypeError): raise AssertionError('title attribute should be a string.') def on_click(self) -> None: sys.exit(0) def render(self) -> RenderableType: renderable = Align.left(Text("", style="bold")) return Panel( renderable, title=self.title, title_align="center", height=3, style="bold white on rgb(50,57,50)", border_style=Style(color="green"), box=DOUBLE, )class MainApp(App): async def on_mount(self) -> None: await self.view.dock(InputText("input field"))if __name__ == "__main__": MainApp.run()Whenever you press a key, it will be appended to the content string variable. Now all you need to do is figure out how to reflect the value of this variable on the widget. As you may guess, this can be done by tweaking the render function as follows:
import sysfrom rich.align import Alignfrom rich.box import DOUBLEfrom rich.console import RenderableTypefrom rich.panel import Panelfrom rich.style import Stylefrom rich.text import Textfrom textual import eventsfrom textual.app import Appfrom textual.reactive import Reactivefrom textual.widget import Widgetclass InputText(Widget): title: Reactive[RenderableType] = Reactive("") content: Reactive[RenderableType] = Reactive("") def __init__(self, title: str): super().__init__(title) self.title = title def on_key(self, event: events.Key) -> None: self.content += event.key def validate_title(self, value) -> None: try: return value.lower() except (AttributeError, TypeError): raise AssertionError('title attribute should be a string.') def render(self) -> RenderableType: renderable = Align.left(Text(self.content, style="bold")) return Panel( renderable, title=self.title, title_align="center", height=3, style="bold white on rgb(50,57,50)", border_style=Style(color="green"), box=DOUBLE, )class MainApp(App): async def on_mount(self) -> None: await self.view.dock(InputText("input field"))if __name__ == "__main__": MainApp.run()If you run the above code and start typing on your keyboard, you will notice that it is not rendered yet. And that's because your terminal needs a focus by clicking on it. Now, the text will be reflected on the widget as shown below.

Custom input field.
You can add the ability to remove a letter by checking if the key being pressed is ctrl+h which is the backspace on your keyboard.
def on_key(self, event: events.Key) -> None: if event.key == "ctrl+h": self.content = self.content[:-1] else: self.content += event.keyPutting It All Together
Go To TOC.
Now, it is time to create a custom widget that has the following properties:
- If the widget is a text field like
username, print out the letter on the widget. - If the widget is a password field, hideout the letters being entered and display the character
*instead. - You can type out letters on the widget only if your mouse is hovering over it. This can be done using the
on_enterandon_leavehandlers.
Our final program is defined as follows:
from rich.align import Alignfrom rich.box import DOUBLEfrom rich.console import RenderableTypefrom rich.panel import Panelfrom rich.style import Stylefrom rich.text import Textfrom textual import eventsfrom textual.app import Appfrom textual.reactive import Reactivefrom textual.widget import Widgetclass InputText(Widget): title: Reactive[RenderableType] = Reactive("") content: Reactive[RenderableType] = Reactive("") mouse_over: Reactive[RenderableType] = Reactive(False) def __init__(self, title: str): super().__init__(title) self.title = title def on_enter(self) -> None: self.mouse_over = True def on_leave(self) -> None: self.mouse_over = False def on_key(self, event: events.Key) -> None: if self.mouse_over == True: if event.key == "ctrl+h": self.content = self.content[:-1] else: self.content += event.key def validate_title(self, value) -> None: try: return value.lower() except (AttributeError, TypeError): raise AssertionError("title attribute should be a string.") def render(self) -> RenderableType: renderable = None if self.title.lower() == "password": renderable = "".join(map(lambda char: "*", self.content)) else: renderable = Align.left(Text(self.content, style="bold")) return Panel( renderable, title=self.title, title_align="center", height=3, style="bold white on rgb(50,57,50)", border_style=Style(color="green"), box=DOUBLE, )class MainApp(App): async def on_load(self) -> None: await self.bind("ctrl+c", "quit", "Quit") async def on_mount(self) -> None: await self.view.dock(InputText("user_name"), edge="left", size=50) await self.view.dock(InputText("password"), edge="left", size=50)if __name__ == "__main__": MainApp.run()If you run the above snippet of code, it will generate the following output. You can switch between widgets by clicking on them.

Custom input fields.
Wrapping Up
Go To TOC.
Textual is an exciting TUI toolkit that you can use to create whatever type of terminal user interface. This article highlighted a few common practices for developing custom Textual widgets, such as an input field, hooking up event handlers, reactive attributes, handling keyboard and mouse events, etc.
There are many components and concepts about Textual that we haven't covered yet. So if you are interested, make sure to check out the Textual repo for examples and tutorials, and don't forget to stay tuned to this blog. I recently found that the creator of Textual has a blog where he documents all the major changes, releases about Textual. I also discovered a css branch for Textual where you can use CSS to customize your widgets. That's a pretty impressive feature, which will be the topic of future articles. Imagine creating a web browser within your terminal using Textual; that would be extremely sick!
As always, this article is a gift to you, and you can share it with whomever you like or use it in any way that would be beneficial to your personal and professional development. By supporting this blog, you keep me motivated to publish high-quality content related to python in general and textual specifically. Thank you in advance for your ultimate support!
You are free to use the code in this article, which is licensed under the MIT licence, as a starting point for various needs. Dont forget to look at the readme file and use your imagination to make more complex apps meaningful to your use case.
Happy Coding, folks; see you in the next one.
Original Link: https://dev.to/wiseai/textual-the-definitive-guide-part-2-6h8
Dev To
More About this Source Visit Dev To