
An Interest In:
Web News this Week
- April 27, 2024
- April 26, 2024
- April 25, 2024
- April 24, 2024
- April 23, 2024
- April 22, 2024
- April 21, 2024
Some of Our Sources
- Mashable
- Smashing Magazine
- Web Designer Depot
- My Ink Blog
- Web Design Ledger
- Specky Boy
- Android Dissected
- Codrops
- Willems Lab
- Hashedout
Help Webnuz
Referal links:
Tutorial: Play with Geth (Go Ethereum)
Interact with a command-line tool for running a private Ethereum blockchain network (MacOS)
This tutorial is meant for those with a basic knowledge of Ethereum and smart contracts, who have some knowledge of HTML and JavaScript, but who are new to dApps.
The purpose of building this blog is to write down the detailed operation history and my memo for learning the dApps.
If you are also interested and want to get hands dirty, just follow these steps below and have fun!~
Prerequisites
- MacOS
- CLI with Homebrew installed
- Coding IDE
Intro & Review
In this tutorial we will be covering:
- Install Geth
- Run Geth
- Create new accounts
- Create genesis block
- Deploy private blockchain
- Mining Ethereum blocks
- Sending Tokens
What is Geth?
Geth(Go Ethereum) is a command-line interface for running Ethereum nodes implemented in Go Language. Using Geth you can join the Ethereum network, transfer ether between accounts or even mine ethers.
Getting started
Install Geth
We should first install Geth using the following CLI command:
brew tap ethereum/ethereumbrew install ethereumThen we can navigate to our favourite directory, create a folder with your favourite name (e.g. named my-private-blockchain)and navigate into the folder using the following command:
mkdir private-blockchain-gethcd private-blockchain-geth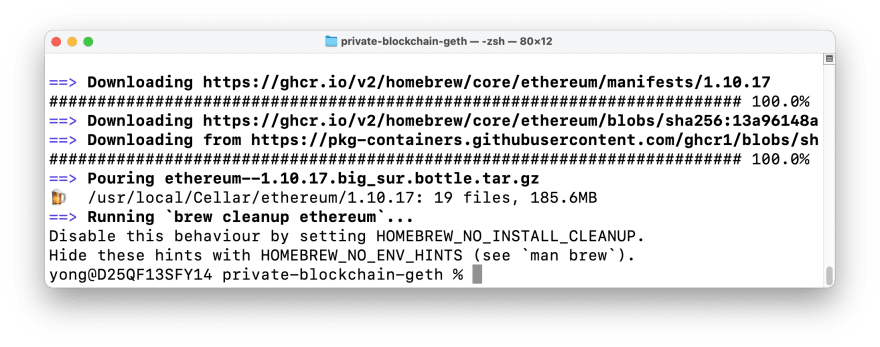
Run Geth
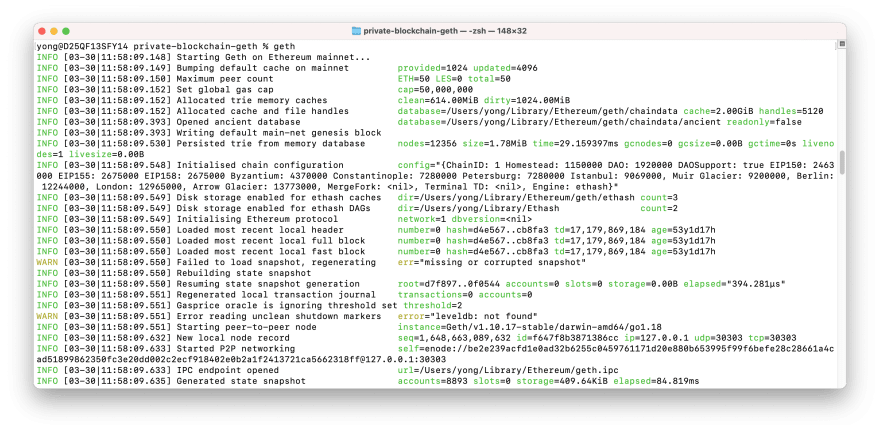
We can then run the following command to see if Geth has been installed successfully:
gethIf your CLI gets information like mine, congrats! You are on the track now. Geth is attempting to download the entire blockchain data into your PC, and the data can take up a ton of disk space. Just Control C to stop the command.
If you are very interested in what has happened just now, you can open a new CLI and navigate to the following directory to see the history logs:
cd Library/Ethereum/geth/ls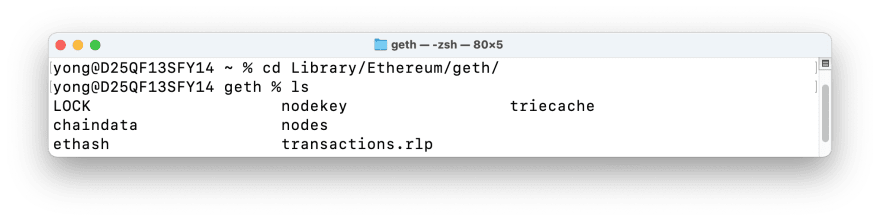
Create new accounts
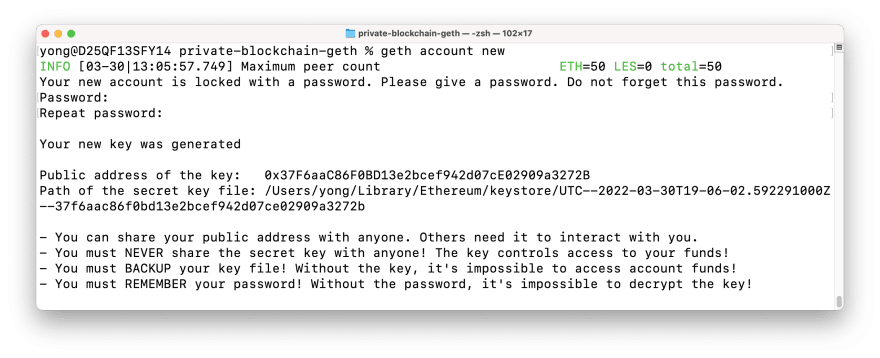
Let's run the following command to create the first account on our private blockchain:
geth account newThis command will then prompt us to enter a password to ensure security. After entering the password two times, our account 0 has been created.

Run geth account new again, to create our Account 1:
Create genesis block
We need to create a genesis block - the first block of the blockchain - to initialize our blockchain network.
Next let's open the folder /private-blockchain-geth using our favourite IDE (Mine is VSCode, and currently there is no file in this directory), create a file named genesis-block.json, copy and paste the following code to this file:
{ "config": { "chainId": 15, "homesteadBlock": 0, "eip150Block": 0, "eip155Block": 0, "eip158Block": 0, "byzantiumBlock": 0, "constantinopleBlock": 0, "petersburgBlock": 0, "ethash": {} }, "difficulty": "1", "gasLimit": "8000000", "alloc": {} }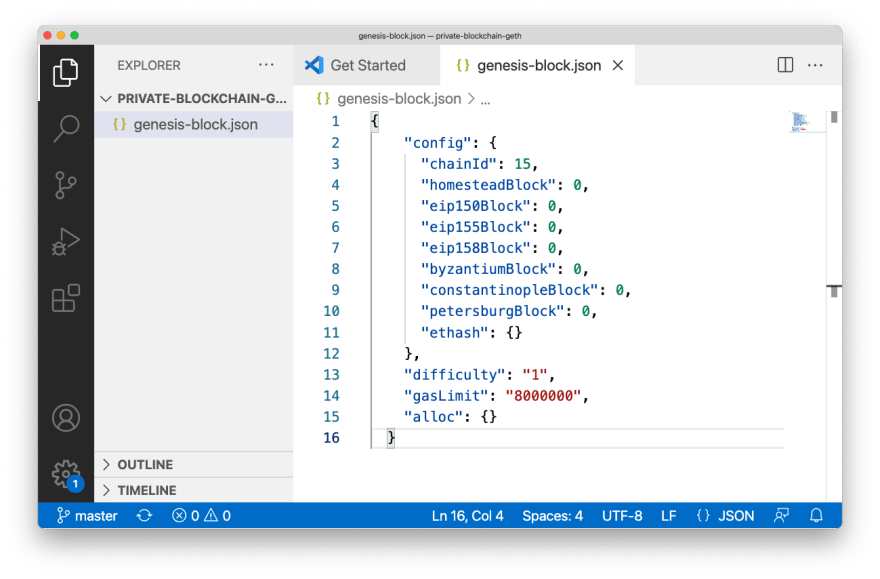
The next step is to initialize the genesis block using this command:
geth --datadir . init genesis-block.json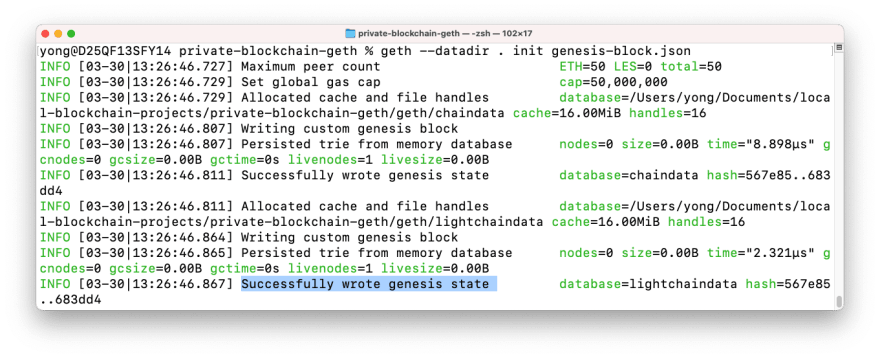
Deploy private blockchain
The log "Successfully wrote genesis state" indicates that we have created our first block correctly. Now we can deploy our blockchain using the following command:
geth --allow-insecure-unlock --datadir . --keystore ~/Library/ethereum/keystore --networkid 4568 --http --http.addr '0.0.0.0' --http.corsdomain "*" --http.port 8502 --http.api 'personal,eth,net,web3,txpool,miner' --mine --miner.etherbase=YOUR_ACCOUNT_0_ADDRESSNote: Replace YOUR_ACCOUNT_0_ADDRESS with your account 0 Public address of the key


We have kicked off an interactive session that keeps printing new INFO of our blockchain. Leave it running and let's start a new CLI, navigate to the same directory /private-blockchain-geth and initialize Geth JavaScript console by running the following command:
geth attach geth.ipc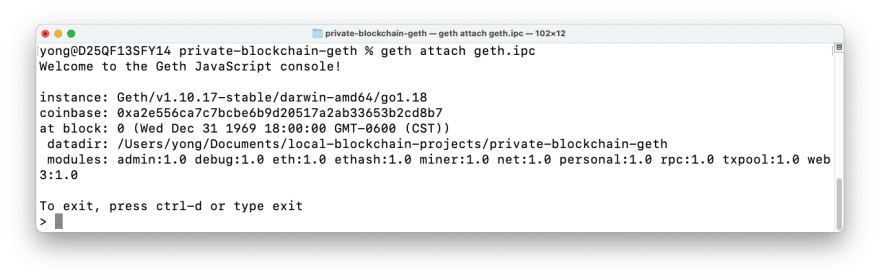
Mining Ethereum blocks
To begin mining our blockchain, we can run:
miner.start()Let's allow it to run for a while, and then stop the mining by typing:
miner.stop()Now We have rewarded some tokens for mining new blocks. We can verify this by running the following command:
eth.getBalance(eth.accounts[0])
Sending Tokens
Run the following command to finish the authentication process of account 0 before sending tokens:
personal.unlockAccount(eth.accounts[0])Input the password we have set to unlock account 0: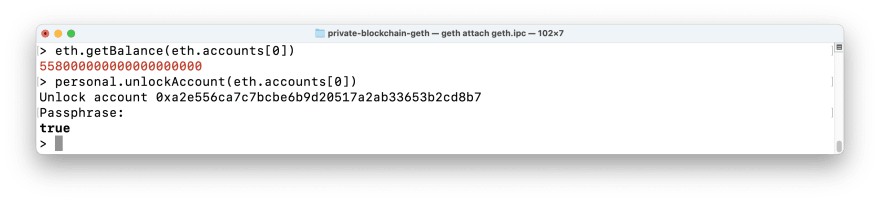
Now let's transfer tokens from account 0 to account 1 by running this command:
eth.sendTransaction({from: eth.accounts[0], to: eth.accounts[1], value: 500000})Value here is in Wei (Where 1 ETH equals 1 x 10 ^ 18 Wei)
We should get a green transaction hash if the transaction has been done correctly.
Since we had stopped the mining process before we were creating the transaction, this transaction is added to the memory pool rather than being added to the blockchain. At this point, account 1 cannot receive the transferred token if we run:
eth.getBalance(eth.accounts[1])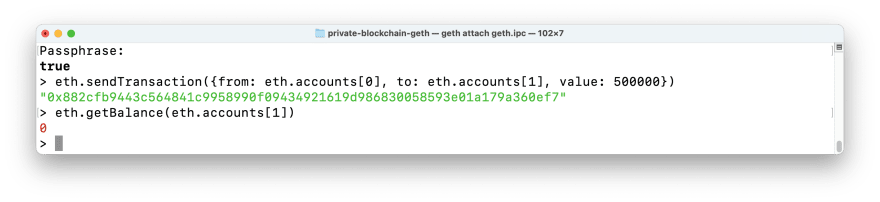
Let's start the mining process again for a while:
And run the following again:
eth.getBalance(eth.accounts[1])Finally transferred tokens have been received by account 1:

Pretty COOL!
References
https://dev.to/heydamali/a-guide-to-private-ethereum-mining-with-geth-go-ethereum-13ol
https://geth.ethereum.org/docs/interface/managing-your-accounts
Original Link: https://dev.to/yongchanghe/tutorial-play-with-geth-go-ethereum-4gic
Dev To
More About this Source Visit Dev To