
An Interest In:
Web News this Week
- April 27, 2024
- April 26, 2024
- April 25, 2024
- April 24, 2024
- April 23, 2024
- April 22, 2024
- April 21, 2024
Some of Our Sources
- Technology Review
- Simplebits
- Spoon Graphics
- Smashing Magazine
- Creative Curio
- Reencoded
- Spyre Studios
- Android Dissected
- Codrops
- TechPowerUp
Help Webnuz
Referal links:
Google Cloud Fundamentals Part 3
Managed Services

IAAS

PAAS

Containers Basics
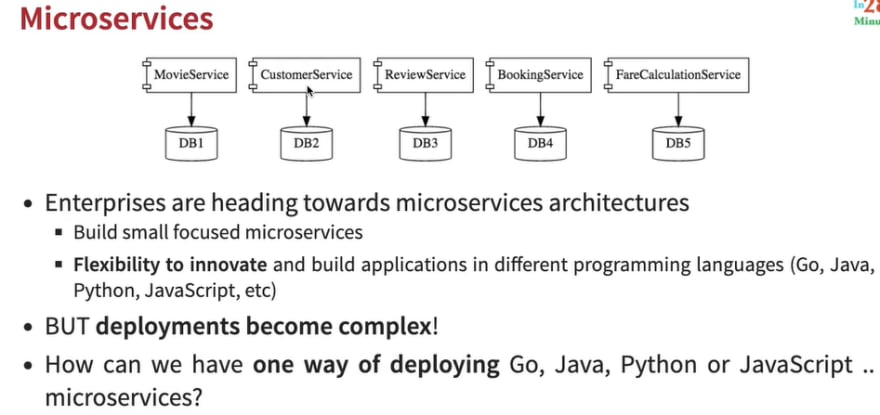
In a virtual machine in addition to hostOS, there is guestOS.
Docker is cloud-neutral and you can run it anywhere9AWS, GCP, Azure)

Container Orchestration
This basically makes images based on your needs. Ex: Kubernetes.
Benefits: They can provide autoscaling, help one service find another, load balancing, provide health checks, zero downtime deployments.

Serverless

SAAS

Shared Responsibility

GCP Services based on Managed

App Engine

Compute engine vs App Engine

Types of App Engine: 1) Standard 2) Flexible

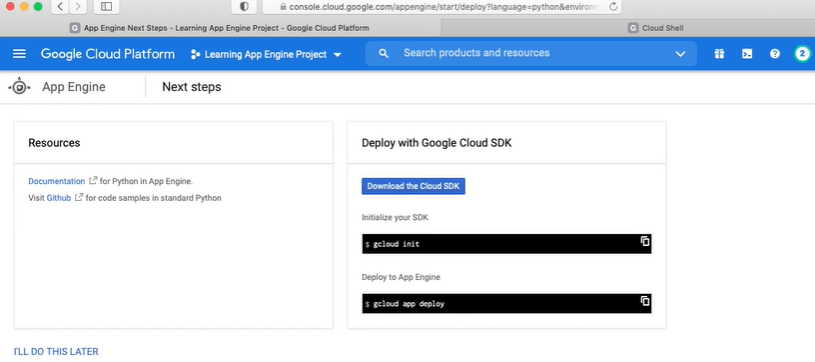
Let's create an APP engine
1) First create a project under your GCP account and enter into it.
2) Go to "App Engine Admin API" and enable it.
3) Go to "App Engine" and create the Application.
4) Select the default options and create app.
5) Select the terminal and then press "Open editor". Then add a folder named "default-service" and add "app.yaml" with these codes:
runtime: python39a folder named "main.py":
from flask import Flaskapp = Flask(__name__)@app.route('/')def hello(): return 'My Default Service - V1'a file named "requirements.txt" with these codes:
Flask==2.0.2Now let's use the terminal to configure to our desired project.
cd default-servicegcloud config set project <Project ID>Now deploy the app:
gcloud app deployand press Y. You may see this error

Here while deploying there was a cloudbuild service account was automatically created which need the permission of 'Storage Object Viewer" as it will work with the store.
SO go to IAM & Admin and give this cloudbuild service account a role of Storage Object Viewer.

Now you can deploy things perfectly. You can check out all of the services created with these codes:
gcloud app services listgcloud app versions listgcloud app instances listNote: When we deployed the app for the first time,gcp automatically assigned us the version number. now let's change code in main.py and give it a new version and deploy.
main.py will have:
from flask import Flaskapp = Flask(__name__)@app.route('/')def hello(): return 'My Default Service - V2'Now go to terminal and write
gcloud app deploy --version=v2Now a new version will be deployed and all traffic will be splitted there. Let's check it from this code:
gcloud app versions listYou can see it here. 
You can check the link to check the old version and also current version.
See new version link:
gcloud app browseTo check old version's link which is still running but not serving infront:
gcloud app browse --version <version id>Google Kubernetes Engine(GKE)

Let's create a cluster using GKe:
- Create a project and enter into it.
- Enable API from "Kubernetes Engine API"
- Go to Kubernetes Engine and press Create cluster. You may see something like this

The standard mode lets you manage everything by yourself but Autpilot mode helps you managing them. You don't need to worry that much.

This is what autopilot does. For now, select Standard mode and Configure.
Give your cluster a name

Let's connect our project to cloudshell:
gcloud config set project <project id>Now connecting our cluster with cloud shell project.
gcloud container clusters get-credentials <cluster name> --zone us-central1-c --project <project id>Let's deploy a microservice (ex: hello-world-rest-api) in this cluster
kubectl create deployment hello-world-rest-api --image=in28min/hello-world-rest-api:0.0.1.RELEASENow check the deployment:
kubectl get deploymentTo access the deployment, you need to expose it. Exposing using load balacner:
kubectl expose deployment hello-world-rest-api --type=LoadBalancer --port=8080Now we can check the deployment we created:
kubectl get services
NOte: Exposing a deployment == service.
Now send a curl request to the External IP of the service you just created.
curl <External IP>:8080/hello-worldI your browser, paste this and see the exposed microservice
:8080/hello-world
Now let's increase our instances:
kubectl scale deployment hello-world-rest-api --replicas=3scaled the deployment to 3 instances.
Now check the status of it:
kubectl get deploymentnow we can see 3 instances which as actually called pods. let's see each of them:
kubectl get pods
When creating kubernetes cluster, we had 3nodes just.Lets scale down to 2:
gcloud container clusters resize my-cluster --node-pool default-pool --num-nodes=2 --zone=us-central1-cNote: you need to give your specific node pool from your cluster and also zone already selected.

You can now see 2 nodes only

Let's auto scale the based on cpu utilization and set max instances to be 4.
kubectl autoscale deployment hello-world-rest-api --max=4 --cpu-percent=70Let's autoscale Kubernetes cluster:
gcloud container clusters update <cluster name> --enable-autoscaling --min-nodes=1 --max-nodes=10Delete the cluster :
gcloud container clusters deleteDelete services:
kubectl delete service <service name>Delete deployment:
kubectl delete deployment <deployment name>Now let's delete the cluster once we are within our project:
gcloud container clusters delete <cluster name> --zone <zone>Cloud Function

Update: Max: 60min (3600sec)
Let's create a Cloud Function:
Enable Cloud Build API
- Search for "Cloud Function" and press "CREATE FUNCTION".
- choose 1st gen, give a name to the function, trigger type is HTTP, allow unauthenticated invocations, uncheck Require HTTPS and Save.
- Press Next
- You can choose the Runtime to default one (Node.js 16)
- All other things are going to be the same. Press DEPLOY.
Go to Testing and you can see your output.
Cloud Run
Container to deploy in seconds.
Let's create one:
- Go to Cloud Run and press CREATE SERVICE.
- Choose Container image from Container Image URL.
- Set the service name.
- Now allow all traffic and allow unauthenticated invocations.
- Press Create.

Original Link: https://dev.to/mitul3737/google-cloud-fundamentals-part-3-35le
Dev To
More About this Source Visit Dev To