An Interest In:
Web News this Week
- April 28, 2024
- April 27, 2024
- April 26, 2024
- April 25, 2024
- April 24, 2024
- April 23, 2024
- April 22, 2024
How to Preview in InDesign
Wondering how to preview a document in InDesign? Sometimes you want to see all the page markings in an InDesign document, such as margins, frame edges, and guides. Other times, you only want to see the page items that will print, without any distractions.
You can toggle between these two view modes—Normal and Preview—using a button or a shortcut.
What You'll Learn in This InDesign Preview Mode Tutorial
- How to see the normal view in InDesign
- How to see a preview in InDesign
- How to see a bleed preview in InDesign
What You'll Need
You won't need any specific assets to follow this InDesign preview mode tutorial, but here are the resources I used in case you want to create something similar:
1. How to See Normal View in InDesign
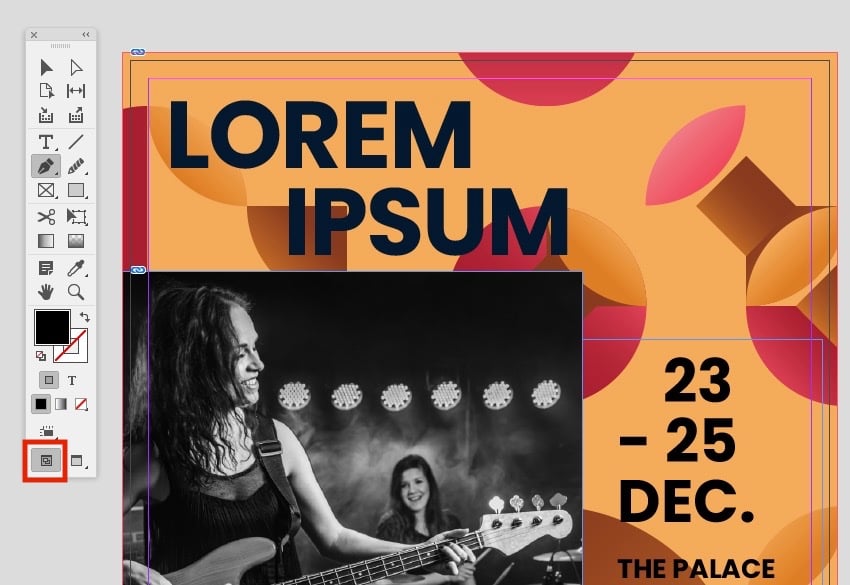
Click on Normal mode to reveal any “invisible” items in a document. In this mode, any guides that you’ve placed, margins you’ve set up, item frame edges, and other structural elements will be visible. This won’t affect how anything prints; it just changes what you see onscreen so you can work with page elements more easily.


2. How to See a Preview in InDesign
Click the Preview mode button at the bottom of the Tools panel to hide all the “framework” on the page and any non-printing elements. Toggle between these two view modes with the keyboard shortcut W—but only if your cursor isn’t currently in a text frame. That's how to view a preview in InDesign.


3. How to See a Bleed Preview in InDesign
Select the Bleed preview mode to see all visible/printing items plus any bleed (the portion of a design that runs past the edge of a page to be trimmed back). You can find that button by pressing and holding the Preview button to reveal a pop-out tool menu with extra view options.


Learning How to Preview in InDesign Is That Easy!
Being able to see your work without all the distractions on the InDesign page is as easy as toggling the Preview mode on and off. Now that you know how to preview a document in InDesign, you’ll find yourself jumping back and forth between the modes frequently as you work.
For more InDesign tips and tricks, check out these tutorials and videos from the Envato Tuts+ YouTube channel:


How to Create a Quick Rainbow Pride Text Effect in Adobe InDesign


Quick Tip: Create a Highlighted Text Effect With Adobe InDesign


The Beginner’s Quick-Start Guide to InDesign (Tutorials, Tips & Resources)


How to Curve Text in InDesign


How to Create Type on a Path in InDesign


Quick Tip: Using the Eyedropper Tool in Adobe InDesign


Quick Tip: Troubleshooting Font Problems in Adobe InDesign


Quick Tip: Creating a Custom Text Box Using Type and InDesign
Original Link: https://design.tutsplus.com/tutorials/how-to-preview-in-indesign--cms-38638
TutsPlus - Design
 TutsPlus+ is a blog/Photoshop site made to house and showcase some of the best Photoshop tutorials around.
More About this Source Visit TutsPlus - Design

