
Some of Our Sources
- Mashable
- Web Designer Wall
- Smashing Magazine
- Creative Curio
- Web Designer Depot
- Naldz Graphics
- CSS Globe
- Specky Boy
- Android Headlines
- Daily Now
Help Webnuz
Referal links:
Creating a custom VSCode Terminal Profile for using Rosetta on an M1 Mac (Apple Silicon)
Why do this?
Many programs and packages still do not support the ARM architecture used on the new Apple M1 chip.
If you are a developer dealing with older codebases, you may have already had issues installing npm dependencies or running specific tools.
Luckily, Apple provides us with the Rosetta emulation layer.
It enables us to emulate the x86 architecture to run all the programs made for older Macs, with a little performance decrease when compared to apps optimized for M1.
Rosetta Terminal
When installing build tools like CocoaPods, you have to run your whole terminal session with Rosetta enabled.
A prevalent practice to achieve this is to create a copy of the Terminal.app, click "Get Info" and enable the flag "Open using Rosetta". Now you have a second terminal that is always running as Rosetta.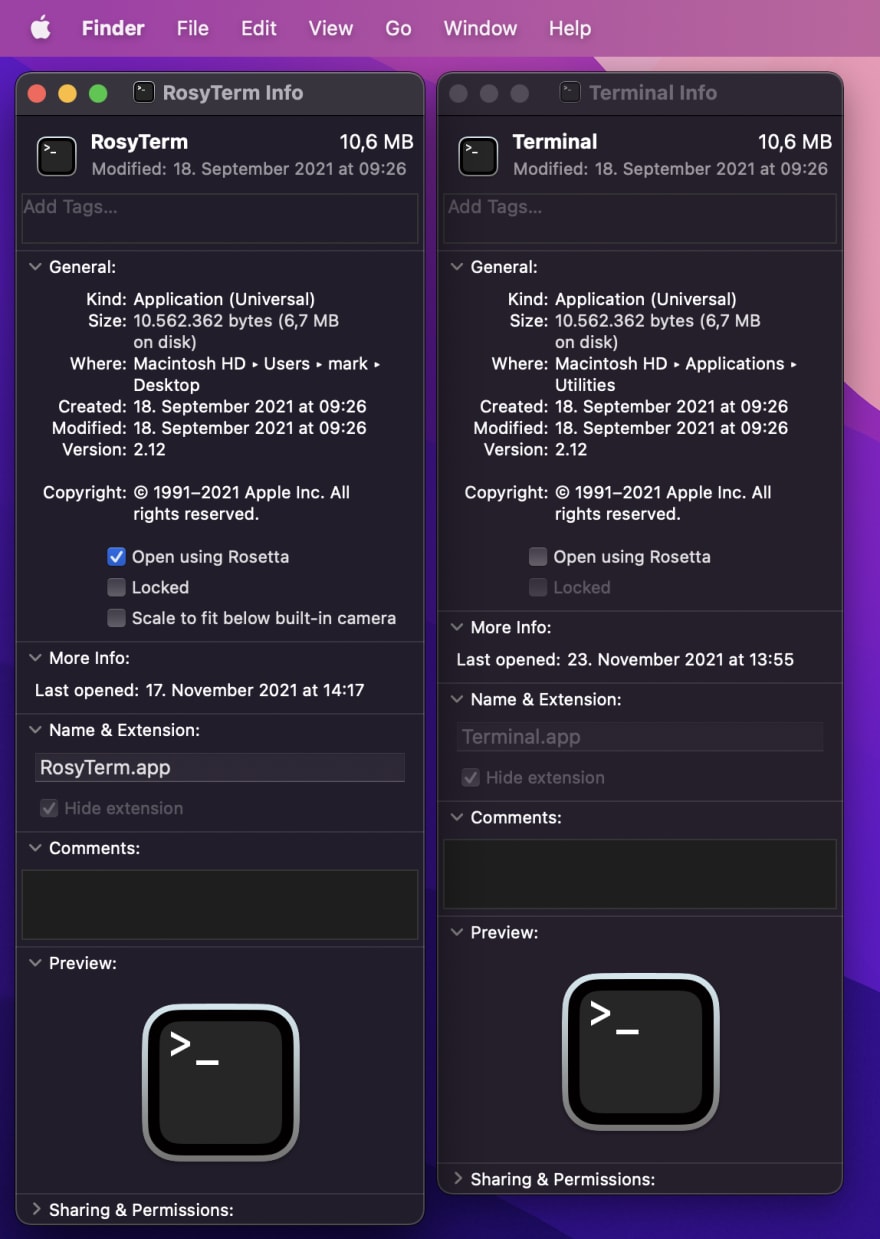
How to do this in VSCode
I very much enjoy using the integrated Terminal in VSCode because I don't have to switch windows so often and can continue coding while running processes like building my app or installing dependencies.
How to create a custom terminal profile:
- Open Visual Studio Code
- Use
cmd+shift+pto open the Command Palette. - Type "Open Settings (JSON)" and press enter
In the settings.json file, search for the property
terminal.integrated.profiles.osx, it should look similar to this:"terminal.integrated.profiles.osx": { "bash": { "path": "bash", "args": ["-l"], "icon": "terminal-bash" }, "zsh": { "path": "zsh", "args": ["-l"] }, "fish": { "path": "fish", "args": ["-l"] }, "tmux": { "path": "tmux", "icon": "terminal-tmux" }, "pwsh": { "path": "pwsh", "icon": "terminal-powershell" }}Add this property:
"terminal.integrated.profiles.osx": { ...., "rosetta": { "path": "arch", "args": ["-x86_64", "zsh", "-l"], "overrideName": true }}Save the file
Tada! You now have a dedicated rosetta Terminal profile in VSCode
Click the dropdown arrow at the right side of your VSCode terminal. You should see the option "rosetta".

If it doesn't work or you have anything else you want to tell me, feel free to hit me up anytime on Twitter.
Original Link: https://dev.to/markwitt_me/creating-a-custom-vscode-terminal-profile-for-using-rosetta-on-an-m1-mac-apple-silicon-2gb2
Dev To
More About this Source Visit Dev To