
An Interest In:
Web News this Week
- April 1, 2024
- March 31, 2024
- March 30, 2024
- March 29, 2024
- March 28, 2024
- March 27, 2024
- March 26, 2024
Some of Our Sources
- Mashable
- Techcrunch
- Just Creative
- Smashing Apps
- Abduzeedo
- Vandelay Design
- You The Designer
- Specky Boy
- Web Resource Source
- Android Dissected
Help Webnuz
Referal links:
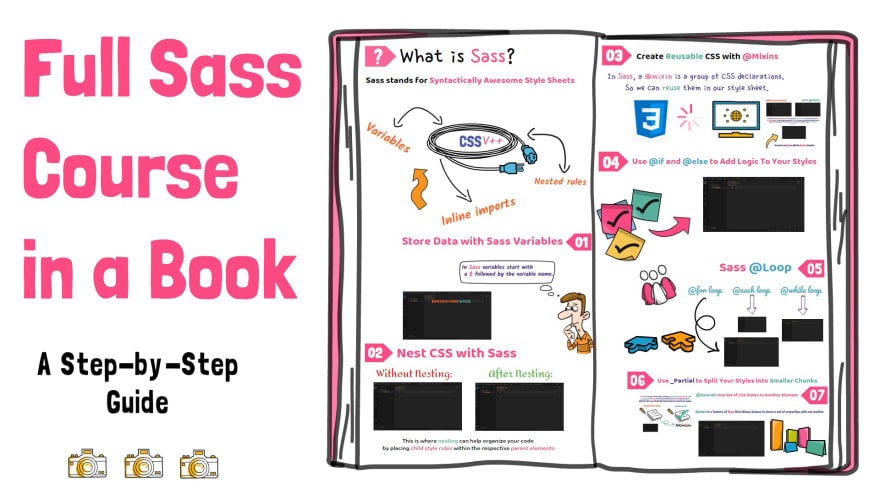
Sass Crash Course in a Book
What is Sass
Sass (which stands for Syntactically Awesome Style Sheets) is an extension of CSS that enables you to use things like variables, nested rules, inline imports, and more. It also helps to keep things organized and allows you to create style sheets faster. The benefit of using Sass is that sass is compatible with all versions of CSS.
Before continue, I encourage you to read this full article and then watch my sass crash course video which is only 15 minutes. This way your Sass memory will remain much longer than usual.
01. Store Data with Sass Variables
One feature of Sass that's different than CSS is it uses variables. They can be declared and set to store data as variables similar to JavaScript.
In JavaScript, variables are declared using let and const keywords. In Sass, variables start with a $ followed by the variable name.
Here is a real example
Let's say we need to use the success color 'green' in different places without repeating its name. So, we need to write code like this:
$success-color: green;Then we use this global variable in different places like this:
.success {color: $sucess-color;}h3 {color: $success-color;}One example where variables are useful is when a number of elements need to be the same color. If that color is changed, the only place to edit the code is the variable value.
02. Nest CSS with Sass
Sass will let you nest your CSS selectors in a way that follows the same visual hierarchy of your HTML which is a useful way of organizing a style sheet.
Normally, each element is targeted on a different line to style it, like so
Without Nesting:
footer {background-color: #000;}footer ul {list-style: none;}footer ul li {display: flex;}After Nesting:
footer { background-color: #000; ul { list-style: none; li { display: flex; } }}This is where nesting can help organize your code by placing child style rules within the respective parent elements:
03. Create Reusable CSS with Mixins
In Sass, a mixin is a group of CSS declarations. So we can reuse them in our style sheet.
As you know newer CSS features take time before they are fully compatible with all browsers. As features are adopted to browsers, CSS rules using them may need vendor prefixes. As an example b*ox-shadow* property.
Without Mixins:
.card { -webkit-box-shadow: 0px 0px 4px #fff; -moz-box-shadow: 0px 0px 4px #fff; -ms-box-shadow: 0px 0px 4px #fff; box-shadow: 0px 0px 4px #fff;}Imagine, we have different types of cards on our website with different effects of box-shadow. It's a lot of typing to re-write this rule to support all browsers.
This is where Mixins come in. Mixins are like JavaScript functions for CSS. Here is how to write one:
With Mixins:
@mixin box-shadow($x, $y, $blur, $c) { -webkit-box-shadow: $x $y $blur $c; -moz-box-shadow: $x $y $blur $c; -ms-box-shadow: $x $y $blur $c; box-shadow: $x $y $blur $c;}The definition starts with @mixin followed by a custom name. The parameters (the $x, $y, $blur, and $c in the example above) are optional. Now any time a box-shadow rule is needed, only a single line calling the mixin replaces having to type all the vendor prefixes.
We need to call @mixin with the @include directive. Have a look
.card { @include box-shadow(0px, 0px, 5px, #000);}.popup-card { @include box-shadow(2px, 2px, 10px, #000);}04. Use @if and @else to Add Logic To Your Styles
In Sass, @if @else statement is similar to JavaScript. It is very useful in Sass when we search for a specific condition before applying any styles. like so,
@mixin text-color($val) { @if $val == danger { color: red; } @else if $val == success { color: green; } @else { color: black; }}Then this is how we need to apply this mixin in different places:
h1 { @include text-color(danger); font-size: 2rem; // We can add additional value.}.sucess-text { @include text-color(success); font-weight: bold; // We can add additional CSS.}05. Sass @Loop
Sass has several loop options, much like other programming languages. They include the @for loop, @each loop, and @while loop. These loops are an incredibly powerful tool for generating CSS code because you can defer code generation into an iterable task.
Use @for to Create a Sass Loop:
In Sass, @for is used in two ways: "start through end" or "start to end". The main difference between these two methods is that the "start to end" excludes the end numbers as part of the count, and "start through end" includes the end number as part of the count.
Here is a **start through end* example:*
@for $i from 1 through 5 { .text-#{$i} { font-size: 10px * $i; }}The #{$i} part is the syntax to combine a variable ( i ) with text to make a string. So, when this Sass file is converted to CSS, it will looks like this:
.text-1 { font-size: 10px;}.text-2 { font-size: 20px;}.text-3 { font-size: 30px;}.text-4 { font-size: 40px;}.text-5 { font-size: 50px;}This is why @for is a powerful way to create a very long grid layout or any HTML elements with just one line of code. Now you have 5 different text sizes for your website available as CSS classes.
"start to end" is the same as "start through end". Just remember "start to end" excludes the end number as part of the count, like so:
@for $j from 1 to 6 { .text-#{$j} {font-size: 10px * $j}}//The result will look like this:.text-1 { font-size: 10px;}.text-2 { font-size: 20px;}.text-3 { font-size: 30px;}.text-4 { font-size: 40px;}.text-5 { font-size: 50px;}Here you can see the last count (6) is not included in this loop.
Use @each to Map Over Items in a List
The @each rule makes it easy to emit styles or evaluate code for each element of a list or each pair in a map. Once each iteration, the variable gets assigned to the current value from the list or map.
Have a look without map:
@each $color in red, green, yellow { .#{$color}-text {color: $color;}}Have a look with Map:
$colors: (color1: red, color2: green, color3: yellow);@each $key, $color in $colors { .#{$color}-text {color: $color;}}You can see, the map has slightly different syntax just like JavaScript. So, here the $key variable is needed to reference the keys in the map. If you don't supply $key, the compiled CSS would have color1, color2... and will never touch the actual value.
Both of the above code examples are converted into the following CSS:
.red-text { color: red;}.green-text { color: green;}.yellow-text { color: yellow;}Use @while Until a Condition is Met to Apply a Style:
In Sass, there is no difference with the @while directive compare to JavaScript. It creates CSS rules until a condition is met.
Earlier, we use the @for directive to create repeated tasks without duplication. It can be done with @while.
Have a look:
$i: 1;@while $i < 6 { .text-#{$i} { font-size: 10px * $i;} $i: $i + 1;}So, first, we take a variable and set it to 1. Next, we check the condition with the @while directive to create different sizes of text while $i is less than 6. Make sure to increment $i by 1 to avoid an infinite loop after setting the CSS rule.
06. Use _Partial to Split Your Styles into Smaller Chunks
A partial is a Sass file named with a leading underscore, i.e: _partial. scss . The underscore lets Sass know that the specific file is partial and will not be generated into a CSS file. Sass partials are meant to be used with the @import directive. This is a great way to group similar code into a module to it organized.
For example, if all your text color is saved in a separate sass file called "_textColor.scss", and you want them in the main.scss module, this is how to use them in the main Sass file:
@import 'textColor'Note that you don't need to specify the underscore and file extension in the import statement. Because Sass understands it is a partial. Once a partial is imported into a file, all text color, mixins, and other bunch of code are available to use.
07. Extends One Set of CSS Styles to Another Element
@extend is a feature of Sass that allows classes to share a set of properties with one another.
For example, the below block of CSS rules style .card class. it has some properties like background color, width, height.
.card { background-color: #fff; width: 200px; height: 150px; }Now you want another card called ".popup-card". It has the same properties just like the base ".card" class. But we need additional property in the popup card. It is possible to copy and paste from the base card to the target class. But there is a much better way to do it with the @extend directive.
Have a look:
.popup-card { @extend .card; border-radius: 5px; background-color: #349db;}As you can see, we can overwrite styles in the base class to the target class by reassigning the values. Otherwise, we will have the same properties as base ".card" as well as our additional styles.
Sass Crash Course In a Book in 15 Minutes:
If you like my article and explanation video, make sure to subscribe my YouTube channel to help me make more content like this.
Original Link: https://dev.to/codewithshahan/sass-crash-course-in-a-book-3kg2
Dev To
More About this Source Visit Dev To