
An Interest In:
Web News this Week
- April 26, 2024
- April 25, 2024
- April 24, 2024
- April 23, 2024
- April 22, 2024
- April 21, 2024
- April 20, 2024
Some of Our Sources
- Mashable
- Simplebits
- Joshua Blankenship
- Pearsonified
- Web Design Ledger
- CSS Globe
- Wal You
- Specky Boy
- CSS Tricks
- Willems Lab
Help Webnuz
Referal links:
Learning Go by examples: part 7 - Create a cross-platform GUI/Desktop app in Go
In previous articles we created an HTTP REST API server, a CLI, a Bot for Discord and even a game for Nintendo Game Boy Advance.
Golang is used a lot for CLI and microservices but what about creating a GUI/Desktop and a mobile application?
Initialization
We created our Git repository in the previous article, so now we just have to retrieve it locally:
$ git clone https://github.com/scraly/learning-go-by-examples.git$ cd learning-go-by-examplesWe will create a folder go-gopher-desktop for our CLI application and go into it:
$ mkdir go-gopher-desktop$ cd go-gopher-desktopNow, we have to initialize Go modules (dependency management):
$ go mod init github.com/scraly/learning-go-by-examples/go-gopher-desktopgo: creating new go.mod: module github.com/scraly/learning-go-by-examples/go-gopher-desktopThis will create a go.mod file like this:
module github.com/scraly/learning-go-by-examples/go-gopher-desktopgo 1.16Before to start our Desktop application, as good practices, we will create a simple code organization.
Create the following folders organization:
. README.md go.modThat's it? Yes, the rest of our code organization will be created shortly ;-).
Fyne

Fyne is a UI toolkit for building Desktop and mobile applications. Its interface design follows the Material Design principles, providing cross-platform graphics that appear identical on all supported platforms.
Graphical applications are generally more complicated to create than web based or command line applications. Fyne changes this by utilizing the great design of Go to make building beautiful graphical applications simple and fast.
Fyne toolkit support building for iOS and Android devices as well as macOS, Windows, Linux and BSD.
With Fyne, no need to know React, Angular or VueJS framework, we can create GUI and mobile apps in Go, our favorite language ;-).
Fyne provides an executable and dependencies.
In order to use Fyne, we first need to install the fyne executable command:
$ go get fyne.io/fyne/v2/cmd/fyneAnd then its dependencies:
$ go get fyne.io/fyne/v2At this time, the go.mod file should have this following import:
module github.com/scraly/learning-go-by-examples/go-gopher-desktopgo 1.16require ( fyne.io/fyne/v2 v2.0.4 // indirect)Let's create our Desktop app!

What do we want?
We want to create an app for Desktop/GUI and mobile that display:
- A menu
- A text
- A cute random Gopher
- A random button
Let's create a main.go file.
We initialize the package, called main, and all dependencies/librairies we need to import:
package mainimport ( "image/color" "fyne.io/fyne/v2" "fyne.io/fyne/v2/app" "fyne.io/fyne/v2/canvas" "fyne.io/fyne/v2/container" "fyne.io/fyne/v2/dialog" "fyne.io/fyne/v2/widget")Define our constant:
const KuteGoAPIURL = "https://kutego-api-xxxxx-ew.a.run.app"Then, create our main() function:
func main() { myApp := app.New() myWindow := myApp.NewWindow("Gopher") // Main menu fileMenu := fyne.NewMenu("File", fyne.NewMenuItem("Quit", func() { myApp.Quit() }), ) helpMenu := fyne.NewMenu("Help", fyne.NewMenuItem("About", func() { dialog.ShowCustom("About", "Close", container.NewVBox( widget.NewLabel("Welcome to Gopher, a simple Desktop app created in Go with Fyne."), widget.NewLabel("Version: v0.1"), widget.NewLabel("Author: Aurlie Vache"), ), myWindow) })) mainMenu := fyne.NewMainMenu( fileMenu, helpMenu, ) myWindow.SetMainMenu(mainMenu) // Define a welcome text centered text := canvas.NewText("Display a random Gopher!", color.White) text.Alignment = fyne.TextAlignCenter // Define a Gopher image var resource, _ = fyne.LoadResourceFromURLString(KuteGoAPIURL + "/gopher/random/") gopherImg := canvas.NewImageFromResource(resource) gopherImg.SetMinSize(fyne.Size{Width: 500, Height: 500}) // by default size is 0, 0 // Define a "random" button randomBtn := widget.NewButton("Random", func() { resource, _ := fyne.LoadResourceFromURLString(KuteGoAPIURL + "/gopher/random/") gopherImg.Resource = resource //Redrawn the image with the new path gopherImg.Refresh() }) randomBtn.Importance = widget.HighImportance // Display a vertical box containing text, image and button box := container.NewVBox( text, gopherImg, randomBtn, ) // Display our content myWindow.SetContent(box) // Close the App when Escape key is pressed myWindow.Canvas().SetOnTypedKey(func(keyEvent *fyne.KeyEvent) { if keyEvent.Name == fyne.KeyEscape { myApp.Quit() } }) // Show window and run app myWindow.ShowAndRun()}Let's explain the main function, step by step.
First, we create a new application and a new window with a title equals to "Gopher":
myApp := app.New() myWindow := myApp.NewWindow("Gopher")For a graphical application to work, we first need to create a new application and a window. So, we create a new app with a single window with a title equals to "Gopher".
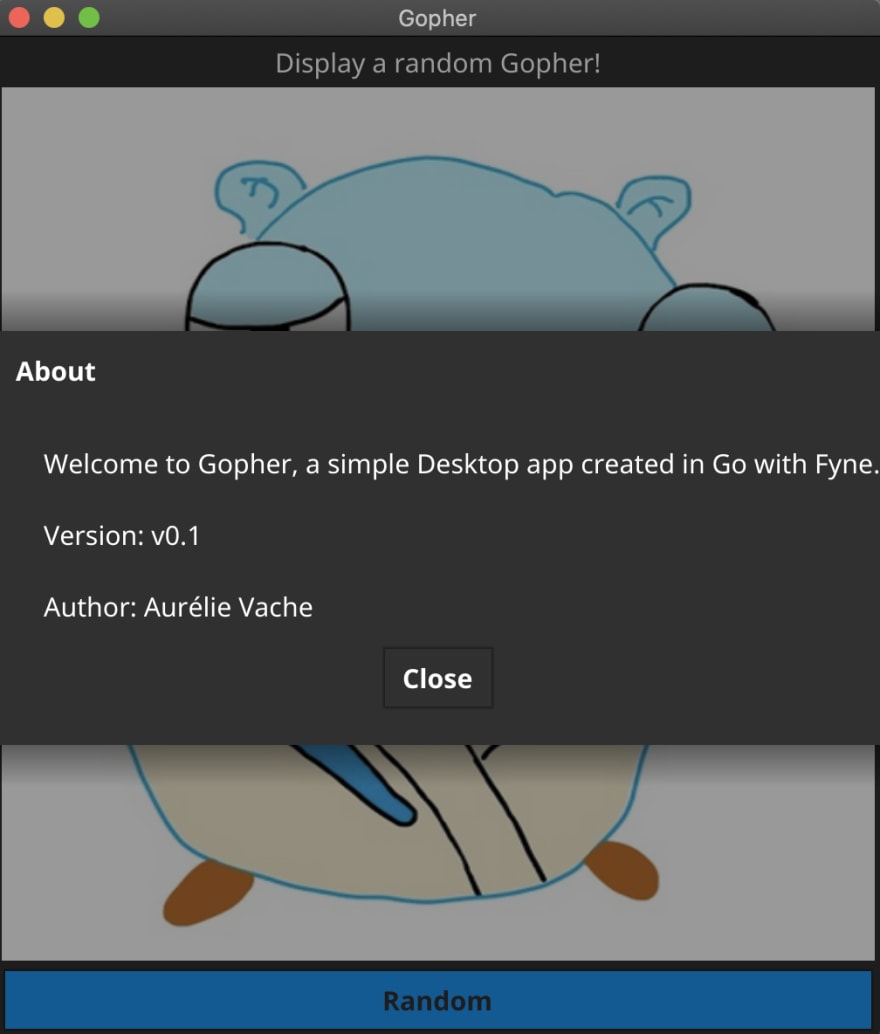
Then, we create a main menu:
// Main menu fileMenu := fyne.NewMenu("File", fyne.NewMenuItem("Quit", func() { myApp.Quit() }), ) helpMenu := fyne.NewMenu("Help", fyne.NewMenuItem("About", func() { dialog.ShowCustom("About", "Close", container.NewVBox( widget.NewLabel("Welcome to Gopher, a simple Desktop app created in Go with Fyne."), widget.NewLabel("Version: v0.1"), widget.NewLabel("Author: Aurlie Vache"), ), myWindow) })) mainMenu := fyne.NewMainMenu( fileMenu, helpMenu, ) myWindow.SetMainMenu(mainMenu)The main menu contains a File and a Help menu:
File Quit Help AboutWhen we click on File>Quit, the application is exited.
When we click on Help>About, a dialog box is displayed with an about text.
Inside the window, we place a text "Display a random Gopher!" and we center it.
// Define a welcome text centered text := canvas.NewText("Display a random Gopher!", color.White) text.Alignment = fyne.TextAlignCenterIt's time to define our cute Gopher image:
// Define a Gopher image var resource, _ = fyne.LoadResourceFromURLString(KuteGoAPIURL + "/gopher/random/") gopherImg := canvas.NewImageFromResource(resource) gopherImg.SetMinSize(fyne.Size{Width: 500, Height: 500}) // by default size is 0, 0For that we creates a new StaticResource in memory from KuteGo API random URL, we define it as a resource to our image and we set the minimum size of the image.

Oh yes, the blank identifier _ is an anonymous placeholder. It may be used like any other identifier in a variable declaration, but it does not introduce a binding.
In this case, the function LoadResourceFromURLString return a resource and an error, but I don't want to retrieve the error, test it and do something in case of an error. So I use _ instead for this value I don't care.
I recommend you to retrieve errors and do something when an error happens, but for this example I wanted to show you this Golang feature :-).
Let's go back to our main() function.
Then, we define a button with "random" text, in blue (HighImportance level).
When we click on this button, we need to retrieve a new random Gopher and define it as a resource to our image. And we need to refresh the image in order to tell to Fyne to redrawn it.
// Define a "random" button randomBtn := widget.NewButton("Random", func() { resource, _ := fyne.LoadResourceFromURLString(KuteGoAPIURL + "/gopher/random/") gopherImg.Resource = resource //Redrawn the image with the new path gopherImg.Refresh() }) randomBtn.Importance = widget.HighImportanceThanks to the new image resource and refresh method, the screen will be update to the end user.
After that, we define a vertical box with our three elements and we set it to our window:
// Display a vertical box containing text, image and button box := container.NewVBox( text, gopherImg, randomBtn, ) // Display our content myWindow.SetContent(box)A vertical box layout arranges items in a column. Each item will have its height set to minimum and all the widths will be equal, set to the largest of the minimum widths.
We listen when the user press the Escape key in the keyboard, we close the application.
And, finally, we run the application and show the window.
// Close the App when Escape key is pressed myWindow.Canvas().SetOnTypedKey(func(keyEvent *fyne.KeyEvent) { if keyEvent.Name == fyne.KeyEscape { myApp.Quit() } }) // Show window and run app myWindow.ShowAndRun()The Window.ShowAndRun() method is a shortcut for Window.Show() and App.Run().
After calling myApp.Run() or myWindow.ShowAndRun(), our application will run and the function will return after the window has been closed.
Test it!
It's time to test our first graphical app, fo that we will run it:
$ go run main.go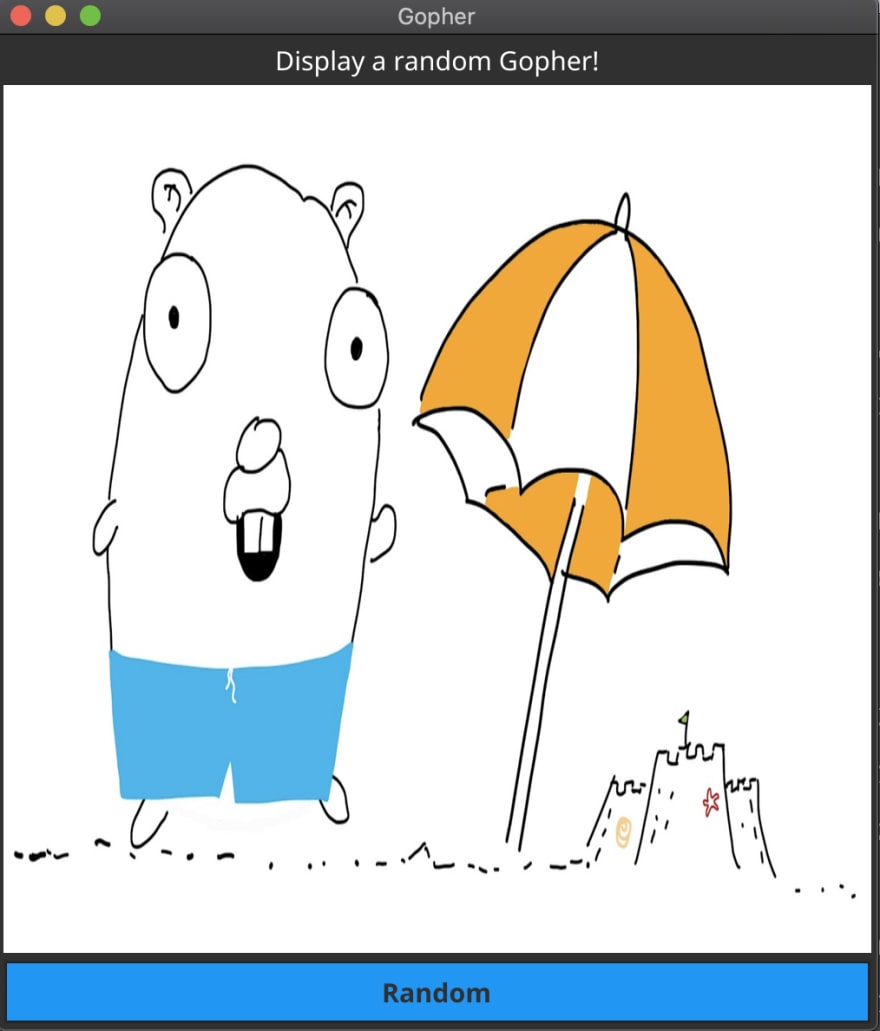
Awesome, our desktop app is running!
We can click on "Random" button, cool another cute Gopher appear :-).
And we can click on the menu in Help>About in order to display our about message:

We can also press the Escape key in our keyboard, the app should exit ;-).
Perfect, our little Desktop app is working correctly!
Test as mobile device
And do you know that we can also test an app and simulate it in a mobile environment?
With the following command we will see how our app would work on a mobile device:
$ go run -tags mobile main.goor through our task:
$ task run-mobiletask: [run-mobile] GOFLAGS=-mod=mod go run -tags mobile main.go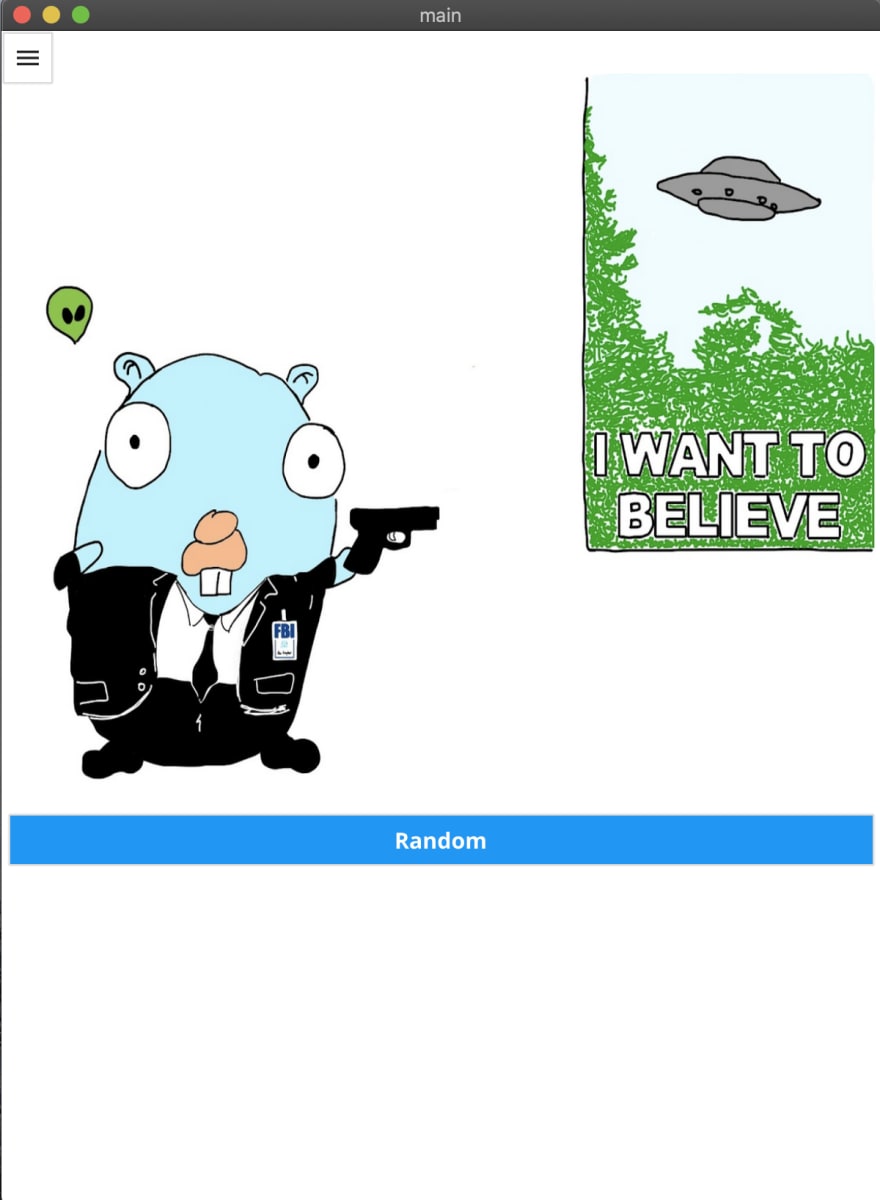
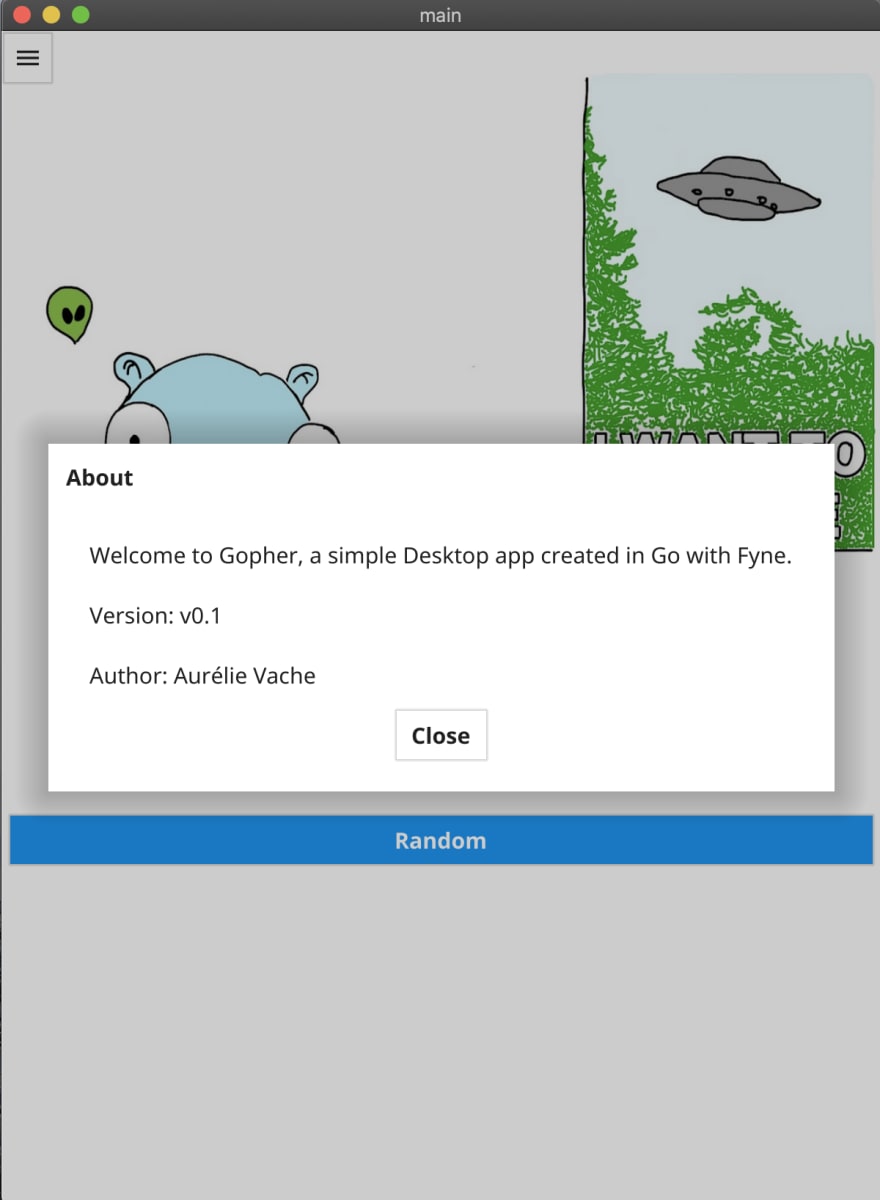
As you can see, the menu is displayed differently than in the GUI/Desktop application.
Built/Package it!
Our application is now ready, we just have to build it.
For that, like the previous articles, we will use Taskfile in order to automate our common tasks.
So, for this app too, I created a Taskfile.yml file with this content:
version: "3"tasks: run: desc: Run the app cmds: - GOFLAGS=-mod=mod go run main.go run-mobile: desc: Run the app on mobile emulator cmds: - GOFLAGS=-mod=mod go run -tags mobile main.go build: desc: Build the app for current OS cmds: # - GOFLAGS=-mod=mod go build -o bin/gopher-desktop main.go - fyne package -icon gopher.png package-android: desc: Package the app for Android cmds: - fyne package -os android -appID com.scraly.gopher -icon gopher.png package-ios: desc: Package the app for iOS cmds: - fyne package -os ios -appID com.scraly.gopher -icon gopher.pngThanks to this, we can build our app easily. Before to execute our task, let's explain packaging for GUI and mobile applications.
Packaging for multiple operating systems can be a complex task. Graphical applications typically have icons and metadata associated with them as well as specific formats required to integrate with each environment.
The fyne command provides support for preparing applications to be distributed across all the platforms the toolkit supports. Running fyne package command will create an application ready to be installed on a computer and to be distributed to other computers by simply copying the created files from the current directory.
Let's build/package it:
$ task packagetask: [package] fyne package -icon gopher.pngThis command create an app for the current OS with icons embedded.
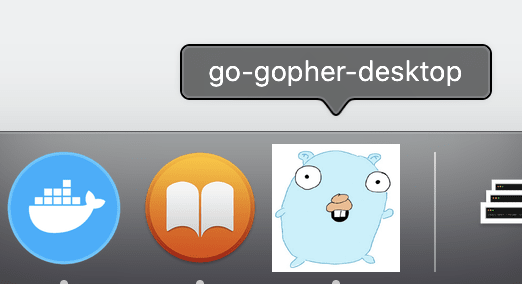
I'm on MacOS so, the comand generate an app for it:
When you double click on it, the Desktop app is launched with our cute icon:
If you run task package command in a Windows environment, you will have an .exe executable file.
In a MacOS computer, you will have an .app bundle (like in this article).
And for Linux, you will have a .tar.xz file that can be installed in the usual manner (or by running make install inside the extracted folder).
And if you can also specify the target OS, like this:
$ fyne package -os windows -icon myapp.png... And package it for Android & iOS!

To run on a real mobile device, it is necessary to package the application. To do this, we can use the fyne package command.
Let's package our app for Android:
$ fyne package -os android -appID com.scraly.gopher -icon gopher.pngor execute our task:
$ task package-androidtask: [package-android] fyne package -os android -appID com.scraly.gopher -icon gopher.pngAnd we can do the same thing for iOS:
$ task package-iostask: [package-ios] fyne package -os ios -appID com.scraly.gopher -icon gopher.png/!\ Warning: In order to package for Android, you need to install adb in your computer and for iOS you need to install XCode. Please read the following instructions.
If you don't install them, you'll have these kind of error messages:
Android:
$ task package-androidtask: [package-android] fyne package -os android -appID com.scraly.gopher -icon gopher.pngno Android NDK found in $ANDROID_HOME/ndk-bundle nor in $ANDROID_NDK_HOMEtask: Failed to run task "package-android": exit status 1iOS:
$ task package-iostask: [package-ios] fyne package -os ios -appID com.scraly.gopher -icon gopher.png-os=ios requires XCodetask: Failed to run task "package-ios": exit status 1Distribute it!

We run it, test it, build it, package it, so now what can be the final step? We can distribute our application!
As you know, it can be painful to distribute our applications in Play and App stores. That's the reason, fyne release command exists.
In one command you can bundle your app for Play store:
$ fyne release -os android -appID com.example.myapp -appVersion 1.0 -appBuild 1Please follow the complete instructions if you are interested to distribute your application.
Conclusion
As we have seen in this article, it's possible to create a simple GUI/Desktop and mobile application in few minutes, with Fyne.
Special thanks to Andrew Williams who helped me on Slack.
But, be careful I not recommend you to develop all of your web apps, REST, gRPC, games, mobiles (...) and desktop apps in Go, but I think it's interesting to know that you can and how is it possible to do that, concretely :-).
All the code is available in: https://github.com/scraly/learning-go-by-examples/tree/main/go-gopher-desktop
Original Link: https://dev.to/aurelievache/learning-go-by-examples-part-7-create-a-cross-platform-gui-desktop-app-in-go-44j1
Dev To
More About this Source Visit Dev To