
An Interest In:
Web News this Week
- April 1, 2024
- March 31, 2024
- March 30, 2024
- March 29, 2024
- March 28, 2024
- March 27, 2024
- March 26, 2024
Some of Our Sources
- Engadget
- Techcrunch
- Simplebits
- Team Treehouse
- Six Revisions
- Abduzeedo
- Fudge Graphics
- 24 Ways
- Codrops
- The Verge
Help Webnuz
Referal links:
Image Slider Using HTML, CSS, and javaScript
In this article you are going to learn how to create image slider using HTML, CSS and JavaScript programming code. I have designed many more types of image sliders before. Hope you like this design like other designs.
This type of slide is used on the homepage or image gallery of various websites. Basically a web developer uses jQuery or different types of plugins to create these.
If you want to create an image slider with HTML, CSS and JavaScript only without any jQuery or plugin then this article will definitely help you. For this you need to have an idea about basic HTML, CSS and JavaScript then you can understand the following programming codes.
If you can watch the live demo then you will understand how this slider works. In this case I used three images and used a white border around this slider. In this case I have used two buttons to change the images. I used JavaScript programming code to activate these buttons.
To create an image slider, you first need to create an HTML and CSS file. Then attach that CSS file to the HTML file[<link rel="stylesheet" href="css.css">].
Step 1: Create the basic layout of the image slider
Copy the HTML programming code below and then paste it into your HTML file. Here I have used the CSS code below which was originally used to design the background and to give this slider a shape.
You can see below I have used the width:600px and height 400px. If you want to increase or decrease the size of this slider, you can increase or decrease that amount.
<div class="carousel-container"> <!--Add Add Preview and Next buttons--> <!--Add Image--> </div> body{ background-color: rgb(58, 58, 58); margin-top: 100px; } .carousel-container { width: 600px; height: 400px; position: relative; margin: 0 auto;}
Step 2: Add Preview and Next buttons
I have used two buttons here as you saw in the demo above. I used the following HTML programming code to make these two buttons. Below I have added some amount of CSS code which was originally used to design this button.
In this case you will see that the font-size is 25 px. If you want to increase the size of this button then of course you can increase this amount. In this case I have used position:absolute which means the two buttons in the slider will be fixed in the same position.
<div class="navigation"> <div class="prev nav-btn"><</div> <div class="next nav-btn">></div> </div>.navigation .prev { position: absolute; z-index: 10; font-size: 25px; top: 40%; left: 10px; font-weight: 700;}.navigation .next { right: 10px; position: absolute; font-size: 25px; z-index: 10; top: 40%;}.navigation .nav-btn { background: rgba(255, 255, 255, 0.55); cursor: pointer; border-radius: 50%; width: 30px; height: 30px; display: flex; justify-content: center; align-items: center; padding: 5px; box-shadow: 2px 2px 10px rgba(0, 0, 0, 0.4);}.navigation .nav-btn:hover { background: white;}
Step 3: Add the required images and text in the slider
I added the images with this image slider using the HTML code below and added some amount of description along with it. There are different descriptions for each image. The description will change as you change the images.
<div class="carousel"> <div class="item main"> <img src="https://wallpapercave.com/wp/wp3473585.jpg" alt="mountain" /> <div class="caption">Image 1</div> </div> <div class="item"> <img src="https://i.pinimg.com/originals/cd/7b/5c/cd7b5c8d4687b5c98a445127926a56e2.jpg" alt="beach" /> <div class="caption">Image 2</div> </div> <div class="item"> <img src="https://i.ytimg.com/vi/-3N6fCzgXuc/maxresdefault.jpg" alt="cityscape" /> <div class="caption">Image 3</div> </div> </div>I have also added CSS code below which has been used to design some of these images. In this case you will see that I have used a border around the image for which I have used border:8px solid white.
.carousel { margin-top: 20px; transition: all 0.3s ease;}.carousel img { width: 100%; transition: all 0.3s ease; border:8px solid white;}.item { position: absolute; display: none;}.main { display: block;}
As I said above I have used it here instead of adding the description. I have given a separate description for each image. I have already added these descriptions and now we will design that description.
.caption { position: absolute; bottom: 0; width: 103%; display: flex; font-size: 20px; justify-content: center; align-items: center; color: rgb(255, 255, 255); background: rgba(0, 0, 0, 0.3); height: 35px;}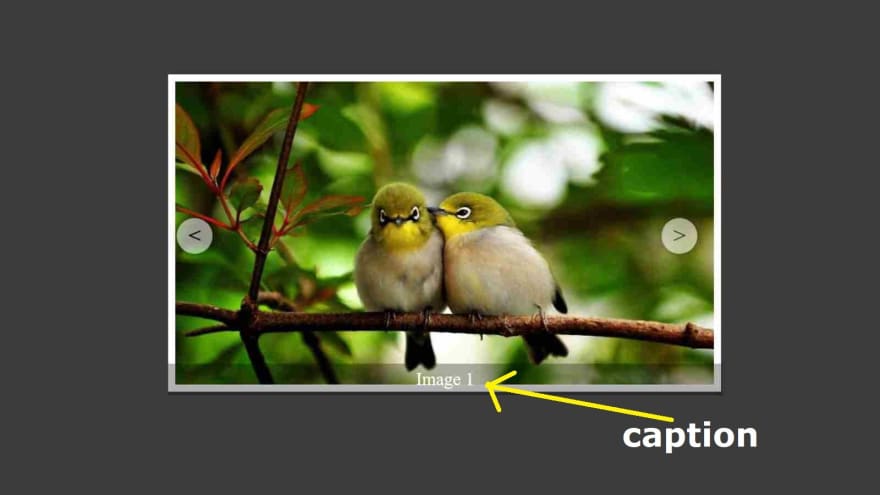
Step 4: Activate the two buttons using JavaScript code
So far we have only designed this slider, now we will activate the buttons here. After activating the button, we can change the images as we wish. Of course, you need to know the basic JavaScript programming code for this, then you can understand the following JavaScript.
const prev = document.querySelector('.prev');const next = document.querySelector('.next');const images = document.querySelector('.carousel').children;const totalImages = images.length;let index = 0;prev.addEventListener('click', () => { nextImage('next');})next.addEventListener('click', () => { nextImage('prev');})function nextImage(direction) { if(direction == 'next') { index++; if(index == totalImages) { index = 0; } } else { if(index == 0) { index = totalImages - 1; } else { index--; } } for(let i = 0; i < images.length; i++) { images[i].classList.remove('main'); } images[index].classList.add('main');}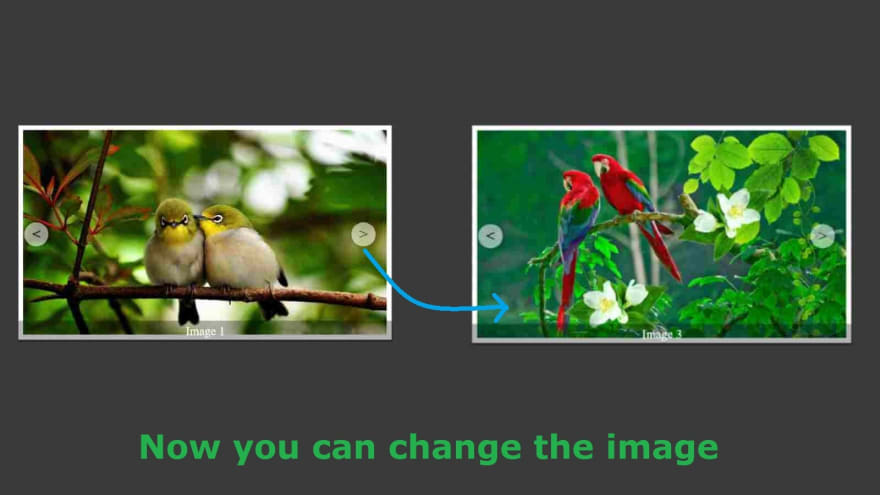
I hope you have learned from this tutorial how I created this image slider using html, css and javascript. If you have any problems, you can definitely comment. You can watch the live demo or download the required source code if you want. You must comment on how you like this design.
Original Link: https://dev.to/code_mystery/image-slider-using-html-css-and-javascript-5dfn
Dev To
More About this Source Visit Dev To