
An Interest In:
Web News this Week
- April 26, 2024
- April 25, 2024
- April 24, 2024
- April 23, 2024
- April 22, 2024
- April 21, 2024
- April 20, 2024
Some of Our Sources
- Mashable
- Technology Review
- Web Designer Wall
- TutsPlus - Design
- Vandelay Design
- Web Designer Depot
- My Ink Blog
- Specky Boy
- Android Dissected
- TechPowerUp
Help Webnuz
Referal links:
How To Build A Chrome Extension NEW Manifest V3
How To Build A Chrome Extension NEW Manifest V3
You can get the source files here to follow along.
There Are 5 Major Components to Building a Chrome Extension
Let's go over them briefly, then in-depth.
1. The manifest file.
This is the ledger of a chrome extension. It's a JSON file that describes the behavior of a Chrome extension. You list things like: your extensions name; a description; which files or libraries you're including; and permissions your extension needs. We'll get into more detail later on.
2. The background script.
This is a JavaScript file. Think of it like the mainframe or hub of a Chrome extension.
One way to think of Chrome extension development is like full-stack web development
You have the back-end that handles heavy programming logic and you have the front-end that takes in user input--the clicking of buttons, entering of information, etc.
The background script can act like a back-end environment.
3. The popup page.
This is an HTML page users see when they click on the extension icon in the menu bar.
This is one of the ways users can interact with your extension--like a front-end.

4. The options page.
This page is also an HTML page. The user sees this page when they right click on your extension icon and choose for the options. This is another way users can interact with your extension--also like a front-end.

5. The foreground/content script.
This file is a JavaScript script. It's a special case and is a bit more complicated than the other files. For now, think of it like any other JS script that you can attach to the website the user is viewing.
Now that we know the big 5, let's go in-depth one component at a time.
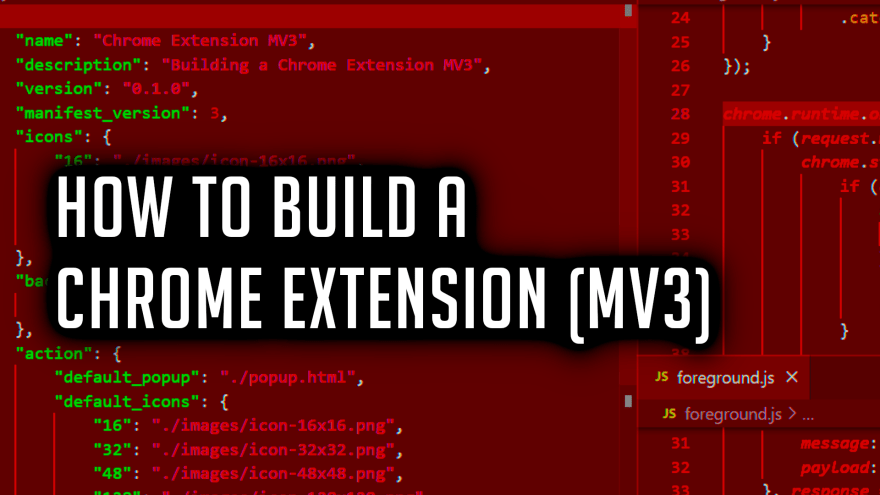
The manifest file.
The manifest file is a JSON file. Here we list the name, description, icons, and manifest version--among other things--of our Chrome extension. For this tutorial, we're working with manifest version 3; think of it like the software version.
In here we define where our background, popup, and options components are located in our file directory. Notice I didn't include the foreground location here. There are two ways of including the foreground script in a Chrome extension: through the manifest (which we won't do in this tutorial) and programmatically (which we will do in this tutorial).
Here is an example of the manifest file we'll be using:
{ "name": "Chrome Extension MV3", "description": "Learning all about Chrome Extensions Manifest Version 3!", "version": "0.1.0", "manifest_version": 3, "icons": { "16": "/images/icon-16x16.png", "32": "/images/icon-32x32.png", "48": "/images/icon-48x48.png", "128": "/images/icon-128x128.png" }, "background": { "service_worker": "background.js" }, "action": { "default_popup": "popup.html", "default_icon": { "16": "/images/icon-16x16.png", "32": "/images/icon-32x32.png", "48": "/images/icon-48x48.png", "128": "/images/icon-128x128.png" } }, "options_page": "options.html", "permissions": [ "storage", "activeTab", "scripting", "tabs" ], "host_permissions": [ "https://www.google.com/*" ]}A key function of the manifest file is defining what our Chrome extension is capable of doing. This gets handled in the permissions properties.
These permissions are APIs that let us do things like store data locally; if your Chrome extension wants to read which urls the user is looking at; and host permissions which tell the browser which urls your Chrome extension is allowed to interact with.
The background script.
The background script is a regular JavaScript script with a very large caveat:
the background script is a JavaScript service worker
If you don't know what a service worker is, we did a tutorial on the basics of service workers. You can find our video tutorial here.
All service workers go through a lifecycle. The first part of that cycle is the install function. This is where we set up the default state of our Chrome extension.
Think of it like this: When you first install a video game(let's say Call of Duty: Warzone) and you navigate to the key bindings, there are default bindings for all the inputs.
This is the same with your Chrome Extension. When the user first installs your Chrome extension, what are the default properties? We handle this in an onInstalled listener and just like installing a game--assuming you don't reinstall--that installation only happens once, not every time you boot the game up.
chrome.runtime.onInstalled.addListener(() => { // default state goes here // this runs ONE TIME ONLY (unless the user reinstalls your extension)});And remember, because the background is a service worker, it's not persistent. So if we want to save any sort of state, we need to store that state somewhere--locally, remotely...doesn't matter.
We can work with temporary variables in the script like any other JavaScript environment...
let name = "Jack";name = "John";...but once the browser has determined that the user or you have stopped interacting with the background script for a certain amount of time, the background environment will de-activate until it's needed again.
So if you want to work with any data past de-activation you need to store it. We'll store it locally using the storage API from our manifest like this:
// setting statechrome.storage.local.set({ name: "Jack"}, function ());// getting statechrome.storage.local.get("name", function (retrieved_data));The popup page.
There's not much to be said here. The popup page behaves exactly like any index.html page with one major difference:
You cannot write in-line JavaScript in this file; only attach a script. You can however write in-line CSS styles (or choose to attach a stylesheet)
The options page.
There's not much to be said here either. The options behaves exactly like any index.html page with the same caveat:
You cannot write in-line JavaScript in this file; only attach a script. You can however write in-line CSS styles (or choose to attach a stylesheet)
The foreground/content script.
Now the most complicated component: the foreground or content script.
It's called a foreground(my wording) or content(Google Docs' wording) script because it gets embedded into the tab(s) the user is viewing. Think of it like this:
We can monitor all of the tabs the user is viewing. When they go to a site of our choosing, we can inject our foreground script INTO THAT SITE giving us the ability to control the DOM of that site
It behaves exactly like a JavaScript script--no surprises here--but incorporating it into our Chrome extension takes some work.
To get our foreground script to actually embed into the users tab(s) we need to first monitor their browsing experience with the tabs API. We do this monitoring in the backround script:
chrome.tabs.onUpdated.addListener((tabId, changeInfo, tab) => { if (changeInfo.status === 'complete' && /^http/.test(tab.url)) { }});Notice the 'if' clause. If the web page the user is viewing is fully loaded(complete) AND it's an actual web page(http), then we do something.
Now that we know the user is on a web page--fully loaded--we can inject our foreground script using the scripting API. Also in the background script:
chrome.tabs.onUpdated.addListener((tabId, changeInfo, tab) => { if (changeInfo.status === 'complete' && /^http/.test(tab.url)) { chrome.scripting.executeScript({ target: { tabId: tabId }, files: ["./foreground.js"] }) .then(() => { console.log("INJECTED THE FOREGROUND SCRIPT."); }) .catch(err => console.log(err)); }});We use the executeScript method and pass in the target (tabId number) and file (location of foreground script) as arguments.
You can also inject CSS into a user's tab using the insertCSS method of the scripting API:
chrome.tabs.onUpdated.addListener((tabId, changeInfo, tab) => { if (changeInfo.status === 'complete' && /^http/.test(tab.url)) { chrome.scripting.insertCSS({ target: { tabId: tabId }, files: ["./foreground_styles.css"] }) .then(() => { console.log("INJECTED THE FOREGROUND STYLES."); }) .catch(err => console.log(err)); }});So now that we have our foreground script injected into the user's tab, what can we do?
Anything we want.
document.querySelector("body > div.L3eUgb > div.o3j99.LLD4me.yr19Zb.LS8OJ > div > img").style.transitionDuration = '3.0s';document.querySelector("body > div.L3eUgb > div.o3j99.LLD4me.yr19Zb.LS8OJ > div > img").style.transform = 'rotate(3000deg)';This bit of code takes the Google logo--using the DOM--and spins it.
const ce_main_container = document.createElement('DIV');const ce_name = document.createElement('DIV');const ce_input = document.createElement('INPUT');......ce_button.addEventListener('click', () => { chrome.runtime.sendMessage({ message: "change_name", payload: ce_input.value }, response => { if (response.message === 'success') { ce_name.innerHTML = `Hello ${ce_input.value}`; } });});This bit of code puts a "form" on Google's homepage and allows the user to enter a name that gets saved in our Chrome extension. (All of the code isn't posted, it's a bit long)

So like any script in any html page, we can manipulate the DOM AND insert our own HTML code.
Let's talk communication.
There are two primary ways of sending message back and forth in a Chrome extension.
1. chrome.runtime.sendMessage()
When we want to send a message from the background, options, popup, or foreground components to the background, options, or popup components we use the RUNTIME version of sendMessage().
chrome.runtime.sendMessage("message", function (response));This method take two arguments: the message you want to send and a callback to deal with a response message.
2. chrome.tabs.sendMessage()
When we want to send a message from the background, options, or popup components to the foreground component we use the TABS version of sendMessage().
chrome.tabs.sendMessage(tabId, "message", function (response));This method takes three arguments: the id of the tab you want to send a message to; the message; and a callback to deal with a response message.
So we know how to send a message, how do we receive the message?
One way:
chrome.runtime.onMessage.addListener(function (request, sender, sendResponse) { // communication tree // if (request === 'get_name') { // return "Jack"; // }});The onMessage method takes a callback which gives you 3 parameters:
- request - the message being sent
- sender - whose sending the message
- sendResponse - a method that allows you send to send a message back to the original sender
A real-life example of a communication tree might be:
chrome.runtime.onMessage.addListener((request, sender, sendResponse) => { if (request.message === 'get_name') { sendResponse("Jack"); } else if (request.message === 'change_name') { chrome.storage.local.set({ name: request.payload }, () => { if (chrome.runtime.lastError) { sendResponse({ message: 'fail' }); return; } sendResponse({ message: 'success' }); }) return true; }});In here we have two branches:
- 'get_name' which just sends a response of (string) "Jack"
- 'change_name' which first saves the name sent by the sender, then sends a response of (object) { message: 'success' }.
Using these three methods: runtime.sendMessage, tabs.sendMessage, and onMessage.addListener you have all the workings of a full-stack application
You can now communicate between "front-end" and "back-end" components. For example, when your user presses a button in your popup page you can send a message to the background script asking to fetch an image and send the image data as a response.
There is much, much more you can do with Chrome Extensions.
But this is a great foundation for you to build from.
You can view our video tutorial down below for more detailed information.
You can get the source files here.
If you want a more in-depth guide, check out my full video tutorial on YouTube, An Object Is A.
Be sure to follow us on Instagram and Twitter to keep up with our latest Web Development tutorials.
How To Build A Chrome Extension--The NEW Manifest Version 3
Original Link: https://dev.to/anobjectisa/how-to-build-a-chrome-extension-new-manifest-v3-5edk
Dev To
More About this Source Visit Dev To