
An Interest In:
Web News this Week
- April 1, 2024
- March 31, 2024
- March 30, 2024
- March 29, 2024
- March 28, 2024
- March 27, 2024
- March 26, 2024
Some of Our Sources
- Slashdot
- Team Treehouse
- You The Designer
- Creative Curio
- Naldz Graphics
- FanExtra - PSD
- Line 25
- Stylized Web
- Wal You
- Freelance Switch
Help Webnuz
Referal links:
react-router setup
Introduction
Developers cannot build more than one-page web application in React because React is a single-page application (SPA). Therefore, a web application that is built in React will not reload the page. How we can make more than one page then? react-router is the answer to this question. react-router gives us the flexibility to render components dynamically based on the route in the URL. These are the steps how you can set up your react-router in react application.
Installation
As usual, we need to install the package by running this command in the terminal.
npm install react-router-dom// oryarn add react-router-domPrimary Components
According to react-router documentation, there are three main categories of components in react-router (routers, route matchers, and navigation).
- routers ->
<BrowserRouter>and<HashRouter> - route matchers ->
<Route>and<Switch> - navigation ->
<Link>,<NavLink>, and<redirect>
Routers
The difference between <BrowserRouter> and <HashRouter> is the URL link. <HashRouter> could store a hash in the link http://example.com/#/your/page, and usually, we use it to refer to several sections in the page.
We must put a router in the top hierarchy component. I usually place the <BrowserRouter> in the index.js and wrap the <App/> component.
// ./src/index.js// ...import { BrowserRouter as Router } from 'react-router-dom';ReactDOM.render( <React.StrictMode> <Router> <App /> </Router> </React.StrictMode>, document.getElementById('root'));Route Matchers
The idea of route matchers is to declare the conditional rendering components corresponding with the URL. I might say <Route> is similar to "if statement", and <Switch> is similar to switch statement. Take a look at the snippets below.
Using Route
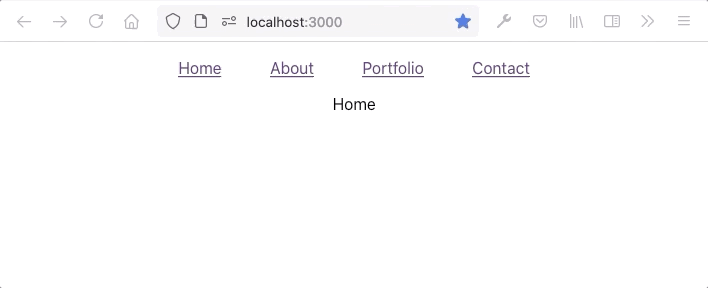
// ./src/App.js// ...import { Route } from 'react-router-dom';function App() { return ( <div className="App"> <Nav /> {/* I will show this components in the next section */} <Route path="/about"> <About /> </Route> <Route path="/portfolio"> <Portfolio /> </Route> <Route path="/contact"> <Contact /> </Route> <Route path="/"> <Home /> </Route> </div> );}If we are not using <Switch>, it will render <About /> and <Home /> components at the same time when users go to the localhost:3000/about link. It renders two components at the same time because /about matches with "/about" and "/" paths.
We can solve more than one component at the same time by adding the exact attribute.
<Route exact path="/about"> <About /></Route><Route exact path="/portfolio"> <Portfolio /></Route><Route exact path="/contact"> <Contact /></Route><Route exact path="/"> <Home /></Route>or we can use the <Switch> component like this snippet below.
Using Switch
// ./src/App.js// ...import { Switch, Route } from 'react-router-dom';function App() { return ( <div className="App"> <Nav /> {/* I will show this components in the next section */} <Switch> <Route path="/about"> <About /> </Route> <Route path="/portfolio"> <Portfolio /> </Route> <Route path="/contact"> <Contact /> </Route> <Route path="/"> <Home /> </Route> </Switch> </div> );}a quick note about why I put
path="/"in the last of Route. If I putpath="/"in the beginning, other Route will not render at all. When users go tolocalhost:3000/about, it will match with '/' first, and others will be ignored.
Navigation
Navigation components allow the website to create a new link in the URL without reloading the page like using an anchor tag (<a>). Whenever we are using the anchor tag, the page will be reloaded, and we cannot do that in SPA.
// ./src/components/Navbar/Navbar.js// ...import { Link } from 'react-router-dom';const Nav = () => { return ( <nav className={styles.wrapper}> <Link to="/">Home</Link> <Link to="/about">About</Link> <Link to="/portfolio">Portfolio</Link> <Link to="/contact">Contact</Link> </nav> );};export default Nav;NavLink
The main difference between <Navlink> and <Link> is styling purposes. If we want to give a style when the link is active we can use <NavLink> like the snippet below
<NavLink to="/contact" activeClassName="active"> Contact</NavLink>It will be rendered to be HTML like this if the users visit /contact.
<a href="/contact" className="active">React</a>Redirect
If this component renders, it will force to redirect to corresponding with the to prop.
<Redirect to="/login" />Conclusion
These three primary categories of react-router components are the basis of how we can apply react-router to our project. If we understand these three kinds of categories, it will be easier to implement react-router. I will share another advanced topic about react-router in the next blog.
Original Link: https://dev.to/raaynaldo/react-router-setup-5gml
Dev To
More About this Source Visit Dev To