
An Interest In:
Web News this Week
- May 1, 2024
- April 30, 2024
- April 29, 2024
- April 28, 2024
- April 27, 2024
- April 26, 2024
- April 25, 2024
Some of Our Sources
- Joshua Blankenship
- Spoon Graphics
- Vandelay Design
- You The Designer
- CSS Globe
- Specky Boy
- CSS Tricks
- Spyre Studios
- Daily Now
- The Verge
Help Webnuz
Referal links:
Building a simple Grocery App in Flutter with Supabase
Introduction
In this article I will show you how you can build an application using Flutter with Supabase as a backend. Supabase is a Firebase alternative which uses Postgres, so that's something different and that's even amazing. Postgres is also a relational database which is also open source and a powerful tool.
We will learn and build a simple grocery application using Flutter with Supabase.
I am not going to go over setting up Flutter step by step since how I built it uses the Stacked architecture which follows an MVVM style so I will just show you how to write Supabase code in Dart with-in a Flutter application instead.
You can learn more about Stacked architecture at FilledStacks :D
My repository for SupaGrocery will be shared at the end of this tutorial. So you can go ahead and download it.
Demo

Database Design
But before we start everything else, we'll take a look at our database design. See attached image below.

For our simple grocery app, we'll only require 4 of these tables.
app_users: This is the table where we will store our users, it will have the same primary ID with the supabase auth users. I was not able to use just theuserstable since it cannot be read publicly so I had to create this table.groceries: All the grocery list of each user will be stored in this table.products: All of the products created by the user will be stored in this table.grocery_products: This is where we sort of link the products with a grocery. This is what we call a pivot table.
Relationships
In relation databases, table relationships are very common thing and is what I love the most about in relational databases.
These two are the most common relationships:
- One to One
- One to Many
- Many to Many (Pivot table)
Our app_users table has a One to Many relationship with the two tables we created namely products and groceries since a user can have many grocery listing and can also have many products in that grocery listing.
Then for our groceries table we have the created_by column as a foreign key so that will link to the app_users table which will then identify it as part of the user's grocery listing in our application.
The same goes for products table with the created_by column as a foreign key as well.
Then for our pivot table which is a Many to Many relationship, because a grocery listing can have many products and a product can belong to many grocery listing.
Supabase setup
Create your first Supabase account! Head over to https://supabase.io/ that is their official website.
Should take you to this wonderful dark themed site :D
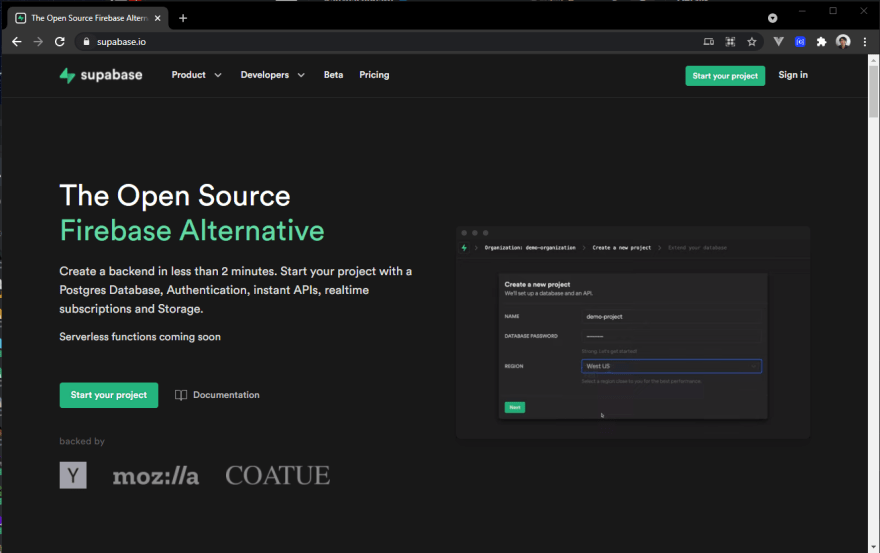
Now go ahead and click that button "Start your project"
It will show you this auth0 page, so just continue with GitHub to get you registered in no time!
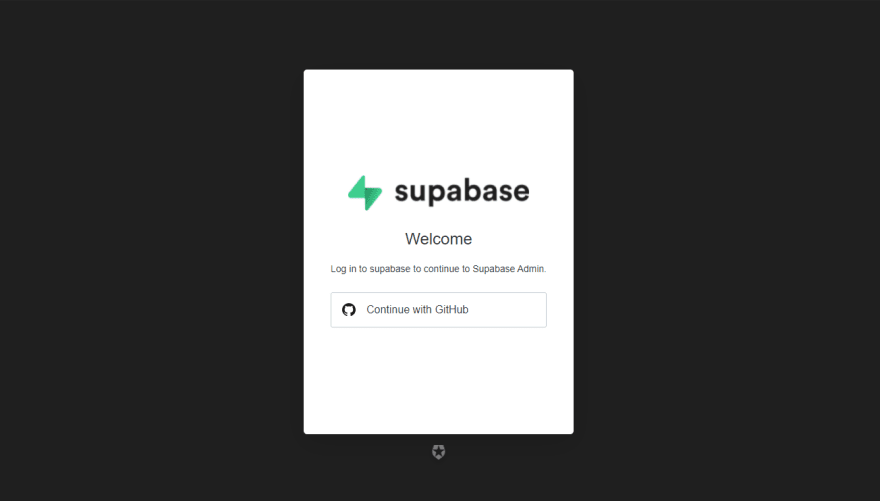
Then just sign in with your GitHub credentials.

Once you are done with creating your first account, you might already be in your dashboard which will have a listing of all your projects created in Supabase.
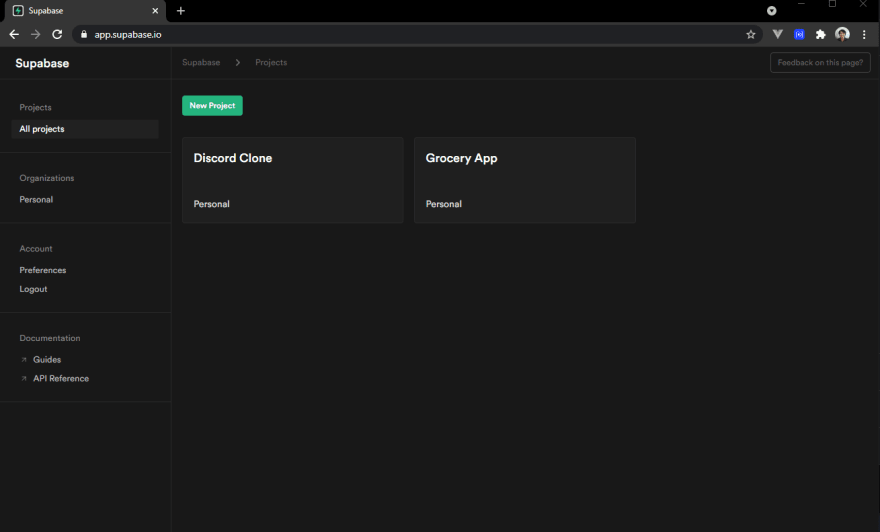
Now click on "New Project" and select any organization as you wish. I'll just select "Personal" which I modified.
When taken to this page, just fill in the following fields:

Name: "Grocery App"
Database Password: "s0m3Str0ng_PassWord!@#" (You should use your own password)
Region: (Select anything that is near you)
When that is done click on "Create new project"!

It will then redirect you to this page.

It will take a few minutes, so please wait :)
Creating Tables
When the Supabase is setup and you have created a new project. It shall take you up into this page.
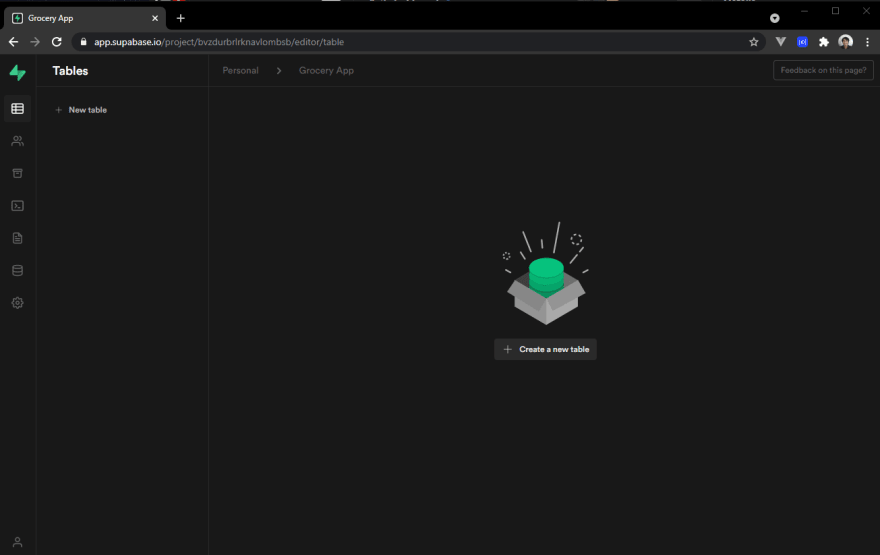
Now let's click on "Create a new table"
We'll put up all the details on what we have from our database design so this setup should be pretty quick.

What I would suggest is to uncheck "Include primary key" and just add a primary key later on when the table is created. There is some sort of bug which I cannot have a default value for the uuid key to just generate a uuid when a new record is created.

Then just click on "Save" at the upper right corner to finally create the table.
When that table is created, we can proceed to add our primary key which is a uuid. Click ahead on that plus icon to add a new column for the table.
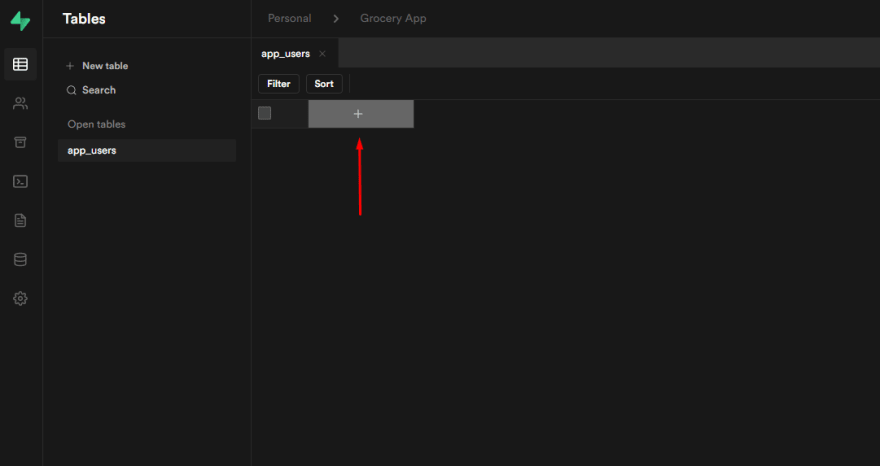
Then name the column as id and it will be a primary key and a type of uuid then have the default value "Automatically generate UUID" and click "Save" once that is done.

Once that is done, we can proceed to create more of those columns that we defined from our database design.
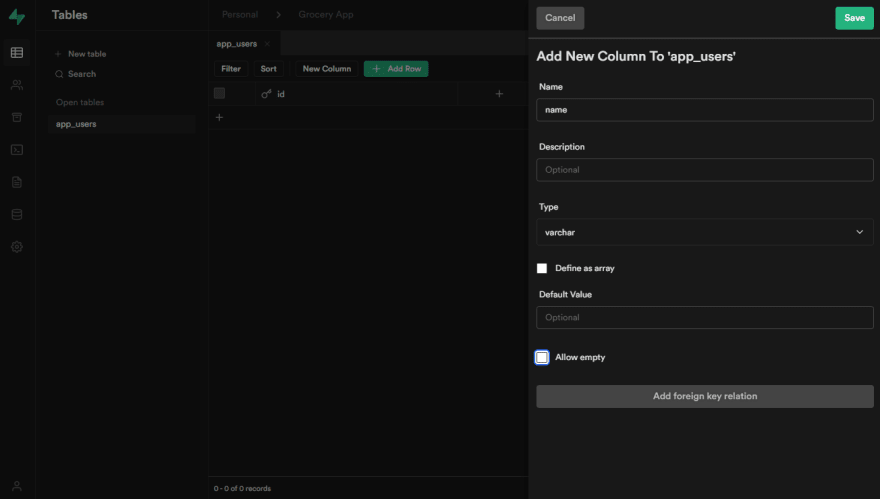
Next is we will create a table for products and we'll have a foreign key setup with this table since a product belongs to a user. So we'll learn how to do that quickly.
So given that you already created a primary key id and its corresponding column name as a varchar, let's create one last field which is created_by and setup this as a foreign key that links up with the app_users table.

Now click on "Add foreign key relation" button at the bottom

Then select the table app_users and the id field, when that is done click "Save"
Should then show you it is now linked up with the app_users table, so that is pretty amazing.

That is all you need to know for setting up foreign keys. Now the rest of the tables is up to you now. You got this!
Flutter Datamodels
We will be setting up our data models using freezed package with json_serializable and make sure to have a builder_runner setup in your project.
The following is our application datamodels
import 'package:freezed_annotation/freezed_annotation.dart';part 'application_models.freezed.dart';part 'application_models.g.dart';@freezedclass AppUser with _$AppUser { const factory AppUser({ required String id, required String name, required String email, }) = _AppUser; factory AppUser.fromJson(Map<String, dynamic> json) => _$AppUserFromJson(json);}@freezedclass Grocery with _$Grocery { const Grocery._(); const factory Grocery({ required String id, required String name, @JsonKey(name: 'created_by') required String createdBy, @Default([]) @JsonKey( name: 'grocery_products', fromJson: Grocery._productsFromJson, toJson: Grocery._productsToJson, ) List<GroceryProduct>? groceryProducts, }) = _Grocery; bool get hasGroceryProducts => groceryProducts!.length > 0; List<Product?>? get products { if (!hasGroceryProducts) return []; return groceryProducts!.map((e) => e.product).toList(); } factory Grocery.fromJson(Map<String, dynamic> json) => _$GroceryFromJson(json); static List<GroceryProduct>? _productsFromJson(List<dynamic>? list) { if (list == null) { return []; } return list.map((e) => GroceryProduct.fromJson(e)).toList(); } static List<Map<String, dynamic>>? _productsToJson( List<GroceryProduct>? list) { if (list == null) { return []; } return list.map((e) => e.toJson()).toList(); }}@freezedclass GroceryDto with _$GroceryDto { const factory GroceryDto({ required String name, @JsonKey(name: 'created_by') required String createdBy, }) = _GroceryDto; factory GroceryDto.fromJson(Map<String, dynamic> json) => _$GroceryDtoFromJson(json);}@freezedclass Product with _$Product { const factory Product({ required String id, required String name, @JsonKey(name: 'created_by') required String createdBy, }) = _Product; factory Product.fromJson(Map<String, dynamic> json) => _$ProductFromJson(json);}@freezedclass ProductDto with _$ProductDto { const factory ProductDto({ required String name, @JsonKey(name: 'created_by') required String createdBy, }) = _ProductDto; factory ProductDto.fromJson(Map<String, dynamic> json) => _$ProductDtoFromJson(json);}@freezedclass GroceryProduct with _$GroceryProduct { const factory GroceryProduct({ required String id, @JsonKey(name: 'grocery_id') required String groceryId, @JsonKey(name: 'product_id') required String productId, required int quantity, @JsonKey(name: 'products') Product? product, @Default('') String? unit, }) = _GroceryProduct; factory GroceryProduct.fromJson(Map<String, dynamic> json) => _$GroceryProductFromJson(json);}@freezedclass GroceryProductDto with _$GroceryProductDto { const factory GroceryProductDto({ @JsonKey(name: 'grocery_id') required String groceryId, @JsonKey(name: 'product_id') required String productId, @Default(1) int quantity, String? unit, }) = _GroceryProductDto; factory GroceryProductDto.fromJson(Map<String, dynamic> json) => _$GroceryProductDtoFromJson(json);}@freezedclass AuthDto with _$AuthDto { const factory AuthDto({ required String email, required String password, String? name, }) = _AuthDto; factory AuthDto.fromJson(Map<String, dynamic> json) => _$AuthDtoFromJson(json);}The code above will generate us the following files
We don't have to write everything we just let it auto generate using build_runner
To break it down for you regarding our data models, we see we have our primary tables for our grocery application
- AppUser
- Grocery
- Product
- GroceryProduct
DTOs
- GroceryDto
- ProductDto
- GroceryProductDto
- AuthDto
But what are those datamodels with "Dto" name on them?
DTO simply means Data Transfer Object, I like to use DTOs in any API request that I make.
A Data Transfer Object is an object that is used to encapsulate data, and send it from one subsystem of an application to another. DTOs are most commonly used by the Services layer in an N-Tier application to transfer data between itself and the UI layer.
Flutter Setup
Install a Flutter application and set it up. Then have the following dependencies to setup Supabase with it.
packages:
I added postgrest since I want to take all typings from the package and Supabase is using those.
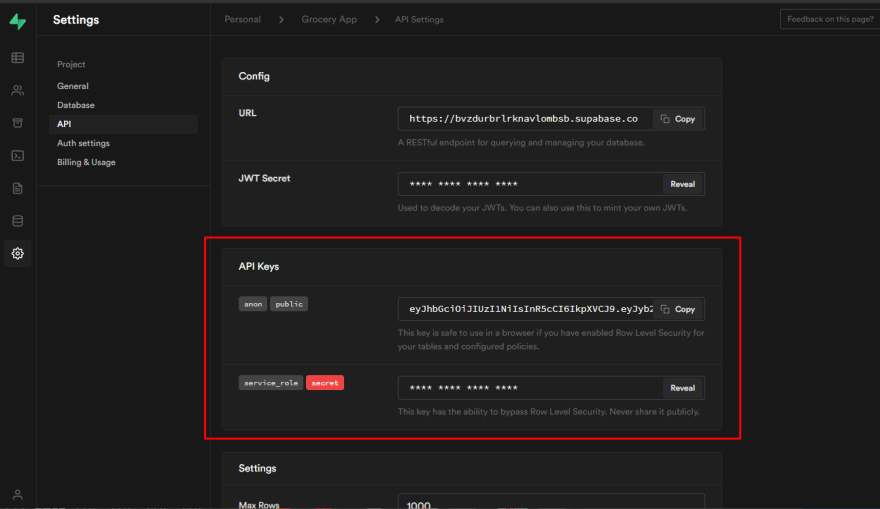
When that is done, you can proceed to setting up your Supabase client
import 'package:supabase/supabase.dart';// use your own SUPABASE_URLconst String SUPABASE_URL = 'https://borayzhhitkyveigfijz.supabase.co';// use your own SUPABASE_SECRET keyconst String SUPABASE_SECRET = 'eyJhbGciOiJIUzI1NiIsInR5cCI6IkpXVCJ9.eyJyb2xlIjoiYW5vbiIsImlhdCI6MTYxOTMwODI5MCwiZXhwIjoxOTM0ODg0MjkwfQ.Kk1ckyjzCB98aWyBPtJsoWuTsbq2wyYfiUxG7fH4yAg';final SupabaseClient supabase = SupabaseClient(SUPABASE_URL, SUPABASE_SECRET);These can be found from your project settings in API tab. To get the SUPABASE_URL

And the SUPABASE_SECRET
Then we can make queries when this is already setup!
Supabase Queries
If you know SQL or familiar with it, it should feel very similar.
But these will be auto generated from Supabase itself, so don't worry in case you don't know how to construct a Supabase query. Just check on the project API which will be dynamically generated for you whenever you update table or change any columns.
To compare it, this is a RAW SQL query.
SELECT * FROM productsAnd this is how you write queries with Supabase in Dart
supabase.from("products").select().execute();Make sure you always have the execute at the last part otherwise it will not get all data from products table.
What about querying for a single record?
In SQL we have,
SELECT * FROM products WHERE id = "uuid-string";In Supabase Dart we have,
supabase.from("products").select().eq("id", "uuid-string").single().execute();There are more queries to show from your Supabase project, so be sure to check it out here

Authentication
In every application, one thing you can secure your user's data is to have an authentication system. So with Supabase it is very easy to get started with authentication right away as they provide a very simple and intuitive API!
class AuthenticationService { final _logger = Logger(); final _localStorageService = locator<LocalStorageService>(); AppUser? _user = null; AppUser? get user => _user; bool get hasUser => _user != null; Future<void> initialize() async {} Future<AppUser?> signIn({required AuthDto payload}) async {} Future<AppUser?> signUp({required AuthDto payload}) async {} Future<void> signOut() async {} Future<AppUser?> fetchUser({required String id}) async {} Future<PostgrestResponse> _createUser(User user, AuthDto payload) {}}To the code above, to break it down. This is dependent with the local storage service (Shared Preferences) which is where we will store out JWT auth token / refresh token and the Logger which can be useful for debugging. So I like to have a Logger with me.
We have a private propery _user which is where we store our user with its own getter and a boolean getter to check if the user is logged in if the _user property is not null.
Inside the initialize() method is where we will perform auto login. So if the user has a refresh token stored in their local storage, we will proceed to login this user and get user data and store it in _user property so the hasUser boolean getter will be true.
Future<void> initialize() async { final accessToken = await _localStorageService.getItem('token'); _logger.i(accessToken); if (accessToken == null) { return; } final response = await supabase.auth.api.getUser(accessToken); if (response.error != null) { return; } final user = response.data!; _logger.i(user.toJson()); await fetchUser(id: user.id); }Next is the signIn method which has an argument of AuthDto that contains email and password field. When a user provided correct and existing email, we will take their access token and store it in local storage.
Future<AppUser?> signIn({required AuthDto payload}) async { final response = await supabase.auth.signIn( email: payload.email, password: payload.password, ); if (response.error != null) { _logger.e(response.error!.message); return null; } _logger.i(response.data); await _localStorageService.setItem('token', response.data!.accessToken); return await fetchUser(id: response.data!.user!.id); }We use the signUp method whenever we have a new user that wants to use our app. When a new user is created, we take the access token and save it to local storage. We will also proceed to creating a new user record in the app_users table but it will be in a different method called _createUser
Future<AppUser?> signUp({required AuthDto payload}) async { final response = await supabase.auth.signUp(payload.email, payload.password); if (response.error != null) { _logger.e(response.error!.message); return null; } final user = response.data!.user!; _logger.i(user.toJson()); await _createUser(user, payload); await _localStorageService.setItem('token', response.data!.accessToken); return await fetchUser(id: user.id); }_createdUser will create a new user record inside app_users table.
Future<PostgrestResponse> _createUser(User user, AuthDto payload) { return supabase .from("app_users") .insert( AppUser( id: user.id, name: payload.name!, email: user.email, ), ) .execute(); }Then the signOut which is already self explanatory. Here we just remove the access token from the local storage when user decides to signOut
Future<void> signOut() async { final response = await supabase.auth.signOut(); if (response.error != null) { _logger.e(response.error!.message); return; } _logger.i(response.rawData); await _localStorageService.removeItem('token'); return; }And lastly we have the fetchUser method, that will fetch the user record that is currently authenticated so we'll have their information across the entire application whenever we need it.
Future<AppUser?> fetchUser({required String id}) async { final response = await supabase .from("app_users") .select() .eq('id', id) .single() .execute(); _logger.i( 'Count: ${response.count}, Status: ${response.status}, Data: ${response.data}', ); if (response.error != null) { _logger.e(response.error!.message); return null; } _logger.i(response.data); final data = AppUser.fromJson(response.data); _user = data; return data; }Supabase Service
We finished handling our data models and authentication, then we can create and handle read write operations for our application. Thanks to the concept of abstraction, we don't have to write up a lot of code for the same functionality, we will be writing less code and have this functionality extended to other service that requires it.
The following will be the abstract class that handles CRUD operations (Cread, Read, Update, Delete)
import 'package:logger/logger.dart';import 'package:postgrest/postgrest.dart';import 'package:supagrocery/app/app.locator.dart';import 'package:supagrocery/app/supabase_api.dart';import 'package:supagrocery/services/authentication_service.dart';abstract class SupabaseService<T> { final _authService = locator<AuthenticationService>(); final _logger = Logger(); String tableName() { return ""; } Future<PostgrestResponse> all() async { _logger.i(tableName()); final response = await supabase .from(tableName()) .select() .eq('created_by', _authService.user!.id) .execute(); _logger.i(response.toJson()); return response; } Future<PostgrestResponse> find(String id) async { _logger.i(tableName() + ' ' + id); final response = await supabase .from(tableName()) .select() .eq('id', id) .single() .execute(); _logger.i(response.toJson()); return response; } Future<PostgrestResponse> create(Map<String, dynamic> json) async { _logger.i(tableName() + ' ' + json.toString()); final response = await supabase.from(tableName()).insert(json).execute(); _logger.i(response.toJson()); return response; } Future<PostgrestResponse> update({ required String id, required Map<String, dynamic> json, }) async { _logger.i(tableName() + ' ' + json.toString()); final response = await supabase.from(tableName()).update(json).eq('id', id).execute(); _logger.i(response.toJson()); return response; } Future<PostgrestResponse> delete(String id) async { _logger.i(tableName() + ' ' + id); final response = await supabase.from(tableName()).delete().eq('id', id).execute(); _logger.i(response.toJson()); return response; }}This abstract class has a dependency on the AuthenticationService that we just created so we'll be able to attach the user's ID every time they create records in our database.
And we'll have the tableName to override for each feature services that requires it. So when creating our ProductService and GroceryService, we simply extend this class and that override tableName with their corresponding table names.
This is an example for ProductService
import 'package:postgrest/postgrest.dart';import 'package:supagrocery/app/app.locator.dart';import 'package:supagrocery/app/supabase_api.dart';import 'package:supagrocery/datamodels/application_models.dart';import 'package:supagrocery/services/authentication_service.dart';import 'package:supagrocery/services/supabase_service.dart';class ProductService extends SupabaseService<Product> { final _authService = locator<AuthenticationService>(); @override String tableName() { return "products"; } Future<PostgrestResponse> fetchProducts() async { return await supabase .from("products") .select("*") .eq('created_by', _authService.user!.id) .execute(); }}This will also have the methods from SupabaseService abstract class that we created and won't have to rewrite anything of it, we only need to override the tableName and return the name of that table. With that inside the ProductService we can then write up any method that is relevant to the business logic.
Then this is our GroceryService
import 'package:postgrest/postgrest.dart';import 'package:supagrocery/app/app.locator.dart';import 'package:supagrocery/app/supabase_api.dart';import 'package:supagrocery/datamodels/application_models.dart';import 'package:supagrocery/services/supabase_service.dart';import 'authentication_service.dart';class GroceryService extends SupabaseService<Grocery> { final _authService = locator<AuthenticationService>(); @override String tableName() { return "groceries"; } Future<PostgrestResponse> fetchGroceryList({required String id}) async { return await supabase .from("groceries") .select("*, grocery_products(*, products(*) )") .eq('id', id) .eq('created_by', _authService.user!.id) .single() .execute(); } Future<PostgrestResponse> addProductsToList({ required String id, required List<Product?> products, }) async { return await supabase .from("grocery_products") .insert( products.map((e) { return GroceryProductDto( groceryId: id, productId: e!.id, ).toJson(); }).toList(), ) .execute(); } Future<PostgrestResponse> markProductChecked( {required GroceryProduct payload}) async { return await supabase .from("grocery_products") .update(payload.toJson()) .eq('id', payload.id) .execute(); } Future<PostgrestResponse> removeProduct({required String id}) async { return await supabase .from("grocery_products") .delete() .eq('id', id) .execute(); }}Summary
We covered database design, setting up Supabase, implementing an authentication system with Supabase API, and using abstraction to easily implement new features.
I hope this gave you an idea and was useful in any sort of way.
Thanks for reading and hope you enjoyed!
Original Link: https://dev.to/carlomigueldy/building-a-simple-grocery-app-in-flutter-with-supabase-5fad
Dev To
More About this Source Visit Dev To