
Some of Our Sources
- Smashing Apps
- Crazy Leaf Design
- My Ink Blog
- Reencoded
- CSS Globe
- 24 Ways
- Web Resource Source
- Codrops
- Android Headlines
- TechPowerUp
Help Webnuz
Referal links:
Hand Lettering: Understanding Types of Type

At this point, after practicing the concepts in Letterforms at Their Core, you're ready to start moving on to bigger and better things!
This tutorial will help you understand the various kinds of typography that exist all around us, such as the typography you see in books, billboards, store signage, and everything else in between. You'll gain a great amount of knowledge to help you decipher typography characteristics and what their usage is in this day and age.
But perhaps you're looking for different types of letters for your creative digital projects. In this case, we've got you covered. Envato Elements has the best sans-serif fonts, serif fonts, slab-serifs, script fonts, decorative fonts, blackletter fonts, and monospace fonts.

Scroll down after this tutorial—we've got a hand-picked selection of premium hand lettering fonts from Envato Elements.
What You Will Learn in This Hand Lettering Tutorial
- Letterform anatomy
- What types of letters are there
- How to do hand lettering
- Most popular letterforms
Letterform Anatomy Resources
Since this is a beginner class focused on hand lettering and typography, I will be using some terms you may not know. Here is a list of terms you may want to read up on just in case you're not sure what they are:
- Typography Glossary
Letterform anatomy: baseline, cap height, x-height- Kerning
- Tracking
One last thing to note about this tutorial before we get too much further: this tutorial is about drawing letterforms, and it includes a lot of info about "why" we do certain things when it comes to typography. This tutorial is more of a guide to provide you with the basics and the understanding, while still allowing you to grow and practice on your own. If I provided you with the exact dimensions of little details and provided every little bit of information, I feel you wouldn't learn and grow as much on your own. Lettering is all about practice and persistence.
With that said... Ready? Let's get started!
1. Preparing the Tools You Will Need
Luckily, not many tools are needed this time around, since we're basically just going to be drawing. Here is a very small list to help you begin:
- Pencil (whatever your favorite pencil may be—no specific brand is needed)
- 8.5" x 11" paper (no specific brand is needed—standard copy/printer paper works great)
- Eraser
- Sharpie or any thick black marker/pen
- Ruler
- Printer (not required, but is certainly useful)
- Download PDF

Step 1
Let's go ahead and print this PDF out (or preview on whatever viewing device you please) for our reference throughout this entire tutorial. We're going to view these faces as we grasp and understand each style of typography.
Why are we using HEAO? Well, those four letters are the perfect combination of vertical, horizontal, diagonal, and curved strokes. Those four basic strokes make up every single letterform imaginable. So focusing on those basics will give you a great start to help you draw the remaining 22 letters in the alphabet.
Here is the list of typefaces we will be studying. These are some standard faces that nearly every computer already has preloaded onto it (except Old London—you might have to download that elsewhere if you'd like it for future reference, but don't worry, it's free!)
Helvetica (sans-serif font)
Times New Roman (serif font)
Rockwell (slab-serif font)
Snell Roundhand (script font)
Rosewood (decorative font)
Old London (blackletter font)
Courier (monospace font)

Step 2
We're going to set up a "guide" or template to use throughout this tutorial. This page will contain the cap-height and baseline your letters will rest on throughout this tutorial.
All you need is a blank piece of 8.5" by 11" paper. Begin by measuring out 3" from the bottom right-hand corner and making a mark. Do the same on the opposite side of the paper and connect the dots!

Step 3
Now that we just created the baseline, let's form our cap-height. From the baseline you just created, measure out 2" and make another mark in the bottom right-hand corner. Then, do the same on the bottom left-hand side. Connect those dots, and you've got yourself a finished guide page that we'll be using in the rest of this tutorial.

2. Drawing Sans-Serif Letterforms
Step 1
Gather all your materials to draw letterforms. That will include paper, pencil, eraser, and pencil sharpener (if needed). Let's begin by drawing and understanding the structure of sans-serif letterforms.
With your "reference sheet" in front of you, study the weight, contrast, negative space, and every little detail about the letterforms. Study exactly how that letterform is composed.
Have your guide page in front of you with a blank piece of paper on top. We're going to use the guide page to allow our letterforms to fit within the 2" space we created with the cap-height and baseline.

Step 2
It may sound silly, but what makes an H look great? What makes the H look proper? Well, the answer is, consistent vertical strokes (the same weight) as well as a slightly thinner horizontal stroke to connect the vertical strokes.
If you've been studying typography for a while, you'll notice the little details such as a 0.5-millimeter difference in weight on the horizontal crossbar. Why is the crossbar nearly a hairline smaller than the vertical strokes? Because the H needs to feel balanced and not overweighted where the strokes meet. With the tiny hairline difference, the H becomes more pleasant to the eye and not an eyesore when being read at small sizes. Those little details are necessary not only for type design but for lettering as well.
Keeping all that in mind, draw two vertical strokes with the same width and a crossbar with a hairline difference. The width of the H is up to you if you'd like to explore—but for this tutorial, we'll make it similar to our reference sheet.

Step 3
Next, let's tackle the letter E. Just as you did with the H, study its characteristics. Pay attention to the little details! If you look closely enough, you can notice the middle crossbar is shorter than the top and bottom crossbars. Why is that? The middle crossbar is just a tad shorter to help balance and evenly distribute weight across the entire letterform. It essentially helps open up the negative space within the E so it doesn't feel so heavy. Additionally, just like the H, the crossbars are a hairline thinner to aid the overall weight as well. Keep these things in mind when drawing connecting horizontal strokes and vertical strokes!
So draw one vertical stroke and three horizontal strokes to form the E. Make sure that middle crossbar is a bit shorter in width too!

Step 4
Now that our E is complete, let's move on to the A. Again, study how the A is composed. What makes it feel balanced? What happens if the crossbar is raised? You can test that out in your own drawing, but I think you'll find it looks rather odd, doesn't it? The crossbar is optically centered so the negative space within the counterform is equal to the negative space just below the crossbar.
How do you know what angle to draw the vertical strokes? Well, you don't really know, because that's all dependent on the width of the letterform. If you want a really thin A, your angles will be incredibly steep. On the other hand, if you want a wide A, your angles will be more moderate.
Draw two angled strokes that meet in the middle. Then, add that crossbar, and it's good to go! Use the below gif to understand how I've formed the A with each stroke.

Step 5
Alright, we've made it pretty far! Let's finish off this sans-serif combination with the letter O. Let's study the reference sheet once more and understand just how that O was created and balanced. You can see that the north and south (vertical) points of the O are ever so slightly thinner in weight than the east and west (horizontal) points. Why does the counterform of the O taper like that? That tapering is yet another balancing act to make the weight easier on the eyes when read within a word or sentence.
If you read through the Letterforms at Their Core tutorial, you know the curves of the O extend above and below the baseline and cap-height.

Step 6
That's a lot of information in a short amount of time. There's tons of practice involved with making your strokes the proper angle and your curves nice and smooth—don't fret, it all comes in time! Just keep practicing! Repeat Steps 1 to 5 if you think you need the practice. If you're not satisfied with the way your letterforms are looking, remove your paper from the guide page and begin again!

3. Drawing Serif Letterforms
Before we begin, I want you to study these letterforms for a bit longer. What makes a serif letterform different from a sans-serif? Well, a serif typeface has serifs, whereas a sans-serif has no serif. Hence, the word "sans", which means without in French.
Additionally, there is more contrast in these letterforms. Some strokes are thin, while others are thicker. Why is that? If you think back to how these letterforms were first created, the thicks and thins are implied by the direction and angle of the pen or chisel. For example, if you're pulling your pen downward towards yourself, generally the pen will release more ink since pressure is being applied. On the other hand, if you're dragging the pen left to right or downward to upward, the stroke will be thinner, since the pressure isn't being applied.
A serif is the finishing stroke of the letterform which generally projects outward of the stroke. So, to simplify things, just think of drawing sans-serif letterforms, but then adding serifs afterwards. You'll see what I mean by the process below.
Step 1
Begin by studying the weights of the strokes in the H. Let's draw a sans-serif H to start off.
Using that previous sans-serif H, let's now add the serifs. They don't extend too far from the stroke, so keep them about a quarter inch or less. It's all up to you! The key is to make sure your serifs are consistent and similar across the entire letterform, as in the image below. And the last thing to notice is that the crossbar is much thinner in weight, so be sure to translate that in your drawing as well.

Step 2
Let's move on to the E. Again, begin by drawing a sans-serif E (except keeping in mind the weights of the crossbars are much lighter), then adding the serifs afterward. The only difference with the E is that the serifs don't extend left and right like the serifs on the H. Instead, the serifs extend downward and upward on the various crossbars.

Step 3
Unlike the sans-serif A, this serif A has more of a pointed apex rather than flat (it is technically flat towards the top, but so tiny it's almost not noticeable! That flat apex makes all the difference, though). Again, start by drawing a sans-serif A, but make sure the left stroke is thin and the right stroke is thick. Once you have that done, add the serifs towards the bottom of the angled strokes, and it's complete.

Step 4
Getting the curves of the O is probably still pretty difficult. It all just takes repetition and practice, so keep at it! Pay attention to the weight, width, and contrast of this letterform. Unlike the sans-serif O, this letterform has much less weight on the north and south curves (that weight is created by the pressure of the pen when drawing an O).

And with that, you've got a finished serifed HEAO!

4. Drawing Slab-Serif Letterforms
Slab-serif letterforms are pretty explanatory. Essentially, just think of a sans-serif typeface with "slabs" on either end of the strokes rather than the thin tapering serifs like the previous serif letterforms we just did.
The only thing to remember with slab serif faces is that the slabs are generally the same weight as the crossbars (which means they're about a hairline thinner than the vertical strokes).
Step 1
Beginning with the H, let's start by drawing another sans-serif H. Next, just add those slabs to the tops and bottoms of the vertical strokes. Pay attention to the weight—it may just be a hairline, but it makes all the difference!

Step 2
Move on to the E whenever you're ready. Just as you did before, start with the sans-serif and add some slab-serifs! Just notice there is no slab on the middle crossbar of the E. There's no slab because if one did exist, it would consume all the negative space within the letterform and feel way too heavy.

Step 3
Alright, you've got this A. No explanation needed really! It's nearly identical to the sans-serif A. The only difference? That's right, slab-serifs. Add 'em on, and you're good to go!

Step 4
Now, anything with a curve generally doesn't have a slab attached to it, unless it's a curve such as a P, R, B, etc., which connect to a vertical stroke. Anyway, for this O, decide on a good width (obviously try to match our reference sheet—unless you're trying something unique and different!) and begin drawing (almost) a perfect circle. Simple as that!

Here's our completed Slab-Serif HEAO!

5. Drawing Script Letterforms
Let me throw out a little disclaimer before we get into this section. Script lettering is another subject in itself. I'll be writing a separate class for script letterforms for you to truly grasp the dos and don'ts of script. We're going to focus on a few minor details of script, based on the typeface Snell Roundhand, to give a little intro to script lettering.
Things to note while practicing: script lettering was generally done with some sort of calligraphy tool like a fountain dip pen, oblique pen, etc. That's something to remember when trying to understand the thicks and thins and other characteristics. Additionally, with a script style of lettering, it's usually only the first letter within the word that's capitalized, not the entire word. I've only kept the HEAO capitalized to remain consistent with the other styles of typography we're learning.
Keep that all in mind when practicing the below steps. Let's get started!
Step 1
Beginning with the H, and all the other letterforms for that matter, we're going to keep a constant angle of about 45 degrees. Let's start by drawing the nice fluid 45-degree left-hand stroke of the H and do the same with the right-hand stroke. As I said above, the thicks and thins are determined by the pen. When a pen is pulled down, more ink is released, causing the thicker strokes. Knowing that, for this H, pay attention to the thin weights near the top and bottom of the stroke, and notice how it begins to get heavier in the middle.
Add that crossbar and the teardrop terminals, and this H is complete! (Note: the additional "swash" stroke on the left-hand stroke of the H is optional. More details and info about the "extras" will be covered in another tutorial.)

Step 2
If you take a look at this script E, you'll notice it's rather odd looking. Definitely a unique letterform. And the best part about it is that it's formed with a single stroke of the pen.
To form this E, begin a bit below the cap-height, curve upwards toward the top-right, and bring it around counterclockwise and downward toward about the center of your 2" space on your guide page. Once that's complete, curve outward and down towards the bottom left and circle around to the top right, while still keeping that curve below the crossbar-line. This gif will help you understand the process a bit more.

Step 3
If you compare the right-hand stroke of the H and the right-hand stroke of the A, they're exactly the same! (other than minor weight differences where the stroke begins).
With that said, begin with the right-hand side of the A (that's just my preference) and essentially draw what you've already done with your H. Next, finish it off by drawing the thin stroke at that same 45-degree angle. You have the option to add the teardrop terminal or leave it off entirely.
Add that crossbar, and it's good to go!

Step 4
The script O should feel pretty similar to drawing a serif O. The only difference here is the 45-degree angle and varying weights.
With that in mind, begin the O just a tad below the cap-height and maintain the thick strokes on the left and lower-left-hand side as well as the right and upper-right-hand side of the O.
The exit stroke where it extends outside of the O is another optional stroke. I'll teach you more about flourishing, swashes, etc., in a later tutorial.

Here's our completed script HEAO!

6. Drawing Decorative Letterforms
What makes a decorative letterform decorative? Essentially, it's just the extra bells and whistles that are added to the face to give it an extra appeal. For example, in the Rosewood typeface we're dealing with on the reference sheet, the drop shadow, diamond shape, and divided color make this "decorative". If all those extra things weren't included, this would just be a normal slab-serif typeface.
So, as far as teaching you this style goes, there's not much I can teach since it's totally up to you how you want to embellish your type. A great website to see tons of decorative styles would be Typefight.

Step 1
Let's begin by using our slab-serif letterforms once again. The only difference with these letterforms is the width of the overall letterforms and the brackets within the slab-serifs. So draw out each letterform, H, E, A, and O. You've done it multiple times now, so it should be easier this time around!

Step 2
Now that you've got your basic letterforms drawn, it's time to embellish. To do so, we're going to use the same direction shade that Rosewood uses, but let's change it up a bit and make a small drop shade rather than a large drop shadow. So, essentially, draw an extra line around each letterform on the right and bottom sides.

Step 3
Instead of copying the exact style of Rosewood, let's fill in the letterforms with a light pencil shade to make them a light grey value.
To finish it off, let's give our type some "spurs". Essentially, let's add a small triangle on whichever side of the letterform you please. I drew mine on the left.

Step 4
To add even more, let's add the circle with two pointed triangles on the north and south of the circle. Repeat that across all the remaining letterforms, and I think we can call it a day.
As I said before, this entire process is totally up to you! You have creative freedom to embellish your typography however you'd like.

7. Drawing Blackletter Letterforms
Blackletter forms are another beast to tackle in a separate class, but I'm still going to provide some basics to get you started in the right direction!
To understand how they're formed, you need a bit of history. Blackletter is also referred to as Gothic Script because it's a form of calligraphy. It was used very widely in Europe for nearly any kind of document/book since everything was written by hand until the invention of printing by Johannes Gutenberg.
There are a wide variety of styles of blackletter forms. The capitals you will be practicing are of a more "modern" approach to the blackletter characters formed in the early 12th to 17th centuries.
Obviously, by the look of these characters, you can tell they're pretty complex, with lots of vertical, angled, and curved strokes. To understand how they're formed, you need to know what tools were used too. A simple broad-edged nib that produces a straight line of ink is the utensil of choice. If you'd like, you can purchase the Pilot Parallel Pen for practice. But, since this class is about drawing letterforms, let's begin drawing rather than writing.
Step 1
Beginning on the H, let's form the first left-hand vertical stroke. Draw that stroke, keeping in mind the thin weight towards the top and bottom and the thicker weight in the middle. It starts thin and gradually gets thicker because of the weight implied by the broad-edged nib and maintaining the 45-degree angle.
Next, let's form the bottom horizontal stroke. It should now look almost like an "L".
Continue further and add the second vertical stroke that eventually connects into the base of the horizontal stroke you just created.
Lastly, add that curve to finish off this H. Additional extra strokes that extend off the letterform are optional, but I included the process in the gif for your reference.

Step 2
Moving onward to the E. This should be relatively easy for you if you completed the Hand Lettering: Letterforms at Their Core tutorial.
Begin by forming a semicircle (the bowl of the E). Next, let's add the vertical stroke that's just a tad to the left of the center. Watch the weight as it connects into the bowl.
Next, add the "crossbar" or the horizontal stroke of the E towards the top. It'll connect to the vertical stroke you just created. Watch the weight again. Make sure it doesn't get too heavy at the top.
Lastly, let's form the last horizontal stroke that sits just above the center of the E. Let's first draw that thin vertical stroke down the center of the E. Then, connect the second horizontal crossbar directly to that thin vertical stroke we created. The finished letterform will look something like this.

Step 3
Moving onward with the A, let's start with the right-hand vertical stroke. Pay attention to the weight once again, as it gets thinner to thicker from top to bottom.
Next, add the 45-degree angle stroke to complete the structure of the A. Then, add that crossbar.
Now here is where you have the choice to add all your embellishments. I say we add the curved stroke from the top of the A to the crossbar.

Step 4
With the O, this should be relatively simple as well if you've mastered your curves from the previous class. The only difference is the flat start of the stroke on the left-hand side of the O.
So begin by drawing the first left-hand curve, and next, add the right-hand curve to complete the circle. Keep in mind the top-left needs to be flat instead of round like the rest of the letterform.
Lastly, let's add the one left-hand vertical stroke on the inside of the O. Again, you have the choice to draw the extra thinner lines. It's up to you what you do with these letterforms!

To really understand the forms and structures these specific letterforms take, it's best to write them with a broad-edged nib and understand your thicks and thins that are created by the angle and direction of the pen. Gothic script (blackletter) is an art form in itself. I highly recommend practicing that before beginning to draw the forms because it'll help your eyes and hand compose the letterforms on paper without writing the forms.
Here's the completed blackletter HEAO!

8. Drawing Monospace Letterforms
To be honest, I've never drawn monospace lettering for a client. It's not as appealing as the rest of the styles you're now capable of, but it's still something to add to the knowledge base! You either have never seen this style of typography or barely at all. The reason is that monospaced fonts were used with the first computers and their terminals. Those computers had very limited graphical capabilities, so a fixed-width (monospace) typeface was needed.
Usually, every letterform within a typeface has different widths. For example, a "W" is much wider than a "J". But with monospace letterforms, those widths would be the same.
With that said, certainly pay attention to the overall widths of your monospaced letterforms. Make sure they're all equal!
Step 1
With these letterforms, they're pretty similar to the slab-serif face we created earlier. Only difference? That's right, rounded slabs, as well as the consistent width of every letterform.
Draw those vertical strokes, add a crossbar, throw on the slab-serifs, and you're good to go!

Step 2
Same as the above, prepare this E by drawing a vertical stroke and attaching three crossbars just as we've done many times above. Lastly, add the rounded-slab-serifs, and it's complete.
Pay attention to consistent weight, as if this was the very first exercise you completed during this tutorial.

Step 3
Again, same process as before. The only difference with this A is that a small exit stroke has been added to the top-left. Other than that, follow the same processes we've already practiced. It consists of two diagonal strokes, a horizontal stroke (for the crossbar) and the rounded slabs.

Step 4
Let's finish this O, and we'll be done! Extend the curves just slightly above and below the guidelines of your "guide page" you have underneath. Draw those curves, and make sure the width is the same as your previous letterforms.

Now, you've got yourself a completed monospaced HEAO!

5 Top Hand-Lettering Fonts From Envato Elements
You've learned everything about the different types of letters and how to do hand lettering in this tutorial. Next up, let's see some of the best hand-lettering fonts from Envato Elements.
If you're a digital creator with multiple projects, you'll love our subscription-based marketplace. For a low monthly fee, enjoy unlimited downloads of the best hand lettering fonts. You can also get unlimited premium fonts, graphic templates, actions and presets, and more.
Let's see some classic hand lettering fonts from Envato Elements:
1. Exensa Grotesk - Sans-Serif Font (OTF, TTF, WOFF)

Exensa Grotesk is a classic and clean sans-serif font inspired by the popular Helvetica sans-serif font. If you're looking for modern sans-serif fonts for your projects, check this one out.
Exensa Grotesk features five weights and includes all web font formats. This is one of the best sans-serif fonts for creative projects.
2. Addington CF - Serif Font Family (OTF, TTF)
We've all worked with Times New Roman and know this classic serif font. And if you're a fan of serif fonts, you'll surely love this one.
Addington CF is one of the modern serif fonts we've got in Envato Elements. This beautiful serif font is excellent for all types of text. It includes seven weights, Roman and Italic sets, and more advanced features.
3. Synthesia Brush Script Font (OTF, TTF, WOFF)

Script fonts will always be popular, and this is one of the best script fonts we've got. Synthesia is a brush script font, which means it has a handwritten look.
The brush script font features stylistic sets, punctuation glyphs, and supports international languages.
4. Hypebeast - Vintage Decorative Font (OTF, TTF, WOFF)

Who doesn't like decorative fonts with vintage looks? Hypebeast is one of the best decorative fonts of the Envato Elements fonts library.
This decorative font is really complete. Hypebeast comes with more than 500 glyphs, ligature and stylistic alternates, ornament vector bonus, and it's accessible in many types of software.
5. Minerva - Blackletter Font (OTF, TTF)

If you like traditional blackletter fonts, Minerva is for you. This classic gothic blackletter font will look great on your creative digital projects. This gothic font includes uppercase letters, numerals, and punctuation symbols.
Explore More Hand Lettering and Calligraphy Resources
I hope you've liked this letterform anatomy tutorial. Now you know what types of letters there are and how to recreate them. After the hand lettering fonts from Envato Elements, I'm sure you'd like to discover more resources:
 Hand LetteringHand Lettering: A Project From Start to Finish
 Hand LetteringHand Lettering: How to Stylize Your Letters
 Hand LetteringHand Lettering: Mastering Brush-Script
 Hand LetteringNew Course: Hand Lettering for Beginners
 TypographyThe Difference Between Typography & Hand Lettering: Typography in 60 Seconds
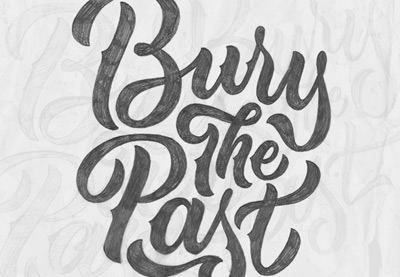 Hand LetteringHand Lettering: Scripts, Swirls, & Flourishes
 Fonts25+ Best Free Hand-Lettering Style Fonts (Designs for 2021)
 Fonts29 Best Handwritten Fonts
Practice the Types of Hand Lettering Today!
Practice, practice, practice. Some of those first initial drawings might not look how you want them to, and that's OK! I started in the same place. Just like anything in life, it all takes practice and patience. Give it time and effort, and you'll be great.
If you need any help or have questions regarding the material above, feel free to comment. Good luck!
If you didn't find the hand-lettering font you were looking for, go to Envato Elements and browse through its library today!
Original Link: https://design.tutsplus.com/tutorials/hand-lettering-understanding-types-of-type--cms-22156
TutsPlus - Design
More About this Source Visit TutsPlus - Design