
Some of Our Sources
- Techcrunch
- TutsPlus - Code
- FanExtra - PSD
- Web Design Ledger
- Wal You
- Web Resource Source
- Android Dissected
- Codrops
- Willems Lab
- The Verge
Help Webnuz
Referal links:
How to Create a Photoshop Oil Painting Effect

In this oil painting Photoshop tutorial, you will learn how to create an oil painting Photoshop action. With this action, you'll be able to transform any photo into an oil paint Photoshop effect. I will explain everything in so much detail that everyone can follow it, even those who have just opened Photoshop for the first time.
What You Will Learn in This Adobe Photoshop Action Tutorial
- How to create an oil painting Photoshop action
- How to create a Photoshop oil painting effect
- How to use the oil paint brush Photoshop filter
- How to create the canvas and emboss Photoshop textures
- How to save Photoshop actions
Take It to the Next Level!
Oil Painting Photoshop Action (ATN, ABR, PAT)

The oil painting Photoshop action will transform your photo into an oil painting effect in no time! All you have to do is open your photo and run the action. Creating an advanced Photoshop oil painting effect has never been this quick and easy.
Follow along with us over on our Envato Tuts+ YouTube channel:
What You'll Need
To recreate the design above, you will need the following resources:
1. How to Get Started
First, open the photo that you want to work with. To open your photo, go to File > Open, choose your photo, and click Open. Now, before we get started, just check a couple of things:
- Your photo should be in RGB Color mode, 8 Bits/Channel. To check this, go to Image > Mode.
- For best results, your photo size should be 2500–4500 px wide/high. To check this, go to Image > Image Size.
- Your photo should be the Background layer. If it is not, go to Layer > New > Background from Layer.

2. How to Start Recording a Photoshop Action
In this section, we are going to start recording the action. Go to Window > Actions, and in the Actions panel, click on the menu icon in the top right-hand corner, choose New Set to create a new set, and name it Oil Painting. Then, click on the same menu icon again, choose New Action to create a new action, and name it Oil Painting.

3. How to Create the Photoshop Oil Painting Effect
Step 1
In this section, we are going to create the Photoshop oil painting effect using a Photoshop oil paint filter along with other filters. Press Control-J on your keyboard to duplicate the Background layer. Then, go to Image > Adjustments > Shadows/Highlights, and set Shadows to 10% and Highlights to 5%.

Step 2
Now go to Filter > Blur > Surface Blur, and set the Radius to 5 px and Threshold to 15.

Step 3
Go to Filter > Sharpen > Unsharp Mask, and set the Amount to 250%, Radius to 1 px, and Threshold to 0 levels.

Step 4
Now go to Filter > Noise > Reduce Noise and set the Strength to 10, Preserve Details to 25%, Reduce Color Noise to 0%, and Sharpen Details to 0%.

Step 5
Go to Filter > Stylize > Diffuse, and set the Mode to Anisotropic.

Step 6
Now go to Filter > Stylize > Oil Paint, set the Stylization to 2.5 and Cleanliness to 2.5, and uncheck the Lighting option.

Step 7
Go to Filter > Sharpen > Unsharp Mask, and set the Amount to 100%, Radius to 1 px, and Threshold to 0 levels.

Step 8
Now name this layer Oil Painting.

4. How to Create a Canvas Texture in Photoshop
Step 1
In this section, we are going to create the canvas texture. Go to Layer > New > Layer to create a new layer, and name it Canvas.

Step 2
Now press D on your keyboard to reset the swatches, go to Edit > Fill, and set Contents to 50% gray, Mode to Normal, and Opacity to 100%.

Step 3
Go to Filter > Filter Gallery > Texture > Texturizer, and set the Texture to Canvas, Scaling to 200%, and Relief to 4.

Step 4
Now change the Blending Mode of this layer to Soft Light.

5. How to Create a Photoshop Emboss Effect
Step 1
In this section, we are going to create the emboss effect. Hide the Canvas layer, go to Layer > New > Layer to create a new layer, and name it Emboss.

Step 2
Now press Control-Alt-Shift-E on your keyboard to make a screenshot, and then press Control-Shift-U to desaturate this layer. Then, go to Filter > Stylize > Emboss and set the Angle to 135°, Height to 3 px, and Amount to 500%.

Step 3
Change the Blending Mode of this layer to Soft Light and set the Opacity to 30%. Then, show the Canvas layer.

6. How to Make Final Adjustments to the Photoshop Oil Painting Effect
Step1
In this section, we are going to make final adjustments to the Photoshop oil painting effect and save the action for future use. Go to Layer > New Adjustment Layer > Curves to create a new curves adjustment layer and name it Color Look.

Step 2
Now Double-click on this layer thumbnail and in the Properties panel enter the settings below:

Step 3
Press D on your keyboard to reset the swatches. Then, go to Layer > New Adjustment Layer > Gradient Map to create a new gradient map adjustment layer and name it Overall Contrast.

Step 4
Now change the Blending Mode of this layer to Soft Light and set the Opacity to 31%.

Step 5
Go to Layer > New Adjustment Layer > Levels to create a new levels adjustment layer, and name it Overall Brightness.

Step 6
Now Double-click on this layer thumbnail and, in the Properties panel, enter the settings below:

Step 7
Go to Layer > New Adjustment Layer > Vibrance to create a new vibrance adjustment layer and name it Overall Vibrance/Saturation.

Step 8
Now Double-click on this layer thumbnail and, in the Properties panel, set the Vibrance to +22 and Saturation to +10.

Step 9
Press Control-Alt-Shift-E on your keyboard to make a screenshot, and then press Control-Shift-U to desaturate this layer. Then, go to Filter > Other > High Pass and set the Radius to 2 px.

Step 10
Now change the Blending Mode of this layer to Vivid Light and name this layer Overall Sharpening.

7. How to Save the Photoshop Action and Crop an Image in Photoshop
In this section, we are going to save the action for future use and crop the image. Go to Window > Actions, and in the Actions panel, click on the rectangle icon in the bottom left-hand corner to stop recording the action. Then, in the same panel, click on the menu icon in the top right-hand corner and choose Save Actions to save the action.
Now choose the Crop Tool (C) and transform the Crop Box as shown below:

You Made It!
Congratulations, you have succeeded! You've learned how to create an oil painting effect Photoshop action to transform any photo into an oil paint Photoshop effect. Here is our final result:

Take It to the Next Level!
Oil Painting Photoshop Action (ATN, ABR, PAT)
The oil painting Photoshop action will transform your photo into an oil painting effect in no time! The action works so you simply open your photo and just run the action. Creating this advanced Photoshop oil painting effect has never been this quick and easy.
Liked this oil painting Photoshop tutorial? Then, you may also like:

How to Create an Illustration Photoshop Action (From Photo to Illustration)

How to Create a Dripping Paint Photoshop Effect Action
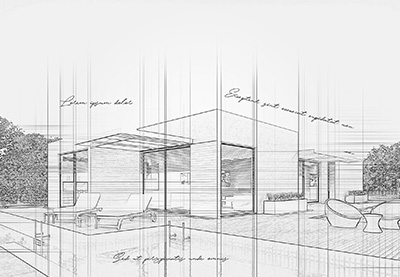
How to Create an Architecture Sketch Effect in Adobe Photoshop

How to Create a GTA Photo Effect Action in Adobe Photoshop
Original Link: https://design.tutsplus.com/tutorials/how-to-create-a-photoshop-oil-painting-effect--cms-35282
TutsPlus - Design
More About this Source Visit TutsPlus - Design