
An Interest In:
Web News this Week
- April 24, 2024
- April 23, 2024
- April 22, 2024
- April 21, 2024
- April 20, 2024
- April 19, 2024
- April 18, 2024
Some of Our Sources
- Slashdot
- Techcrunch
- Web Designer Wall
- Just Creative
- Six Revisions
- Vandelay Design
- Fudge Graphics
- Wal You
- Freelance Switch
- Hashedout
Help Webnuz
Referal links:
Developing a CRUD Node.js Application with PostgreSQL
Hey all Coders! How are you doing? Today we are going to start a series of articles where we will be developing a CRUD application with Node.js & PostgreSQL focusing on the Back-End. After that, we will be migrating the project to serverless architecture with Azure Functions, migrating the local database to Azure PostgreSQL, and finally deploying this application using GitHub Actions.
I created a repository on GitHub HERE, where all the source code of this project and the resources that I will be mentioned during the 5 articles are allocated.
updated repository HERE.
Important information: the focus of the project will be on the Back-End. If, when we reach the end of the project, we want to test the Back-End API created in some application in the Front-End, I can then be creating a generic Front-End just to test the created api!
Well, I talked a lot, let's go ?!
Resources Used during the Tutorial
I will mention here some resources that we will use during the development of this application throughout this article. Here they are:
One of the things that attract many developers to use PostgreSQL is that it is completely free, available on any Operating Systems, and best of all: it is completely Open Source! Countless large companies like Uber, Netflix, Spotify, Instagram, Reddit, and many others make use of PostgreSQL. That's why PostgreSQL is so popular!
PostgreSQL was the first database that I learned to work with and it was with it that I learned in Database I and II classes in 2012 at the University. I always liked PostgreSQL because it is very simple and easy to use!
We'll need to install PostgreSQL on our machine. But also feel free to use some Docker image to continue this tutorial.
Installing PostgreSQL Database
Well, I'll teach you here how to install PostgreSQL for different OS users:
Windows: for Windows users, just download it HERE. Common and simple installation, as if you were installing a program on Windows.
macOS: for Mac users, just download the packages HERE. Also, you will need to have Homebrew installed. If you have some issues or difficulty installing, I recommend you to take a look at this video HERE
Linux: for Linux users, as there are countless different versions of Linux, I recommend you to take a look at this PostgreSQL guide HERE
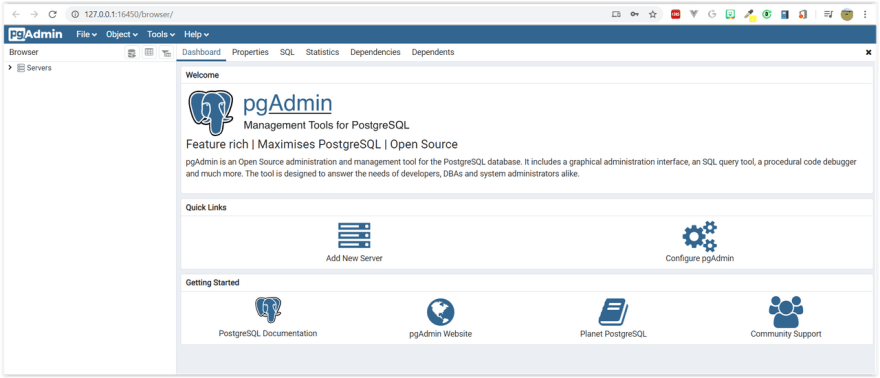
In my case, I will be using Windows, since it is my main development machine. I will be using PostgreSQL version 12. After installing, just search for pgAdmin. A browser page will open on http://127.0.0.1:16450/browser/ and now we can start to use it!
Creating Table in PostgreSQL
We will now create the table with the properties that will be used to persist to be used in our Back-End.
The class will be: Product
Class: Product- productId: integer primary- product_name_: varchar- quantity: int- price: realNow open PgAdmin. It is likely that you will need to include the password to perform some actions within PgAdmin. It is likely that you will need to create a Database. Just create with the name you want. After you've created your database, right-click on Create Script, and run the script below on PostgreSQL (as shown in the gif below):
CREATE TABLE products ( productId SERIAL PRIMARY KEY, productName VARCHAR(255) NOT NULL, quantity INTEGER NOT NULL, price NUMERIC(5,2));
Now, all you have to do is access the newly created table!

Great! We have already created our table!
Creating the Application Architecture in Node.js
Now that our table is created, let's create the project in Node.js. In this project, I will follow the SOLID & Clean Code principle. If you want to know more about these two topics, I highly recommend you to see these 2 links below:
Well, let's start to architect our project. Create a folder called API and run the following command:
> npm init -yThis command creates a standard package.json file. And now we will install the following packages:
> npm i --save-dev husky nodemonAnd also install the other packages as dependencies:
> npm i cors dotenv express express-promise-router pgAnd finally, the package.json file will look like this:
{ "name": "crud-nodejs-psql", "version": "1.0.0", "description": "Aplicao CRUD com Node.js & PostgreSQL", "main": "server.js", "scripts": { "dev": "nodemon", "lint": "eslint --ext .js,.html -f ./node_modules/eslint-friendly-formatter . --fix", "prepush": "npm run lint", "start": "node server.js" }, "keywords": [ "node.js", "javascript", "postgresel", "azure", "serverless", "azure-functions", "azure-devops", "azure-storage", "github-actions", "app-service", "express" ], "author": "Glaucia Lemos", "license": "MIT", "bugs": { "url": "https://github.com/glaucia86/nodejs-postgresql-azure/issues" }, "homepage": "https://github.com/glaucia86/nodejs-postgresql-azure#readme", "devDependencies": { "eslint": "^6.8.0", "eslint-config-airbnb-base": "^14.0.0", "eslint-plugin-import": "^2.20.1", "husky": "^4.2.3", "nodemon": "^2.0.2" }, "dependencies": { "cors": "^2.8.5", "dotenv": "^8.2.0", "eslint-friendly-formatter": "^4.0.1", "eslint-plugin-html": "^6.0.0", "express": "^4.17.1", "express-promise-router": "^3.0.3", "pg": "^7.18.2" }}Create the structure of the folders and files as shown in the image below:

Developing the Application
Here after, I will not explain what each file does. Because the main focus of the article is to create a RESTful API, which in the end must be persisted in PostgreSQL.
Open Visual Studio Code and let's start developing the file: server.js and include the following code block:
- file: server.js
/** * File: server.js * Description: arquivo responsvel por toda a configurao e execuo da aplicao. * Data: 02/03/2020 * Author: Glaucia Lemos */const app = require('./src/app');const port = process.env.PORT || 3000;app.listen(port, () => { console.log('Aplicao executando na porta ', port);});Now, open the src -> app.js file and include the code block below:
- file: app.js
const express = require('express');const cors = require('cors');const app = express();// ==> Rotas da API:const index = require('./routes/index');// const productRoute = require('./routes/product.routes');app.use(express.urlencoded({ extended: true }));app.use(express.json());app.use(express.json({ type: 'application/vnd.api+json' }));app.use(cors());app.use(index);// app.use('/api/', productRoute);module.exports = app;Note that in this app.js file, there are several lines of code commented on, just to be able to initially execute our API and see if we are developing correctly. But, later on we will make some significant changes to this file and then uncomment these lines.
And finally, open the src -> routes -> index.js file and include the code block below:
- file: src -> routes -> index.js
/** * File: src/routes/index.js * Description: arquivo responsvel pela chamada da Api da aplicao. * Data: 02/03/2020 * Author Glaucia Lemos */const express = require('express');const router = express.Router();router.get('/api', (req, res) => { res.status(200).send({ success: 'true', message: 'Seja bem-vindo(a) a API Node.js + PostgreSQL + Azure!', version: '1.0.0', });});module.exports = router;Now, open the command prompt inside the apifolder and run the command:
> nodemonAnd then open the postman and include the following URL in (GET): localhost:3000/api/:
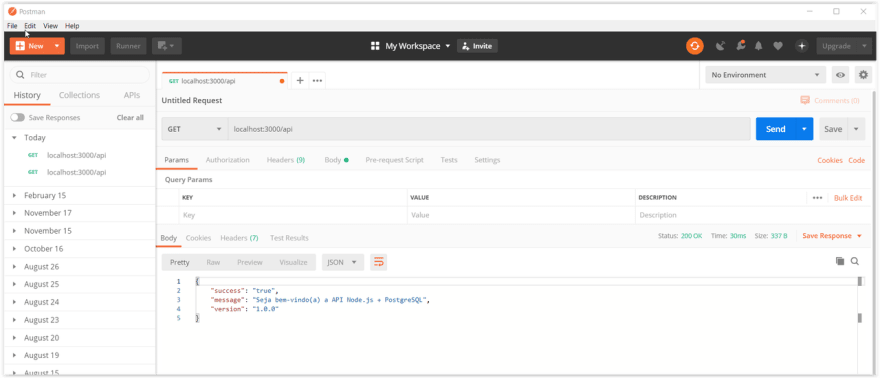
If the screen is shown just like the one you can see above, this means our API is working correctly! Now, let's go deeper into development. Here we go!
Understanding a little bit more about the package: 'node-postgres'
You may have noticed that when we installed some packages, we included the node-postgres package. This package will be essential for us to work with the PostgreSQL Client on Node.js.
This package is an open source project. And it has simple and straightforward documentation-teaching how we can implement this package in Promises or using Async / Await. It helped me a lot to develop this tutorial!
I recommend reading the package documentation, which can be found here HERE.
In this project, I decided to use node-postgres rather than Sequelize, which is a widely used ORM for those who use PostgreSQL, MySQL, MariaDB, SQLite, and Microsoft SQL Server. Just to make this project-1 easier.
As we already installed the node-postgres package at the beginning, let's move on!
Creating an environment variable with 'dotenv'
Another point that you may have noticed is that we also installed the dotenv package. This server package is important so that we can store our environment variables that we don't want to make available to the public when you do a commit.
And as how we will use the database connection string and as how this connection string has sensitive data we don't want to make it available to everyone. We will address this now in our project. To do this, follow the steps below:
DATABASE_URL=postgres://{db_username}:{db_password}@{host}:{port}/{db_name}If you don't know what your PostgreSQL db_usernameis, just right click on the PgAdmin Server and go to Properties -> Connections and you will find the username. See the gif below:

Configuring the connection string to the database in the file: 'database.js'
Now that we have included our connectionstring in the .env file, now is time to start developing and configuring our application's database connection to PostgreSQL.
To do this, open the database.js file and include the following code block:
- config/database.js:
/** * Arquivo: config/database.js * Descrio: arquivo responsvel pelas 'connectionStrings da aplicao: PostgreSQL. * Data: 04/03/2020 * Author: Glaucia Lemos */const { Pool } = require('pg');const dotenv = require('dotenv');dotenv.config();// ==> Conexo com a Base de Dados:const pool = new Pool({ connectionString: process.env.DATABASE_URL});pool.on('connect', () => { console.log('Base de Dados conectado com sucesso!');});module.exports = { query: (text, params) => pool.query(text, params),};This block is connecting with our connection string so that we can finally begin to persist data in PostgreSQL using Node.js.
Note that we are using node-postgres package. If you want to understand a little more about pg.Pool, I recommend reading HERE, as from now on we will use it a lot, including the properties of this builder!
Route: (POST) 'Create Product'
We've done the configuration of our application and we are already making the connection to the database! Now the game will start! And for that, we will develop the first route. For this, we will use a lot from now on two files: product.controller.js and product.routes.js.
Follow these steps:
Include the code block below in the product.routes.js file
- file: product.routes.js
// @ts-nocheck/** * Arquivo: src/routes/product.routes.js * Descrio: arquivo responsvel pelas rotas da api relacionado a classe 'Product'. * Data: 04/03/2020 * Author Glaucia Lemos */const router = require('express-promise-router')();const productController = require('../controllers/product.controller');// ==> Definindo as rotas do CRUD - 'Product':// ==> Rota responsvel por criar um novo 'Product': (POST): localhost:3000/api/productsrouter.post('/products', productController.createProduct);module.exports = router;Now we will develop the logic of the method createProductinside the file product.controller.js
- controllers/product.controller.js
const db = require("../config/database");// ==> Mtodo responsvel por criar um novo 'Product':exports.createProduct = async (req, res) => { const { product_name, quantity, price } = req.body; const { rows } = await db.query( "INSERT INTO products (product_name, quantity, price) VALUES ($1, $2, $3)", [product_name, quantity, price] ); res.status(201).send({ message: "Product added successfully!", body: { product: { product_name, quantity, price } }, });};Note that we simply use the insert query in the code, just as we would in an SQL script. Just like that. And of course, to return all the values entered we put a message to confirm the created product and returning all values for that product.
Now we need to update the app.js file before testing our application. To do this, uncomment the lines where the product.routes were:
- file: app.js
/** * Arquivo: app.js * Descrio: arquivo responsvel por toda a configurao da aplicao. * Data: 02/03/2020 * Author: Glaucia Lemos */const express = require('express');const cors = require('cors');const app = express();// ==> Rotas da API:const index = require('./routes/index');const productRoute = require('./routes/product.routes');app.use(express.urlencoded({ extended: true }));app.use(express.json());app.use(express.json({ type: 'application/vnd.api+json' }));app.use(cors());app.use(index);app.use('/api/', productRoute);module.exports = app;Open the command prompt and type the following command into the api folder
> nodemon- Now we can test our first created route. So now, open Postman at the following endpoint: (POST) localhost: 3000/api/products, as shown in the gif below:

If the following message appears as below:
{ "message": "Product added successfully!", "body": { "product": { "product_name": "Logitech MK270 Wireless Keyboard and Mouse Combo", "quantity": "2", "price": "18.99" } }}It is because it persisted perfectly. To be sure of that, open the PgAdmin of the created table and do as shown in the gif below:

Perfect! Once we manage to create the first route, the others will be easy!,
Let's keep on!
Route: (GET) 'List All Products'
Now we are going to create the route that will list all created and persisted products in PostgreSQL. As the POST route is already created, it would be good for you if you included more data to help with future routes!
Return to the product.routes.js file again and add the route to list all products:
- file: product.routes.js
// ==> Rota responsvel por listar todos os 'Products': (GET): localhost:3000/api/productsrouter.get('/products', productController.listAllProducts);Now, go back to the file product.controller.js and let's develop the logic of the listAllProducts method:
- file: product.controller.js
// ==> Mtodo responsvel por listar todos os 'Products':exports.listAllProducts = async (req, res) => { const response = await db.query('SELECT * FROM products ORDER BY product_name ASC'); res.status(200).send(response.rows);};Note that the query I made here was: SELECT * FROM products ORDER BY product_name ASC. Here I am asking to return all products persisted in PostegreSQL in alphabetical order! I did it to make it a little different! ;)
Let's test it. Open Postman and see the result:

It worked perfectly! Note that if we need to do a more elaborate SELECT with subqueries, following the logic, it will work perfectly! :)
Route: (GET) 'List Product by Id'
Now, it's very easy. Just combine our knowledge of SQL with the other CRUD's that we have already created in other Node.js applications.
Now let's create the route to list a specific product by Id. Again, open the file product.routes.js and include one more route:
- file: product.routes.js
(...)// ==> Rota responsvel por selecionar 'Product' pelo 'Id': (GET): localhost:3000/api/products/:idrouter.get('/products/:id', productController.findProductById);(...)Now open the file product.controller.js and we will develop the logic of this route:
- file: product.controller.js
(...)// ==> Mtodo responsvel por selecionar 'Product' pelo 'Id':exports.findProductById = async (req, res) => { const productId = parseInt(req.params.id); const response = await db.query('SELECT * FROM products WHERE productid = $1', [productId]); res.status(200).send(response.rows);}Let's test this route on Postman now and see what happens:

Route: (PUT) 'Update Product by Id'
Now let's go back to the product.routes.js file to create the updateProductById route that will be responsible for updating the product by the Id:
- file: product.routes.js
(...)// ==> Rota responsvel por atualizar 'Product' pelo 'Id': (PUT): localhost: 3000/api/products/:idrouter.put('/products/:id', productController.updateProductById);Let's return to the updateProductById file to develop the logic of the product.controller.js method:
- file: product.controller.js
(...)// ==> Mtodo responsvel por atualizar um 'Product' pelo 'Id':exports.updateProductById = async (req, res) => { const productId = parseInt(req.params.id); const { product_name, quantity, price } = req.body; const response = await db.query( "UPDATE products SET product_name = $1, quantity = $2, price = $3 WHERE productId = $4", [product_name, quantity, price, productId] ); res.status(200).send({ message: "Product Updated Successfully!" });};It's updating perfectly! See the gif below:

Now let's go to our last route!
Route: (DELETE) 'Delete Product by Id'
Finally, we got to the last route of our api! Let's go back to the product.routes.js file and create the route for the deleteProductById method:
- file: product.routes.js
(...)// ==> Rota responsvel por excluir 'Product' pelo 'Id': (DELETE): localhost:3000/api/products/:idrouter.delete('/products/:id', productController.deleteProductById);(...)And finally, developing the logic of this route in the file product.controller.js:
- file: product.controller.js
(...)// ==> Mtodo responsvel por excluir um 'Product' pelo 'Id':exports.deleteProductById = async (req, res) => { const productId = parseInt(req.params.id); await db.query('DELETE FROM products WHERE productId = $1', [ productId ]); res.status(200).send({ message: 'Product deleted successfully!', productId });};Everything is working perfectly, if we open PostgreSQL we will see that now we only have 5 registered products!

Conclusion
Today we have learned how to create a CRUD API RESTFul with Node.js persisting locally in PostgreSQL. In the next article, I'll teach you how to deploy this application in Azure App Service! After performing this deployment we will test on Postman and consequently on Swagger!
Here I would like to let some good resources about Node.js, Azure Database PostgreSQL & GitHub Actions:
- Build JavaScript applications with Node.js
- Azure Database for PostgreSQL documentation
- Quickstart: Create an Azure Database for PostgreSQL server by using the Azure portal
- Tutorial: Design a real-time analytics dashboard by using Azure Database for PostgreSQL Hyperscale (Citus)
- Azure for JavaScript & Node.js developers
- Free E-Book - Azure Serverless Computing Cookbook
- Free Course - Create Serverless Applications
And to stay on top of several other news, be sure to follow me on Twitter!

And subscribe on my Youtube Channel - Glaucia Lemos to see weekly new videos about Web Development, Node.js & JavaScript!

See you!
Original Link: https://dev.to/glaucia86/developing-a-crud-node-js-application-with-postgresql-4c9o
Dev To
More About this Source Visit Dev To