
An Interest In:
Web News this Week
- April 1, 2024
- March 31, 2024
- March 30, 2024
- March 29, 2024
- March 28, 2024
- March 27, 2024
- March 26, 2024
Some of Our Sources
- BoingBoing
- Mashable
- Team Treehouse
- Spoon Graphics
- Six Revisions
- Fuel Your Creativity
- 24 Ways
- Stylized Web
- Freelance Switch
- Hashedout
Help Webnuz
Referal links:
How to Customize a Registration Form Template Using Microsoft Word

Remember paper registration forms?
It’s easy to forget that printed registration forms are part of your branding. You may not use them much, but don’t take them for granted and use any old registration form. The right registration form template is both useful and looks great.

Your printed registration forms need to be well organized and look professional. They also need to use the same branding as your other materials.
When to Use a Printable Registration Form
You need a printable registration form for various purposes, such as:
- Getting entries for a contest
- Signing up subscribers to your mailing list
- Collecting contact information at a tradeshow
- Receiving donations during a live fundraising event
- Registering people to a class
And those are only a few examples!
You may wonder why you need a printable registration form in Word in the first place. Why couldn’t you do all your registration online?
There are some circumstances when you’ll need a paper form instead of an online one. For example:
- At events where an internet connection is either unreliable or totally unavailable
- When registrants, such as the elderly, prefer to use paper forms
- When paper forms are required by the government or another regulating body
Even if you plan on using an online registration form, it’s a good idea to have a paper printable registration form on hand. A power outage or computer breakdown might make it impossible to use your online forms!
Save Time With a Premium Printable Registration Form Template
The easiest way to create a registration form in Word is by using a template. A printed registration form template for Word is available at Envato Elements and GraphicRiver. Many of them are editable in Microsoft Word, which you may already be familiar with.
If you only need a single registration form template Word, check out GraphicRiver. You pay just one small fee for a single use of each MS Word template.

A free registration form template sounds tempting. But premium templates offer a better deal. For starters, they're professionally designed. Secondly, you can be sure that not everyone is using that same form.
Getting Started With Paper Registration Forms
Before creating your paper registration form, plan it out.
1. To Begin, Get Clear on What the Form Is For
Is it merely a tool to collect information, such as an attendance record? Or will it be the basis of a financial transaction? Will it need to pass muster with a particular institution? If so, you’ll need to know what their requirements are.
2. List the Information You'll Gather
Based on the goal for the form, make a list of the information the registration form needs to capture. The items on this list will become the fields on your registration form later on. The specific items on your list will depend on what you’re using the form for, but here are some items to consider:
Personal information. Typically, you’ll need the registrant’s name and contact information. You may also need their mailing address, affiliations, and other details.
Information for the registrant. Will they choose between different packages, dates, or other options?
Payment details. These could include forms of payment, amounts, and credit card information.
Permissions. If you’re subscribing people into a list, add a checkbox where they can indicate that they’re giving you permission to do so.
Signature. Do you need the registrant to sign?
Consider making a registration form sample by hand. This will give you an idea of where you want to place the different parts of your form.
3. Make It Easy to Complete
Don’t ask for more data than you’ll actually need. Make it as easy as possible for people to fill in the form.
You’ll also want to keep the form length to a minimum to save on printing and paper costs. If you expect to print hundreds, even thousands, of copies, then the cost can quickly add up. In most cases, your registration form doesn’t have to be longer than one page.
When you have the list of the information you need, then you’re ready to create your paper registration form.
How to Quickly Customize a Registration With a Premium Microsoft Word Template
In the rest of this post, I’m going to show you how to customize a registration form in Word.
1. Download a Registration Form Template
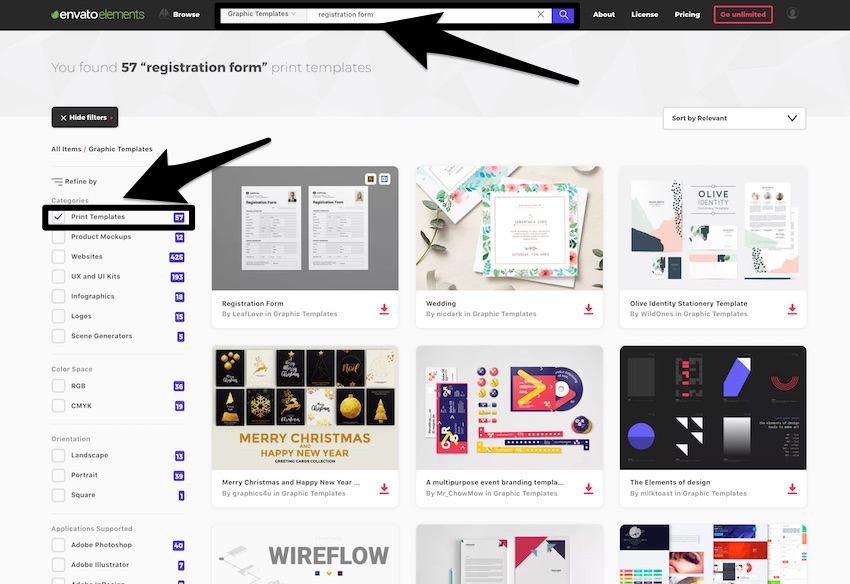
Log into your Envato account, then go to either Elements or GraphicRiver.
Type “registration form template” in the search bar. Filter your search; under Categories, check Print Templates.

Play around with different search terms to see what other options you find.
For this tutorial, I’m going to create a registration form template sample. I'll be using this template for registration form in Word. This template is one of the print templates available in Envato Elements.
When you see a printable registration form template you like, download it from the search results. You can do this by clicking on the download icon underneath the template's thumbnail:

Or click on the registration template to open its product page. Then, click the Download button.

Add the registration template to an existing project in your Envato Elements account. You can also create a new project. Click Add & Download.

You can find the registration template anytime in your Envato account. It will be available under the My Downloads area. You can also download it from there in the future.

After downloading the template file, you’ll have to unzip it.
In Windows, find the zip file in File Explorer. Double-click on the file name to unzip it.

To unzip the file on a Mac, find it in Finder, then double-click on the file. Or right-click the file and then click Open.

You should see the following folders:

You may wish to open and read the Info Documentation file in the Info Documentation folder. It also has the link to the Roboto font that’s used in the template if you don’t have it on your computer yet.
You must download and install this font before opening your form template file in Word.
The Info Documentation file has extra instructions and the designer’s email address. The email address comes in handy, so you know how to reach out if you get stuck when using the template.

Expand the Microsoft Word folder and the sub-folder that has your desired print registration form size. You can choose between US Letter Size for 8.5 x 11 inches and A4 for 8.27 x 11.69 inches.
TIP: Duplicate either “Registration Form.doc” or “Registration Form.docx”. Then, customize the copy. Don’t touch the original file. This way, if you mess up the file, you can duplicate the template again and start over.
If your computer is newer than 2004, then you should be fine with .docx.
Rename the duplicate file and open it.

Now you’re ready to customize the registration form template and make it your own!
Follow these steps to customize the printed registration form template in Microsoft Word:
2. Replace the Logo
The logo is a great place to start customizing the registration form.
To replace it with your own, right-click on the logo and click Change Picture.
Find the image file in your hard drive, then click Insert or Open.
Click and drag the corners of the logo image to resize it.
Or change its height and width in the Picture Format tab.
3. Delete the Company Name and Image Placeholder
Select the unwanted element then click Delete or right-click on it and select Cut from the drop-down menu.

In this case, I don’t need the big text beside the logo and the rectangular box in the upper-right corner. The box serves as a placeholder for the registrant’s photo. We can delete those elements.
4. Add Your Contact Information
Under the logo, add your address, telephone number, and email. Double-click inside the text box to edit the text. Type your information inside the text box.

5. Change the Form Title
Replace the form title with one that reflects your event or the purpose of the form.
At this point, you may wish to change the font, font size, color, style, and alignment of the form title. To do so, select the text box. Under the Home tab, choose the settings you desire.

Remember to save as you go!
6. Customize the Form Fields
Now it’s time to customize the form fields.
How to Delete Form Fields
Remove the fields you don’t need. For example, to remove Place of Birth, select the text box, then click the Delete key. Or right-click the text box and click Cut.

You’ll notice, this leaves white space in the middle of the line. To remove the white space, delete the gray rectangle at the end of the line.
Next, select the remaining gray rectangle and resize it to the end of the line.

To remove several elements at the same time: Click on one, hold the shift key, then click on other elements. Press the Delete key.

Remember to also delete the gray lines that remain.

For this registration form template sample, I’m going to delete the rest of the fields under Personal Information.
How to Add Form Fields
If you need to add form fields, the easiest way is to copy an existing field. In this case, I’m going to copy the Membership Type field and use it to create a Payment Details field.
Right-click on the fields and then select Copy from the drop-down menu.

Replace the text with your own.
Move elements, as needed, to make room for new fields or sections.
And now, my paper registration form is finished:

7. Print the Form
When the registration form looks just the way you want it to, it’s time to print the form.
Go to File > Print.

Choose the appropriate printer settings and print just one copy for now.
Double-check the printed form to make sure it:
- Has your organization name and/or logo
- Is consistent with your branding
- Contains all the form fields you need
- Is free of typos and grammatical errors
- Provides enough space to write on
If everything looks good, then go ahead and print the number of copies you think you’ll need.
TIP: Print extra copies, because you may need more than you think. It doesn’t hurt to be prepared!
Five Quick Registration Form Tips to Get More Signups
Customizing your registration form template is only the first step towards securing more signups and registrations. Here are five quick tips for enticing registration forms:
1. Use Color to Differentiate Between Sections
If your form has several sections, use color to differentiate between them. This will make your form look more appealing and better organized.

2. Ask Only for Information You Need
Make sure to only ask for information you need on your form. Forms that are too long have the potential to turn off people, so you risk losing signups and registrations as a result.
3. Make the Fields Big Enough
Ensure your form fields are big enough so people have an easier time entering the necessary information.

4. Print a Few Extra Copies
Even if you know an idea of how many people will fill out your form, it’s always better to print a few extra copies. This will ensure you've got enough forms in case someone makes a mistake.
5. Provide Instructions
Include a brief set of instructions on your form. This will help your registrants fill out the form quickly.

More Print Templates You Can Customize in MS Word
If you need to make other types of documents, you’ll find countless other templates you can customize in Microsoft Word. Here are just a few:
 Resumes39+ Professional MS Word Resume Templates (Simple CV Design Formats 2020)
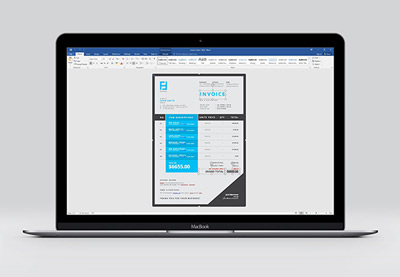 Invoicing20+ Best Simple Microsoft Word Invoice Design Templates for 2021
Learn More About MS Word
If you need to learn more about working with MS Word, we've got you covered. Brush up on your knowledge with the help of these tutorials:
 Microsoft WordHow to Quickly Format Basic Text Styles in Microsoft Word Documents
 Microsoft WordHow to Make Awesome Page Layout Designs in Microsoft Word
 Microsoft WordHow To Insert, View, or Delete Section (& Page) Breaks in Microsoft Word
Create a Branded Paper Registration Form With a Microsoft Word Template
It’s easy to customize a Microsoft Word template and create a branded registration form that meets your objectives.
As you learn to customize one printable registration form template, you’ll find it much easier to edit others. Microsoft Word templates enable you to easily create various printed and digital documents.
Don't be tempted by a registration form template for free download you find online. Free registration form templates can come with many problems.
Instead, explore editable MS Word templates on Envato Elements for unlimited template downloads. Your subscription also gives you unlimited access to fonts, stock photos, icons, and other graphic elements to use in your document.
Or pay only for what you use on GraphicRiver. Either way, customizing a Microsoft Word template is the best way to come up with your own paper registration form and other documents.
Editorial Note: This tutorial was originally published on February 24, 2019. It's been revised to make it current, accurate, and up to date by our staff—with special help from Brenda Barron.
Original Link: https://business.tutsplus.com/tutorials/customize-registration-form-template-microsoft-word--cms-32709
Freelance Switch
More About this Source Visit Freelance Switch