
An Interest In:
Web News this Week
- April 1, 2024
- March 31, 2024
- March 30, 2024
- March 29, 2024
- March 28, 2024
- March 27, 2024
- March 26, 2024
Some of Our Sources
- Slashdot
- Joshua Blankenship
- Abduzeedo
- Creative Curio
- Inspiredology
- Naldz Graphics
- 24 Ways
- Freelance Switch
- Android Headlines
- Willems Lab
Help Webnuz
Referal links:
Building a React Movie Application.
In this article, we are going to build a react movie application for searching and discovering movies using the OMDB API. You can clone the repo directly https://github.com/Tk-brainCodes/OMDB-Movies.git.
View Live-Demo.
Step 1 (Get An API Key):
Proceed to this link to get a free API key for this project:
Link: API Key.
The purpose of the API key is to track how the API is been used by the user and how many requests are made a day. This API offers 1,000 search limits a day. The API key will be forwarded to your email address, now you can start using the OMDB API.
Project Setup:
In your terminal or command prompt run these commands:
run: npx create-react-app OMDB-movies to create a new react app.
cd into the directory: cd OMDB-movies
run: npm install axios for requesting data from an API.
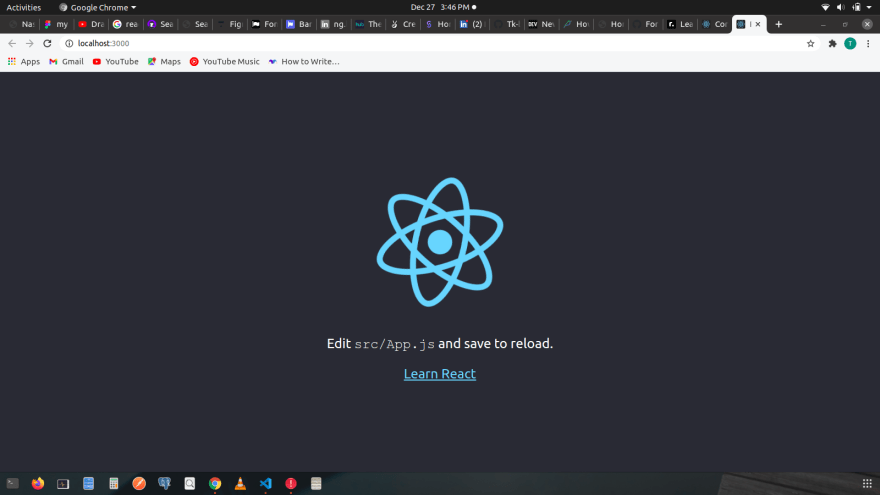
Then run: npm start or yarn start to start the react application server. You should see the react logo spinning in your browser:
Creating Components:
In the App.js component get rid of everything. It should look like this:
import './App.css';function App() { return ( <div className="App"> </div> );}export default App;Next inside the src folder create a new folder and name it Components.Inside the Components folder create three folders for each components.
- Card folder
- Header folder
- Movies folder
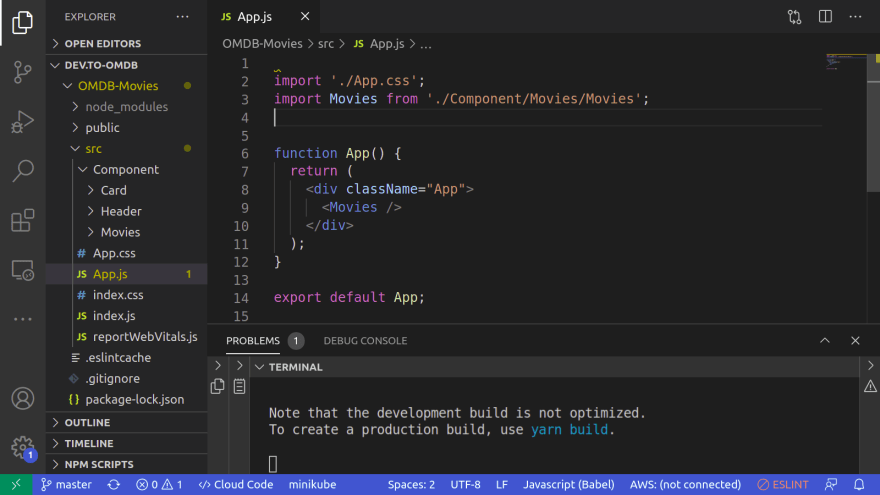
Your project structure should look like this:
Next, we are going, to begin with, the Header.js component. Inside the Header components folder create a Header.js component and Header.css file. The code below are the basic CSS code for our Header.css file.
/*HEADER.CSS*/@import url('https://fonts.googleapis.com/css2?family=Nanum+Gothic:wght@800&display=swap');@import url('https://fonts.googleapis.com/css2?family=Pacifico&display=swap');.input { padding: 20px; width: 300px;}.heading { font-size: 17px; font-weight: bolder; padding: 5px; font-family: 'Nanum Gothic', sans-serif;}.paragraph { padding: 5px; color: #3da4ab ;}.title { font-family: 'Pacifico', cursive; color: white;}.header { display: flex; align-items: center; justify-content: space-evenly; padding: 20px;}.name { font-size: 20px; padding: 10px;}.search { color: white; font-weight: bolder;}.search input[type="text"]{ border: 1px solid #f6cd61; background-color: black; color: white; text-transform: uppercase; font-weight: bolder; border-radius: 2px; width: 40em; padding: 20px;}.search input[type="text"]:focus{ outline: 0;}button { background-color: #dfad31; border: none; color:white; font-weight: bolder; font-size: 16px; padding: 20px; cursor:pointer;}.norminee { border-radius: 4px; background: rgb(9, 136, 9);}/* =========================== ====== Medua Query for Search Box ====== =========================== */@media only screen and (min-width : 150px) and (max-width : 780px){ .search { width: 40em; margin: 0 auto; }}.link { text-decoration: none; list-style-type: none;}Next, we are going to import our CSS to the Header.js components:
//HEADER.JSimport React from 'react';import './Header.css';const Header = () => { return ( <div className="Header"> <h1>Header Components</h1> </div> )}export default Header;Our Header.js component is set but no reasonable content, we will come back to that shortly.
Next we are going to set up our Movies.js component. Inside the Movies folder, we created earlier, create a Movies.js component and a Movie.css file. The code below are the basic CSS code for our Movies.css file.
/*MOVIES.CSS*/@import url('https://fonts.googleapis.com/css2?family=Nanum+Gothic:wght@800&display=swap');@import url('https://fonts.googleapis.com/css2?family=Pacifico&display=swap');.input { padding: 20px; width: 300px;}.cardlist__movies { display: flex; flex-wrap: wrap; align-items: center; justify-content: center; -webkit-box-shadow: 5px 5px 32px 5px rgba(0,0,0,0.43); box-shadow: 5px 5px 32px 5px rgba(0,0,0,0.43);}.card { margin-left: 20px; border-radius: 4px; margin-top: 30px; margin-bottom: 20px;}.movie__image { height: 500px; width: 350px; border-radius: 10px;}.flex__card { background-color: rgb(14, 13, 13); color: #f6cd61 ; padding: 20px; border-radius: 10px; margin-top: 10px;}.heading { font-size: 17px; font-weight: bolder; padding: 5px; font-family: 'Nanum Gothic', sans-serif;}.paragraph { padding: 5px; color: #3da4ab ;}.title { font-family: 'Pacifico', cursive; color: white;}.header { display: flex; align-items: center; justify-content: space-evenly; padding: 20px;}.name { font-size: 20px; padding: 10px;}In the code below:
I imported Axios we installed earlier and also imported the Header.js component and the Movie.css file.I created a state for movies and queries and created a function searchMovie, inside the searchMoviefunction, I consumed my API and passed in response.data.Search to my setState function, setMovies.In the return statement, I passed in the function and the states as props to theHeader component.
//MOVIES.JSimport React, { useState } from 'react';import Header from '../Header/Header';import axios from 'axios';import './Movies.css'const Movies = () => { //states const [movies, setMovies] = useState([]); const [query, setQuery] = useState(''); //Consume the API const searchMovie = async (e) => { e.preventDefault(); const API_KEY = "b57e0c63"; //use your personal API Key const apiURI = `https://www.omdbapi.com/?i=tt3896198&apikey=${API_KEY}&s=${query}`; try { const response = await axios.get(apiURI); const data = response.data.Search console.log(data); //setState setMovies(data); } catch (err) { console.error(err); } } return ( <div className="shoppies"> {/*Header component*/} <Header searchMovie={searchMovie} query={query} setQuery={setQuery} movies={movies} /> </div> )}export default Movies;Back to our Header.js component:
In the code below:
I destructured the properties that were passed in from the Movies.js component to the Header.js component. Then I created a search form with an onSubmit handler that takes a function searchMovie which was defined in the Movies.js component, and also the onChange handler that has an inline function to update the value that the user types in the input.
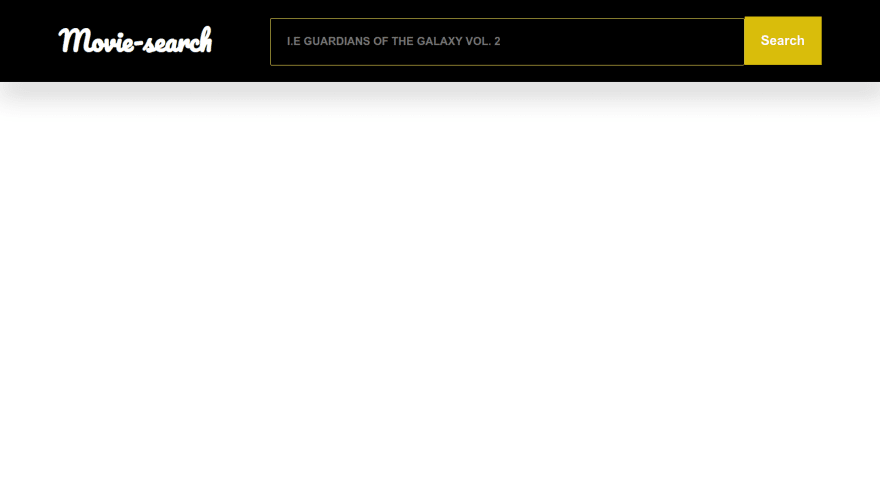
//HEADER.JSimport React, { Fragment } from 'react';import './Header.css';//destructure propsconst Header = ({ searchMovie, query, setQuery, movies }) => { return ( <Fragment> <div className="header"> <h1 className="title">Movie-search</h1> {/*Search form*/} <div className="search"> <form className="search-form" onSubmit={searchMovie}> <label htmlFor="query" className="name" > </label> <input type="text" name="query" placeholder="i.e Guardians of the Galaxy Vol. 2" value={query} onChange={(e) => setQuery(e.target.value)} /> <button type="submit">Search</button> </form> </div> </div> </Fragment> )}export default Header;Let's see how far we have gone!:
import the Movie.js component to the App.js component.
code below:
//APP.JSimport './App.css';import Movies from './Component/Movies/Movies';function App() { return ( <div className="App"> {/*Movie component*/} <Movies /> </div> );}export default App;Now run: npm start to start the app. You would see the header displaying in your browser with the search box.
Right now nothing is been rendered when we search for a movie. Next, we move to the card component containing the movie image, movie title, and movie year.
Inside the card folder we created earlier, create a Card.js component.
In the code below:
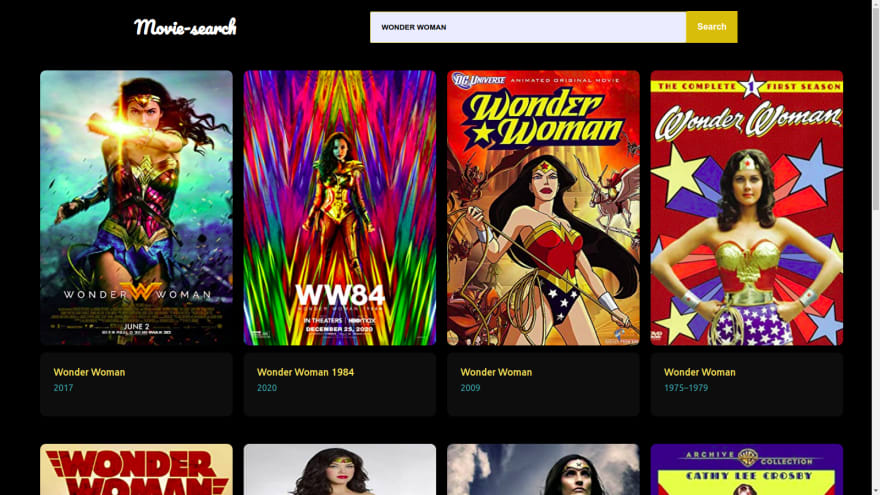
I destructured movies which do not yet exist in the Card.js component but in the Header.js component, then filtered any image that does not have a poster image {movies.filter(movie => movie.Poster) and mapped through the arrays of movies using .map((movie,index) => then passed in the {movie.Title} and {movie.Year}.
//CARD.JSimport React from 'react';const Card = ({ movies }) => { return ( <div className="cardlist__movies"> {movies.filter(movie => movie.Poster).map((movie, index) => ( <div className="card" key={index}> <img className="movie__image" src={movie.Poster} alt="postal" /> <div className="flex__card"> <p className="heading">{movie.Title}</p> <p className="paragraph">{movie.Year}</p> <br /> </div> </div> ))} </div> )}export default Card;Next we import the Card.js component into the Header.js component and render it at the bottom. Your code should look like this:
//HEADER.JSimport React, { Fragment } from 'react';import './Header.css';import Card from '../Card/Card';const Header = ({ searchMovie, query, setQuery, movies }) => { return ( <Fragment> <div className="header"> <h1 className="title">Movie-search</h1> {/*Search form*/} <div className="search"> <form className="search-form" onSubmit={searchMovie}> <label htmlFor="query" className="name" > </label> <input type="text" name="query" placeholder="i.e Guardians of the Galaxy Vol. 2" value={query} onChange={(e) => setQuery(e.target.value)} /> <button type="submit">Search</button> </form> </div> </div> {/*Card component*/} <div className="list-movie"> <Card movies={movies} /> </div> </Fragment> )}export default Header;Now if you search for a movie you should see it displaying the poster image, year of release, and name of movie.
Feel free to ask questions in any area you don't understand.
If you like this content you can follow me on Twitter @tkworldclass.
Original Link: https://dev.to/tkbraincodes/building-a-react-movie-application-2f55
Dev To
More About this Source Visit Dev To