
An Interest In:
Web News this Week
- April 15, 2024
- April 14, 2024
- April 13, 2024
- April 12, 2024
- April 11, 2024
- April 10, 2024
- April 9, 2024
Some of Our Sources
- Slashdot
- Smashing Apps
- You The Designer
- Inspiredology
- Noupe
- 24 Ways
- Freelance Switch
- Codrops
- Willems Lab
- TechPowerUp
Help Webnuz
Referal links:
Tutorial - Build a smooth, animated blob using SVG JS
Hey there! Do you love gradients, fear hard edges, maybe own an enormous collection of lava lamps?
Oh you do?
Youre in the right place, my friend!
I posted this CodePen on Twitter / Reddit land a couple of days ago:
Since posting, a few folks have asked for some info about how it was made, so I thought I would write a short tutorial on the process .
Prerequisites
This tutorial is geared towards people comfortable with JavaScript, HTML and CSS. A degree of familiarity with SVG is also handy here, although this could be a good opportunity to dip your toe into the SVG ocean if you havent before.
SVG markup
Lets start off by adding some markup for our <svg> element.
The gradient (<linearGradient>)
One of the most important aspects of this sketch is the modulating gradient fill that you see within the blob. It is also a great starting point for our code:
<!-- Draw everything relative to a 200x200 canvas, this will then scale to any resolution --><svg viewBox="0 0 200 200"> <defs> <!-- Our gradient fill #gradient --> <linearGradient id="gradient" gradientTransform="rotate(90)"> <!-- Use CSS custom properties for the start / stop colors of the gradient --> <stop id="gradientStop1" offset="0%" stop-color="var(--startColor)" /> <stop id="gradientStop2 " offset="100%" stop-color="var(--stopColor)" /> </linearGradient> </defs></svg>If you arent too familiar with SVG, check out the MDN docs on linearGradient.
If you check out the code, you might notice I am using CSS custom properties for the start / stop values of the gradient, but they dont have any values yet. This is fine, we are going to set them dynamically using JavaScript a little later.
The blob shape (<path>)
The blob shape you see is a single SVG <path>. <path> is a powerful SVG element that can be used to render a whole variety of shapes using a combination of curves and lines. I wont get into it too much here to keep things brief, but here is a great primer on MDN.
Lets add a <path /> element to our markup:
<svg viewBox="0 0 200 200"> ... <!-- Add a path with an empty data attribute, fill it with the gradient we defined earlier --> <path d="" fill="url('#gradient')"></path></svg>Right now, the <path> element has an empty d attribute. d stands for data and is used to define what shape the path is. We are going to set this a little later in our JavaScript.
Style it out
OK, so we have all the SVG markup we need! Nice. We shouldnt need to touch any markup for the rest of this tutorial as we can simply manipulate our custom properties and update the <path> data attribute.
We could do with adding a little CSS though. Nothing too crazy, lets just make sure our blob dimensions always fit the viewport and it is aligned perfectly centre-aligned:
* { margin: 0; padding: 0; box-sizing: border-box;}body { // align our svg to the center of the viewport both horizontally and vertically height: 100vh; display: grid; place-items: center;}svg { // a perfectly square <svg> element that will never overflow the viewport width: 90vmin; height: 90vmin;}Note: Im not actually defining any custom properties in the CSS itself, as we are going to set them dynamically using JavaScript shortly.
The main event
OK, awesome, we have added our markup and styles. We cant see anything yet, but we have our blank canvas all set up and ready to start creating some beautiful blobs.
Adding the dependencies
In order to create our blob, we are going to need a few libraries:
- @georgedoescode/spline: used to draw a smooth curve through a set of points
- simplex-noise: used to generate a smooth, self-similar stream of random values (more on this later)
If you are using CodePen you can simply import these libraries like so:
import { spline } from "https://cdn.skypack.dev/@georgedoescode/[email protected]";import SimplexNoise from "https://cdn.skypack.dev/[email protected]";If you have set up your own environment, you can install these packages with:
npm install simplex-noise @georgedoescode/splineAnd import them like so:
import { spline } from "@georgedoescode/spline";import SimplexNoise from "simplex-noise";Note: if you are working in your own environment, you will most likely need a bundler such as Parcel or Webpack to handle these module imports.
DOM references
Now that we have installed and imported all of the dependencies we need, we should store some references to the DOM so that we can manipulate the elements a little later:
// our <path> elementconst path = document.querySelector("path");// used to set our custom property valuesconst root = document.documentElement;Creating the blob shape, an overview
Hooray, its time to start creating our blob shape!
First off, let me highlight the steps needed to create/animate the blob:
- Create 6 equally spaced points around the circumference of a circle
- Over time, change the
{ x, y }values of each point - Draw a smooth curve through each point using
spline() - Repeat steps 2 + 3
Dont worry if this seems a little crazy right now, all will become clear as we write our JavaScript!
Initialise the blob points
As mentioned in step 1 above, the first thing we need to do is create and store some { x, y } points plotted around the circumference of a circle. To do this, we can add a function createPoints():
function createPoints() { const points = []; // how many points do we need const numPoints = 6; // used to equally space each point around the circle const angleStep = (Math.PI * 2) / numPoints; // the radius of the circle const rad = 75; for (let i = 1; i <= numPoints; i++) { // x & y coordinates of the current point const theta = i * angleStep; const x = 100 + Math.cos(theta) * rad; const y = 100 + Math.sin(theta) * rad; // store the point points.push({ x: x, y: y, /* we need to keep a reference to the point's original {x, y} coordinates for when we modulate the values later */ originX: x, originY: y, // more on this in a moment! noiseOffsetX: Math.random() * 1000, noiseOffsetY: Math.random() * 1000, }); } return points;}We can then initialise our blob points like so:
const points = createPoints();Lets render something!
So we have some points plotted nicely around the circumference of a circle, but we still cant see anything. I think its high time we change that.
Lets add an animation loop using requestAnimationFrame:
(function animate() { requestAnimationFrame(animate);})();This animate() function will call itself, then continue to do so roughly 60 times per second (this could vary based on different monitors/devices but most often its going to run at around 60fps). If you havent used requestAnimationFrame before, here are some useful docs.
Within the animate() loop, we can draw a smooth spline through all of our points:
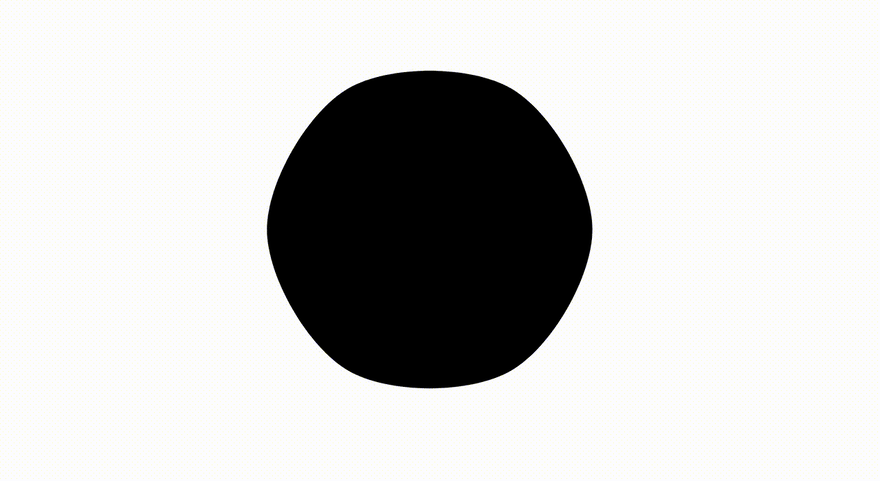
(function animate() { // generate a smooth continuous curve based on points, using Bezier curves. spline() will return an SVG path-data string. The arguments are (points, tension, close). Play with tension and check out the effect! path.setAttribute("d", spline(points, 1, true)); requestAnimationFrame(animate);})();Once this line has been added, you should see a kind of almost circle shape appear on the screen. Delicious!

Note: about the spline() function
The spline function you see here is actually a Catmull-Rom spline. A Catmull-Rom spline is great for drawing organic shapes as it not only draws a smooth bezier curve through every { x, y } point, it also closes or loops back to its first point perfectly.
A quick primer on noise
Before we move onto the next step of animating our blob, it would be good to dip into the basics of noise and how it can be useful for animation.
In a nutshell, noise (commonly either Perlin or Simplex) is used to generate a self similar stream of random values. That is to say, each value returned is similar to the previous value.
By using noise we remove large changes between random values, which in our case would result in a rather jumpy animation.
Heres an excellent diagram from Daniel Shiffmans The Nature Of Code book that visually demonstrates the difference between the (technically) pseudo-random values generated using noise vs random values generated using a method such as Math.random() in JavaScript:

It can be helpful to think about noise values as existing relative to a position in time. Here is another visual example from The Nature Of Code.

Remember these values from earlier?
points.push({ ... noiseOffsetX: Math.random() * 1000, noiseOffsetY: Math.random() * 1000});These are the starting time positions for each of our points. We start each points noise values in a random position to make sure they all move in a different way. Heres what our animation would look like if they all started from the same point in time:
A little boring, right?
Note: if you would like to go deeper on noise, Daniel Shiffman can offer a far more in-depth explanation than I can over at https://natureofcode.com/book/introduction/.
Lets animate!
Now, this is where things start to get interesting. Its time to modulate each point in our shapes { x, y } values based on a noisy random value.
Before we do this though, lets add a quick utility function:
// map a number from 1 range to anotherfunction map(n, start1, end1, start2, end2) { return ((n - start1) / (end1 - start1)) * (end2 - start2) + start2;}This map() function is incredibly useful. It simply takes a value in one range and maps it to another.
For example: if we have a value of 0.5 that is usually between 0 and 1, and we map it to an output of 0 to 100, we will get a value of 50. If this is a little confusing, try copying the above function into dev tools and have a play!
Lets also create a new SimplexNoise instance, add a noiseStep variable and define a quick noise() function:
const simplex = new SimplexNoise();// how fast we progress through "time"let noiseStep = 0.005;function noise(x, y) { // return a value at {x point in time} {y point in time} return simplex.noise2D(x, y);}Note: the above code should be added before our animate function!
noiseStep simply defines how quickly we progress through time for our noise values. A higher value will result in a much faster-moving blob.
Now that we have our map() and noise() functions, we can add the following to our animate() function/loop:
(function animate() { ... // for every point... for (let i = 0; i < points.length; i++) { const point = points[i]; // return a pseudo random value between -1 / 1 based on this point's current x, y positions in "time" const nX = noise(point.noiseOffsetX, point.noiseOffsetX); const nY = noise(point.noiseOffsetY, point.noiseOffsetY); // map this noise value to a new value, somewhere between it's original location -20 and it's original location + 20 const x = map(nX, -1, 1, point.originX - 20, point.originX + 20); const y = map(nY, -1, 1, point.originY - 20, point.originY + 20); // update the point's current coordinates point.x = x; point.y = y; // progress the point's x, y values through "time" point.noiseOffsetX += noiseStep; point.noiseOffsetY += noiseStep; }})();Drumroll, please

Aww yeah, check out that blobby goodness! Nice work.
Adding the gradient
We now have an awesome animated blob shape. The only thing missing is color! In order to create a beautiful gradient fill, we are going to:
- Choose a base hue based on another noise value (somewhere between 0 and 360)
- Choose another hue 60 degrees away from the base hue (thanks to Adam Argyle for this tip!)
- Assign the base hue to our custom property
--startColorand the complementary hue to our custom property--stopColor - Set the
<body>background color to a darkened version of--stopColor - (hopefully) Marvel at the gradient beauty!
To add this to our code, lets first define a hueNoiseOffset variable above our animate loop (this is the hues position in time, just like our points noiseOffsetX/noiseOffsetY values but for 1 dimension)
let hueNoiseOffset = 0;We can then progress hueNoiseOffset through time as our animate() loop runs:
(function animate() { ... // we want the hue to move a little slower than the rest of the shape hueNoiseOffset += noiseStep / 6;})();Now that hueNoiseOffset is moving nicely through time, we can add the following code to perform steps 2 / 4:
(function animate() { ... const hueNoise = noise(hueNoiseOffset, hueNoiseOffset); const hue = map(hueNoise, -1, 1, 0, 360); root.style.setProperty("--startColor", `hsl(${hue}, 100%, 75%)`); root.style.setProperty("--stopColor", `hsl(${hue + 60}, 100%, 75%)`); document.body.style.background = `hsl(${hue + 60}, 75%, 5%)`;})();With a bit of luck, you should now see something like this:

Bonus round Interaction!
Our blob is all done! There is one more thing we could add though
It would be cool if when you hover over the blob, it responded in some way. Perhaps by moving a little faster?
We can easily achieve this by simply increasing the noiseStep value when hovering over the blob:
document.querySelector("path").addEventListener("mouseover", () => { noiseStep = 0.01;});document.querySelector("path").addEventListener("mouseleave", () => { noiseStep = 0.005;});When noiseStep moves quicker through time, so do our random noise values. This gives the impression of the shape moving faster. Neat!
Thank you for reading!
I hope you enjoyed this article and learned something new. If you got a little stuck at any point, please check out the end result CodePen. If this isnt quite enough to help you out, feel free to get in touch. Im always happy to chat!
If you dig this content and would like to be kept up to date with more of my posts / CodePens / generative art material follow me on Twitter @georgedoescode
Original Link: https://dev.to/georgedoescode/tutorial-build-a-smooth-animated-blob-using-svg-js-3pne
Dev To
More About this Source Visit Dev To