
Some of Our Sources
- Slashdot
- The Logo Smith
- Six Revisions
- Vandelay Design
- Inspiredology
- Noupe
- Fudge Graphics
- CSS Tricks
- Design Modo
- Hashedout
Help Webnuz
Referal links:
How to Create Google Slides Presentations Using Cool (Customizable) Themes
Creating a presentation from scratch takes a lot of time. You've got to design the layout variations, make sure the fonts and design elements are well-chosen, and that all the slides work together as a cohesive presentation set—with an appealing style.
But, by using a quality, predesigned presentation theme, you'll save all that initial design time. Now, begin with a single focus: to jump right into customizing the content, imagery and colors of your presentation, instead of designing slide layouts from scratch.

Themes (also known as templates) exist for the commonly used presentation software like PowerPoint, Keynote, or alternatively Google Slides. You can use Google Slides themes to build beautiful presentations fast.

In this tutorial, we cover how to build a great presentation (both visually as well as content-wise) with Google Slides. The workflow we're using begins with the quick starting point of an existing Google Slides presentation theme. Let's learn more about Google Slides and then walk through each step of the customization process.
Need Help? Download Our eBook on Making Great Presentations (Free)

We also have a helpful complement to this tutorial. Quickly grab it before you read on. Download our FREE eBook: The Complete Guide to Making Great Presentations. Learn how to write, design, and deliver the perfect presentation.
Now, let's get started!
Getting Started: Google Slides vs PowerPoint
You might wonder, what does Google Slides offer in comparison to PowerPoint or Keynote?
Google Slides shines when it comes to collaboration with multiple people simultaneously to build a presentation.

It's a web-based tool, with a pared-down, simpler interface to use. This helps you to design a cleaner, more focused presentation. Your design options are more limited, but unlike the other tools, there are no endless bells and whistles to spice up your presentation with. Endless options tend to just waste time. Also, too many effects or animation lead to distracting viewers from your presentation content.
Why Should You Use Google Slides?
Google Slides is an ideal tool if you want to create a clean presentation, with a focus on your content, and do so quickly—without fuss. A few reasons that Google Slides might be the right tool for your next presentation are:
Collaboration. The real-time collaboration features allow multiple users to work in the same presentation simultaneously. Trade feedback, comments, and build slides with anyone you've shared the presentation to.
Less is more. While it's true that Google Slides doesn't have some of PowerPoint's features, it can actually be an advantage to focus on a few key tools and options that stay out of the way of your work.
Backward compatibility. Upload all of those PowerPoint format (PPTX / PPT) presentations and keep working, thanks to the excellent support from Google.
Total cost. In case you haven't purchased PowerPoint or don't have a Mac with Keynote, you can use Google Slides instead. It's freely accessible as long as you've got a Google account, which you can create for free as well.
Custom Google Slides themes. Even though Slides is a web-based tool, there's a massive library of custom Google Slides themes and templates that you can use to jump ahead while designing.
Learn more about what Google Slides is. Also, how it compares to PowerPoint and Keynote in these Envato Tuts+ articles:
 Google SlidesWhat Is Google Slides? Great (Free) Online Presentation Software
 PresentationsPowerPoint vs. Keynote vs. Google Slides: What Is the Best Presentation Software?
Create a Cool Google Slides Presentation With a Pro Theme (From Envato Elements)
The best Google Slides presentations are already built—you just need to add your content to make the most of them. Using pre-built Google Slides templates can save you hours of design work that you can re-dedicate to preparing for your next big presentation.
That's why I always recommend using custom Google Slides themes. If you're wondering how to make Google Slides that stand out from the crowd, start here with a great template.
The best source for custom Google Slides themes is Envato Elements, an all-you-can-download service for creatives. Your subscription to Envato Elements unlocks thousands of great templates. You can create Google Slides presentations easily when you've got the help of beautiful templates.

How to Create Google Slides Designs from Templates
If you've never used a custom Google Slides theme, you might be wondering how to create Google Slides using a professional template. Templates give you pre-built elements, but you can still customize them to include your personalized content.

In this section, we'll sample a custom google Slides theme from Envato Elements and completely customize it for use in your next presentation. I'll show you three slides from Vexana, one of my favorite custom Google Slides themes that you can download as a part of Envato Elements.
1. Get Started
Before we dive into learning how to create Google Slides custom presentations, let's look at how to start working with custom Google Slides themes.
After you download a custom Google Slides theme like Vexana, jump over to your Google Drive account. Open up the template on your computer, and you'll see that the download includes several color schemes. You might also notice that Google Slides templates often come packaged as PPTX (PowerPoint) template files.
In Drive, drag-and-drop one of the PPTX templates onto the window. Then, go the File > Save as Google Slides menu option. While Google Slides supports working directly with PPTX files, you'll need to convert it to the Slides format to take full advantage of customization.

Now that we've loaded our template, let's walk through customizing a few slides. You'll see just how easy it is to start with a custom Google Slides theme and make it your own.
2. Image Panels Slide
Custom Google Slides themes already have the important layout elements you need to design your presentation. This "four-up" slide with four image placeholders is the perfect way to build a Google Slides presentation with powerful visuals.

To learn how to make Google Slides customizations, it helps to understand Slide Masters. A slide master controls the design of multiple slides. Sometimes, custom Google Slides templates rely on editing the master to design the slide. In this case, go to the View > Master menu option.

Most of the time, you'll edit a custom Google Slides template master when you want to add shared elements, like a logo or tagline. Adjusting the master is more efficient than applying a tweak to each and every slide.
In the case of Vexana, you'll adjust the master so that you can add your custom imagery. On this slide, right click on the image placeholders and choose the Replace Image > Upload from Computer option to browse to your image and drop it in.

Once you've filled in the images in your Google Slides presentation, it's time to make other customizations. Just click in the text boxes and fill in your company-specific copy. In my version, I've also adjusted the Google Slides theme to use a single color.
That's it! Learning how to make Google Slides your own comes down to just swapping in your content. This opening slide is visually impactful and totally customized.
3. Welcome Slide
Every presentation needs a strong start. In this Google Slides template, there's a picture-perfect introduction slide that you can easily fill in.
In the example below, we'll use the same steps by entering the Slide Master to add the background image. In the image placeholder, again right click and choose Replace Image. Browse to a horizontal image that'll fill the space nicely.

Customize the introduction slide with copy that matches your purpose. Introductory slides should always cut straight to the chase and embody a "less is more" philosophy. In this case, you can again customize your Google Slides theme by typing in the text boxes.

Finally, I also customized the shape at the bottom to match my brand colors. Just click on the horizontal line and choose a new color from the dropdown option on the menu above it.
With this slide, you can see how to make Google Slides with less effort. Beautiful presentations come together in mere minutes when you use the headstart of a professionally-designed Google Slides layouts. Let's customize one more slide.
4. The Offer Slide
Rounding out our customizations, you can customize what I call "the offer slide" easily to show what you're proposing.
In the template below, you can see yet another image placeholder that you can customize on the Slide Master view. Then, just fill in the text. After customizing a few slides in the steps prior, you'll find the process to be familiar and straightforward.

By adding an image and your text details, you can quickly bring together a totally custom slide. How to create Google Slides comes down to repeating these same steps with new details on each slide.

Now that you've seen this section, you know how to make Google Slides with pre-built templates. Open them up, drop in your content, and you've built an excellent presentation that supports your speaking points.
How to Customize a Google Slides Presentation Theme (From GraphicRiver)
If you're still doubtful about Google Slides, give it a shot by following this presentation theme customization tutorial. It's a simple to follow workflow and an easy way to learn more about this presentation tool. Without further ado, let's get going!
1. Set Up the Theme
For the design of this presentation, I'll be using Hipster, a Google Slides theme with a strong focus on imagery (shown below):

If you're looking for additional Google Slides themes you can find more on GraphicRiver—each with different designs and purposes, such as our best-sellers shown here:

Or, take a look at the article below, it's a curation collection of our favorite Google Slide themes:

Depending on the type of presentation you want to create, you can find different theme designs to suit your needs. Also, note that even without finding a theme exactly the way you'd like, it's still easy to customize it to your needs, as you'll discover next.
Step 1. Import the Theme
Once you've downloaded the theme, you'll notice that there's a PowerPoint file. Even if you don't have PowerPoint, there's nothing to worry about.
Open Google Slides and start with an Empty presentation. When you click on the File menu, you've got the ability to Import slides. In this menu, you can select a file. Select the main PowerPoint file (the Hipster presentation file in this case) and start uploading. Through this process, the PowerPoint file will be converted to a Google Slides presentation.

Once the uploading has completed, you can choose which slides you'd like to import. To start, select all. This way, you've got an overview of the different slide layout templates you could use. Now, it's time to start customizing the design of your slides!
2. Customize the Theme
At first, you'll notice that there are many slides to choose from to start creating your presentation with. I recommend that, instead of deleting the ones don't need, just start by dragging the slides that you do plan to use to the top of your slide list.
Now, you can keep an overview of the different slide designs, which helps as you start putting together your presentation.
This makes it easy to have a handy overview of the different slide layouts you can work with while designing. Once you're done with the presentation design, you can delete the remaining slides that you won't use.
Step 1. Design a Cover Slide

The first slide in the theme is an ideal cover slide to use. A cover slide is the initial slide, which displays the title of the presentation and acts as the introduction before diving into the rest of the presentation.
On the cover slide, we want to change the following elements:
- change the title
- add a background image
Work With Text in Google Slides
Updating the copy in a Google Slides presentation is easy. Click on the text on the slide and start typing your new title. As you notice, the title is embedded in a text box. Depending on the size and length of your title, your text box might be too small.

You can readily manipulate a text box in Google Slides. Just drag the corners surrounding the box in order to make the text box larger or smaller. In the toolbar, you also have the Alignment options to make use of.
By changing the dimensions of the text box, the actual font size and using the alignment options, you're capable of manipulating the text on a slide as you see fit.
Tip: Typography will help you to create a better visual hierarchy in your slide. Make titles bigger and bold, while body text should be smaller.
In the menu bar, you'll notice Arrange in the top menu. In there, you can choose to Center on page, which is useful to help you arrange elements on a slide to improve the visual design. I'll be centering my title horizontally on this slide.
Tip: While dragging elements around, you can hold the Shift key to keep the element on the same x-position or y-position. For example: if you'd like to shift the title a little bit more to the left while keeping it aligned on the horizontal axis.
Working with Images in Google Slides
To add an image, you can select on any of the placeholder images in a slide. In the toolbar, you'll see a Replace image option. When you click on this, you're capable of uploading an image that'll be used in the slide. I recommend finding images through a free service such as Unsplash for example or use our affordable premium photos site PhotoDune, which is part of Envato Market.
Once you've uploaded an image, you'll often be using two tools to perfect how the image looks on a slide. You'll be using:
- image options
- cropping tool
The Image options is a useful tool to manipulate an image to make it fit your slide. For example, think of reducing the transparency, changing the colors by using any of Google's premade options or reducing the brightness of the image so that the white text on top becomes more legible.

With Cropping you've got the ability to change how the image is displayed on the slide. You've got the Mask, which is the area that'll be actually visible from the image on the slide and you've got the actual image itself. Visually, the mask area is the area of the image that's fully visible, the cropped area is the area of the image that's slightly transparent.
You can manipulate the mask, to define how the image should look on the slide and then you can manipulate the actual image, to change how the image will look in the mask.
With the title updated and a background image added, we're done with our title slide! An example of a finished slide is shown below.

Step 2. Design a Services Slide
Next up, let's design a traditional services slide, which is often found in a sales presentation. They usually contain the following elements:
- an overview of the services
- a brief description about said service
- pricing information
Now, let's take a look at the theme and see what slides we could use for this design. As you notice, there are some slides designed in the theme that could act specifically as a slide to present services.
However, I really like the design of slide 8, which you can see below. Let's customize this slide to use it as a service slide.

The following are elements on the slide that I'd like to change:
- image on the left half of the slide
- slide title
- features and icons on the right section of the slide
Let's first change the image. When you click on the placeholder image, you can use the Replace image tool again, in combination with masking and cropping as described above to change the image as you please.
Now, let's change the text as well as change the icons that are used on the right section of the slide. First, let's see what icons we could use.
At the end of the different theme slides, you'll notice a collection of icons. For the services, instead of using the checkmark icon that's used in the template slide, you could use any of the other icons provided with the theme. In the Hipster theme, you can find the icon slides at the end of the presentation.
Simply copy an icon from the icon slide and paste it in the slide you'd like to use. You can use the toolbar menu to, for example, change the color or stroke size of the icon.
Tip: If an icon consists of different elements, you can select them all by dragging your cursor around the elements and group the elements by right-clicking and selecting 'group'. This makes it easier to, for example, change the color of the icon.
If you dislike the icon options that are provided in the theme, you could always discover icons on Envato Elements or The Noun Project for example.
Time to practice! Use what you've learned to manipulate the text and add icons to your slide. Try to achieve a similar result as the finished slide below.

Step 3. Design a Portfolio Slide
To showcase some of the work you've done in the past, a presentation could include a portfolio slide.
A portfolio slide tends to contain a lot of images. They typically including either logos or images from projects.
In the theme, there are a few suitable portfolio slides. You could use one that includes a project description. If you're a photographer for example, you might want to pick a slide that only contains images.

I personally really like slide 23. The only elements we need to change is to replace the images. As described in designing the cover slide, you'll probably have to work with cropping and masking the different images in order to get the design of the slide right.
This is a good slide to practice image composition as well. What images can you combine to create a nice look and feel? Perhaps you could use Image options to give each image similar colors for example.
Tip: You can double-click on an image to open the cropping masking interface.

I replaced the images. You can see the completed portfolio slide design below.

Step 4. Design a Team Slide
Another commonly recurring slide in a presentation is a slide that features people, often known as a team slide.
Most themes include designs for a team slide. You've got slides that could feature multiple people or highlight one person. I've picked slide 18 to customize.

We're going to change the following elements:
- copywriting (name, title, bio)
- social media links
- image
By now, we know how to change the image by using Replace image. Changing the text should be easy by now as well.
How can you change the social media links? Select the piece of text that you'd like to make clickable. Go to Insert in the menu bar and select Link. Now you can paste the URL you'd like to link to. You can also use the link feature to link to different slides in the presentation.
Tip: In the future, instead of using the menu bar, you could also use the shortcut CMD+K for Mac or CTRL+K for Windows computers to insert a link.
Time to finish the design of the slide. You can use the finished design below as a guideline.

Learn More About Using Google Slides
Even though Google Slides is a beginner friendly presentation software,
Check out the rest of these beginner resources to k
 PresentationsHow to Convert PowerPoint (PPT) to Google Slides Presentations on Import
- Google SlidesWhat Is Google Slides? Great (Free) Online Presentation Software
 Google Slides10+ Google Slides Presentation Tools: To Learn How to Use (Now)
Make Great Presentations (Free eBook Download)
We've got the perfect complement to this tutorial, which will walk you through the complete presentation process. Learn how to not just design, but also come up with great ideas, the process of writing presentations, and how to prep it to powerfully present to your audience.
Download our eBook: The Complete Guide to Making Great Presentations. It's available for free with a subscription to the Tuts+ Business Newsletter.

Choose & Customize Your Own Google Slides Themes
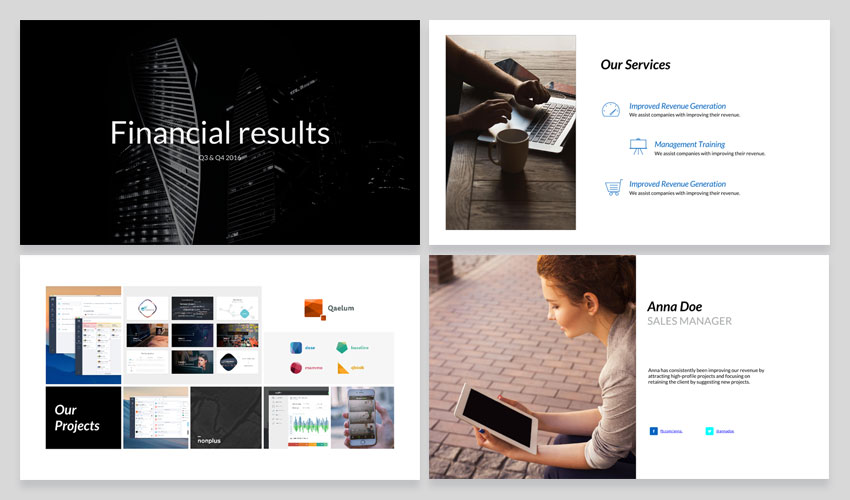
As you see, Google offers excellent presentation software alternative to quickly have a presentation ready using custom Google Slides themes. Here's our final set of slide designs for reference:
Discover more great Google Slides themes on Envato Market with new designs trending weekly. Don't forget that Envato Elements is an all-you-can-download site for procuring the best custom Google Slides themes.
Also, if you're looking for some final advice to get your presentation straightened out, I recommend taking a look at the following article. It helps you understand how an efficient presentation is designed.

Editorial Note: This tutorial was originally published in September of 2016. It's been updated to include new information—with special assistance from Andrew Childress.
Original Link: https://business.tutsplus.com/tutorials/how-to-create-a-presentation-from-a-google-slides-theme--cms-27071
Freelance Switch
More About this Source Visit Freelance Switch