
An Interest In:
Web News this Week
- April 27, 2024
- April 26, 2024
- April 25, 2024
- April 24, 2024
- April 23, 2024
- April 22, 2024
- April 21, 2024
Some of Our Sources
- Simplebits
- Pearsonified
- Inspiredology
- FanExtra - PSD
- Noupe
- Web Design Ledger
- Specky Boy
- Android Dissected
- Willems Lab
- Dev To
Help Webnuz
Referal links:
How to Create a Living Galaxy Photo Effect in Adobe Photoshop

Creating stars, galaxies, and nebulas requires a unique set of techniques, and in this tutorial, we are going to be taking a quick look at a slew of different effects, ultimately creating a being made of the stars themselves!
Like nebulas, we are going to be keeping everything very loose and freeform; it's all about going with the flow with this one! We are going to do a whole lot of playing with different layer modes and experimenting with the flow of shadows and light, seeing what shapes naturally form as we go.
Follow along with us over on our Envato Tuts+ YouTube Channel:
What You'll Need
To complete this project, we are using the following resources:
- Model
Space Texture
Nebula - 30 Abstract Design Pack
M3 Star Cluster
Perlin Flow Fields Photoshop Brushes- starlight glowing in the outer space
Find more resources on Envato Elements!
1. How to Create a Star Field (Optional)
First, we will start by preparing our space environment! For the base, I have supplied a pre-painted nebula-like texture that's free to use anytime, anywhere, but also want to walk you through how to create a star field, which is the first step to creating many space-themed images.
Step 1
Create a new portrait style canvas.
Create a Color Fill layer set to a dark blue #0e101f.
Create a New Layer filled with black, setting it to Screen.
Step 2
Go to Filter > Noise > Add Noise.
Noise Settings
- Amount: 50%
- Distribution: Gaussian
- Monochromatic: Checked
Step 3
Blur the noise with Filter > Blur > Gaussian Blur.
Gaussian Blur Settings
- Radius: 0.8 px

Step 4
Open up Image > Adjustments > Levels and slide the three toggles around until you get the desired result. There is no one set of settings, but here's mine:
Levels Settings
Input Levels: 110, 2, and 197
You can also further adjust the stars using Curves.

Step 5 (Optional)
If you want to create bigger stars, you can paint them in by hand using a hard round Brush, or you can Duplicate your current star layer and then enlarge the duplicate.

2. How to Turn a Texture Into a Background
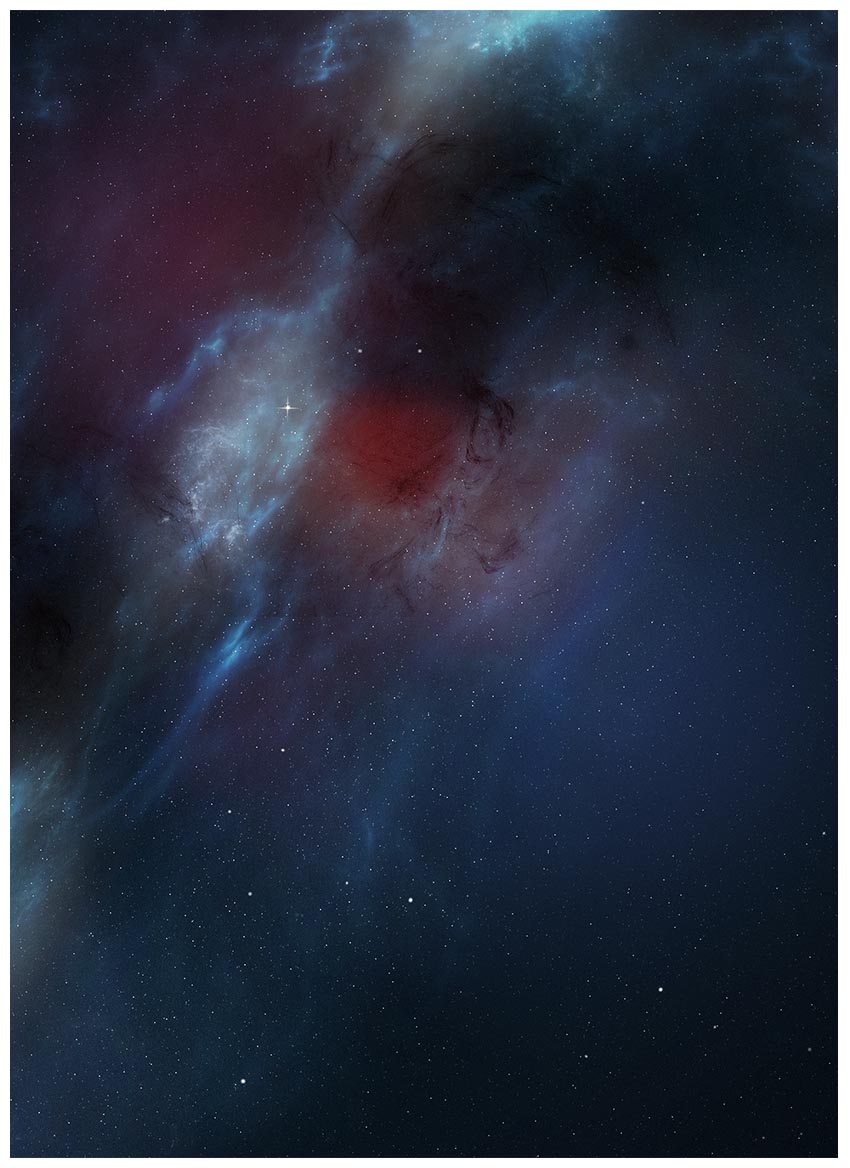
Next, we will be adding our space texture! Unlike with the stars, I sadly do not have a set method on how to paint nebulas and space backgrounds to share with everyone, but I do have a pre-painted texture to share!
Step 1
Download and place the Space Texture onto the canvas.

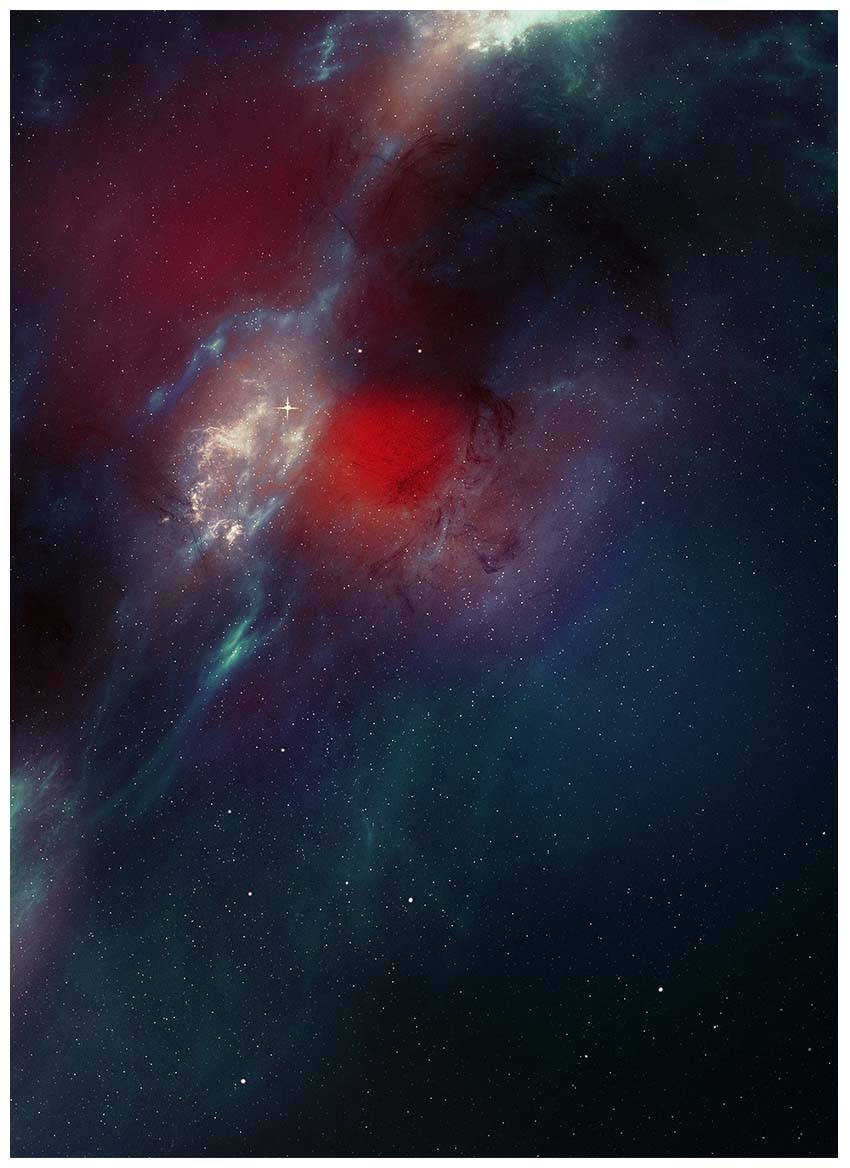
Step 2
Create a New Layer above the space texture, setting it to Screen.
Using a large, soft, round Brush, lightly paint reds #563031 and purples #4e3159 all over the canvas, focusing on the lighter areas of the space background.
Create another New Layer set to Overlay, and repeat the last step but with white!

Step 3
On many different New Layers set to a mixture of Screen and Color Dodge, paint blobs of purples, oranges, and reds across the space background!
Use a large, soft, round Brush with a very low Flow Rate!
Adjust the Opacity of the different layers if needed.
I only ended up with three layers, but feel free to go crazy adding as much color as you want! Remember you can always come back and adjust these layers later.
Step 4
Finish up the background with Color Balance, Brightness/Contrast and Curves adjustment layers.
Color Balance Settings
- Red: +20
- Green: +8
- Blue: +18
Brightness/Contrast Settings
- Brightness: 58
- Contrast: 39
- Blend If:

Double-click a layer to access the Blend If settings. Hold Alt to separate and move the toggles independently.
Curves Settings

Group everything, naming the group "Background."

3. How to Create a Vivid Color Grade
All of the layers coming up should be in a group marked "CC" or "Color Correction," and placed on top; all current and future layers will be placed below this group!
The layers are listed from bottom to top.
Step 1
Create a Curves adjustment layer. Increase the Red, Green, and Blue curves as well!
Curves Settings
- Opacity: 80%


Step 2
Create a Color Lookup adjustment layer.
Color Lookup Settings
- 3DLUT: Crisp Warm
- Opacity: 29%

Step 3
Create a second Color Lookup layer.
Color Lookup Settings
- 3DLUT: Fall Colors
Layer Mask: Mask on the lower right corner.

Step 4
Create a third Color Lookup layer.
Color Lookup Settings
- 3DLUT: Late Sunset
- Opacity: 41%

Step 5
Create a Selective Color adjustment layer. While you can adjust multiple colors using the same Selective Color layer, I like to dedicate a new selective color layer for each color to give myself more control!
Selective Color Settings
- Colors: Blues
- Cyan: +40%
- Magenta: -2%
- Yellow: +18%
- Blacks: +27%
Step 6
Create a second Selective Color adjustment layer.
Selective Color Settings
- Colors: Reds
- Cyan: -100%
- Magenta: +1%
- Yellow: +41%
Step 7
Create a third Selective Color adjustment layer.
Selective Color Settings
- Colors: Magentas
- Blacks: +100%
Step 8
Create a fourth Selective Color adjustment layer.
Selective Color Settings
- Colors: Cyans
- Cyan: +100%
- Magenta: -100%
- Yellow: +100%
- Blacks: +50%
Group all layers together into a group marked "CC" or "Color Correction" and Lock the group.
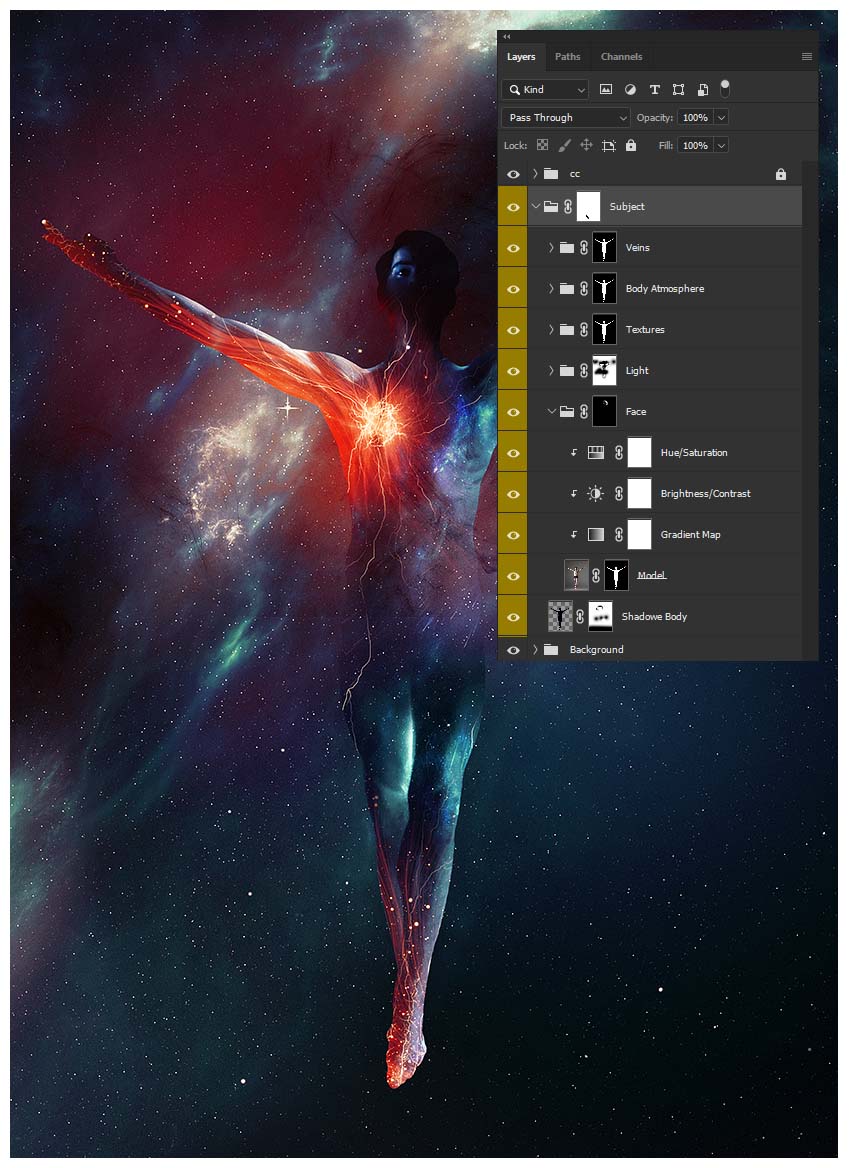
4. How to Create a Living Galaxy Photo Effect
Now, on to our main event: the man made out of stars! For this, you will have to have a good handle on both layer masks and layer modes.
I highly recommend keeping your groups named and organized in this step as there are quite a few!
Step 1
Download, place and extract our model using your preferred method. Mine is the Pen Tool!

Step 2
Create and clip a Gradient Map, Brightness/Contrast and Hue/Saturation adjustment layer into our model.
Gradient Map Settings
- Black to White
Brightness/Contrast Settings
Brightness: -116- Contrast: 100
Hue/Saturation Settings
- Colorize: Checked
- Hue: 230
- Saturation: 44

Step 3
Group the model and his layers, naming the group "face" as this will only be the face of our subject.
Hide the "Face" group for now.
Step 4
Duplicate the "Model" layer, bringing it outside of the "Face" group.
Right-Click > Apply Layer Mask if it has a layer mask.
Rename the layer "Shadow Body," setting it to 60% Opacity.
Fill the layer with black by going to Image > Adjustments > Hue/Saturation
Hue/saturation settings
- Lightness: -100

Step 5
Add a Layer Mask to the "Shadow Body" and mask out the feet and part of the midsection.
You can also come back and tweak this later!

Step 6
Turn the "Face" group back on.
Add a Layer Mask to the "Face" group, filling it with black.
Mask back in parts of the face and neck. I chose to do this on the left eye and the middle part of the neck, but feel free to experiment!
Remember, again you can come back and tweak this later!

Step 7
Duplicate the "Face" group, bringing the copy above the original.
Rename the copied group "Light" and add a Layer Mask.
Change the model inside the "Light" group to Screen.
Reverse the gradient map so that it is White to Black.
Use a soft round Brush to mask out the model's shorts, hair, hand, and the left part of the torso.

Step 8
Create a New Group above your previous groups, naming it "Textures."
Create a Selection in the shape of your model by going to the "Shadow Body" layer, holding Control and clicking on the layers icon.
Once you have a selection, go back to the "Textures" group and add a layer mask. The mask will take the shape of the model.
Now, every layer you place in this group will be masked as well!
Step 9
Take a copy of the Space Texture and place it in the group, setting it to Color Dodge.
Play with its size and shape until you are happy!

Step 10
Download the Nebula - 30 Abstract Design Pack and place texture "27" into the "Textures" group, above the previous texture.
Set the layer to Color Dodge.
Adjust the Brightness/Contrast and Hue/Saturation.
Brightness/Contrast Settings
Brightness: -118- Contrast: 100
Hue/Saturation
- Saturation: -47
Also, mask out any area you think looks too bright or busy!

Step 11
Repeat the above step with the starlight glowing in the outer space texture, with the texture set to Screen.
Place, mask, and adjust it as you see fit. Below are my settings, but I encourage you to experiment!
Brightness/Contrast Settings
Brightness: -150- Contrast: 100
Hue/Saturation
- Hue: -33
- Saturation: -46

Step 12
Place some stars using the M3 Star Cluster texture in the feet and hands of the model, again using the steps above.
I set my stars to Lighten, but again feel free to experiment.
The "Textures" group is now complete!

Step 13
Repeat step 8, creating a New Group, this time naming it "Body Atmosphere".
Create a New Layer inside "Body Atmosphere", setting it to Overlay.
Using a soft round Brush set to black, increase the shadows within our model.
Create a second New Layer inside of "Body Atmosphere", this time setting it to Color Dodge.
Paint a bright orange #ff5111 color onto the hands, feet, and left portion of the chest.

Step 14
Create a New Layer set to Screen, once again making sure it's in the "Body Atmosphere" group.
Using the same orange as above, paint flowing rivers of light using the Perlin Flow Fields Photoshop Brushes or a soft round brush.
The "Body Atmosphere" group is now complete!

Step 15
Repeat step 8 once last time, creating a new group named "Veins."
Create a New Layer inside the "Veins" group, setting it to Overlay.
Paint lines of light coming from the orange exception on the left side of the chest using a small, soft, round Brush set to white.
Build the light up slowly, and I encourage you to layer different layers on top of each other! I used three in total.

Step 16
Create a New Layer inside of the "Veins" group.
Using a very small, 1-2 px hard round Brush, paint white veins coming from the model's chest and spreading throughout the rest of his body.
I used a pen tablet for this, so I was able to use Pen Pressure and taper my lines. It also makes it easier to get the jagged line effect.
If you don't have a tablet, use a large, soft, round Easer Brush to achieve a similar effect. Paint your line, and then gently erase portions of it.
You can also try doing long, smooth lines, as I did on the left arm.
Just experiment and do your best—practice makes perfect! You can also try searching for pre-made vein brushes to help you out.
Once you are happy with your living galaxy, group all of his layers (and groups) together into one big group, naming it "Subject."
I also took this time to remove the subject's left foot by adding a Layer Mask to the group and using the Pen Tool to select and mask it out.
5. How to Create Glowing Eyes in Photoshop
Step 1
Create a New Layer set to Soft Light, placing it below the "Subject" group.
Using black and white, form the base of the model's hair. Use and build upon the existing shadows to figure out a good shape. Work with the current lighting, not against it!

Step 2
Create a New Layer set to Soft Light and repeat step 1 as many times as you need to, refining the shape more and more.
Remember, keep your brush to a low Flow Rate to slowly build up shadows, and use as many layers as you need!
Group your layers, naming the group "Hair."

Step 3
Create a New Layer, keeping it set to Normal and placing it above the subject.
Use a hard, round brush to paint three eyes onto the subject's face—one on each eye and one on his forehead.
Increase the brightness of the eyes with an Overlay layer if needed.

Step 4
Below the eyes and their light, create a New Layer set to Screen.
Paint bright orange #ff7441 smoke coming from the eyes.
Paint some orange glow as well! Again, use as many layers as you need to get the perfect glow.
Group all of the eye layers, naming the group "Eyes."

6. How to Add Depth and Detail in Photoshop
Step 1
Drag and drop another M3 Star Cluster texture above the "Eyes" group, setting it to Screen.
Hit it twice with two Brightness/Contrast image adjustments, using the same settings.
Brightness/Contrast Settings
- Brightness: -32
- Contrast: 100
Add a Layer Mask and mask out any hard edges or unwanted stars.

Step 2
Take a copy of the Space Texture, setting it to Screen.
Place the lightest part of the texture over the midsection of the subject.
Adjust the size and shape as needed, and Mask Out any hard edges and excess texture!

Step 3
Duplicate the above Space Texture and set it to Lighten.
Enlarge it significantly and place it in the lower right corner of the canvas.
Add a Filter > Blur > Gaussian Blur to the texture. The settings will depend on the size of our canvas, so just blur it to your liking!

7. How to Add Light, Shadows and Glow in Photoshop
To finish everything up and pull it all together, we are going to add some final touches of light and color, as well as shadows!
Step 1
Using a mixture of Multiply, Overlay, and Soft Light layers, increase the shadows and highlights.
Use a soft, round brush with a low Flow rate as always when building up light and shadows!
Use as many layers as you see fit, and don't forget about experimenting with Blend If!

Step 2
Finally, using a mixture of Screen and Overlay layers, paint areas of bright colored light as well as enhancing the colors that are already present.
Color pick existing colors such as oranges, blues, and greens! Adjust the Opacity of the layer as needed, and don't be afraid to go in with very large brushes and eraser brushes.

We've Done It!
And there you have it! Some quick space-inspired techniques you can apply to your future works, and remember these are just the jumping-off point! Space is limitless, after all!
So, as always, keep experimenting with different techniques and practicing, and don't forget to post your version below, along with any questions, comments, or critiques!

Looking to learn more? Why not check out the following photo manipulation tutorials:
 Photo ManipulationHow to Create a Dramatic Mermaid Photo Manipulation in Photoshop
 Adobe PhotoshopHow to Create an Abstract Diamond Lens Effect in Photoshop
 Photo ManipulationHow to Create a Honey Bee Themed Photo Manipulation in Photoshop
 Photo ManipulationHow to Create a Surreal Stitched Portrait in Adobe Photoshop
 Photo ManipulationHow to Create a Neon Rainbow Photoshop Portrait Effect
 Photo ManipulationHow to Create a Ghostly Horror-Themed Photo Manipulation in Adobe Photoshop
Original Link: https://design.tutsplus.com/tutorials/how-to-create-a-living-galaxy-adobe-photoshop--cms-32514
TutsPlus - Design
More About this Source Visit TutsPlus - Design