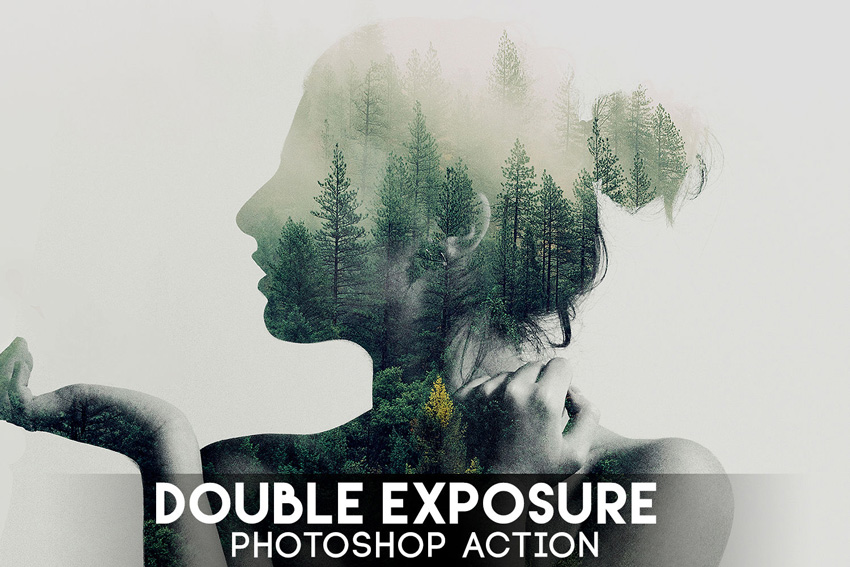
Make a Trendy Double Exposure Effect in Adobe Photoshop

You’ve
probably seen this interesting effect of two or more overlapping photos on the
covers of music albums, in modern magazines and in advertisements. In this tutorial
we’ll create a trendy double exposure effect in Adobe Photoshop with the help
of Blending Modes and Clipping Masks in a few steps.
In
photography and cinematography, multiple exposure is a combination of two or
more exposures to create a single image. Initially, this is a technique in
which the camera shutter is opened more than once to expose the film multiple
times, usually to different images. However, with our modern software, we can easily
recreate a similar effect in Adobe Photoshop.
Looking for a Quick Solution?
If you want to create a double exposure effect with just a few clicks, try this amazing Double Exposure Photoshop Action on Envato Elements. With it, you can create a wonderful double exposure effect to your own image in just a few seconds. After the action has finished, you can add a color tone or gradient to your composition, and voilà, your effect is complete!

Using a ready-made action can save you time, but in this tutorial you'll learn how to create a double exposure effect from scratch—giving you maximum flexibility and creative control. Let’s get to it!
Find out all the extra benefits and amazing Photoshop Actions we recommend over in our post on Super Awesome Adobe Photoshop Actions on Envato Elements:
1. Prepare
the Main Photo
Step 1
For the
base of our image, we’ll be using the following photo of a young man from
Stockvault.net.
You can use any photo to your liking, for example, from your personal archive. However, make sure that the background of your photo is more or less neutral, without noisy
elements such as grass or foliage, to make it easier to work with.

Let’s take
the Crop Tool (C) and make the photo
less wide by deleting its side parts.

Step 2
Now we need
to make it much brighter and add contrast. Go to Image > Adjustments > Levels or press Control-L to call the
pop-up Levels menu. Move the
lightest slider to the left, making our photo brighter, and add contrast
by moving the left black slider to the right. Otherwise, you can just set the
particular values in the spaces below: 7
for the shades of black, 1.15 for
greys and 197 for whites. Click the OK button to apply the adjustments.

Step 3
Let’s fix
the guy’s ear with the Spot Healing
Brush Tool (I). Just click and move your mouse, drawing above the area you
wish to fix and—voila!—the marked area is clean and flawless. This is a
very handy tool for photo retouching, when you need to get rid of some minor
flaws and bumps on the skin.

Step 4
Now we need
to get rid of the background. This is a piece of cake, as we’re using a photo
with a clean background. Take the Magic
Wand Tool (W) and click anywhere on the background to select it. Then go to
Select > Inverse in order to make
the man selected.

Step 5
While you
are still armed with the Magic Wand Tool
(W), find the Refine Edge button
in the control panel above to reveal the Refine
Edge options window. Here you can change the View of your photo in the View
Modes, placing the selected element on white, black, transparent and other
backgrounds, making it more visible and convenient to edit.
Slightly increase
the Radius value in the Edge Detection, setting it to 1.5, making the edges less rigid and thus
revealing minor details, such as separate hairs. Set the Output To in the Output
section of the options window to New
Layer with Layer Mask. This will automatically create a copy of your
initial image with the background hidden by the Clipping Mask.
You can
play with other Refine Edge options
as well, making the edge smoother or more blurred. This would be handy
if you’re cutting out the element that is surrounded by other elements, or the
image has some more complex background and the edges of the main object are
messy. In our case, these minor adjustments are enough to continue creating the
desired effect.

Step 6
Create a New Layer below the cut-out portrait
and fill it with neutral greyish color (#dcdbd9)
using the Paint Bucket Tool (G).

2. Create
the Double Exposure Effect by Combining Two Images
Step 1
Let’s
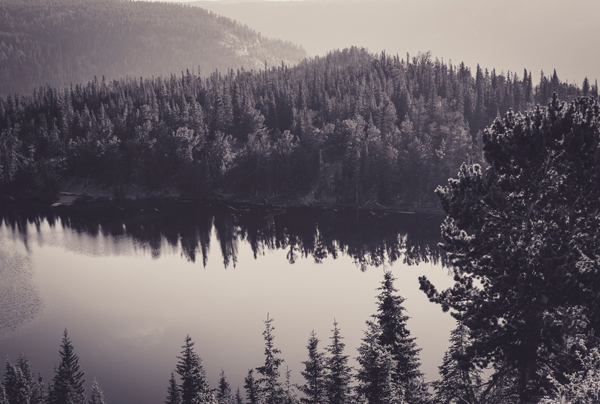
select the second photo for our composition. This can be some nice flower shot
or cityscape, or anything abstract and intricate. For this tutorial, we’ll use
this monochromatic nature scene of a forest by Samuel Rohl, which you can find
at Unsplash.com.

Step 2
Place the
image of the forest above the man’s portrait. Keeping the forest layer selected,
press the Control key and click on
the Layer Clipping Mask of the layer
below (the one with the portrait). You will see the marching ants selection of
the man’s silhouette on the forest layer.

Step 3
Press the Add vector mask button in the bottom of
the Layers panel to hide the
unneeded parts of the forest image. If you click on the chain icon between the image thumbnail and the mask thumbnail in
the Layers panel, this will unlink the layer and its mask, so that
you can move and rotate the image inside the mask without moving the whole layer.
In our case, let’s put the forest image upside down, so that the dark
reflection of the trees is placed in the head area of the silhouette, as shown
in the screenshot below.

Step 4
Select the
layer which contains the cutout portrait with Clipping mask. Make a copy (Control-J) and drag and drop it
above the forest layer.

Let’s make
the portrait monochromatic to fit the forest image color palette. Keeping the
portrait layer selected, move to Image
> Adjustments > Desaturate or just press Shift-Control-U, converting our image to
grayscale.

Step 5
Open the Levels (Control-L) options window and make the image much darker by moving
the black slider to the right side or manually setting its value to 117.
Apply the
effect and go to Image > Adjustments
> Hue/Saturation. Tick the
Colorize checkbox in the bottom right corner of the options window to
change the whole range of colors of our image. Set the Hue value to 212, moving
the slider to the right, thus adding tints of blue. Set the Saturation level to 10, decreasing the vividness of the
photo, and click OK to apply the
created effect.

Step 6
Right-click on the portrait layer mask and we can Apply Layer Mask in the dropdown
menu. Change the Blending Mode of
the portrait layer to Screen in the Layers panel. We can already see that the
desired double exposure effect appears! Only a few minor tweaks left, so let’s
move on!

Step 7
Let’s make
the image more surrealistic by editing the head of the portrait. Take the Brush Tool (B) and select the Airbrush Soft Round 17 from the
standard Round Brushes with Size set
(you can find it in the drop down brushes menu if you click the right mouse button or in the
Brushes (F5) panel).
Select the
Layer Mask of the forest layer, set the Fill
color to white and paint softly over the upper part of the head area (marked
with red in the screenshot), thus erasing the unwanted parts of the head and
adding some air in the top part of the image. This makes the image look
as if the trees are growing directly from the man’s head.

Step 8
Some parts
of the image look too noisy at this step—for example, the eyes area, where the
trees from the forest image create a distracting effect. Let’s get rid of this
and make these parts more clear and contrast.
Create a New Layer beneath the desaturated portrait layer, take the Brush Tool (B) again and switch the Fill color to dark blue (#2f2c35),
which you can pick directly from the hair part of the portrait with the Eyedropper Tool (I).
Start painting
over the eyes area, making it more distinct. For more convenience, you can Control-click on the layer mask of the
portrait layer to create a marching ants selection, which allows you to
draw inside the selected area, without crossing its boundaries.

Step 9
Let’s add a
finishing touch to our image. Select the desaturated portrait layer and Add Layer Mask by clicking the mask
icon in the bottom part of the Layers
panel. Take the Brush Tool (B) and
switch the Fill color to black.
Since our Layer mask is white by default, the black color will help us to erase
the unwanted parts of the image. Paint over the neck area of the man, creating
an illusion of his face popping out from the trees.

Great Job!
Our Trendy Portrait Is Finished!
Congratulations!
These simple steps helped us to create a stylish double exposure portrait by
combining two images and creating an interesting surrealistic effect. I hope
you’ve found some handy tips and tricks, which will help you to make more
interesting combinations and photo manipulations. Good luck!

Looking for more photo effects and filter tutorials? Check out the following articles:
 Photoshop ActionsHow to Create a Vintage Photo Filter With Photoshop in 60 Seconds
 Photoshop Actions50 Amazing & Cool Photoshop Action Tutorials
 Photo EffectsHow to Make a Photoshop Action to Create a Photo Art Effect
 Adobe PhotoshopHow to Apply a Photo Filter or Effect in Photoshop
 Photo EffectsHow to Create Instagram Photo Filters in Photoshop
Original Link: https://design.tutsplus.com/tutorials/make-a-trendy-double-exposure-effect-in-adobe-photoshop--cms-23774
TutsPlus - Design
 TutsPlus+ is a blog/Photoshop site made to house and showcase some of the best Photoshop tutorials around.
More About this Source Visit TutsPlus - Design


