
An Interest In:
Web News this Week
- April 30, 2024
- April 29, 2024
- April 28, 2024
- April 27, 2024
- April 26, 2024
- April 25, 2024
- April 24, 2024
Some of Our Sources
- Engadget
- Pearsonified
- Spoon Graphics
- Smashing Apps
- Web Designer Depot
- Crazy Leaf Design
- Line 25
- Specky Boy
- Codrops
- Willems Lab
Help Webnuz
Referal links:
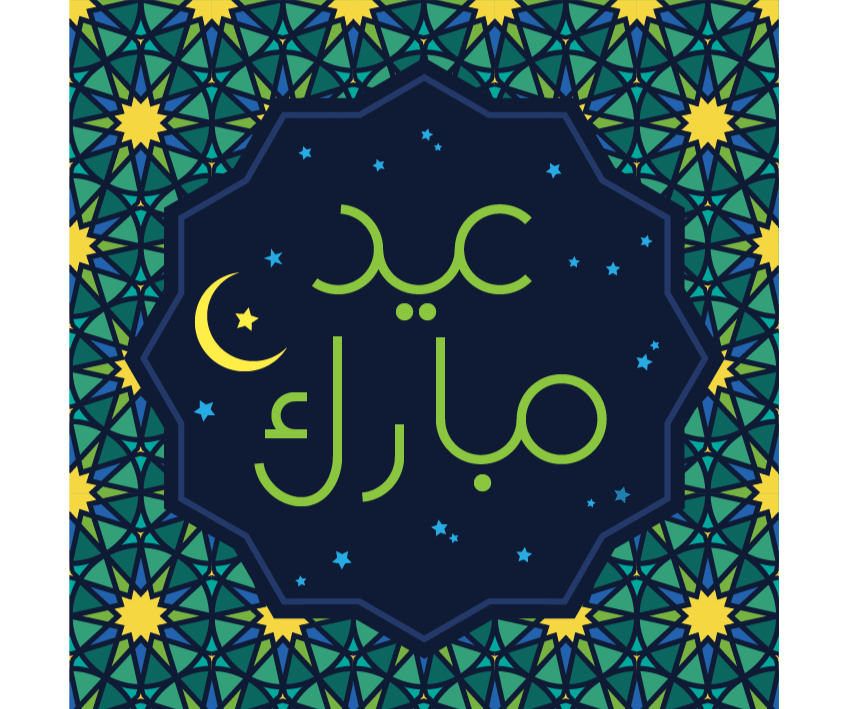
How to Design an "Eid Al-Fitr" Greeting Card in Adobe Illustrator

"Eid al-Fitr", which is often shortened to "Eid", is the "festival of breaking fast". It is a religious holiday celebrated by Muslims across the world, to mark the end of the month-long fasting of Ramadan.
Traditionally, Eid is the celebrated for three days, just as the first sighting of the crescent moon is spotted by the end of the Ramadan lunar month.
To celebrate, Muslims gather in the morning at the mosque to perform their Eid prayer, and then visit friends and family, have a feast, and enjoy loads of sweets to mark the end of the fasting. The celebrations are also a time of forgiveness, giving thanks to
Allah, and offering donations and food to those less fortunate.
The most popular Arabic greeting during this holiday is usually "Eid Mubarak", which is translated in English to "blessed festival".
In this tutorial, we’ll go through the process of creating an Arabesque Eid greeting card. We’ll be using basic shapes to design an Islamic art pattern, and will learn to tailor a font in Arabic for "Eid Mubarak".
If you're looking for inspiration, why not check out the many Eid designs over on Envato Market.
1. Create a New Document & Set Up
To design our greeting card, we need to have basic knowledge of Islamic art. The general construction method of any Arabesque pattern is more or less intertwined geometric shapes like hexagons, squares, octagons, triangles, stars, and circles. Creating a pattern tile is quite an interesting challenge, so as a beginner, keep it as simple as possible, and work with a grid.
I sketched out roughly the idea for the card design and a sample of the tile design I want to recreate. It's a combination of stars, a circle, and a hexagon. So let's get started!

Open Adobe Illustrator CC, and hit Control-N to create a new document.
Select Profile: Basic RGB.
In theUnits drop-down menu, select Millimeters and enter 250 mm for Width and Height, and Name your file "Eid_Greeting". Click OK.
Click on the Advanced button, make sure RGB, Screen (72ppi) is selected, and check Align New Objects to Pixel Grid. Click OK.

Once the file is open, View > Show Grid.Then select View > Snap to Grid.
The grid needs to be customized to the artboard, so we need to edit it. Go toIllustrator > Preferences > Guides & Gridand in the Gridline every box write 25 mm, and write 6 in the Subdivisions
box.

2. Pattern Design
Step 1
First let's create the tile for our pattern, and thenthe rest is easy.
In my sketch I had two six-pointed stars in a circle and enclosed in a hexagon.
Select theEllipse Tool (L) with Fill to None and black Stroke, hold down
the Option andShift keys, and drag to constrain your selection. Snap the ellipse to two square subdivisions of the grid. Each square division is 25 mm, so the diameter of your circle would be 50 mm. If you select Window > Info, you can view the exact dimensions of the Width & Height of your selection.

Step 2
Next we need to create the two six-pointed stars within the circle.
To make a 6-pointed
star, select the Star Tool, and click once in the center of the ellipse, to center the star and open the Star dialog box.
Make Radius 1: 25 mm (half the diameter of our ellipse), Radius 2: 8mm, and Points: 6.

Go toWindow > Stroke, to open theStroke panel.
Select Cap: Round Cap and Corner: Round Join, so the pointy ends of the star do not exceed the ellipse border.

Next with the 6-point star selected, Copy (Command-C), Paste in Front (Command-F). ThenObject > Transform > Rotate.The Rotate dialogue box
will appear;make Angle: 90 degrees.

With the Selection Tool (V), select the elements of the two six-point stars and the circle, and apply a 5 pt Weight to the Stroke, from theStroke panel.
Then select the Cap: Butt Cap, Corner: Miter Join, and apply a Limit of 4x, so the corner edges are sharp for the inner dodecagon.

Step 3
Select the three objects with the Selection Tool (V).
Object > Expand. Make sure Fill and Stroke are checked, and OK.
Open the Pathfinder panel: Window > Pathfinder, and select Shape Modes: Unite, to create a compound shape.

Step 4
Select the Rectangle Tool (M) with a white Fill and black Stroke, hold down
the Alt andShift keys to constrain the selection, and draw a rectangle around the circular pattern.
Next, with the Selection Tool (V), drag over both objects to select them, and click on Pathfinders: Divide.

Take the Direct Selection Tool (A), and select the outer excess shape, then Delete.
Then with the Selection Tool (V), select our object and Object > Ungroup (Shift-Command-G ), so we can color each element separately.

Step 5
Let's color our tile pattern.
With the Direct Selection Tool (A), select the elements in the pattern you want in the same color group.
Apply a Fill color of your choice, with Stroke to None. Then group the same color fill elements together.Object > Group (Command-G).

Do the same with the rest of the elements.
Make sure that each element is grouped to its corresponding color choice, and with Stroke to None.

Step 6
Select all the elements with the Selection Tool (V), and thenObject > Pattern > Make. Our new pattern will automatically appear, but it needs to be edited in the Pattern Options dialog box.

Choose how to lay out the tiles. Hex by Row will place the tile in a hexagonal shape and arrange it in rows. The tiles in the row will center in horizontal alignment, with the alternate rows vertically aligned.
Next, specify the overall height and width of the tile.Change the Width to 50 mm and Height 58 mm.
You will need to experiment with various values,
smaller or larger than the height and width of the artwork, to reach the pattern you desire.

Step 7
Next we need to fill the triangular space between the circular patterns.
Remove Snap to Grid so we can create a three point star in the empty triangular space. View > Snap to Grid (Command-Shift-'').
Next choose a color Fill and Stroke of 4 pt.
Select the Star Tool, and click once on the top left corner on the hexagon grid.
The Star dialog box will appear. Enter:
Radius 1: 4.5 mm
Radius 2: 1.2 mm
Points: 3
OK

Step 8
With the star selected,Object > Expand, with Object, Fill andStroke selected, and click OK.
Select the Direct Selection Tool (A), and give the two elements each a different color. I kept the thick borders the same color tone.

With the Selection Tool (V), select the three-point star, hold down the Alt-Shift keys, and drag the object to the bottom left corner of the hexagon grid.
Object > Transform > Rotate, and the Rotate dialog box will open.
Make the Angle180 degrees, and align the center to the hexagon grid corner. ClickOK.

Once you are done, click Done from the bar in the Control Panel to save the New Pattern.
Once a pattern is created, it is
stored in the Swatches panel.
If you wish to edit the New Pattern again, then open the Swatches panel: Window > Swatches, and double click the swatch pattern, to edit.

File > Save(Command-S) and OK.
Select the pattern tile object we created and delete it; we no longer need it.
Step 9
Once we’ve set up
our tile pattern, all we need to do is to fill our background.
Select the Rectangle tool (M), and with our New Pattern Fill draw a rectangle around the artboard.

Once you do that, take the Rectangle Tool (M), select a color Fill of your choice, and draw another rectangle around the artboard. Then Send to Back (Command-[), so it's behind our pattern.

Step 10
Next let's create the background area for our text. Pick the Star Tool from your toolbar, set a color fill, and click once the center of your artboard for the Star dialog box to open.
Set Radius 1: 106 mm
Radius 2: 95 mm
Points 12
OK.

Once you have set the background color and shape,Object > Path > Offset Path, and set it to -6mm, Joins: Miter, and OK.
Give the new shape a color, no fill, and set Stroke to 6 pt.

File > Save(Command-S) and OK.
Open the Layers panel (Window > Layers), and select the Create a New Layer icon to create a new layer for our text illustration.
3. Tailoring Arabic Type
The art of Arabic calligraphy is also known as Islamic calligraphy,
because it was first designed to be written for the Koran, which is the holy book of
Islam. Calligraphy differs from handwriting, as it serves the purpose of being both aesthetic and functional. Writing, on the other hand, is primarily used to communicate.
There are many different styles of Arabic calligraphy, and each script has its own distinctive shape and characteristics. We won't be going through the different style types, but if you have an interest in letters and patterns, then you can benefit on your own from these Arabic calligraphy tutorials, aimed at beginners.
Before we start working on tailoring our Arabic text, here's a brief introduction to the basics of proper calligraphy:
- Arabic is written from right to left, and in cursive nature.
- There are no capital letter forms.
- All letters connect together on the right, but not all letters connect to the left.
- When writing Arabic words, you should be familiar with the basic behavior of each letter. Basically, all letters are written on the baseline, and some are ascending while others fall below the baseline.
Google translated the words for our greeting "Eid Mubarak". You will see how it's written in Arabic, as: عيد مبارك.
To familiarize your eye with its various forms, I've sketched it on a baseline for you, so you can see which letters ascend and descend. Plus a round form of lettering is used, so it's easier to mimic.

Step 1
Let's start creating our letter form by determining the baseline, ascending and descending heights.
Select the Ellipse Tool (L). With a white stroke of 7 pt, and fill to none, click once to open the Ellipse dialog box.
Set Width and Height at 31 mm, and OK. This will be our baseline height.

Then select the Round Rectangle Tool, from the Tools bar, and click once on the artboard to get the Rounded Rectangle dialog box.
Set Width: 31mm (same diameter as the ellipse created)
Height: 60 mm (half the diameter of the ellipse added over and under)
Corner Radius: 16mm (for a nice round curve)
OK.

Select both objects with the Selection Tool (V).
Open theAlign panel (Window > Align), and Horizontal Align Center andVertical Align Center.

Step 2
Change theView to Outline Mode (View > Outline).
With the two objects selected, hold down the Shift-Alt keys and drag, to duplicate the object, and move it towards the left to align with the left borderline.
The Command-D shortcut will repeat the last action. Repeat four times, until six object groups are aligned.

Use the Command-Y shortcut to switch the view to Preview.
Select all objects with theSelection Tool (V), and with Shift-Alt held down, scale them down to fit our hexagon background.
Then Shift-Alt-Drag down to Duplicate and create the second row.

Next let's bring out our Ruler through the shortcutCommand-R, so we can put in our text guidelines.
To make sure the guides will be locked, select View > Guides > Lock Guides.
Drag the guides to create the baseline, ascending and descending height levels.

Step 3
"Eid" (عيد) is made up of three letters, but they are all on the baseline.
So Delete the left and right objects in the first row, plus the ascending three rounded rectangles.

Next, move on to cut the letter shapes. Following the Arabic type sketch, use the Scissors Tool (C) from the Tools bar to cut the points on the ellipses, and then delete the excess.

Next, let's tailor the word "Mubarak" (مبارك). There are two ascending letters and one descending. Select the objects that we don't need, and delete, then use the Scissors Tool (C)to cut the letters, according to the sketched illustration.

Step 4
Select the end points of the ascending letters, with the Direct Selection Tool (A), and hold down the Shift key to constrain the selection as you move the ascending height guidelineupwards.

Then use the Selection Tool (V), holding Shift down, to distribute the letters closer together.
Once you are done, let's dot and add signs to our letters.
Step 5
Select the Ellipse Tool (L) and open the Ellipse dialog box, by clicking once on the artboard.
Create a 6 mm Width & Height ellipse.

There will be two dots below the baseline in the middle letter of "Eid" (عيد).
So make sure you have two aligned ellipses created.
Plus, there is another dot to add, below the second letter of "Mubarak" (مبارك). So create another ellipse for it.

Step 6
The last letter (Kaph ك ) in "Mubarak" (مبارك), has the "hamzah" (ء) symbol which we need to recreate. It looks an elongated letter "c" but with a tail.
From the tools bar, select the Rounded Rectangle Tool. With a white stroke of 7 pt, and fill to none, create a rounded rectangle with 17 mm Width, 13 mm Height, and Corner Radius 16 mm.

Use the Scissors Tool (C) from the Tools bar, to cut it into a "C" form. Deletethe excess.
Then select the Pen Tool (P) and select the joint to draw a tail.

File > Save(Command-S) and OK.
4. Adding Details
Step 1
Great, we are almost done.
Hide the guidelines, as we no longer need them.View > Guides > Hide Guides(Command-;).
Command-A, to Select All objects on the text layer, then align them correctly into the hexagon.
Then with the Selection Tool (V), select the elements with a white stroke, and thicken the stroke to 9 pt.

Object > Expand with Fill and Strokechecked, and OK.
Command-A, to Select All, and give them a Fill color of your choice with Stroke to none.

Step 2
Let's finish it off with stars and a moon.
With the Ellipse Tool (L), and yellow fill, draw a freehand ellipse.
Then freedraw another ellipse over it, towards the inside of the first ellipse, so that the below ellipse would start to look like a crescent.

Let's cut out our crescent.
Open Window > Pathfinder.
InPathfinder > Shape Modes, select Minus Front.
Now, you should have a crescent moon!
Finally, take the Star Tool from theTools bar, select a color tone Fill, and randomly fill the space around the text with little stars.
File > Save(Command-S) and OK.
Eid Mubarak!!
I hope you enjoyed learning
the process of creating an Arabesque pattern and gained a few useful shortcuts to tailor a rounded Arabic font, as well as having been inspired to create your own colorful Eid greeting card for the
celebration of Eid Al-Fitr.
Have fun creating, and always feel free to share how
your Eid greeting turned out.
Leave any questions you may have in the comments section below.
Happy Eid!
Original Link:
TutsPlus - Design
More About this Source Visit TutsPlus - Design