
An Interest In:
Web News this Week
- April 27, 2024
- April 26, 2024
- April 25, 2024
- April 24, 2024
- April 23, 2024
- April 22, 2024
- April 21, 2024
Some of Our Sources
- TutsPlus - Code
- The Logo Smith
- Abduzeedo
- Vandelay Design
- You The Designer
- 24 Ways
- Stylized Web
- Spyre Studios
- Android Headlines
- Willems Lab
Help Webnuz
Referal links:
How to Make Restaurant Websites With HTML5 Templates
Creating a website for your restaurant is crucial if you want to attract new customers. Luckily, nowadays it’s easier than ever to get restaurant websites up and running quickly. Thanks to numerous HTML templates for restaurants, you don’t need to spend time looking for a designer nor learning how to create restaurant websites from scratch.
An HTML template is easy to modify and upload to a hosting server. Another benefit of an HTML template is the fact that it uses less complex code, which makes restaurant websites built with HTML templates faster to load than those built on a CMS like WordPress.
If you’ve been wondering how to make a website for a restaurant, this post is for you. We’ll show you what you’ll need to get started, how to use an HTML5 restaurant template, customize it, and finally how to upload it to your hosting server so you can showcase what your restaurant has to offer.
Tools and Resources You Need to Launch a Restaurant Website
The first step in creating your restaurant website is gathering all the tools and resources you’ll need. This includes a domain name, hosting company, an FTP program, the content that will go on your site, and a restaurant template. Let’s take a closer look at each of those below.
1. Domain Name
A domain name is how your customers will find you online. The most obvious choice is to use your restaurant’s name as the domain name paired with a .COM extension. However, the best domain names are often already claimed, so don’t be surprised if your desired domain name is taken.
If that’s the case, you can try contacting the domain owner and inquiring about the possibility of buying the domain name from them. Another option is to experiment with a different extension or adding the words restaurant or your city’s name.
2. Hosting Company
Aside from the domain name, you’ll also need a hosting server that will house all of the restaurant website files for you. It’s worth mentioning that you can purchase a domain name at the same time as you purchase a hosting plan. In fact, most hosting companies will offer a free domain as an incentive to sign up for their hosting plan.
Before you settle on a hosting company, make sure to do your due diligence and read third-party reviews on independent restaurant sites. This will give you a more accurate picture of the host’s quality and customer satisfaction.
3. An FTP Client
The next task on your list is downloading an FTP client so you can transfer your template’s files from your computer onto your server. Depending on your operating system, you’ll find plenty of FTP programs for Windows, Mac, and Linux. You can also consider FileZilla since it’s a cross-platform client that’s free to download and use.
4. A Code Editor
You'll need a code editor to edit the files for your template. A code editor is similar to a text editor such as Notepad, but it uses syntax highlighting for greater clarity.
I prefer Sublime Text, which can be used on Mac, Windows, and Linux -- a free trial is available as well -- but any code editor will suffice.
5. An HTML Template and Content
Finally, you’ll need a restaurant website template and the content that will go on your website. Although you may be hoping to get a restaurant HTML template free, you'll find that a premium template offers more features. You can start by looking at our collection of website templates for restaurants to find the one that’s right for your business. For the purposes of this tutorial, I’ll be using the Resta template. This template has a simple and clean design with an attractive full-width slider. It also includes a working reservation form, so you’ll be able to take online reservations.

When it comes to the content, gather all the copy that you want included, such as when your restaurant opened for business, what type of cuisine you offer, your menu lists, staff bios, headshots, and anything else that’s relevant to your restaurant.
Now, it’s time to familiarize yourself with the template and customize it to your needs. Let’s continue!
How to Edit Your Restaurant Template’s Content
Once you’ve found an HTML5 restaurant template that you like, purchase it then save the zipped folder to your computer. Unzip it to a location that’s easily accessible such as your Desktop or your Downloads folder.
1. Understand the Structure of the Restaurant Template
Before you can start modifying the files, it’s a good idea to have at least a cursory understanding of the structure of the template. Keep in mind that some of the folders and files may be different from what’s shown below. However, in most cases, you’ll find a folder that contains the template’s documentation and one with the actual template.

Inside the actual template’s folder, you’ll usually find the following subfolders and files:
CSS. This folder will contain all the stylesheets that control the fonts, colors, columns, margins, paddings, and other visual styles of your template.
JS. The JavaScript folder will contain JavaScript files used for validating forms, controlling sliders, various animations, and other effects.
HTML files. You’ll also find several HTML files that represent the pages of your restaurant website template such as the home page, about, services, and so forth.
Images. In this folder, you'll find all the background images as well as other placeholder images used in the template.
You may also find the following files and folders like in the Resta template:
Audio. This folder contains the audio file that’s played as background music when someone lands on your restaurant website.
Fonts. The Fonts folder holds all the icon fonts used throughout the template.
Mail.php. This file is used to set up the contact and reservation form.
With structure out of the way, let’s begin modifying the template.
2. Replace the Default Information
We’ll start by editing the index.html file. Right-click the file and select Open in browser. This will open up the file in your default browser and allow you to see what parts need to be changed.
As you see from the screenshot below, there are quite a few things to edit, including:
- the header text in the slideshow
- the about information
- popular dishes section
- menu list section
To make it easier to find that information in your template, right-click on the header text and click Inspect.
A pane will appear at the bottom that shows the HTML code that makes up our template.

In that panel, you’ll notice the line of text we selected to inspect is highlighted in blue on the left-hand side of the Inspector panel. If you look to the right, you’ll notice that slightly different code is displayed, which controls the visual style of that line of text.
As you can see from the screenshot, the header text we selected is between the <h2> tags, which represent headings in HTML.
To edit the template, locate the tags that contain the content you want to change, find them in the code editor, and swap it out for your info.
With that knowledge, go back to the template folder, right-click on index.html and select Open with Sublime Text or the code editor you downloaded earlier.

Now, you want to find the same code you saw in the Inspector panel of your browser.
Scroll down until you find it on line 298. Then, click in between the <h4> tags and add your own welcome message.
Then, on line 301, click in between <h1> tags and replace that sentence with your own.
In a similar fashion, you can keep doing these steps over and over: inspect the information you want to change, identify the tags that contain that text, find them in your code editor, and replace it with your text.
To change the logo and other images on the site, take a moment to look at the image names used in the img folder of your template. Then, rename your images using those names, select all the placeholder images, delete them, then place your images in the img folder.
Finally, to modify the reservation form so your reservations come to the right address, go to your template’s folder, right-click mail.php file and open it with your code editor. On the line of code that has the dummy email address, click in between quotation marks, highlight the email address, and replace it with your own.

How to Customize Your Template’s Appearance
Once you've replaced all the information, it’s time to style the template to your liking. Back in your template’s folder, right-click on the style.css file and open it in your code editor.

To edit the CSS, follow the same steps used to edit the HTML. Right-click the element you want to style and click inspect, but this time look for the code on the right-hand side of the Inspector tab and then find the same code in the code editor. The Inspector tab will show you which line of CSS you need to edit.
For example, let’s change the header to a teal color by entering a HEX code like so:
color: #65b5c1;
Let’s also change the paragraph text to a darker color like so:
color:#222222;
How to Upload Your Files to the Server
Now that you’ve customized the template, all that’s left to do is to upload your files to the hosting server. The login details should have been emailed to you by your host so look for that email and note down the server name, your username, and password.
Launch your FTP program. Enter the information provided by your host in the appropriate fields and then click on Connect.

The left side of the screen will allow you to find the folder that contains the template files on your computer. Click to expand it. Select all the files and folders, drag them over to the right side of the screen, and drop them into the public_html folder.
Wait for the files to upload then open up your browser and enter your domain name. Congratulations, your site is now live!
5 Tips to Make Your Restaurant Website Awesome
Once your site is live, there are a few additional tweaks that you can do to make a great first impression on your audience.
Add Your Site to Your Social Media Profiles. Now that you've got a restaurant website, it’s time to update the bio and website section on all your social media profiles. Let your followers know they can check out your menu online as well as make a reservation. Share the restaurant website screenshot and encourage them to book by offering them a discount code or a promo coupon.
Include Reviews from Past Customers. Your past customers probably know how good your meals are and the great atmosphere your restaurant provides. Showcase their testimonials and reviews on your restaurant website. This will help encourage new visitors to come check you out.
List Your Restaurant with Google Business. Listing your restaurant with Google Business will make your restaurant website more likely to appear in search results, and if you include your website, it will allow searchers to connect with you directly.
Compress Your Images. Great photos are a must for a restaurant, but make sure you compress the size of your images. This will make your site faster to load and improve the visitor’s user experience.
Embed a Google Map. Adding a Google Map to your restaurant website will make it easier for potential customers to find you and get directions while they’re on the go.
Learn More About Restaurant Websites
In this tutorial we've explored how to make a website for a restaurant. To learn more about restaurant websites review one of the tutorials below:
 WordPress Themes22+ Best Restaurant WordPress Themes: With Premium Responsive Designs
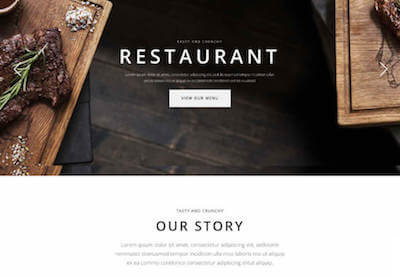 WordPressHow to Make a Website for a Restaurant With WordPress (Quickly)
Start Your Restaurant Website With an HTML Template
Thanks to a variety of HTML5 templates for restaurant websites, you don’t have to break the bank to create a beautiful site for your restaurant. Now that we've shown you how to make a website for a restaurant, you're ready to go. Browse our restaurant template collection and use our guide to launch your restaurant website today.
Original Link:
Freelance Switch
More About this Source Visit Freelance Switch