
An Interest In:
Web News this Week
- April 16, 2024
- April 15, 2024
- April 14, 2024
- April 13, 2024
- April 12, 2024
- April 11, 2024
- April 10, 2024
Some of Our Sources
- Techcrunch
- Simplebits
- TutsPlus - Code
- Web Designer Wall
- Joshua Blankenship
- TutsPlus - Design
- Fuel Your Creativity
- CSS Tricks
- Freelance Switch
- Daily Now
Help Webnuz
Referal links:
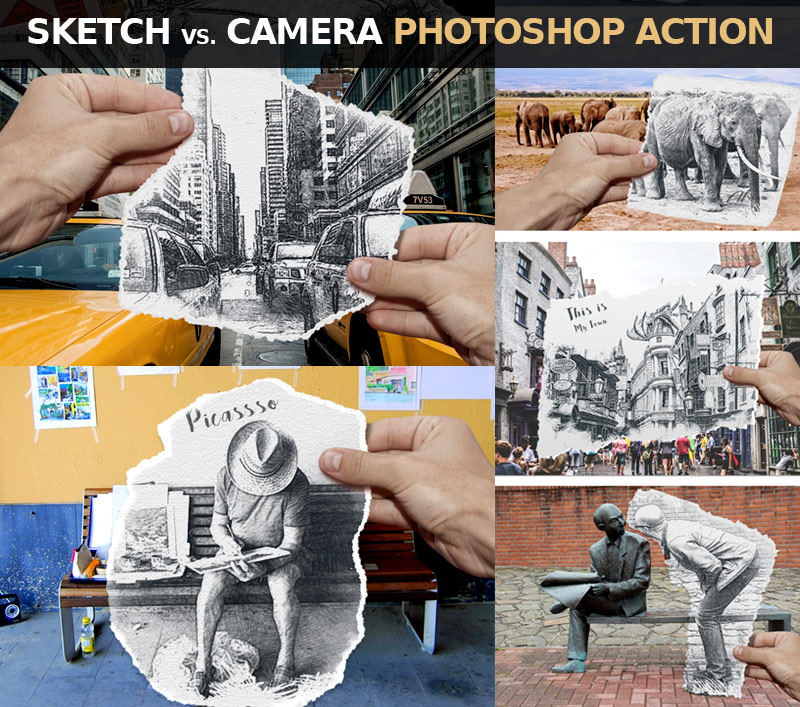
How to Create a Sketch vs. Camera Effect in Adobe Photoshop

Ben Heineis a Belgian visual artist and music producer born in 1983 in Abidjan,Ivory Coast, currently living and working in Brussels, Belgium.
He is best known for his original series "Pencil Vs Camera", "Digital Circlism" and "Flesh and Acrylic".He is a self-taught person in drawing, photography, and music.
Pencil Vs Camerais an original visual concept invented and popularized by Ben Heine since April 2010.The images in this series usually show a surreal hand-drawn sketch held by the artist and placed over a real photograph to symbolizethe connection between reality and imagination/creativity.
Pencil Sketch vs. Camera Photoshop Action
This effect is part of thePencil Sketch vs. Camera Photoshop actionthat you can download fromEnvatoMarket.
Tutorial Assets
The following assets were used during the production of this tutorial:
1.Add the Girls Photo
Create an850 x 636 pxNew Document. You can, of course, use another size for your PSD file,but you have to proportionally adjust all the sizes used in this tutorial. Add the Girls stock image.

2.Add the Torn Paper
Step 1
I have attached a Torn Paper PNG image that you can use. But, if you want to create your own texture of a torn paper, it's very easy to do. You can find a piece of thick paper or cardboard and tear it roughly in the shape that you want. Then place it on a flat surface, preferably of a contrasting color (e.g. black if the paper is white).
Take a photo using a camera or a mobile phone. Make sure that you take the picture from directly above the piece of paper so that the perspective matches what we need.

Step 2
Upload the photo to your computer and open it in Photoshop. Using the Magic Wand Tool,make a selection and remove the background.

Step 3
Download the Torn PaperPNG image and add it in a new layer.

Step 4
Press Control-T to rotate the Torn Paper and position it over the area that you want to turn into a sketch.

Step 5
Press Control-Jtwice, to make two copies of theTorn Paperlayer, and call themTorn Paper 1layer andTorn Paper 2layer.

Step 6
Add a Drop Shadow layer style to the Torn Paper layer, using the color #000000.

3.Make Four Copies for the Girls Layer
Step 1
PressControl-Jfour times, to make four copies of theGirlslayer, and call themGirls 1layer,Girls 2layer,Girls 3layer, andGirls 4layer.

Step 2
Keep the Control key pressed and selectGirls 1layer,Girls 2layer,Girls 3layer, andGirls 4layer. Move them above the Torn paper layer.

4.Use the Graphic Pen and Motion Blur Filters in Photoshop
Step 1
Hide all the copy layers except the Girls 1 layer.
Set the Foreground Color to #000000 and the Background Color to#ffffff.
Step 2
For the Girls 1layer, go to Filter > Sketch > Graphic Pen. For another image, you might have to adjust these settings.

Step 3
Go to Filter > Blur > Motion Blur.

5.Use the Graphic Pen and Noise Filters in Photoshop
Step 1
Make theGirls 2layer visible and set the blend mode to Multiply, opacity 30%.
Step 2
Go toFilter > Sketch > Graphic Pen. For another image, you might have to adjust these settings.

Step 3
Go to Filter > Noise > Add Noise.

6.Use the Photocopy Filter in Photoshop
Step 1
Make theGirls 3layer visible and set the blend mode to Multiply, opacity 100%.
Step 2
Go toFilter > Sketch > Photocopy.

7.Use the Watercolor Filter in Photoshop
Step 1
Make theGirls 4layer visible and set the blend mode toColor, opacity 100%.
Step 2
Go toFilter > Artistic > Watercolor. You can hide theGirls 4layer for now.

8.Create the Sketch Paper Piece With a Clipping Mask
Keep theControlkey pressed and select theGirls 1layer,Girls 2layer,Girls 3layer, andGirls 4layer. Right click on the selected layers and choose Create Clipping Mask.


9.Create the Torn Paper Border
Step 1
Make theTorn Paper 1layer visible and set the blend mode toMultiply, opacity 57%.

Step 2
Make theTorn Paper 2layer visible.Click on theAdd Layer Maskbutton from theLayerstab to add a mask for theTorn Paper 2layer.

Step 3
Create a new layer just below theTorn Paper 2layer and fill it with color #ffffff.

Step 4
Click on theTorn Paper 2layer mask thumbnail. Go to Image > Apply Image.

Step 5
Go to Image > Adjustments > Levels and enter these settings.

You can use the Brush Tool and paint with color #ffffffinside theTorn Paper 2layer if you want to add a more ripped edge effect.
Step 6
Delete the White Background layer to see the effect.

Step 7
Keep theControlkey pressed and select theTorn Paper 1layer and theTorn Paper 2layer. Right click on the selected layers and chooseCreate Clipping Mask.

10.Move the Sketch Effect Very Easily
If you want another part of your image to be turned into a sketch, simply keep theControlkey pressed and select theTorn Paper 1layer, theTorn Paper 2layer, and theTorn Paperlayer.
Use the Move Tool to change the position of the torn paper piece.

Congratulations! You're Done!
In this tutorial, you've learned how to create a Sketch vs. Camera effect in Photoshop using your photos, in just a few steps.

This effect is part of thePencil Sketch vs. Camera Photoshop actionthat you can download fromEnvatoMarket.
Original Link:
TutsPlus - Design
More About this Source Visit TutsPlus - Design