
An Interest In:
Web News this Week
- April 27, 2024
- April 26, 2024
- April 25, 2024
- April 24, 2024
- April 23, 2024
- April 22, 2024
- April 21, 2024
Some of Our Sources
- TutsPlus - Code
- Just Creative
- Inspiredology
- Naldz Graphics
- 24 Ways
- CSS Tricks
- Spyre Studios
- Freelance Switch
- Codrops
- Dev To
Help Webnuz
Referal links:
Working With Shopify Products: AnAjax Shopping Cart
Making your Shopify store more intuitive is a great way to convert more sales and get a larger item count per checkout. Combined with displaying your products in a simple list, we can make the experience of adding to cart as simple as just a one-click operation, without needing to navigate to the product listing page.
This modification can work in a grid or list display and really only needs a few changes to get it working, plus it's easily extensible. So let's get started and maximize your store's monetization!
The Finished Collection List

Here is an example of what you can create with this modification. We have a store which sells commemorative coins, and for ease of use the user can select the quantity of each coin and add to cart without leaving the page.
This is achieved via an AJAX call written in JavaScript which sends a request to the Shopify API. Essentially, the browser is able to submit the form via a background request and keep the user on the page.
Modifying the Theme
To do this, we need to modify the Shopify theme, so log into your admin and go into the Online Store and then the Themes section (or for a shortcut, press G W T).

Now click on the ... button on your theme and choose Edit HTML/CSS. Inside this section, look on the left and click on the snippets folder and then add a new snippet.

Call your snippet ajaxify-cart and click Create snippet.
Now open this file, select all, and copy paste the contents into the ajaxify-cart.liquid snippet that has just been created.
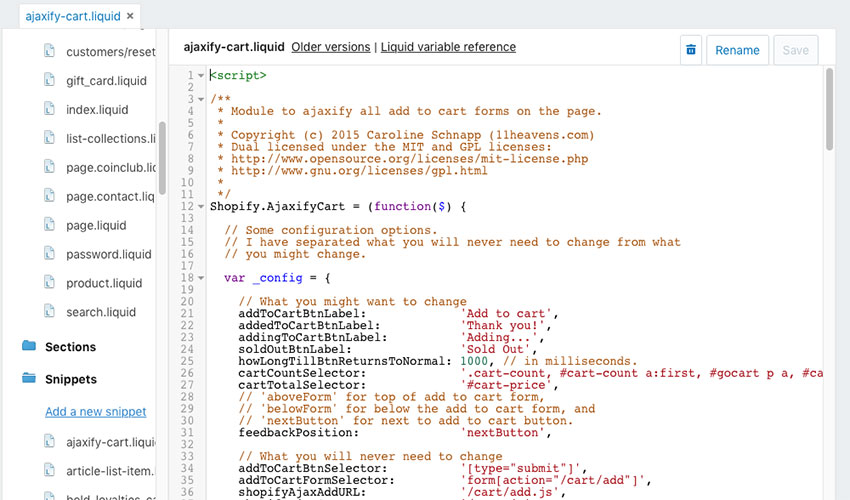
Make sure you Save your changes before exiting. If you wish to change the text of the ajaxify cart, you can look at changing the strings in this file such as addToCartBtnLabel. For more information on configuration, read the readme for the ajaxify cart.
Now, inside your layouts folder, click on the theme.liquid file. Find the end </body> tag in the editor and ensure you add the following anywhere before it:
{% include 'ajaxify-cart' %}This will include the ajaxify-cart snippet you have just added to all pages so the code is available when we call upon it in the next step.

You can include the ajaxify-cart and other snippets also inside the <body> </body> tag as shown above.
Make sure you have saved your theme.liquid file before exiting the window.
Adding Quantity
Now that you have the basis for the ajax cart put in place, we can add some more modifications to utilise more features of the Shopify API.
Let's add a quantity field to the form by modifying the product listing theme. Look through your theme snippet files to find the form for add to cart; you can modify it as below:
<form method="post" action="/cart/add">
    <input type="hidden" name="id" value="{{ product.variants.first.id }}" />
    <label for="quantity">Qty: </label>
<input min="1" type="number" id="quantity" name="quantity" value="1" />
    <input type="submit" value="Add to cart" class="btn" />
</form>
Now save the file and take a look in the browser, and you will also have a quantity field on your form.
Testing It Out
Visit your shop and go to any product, and if all has gone to plan, the add to cart button with the quantity field will now add to cart without refreshing the page.

If this is not working, please check the previous steps and look in your browser's web developer tools error console, to see if there are any errors reported.
Display Your Items in a List
To display your collection in a list, we will need some CSS to make that happen. Modify your theme's css file and add the following to achieve this.
Note: Bear in mind some themes may display differently to the theme we used, which is the Pacific theme, but to adapt this knowledge to your theme, know that the basic principle is adding a float: left; combined with width settings.
 .product-list-item-title {
     font-size: 16px;
     line-height: 22px;
     margin: 5px 0 0;
     float:left;
     width: 50%; }
  .product-list-item-price {
      float:left;
      width: 10%;
      margin-top:5px}
  .product-list-item-details form {
      float:left;
      width: 30%;
      }
To make this responsive to work on mobile and desktop, you will need to use media queries such as the following to clear the float:
@media (min-width: 1020px) {
  .product-list-item-title-list { font-size: 16px;
  line-height: 22px;
  margin: 5px 0 0; float:left; width: 50%; color: #000}
  .product-list-item-price-list {float:left; width: 10%; margin-top:5px}
  .product-list-item-details-list form { float:left; width: 30%; }
}

@media only screen
  and (min-device-width: 320px)
  and (max-device-width: 480px)
  and (-webkit-min-device-pixel-ratio: 2) {
    .product-list-item-title-list {  font-size: 16px;
  line-height: 22px;
  margin: 20px 0 0; float: none;}
    .product-list-item {  }
    .product-list-item-price-list  { float: none;}
    .product-list-item-details-list form { float:none; padding-left:90px; }
}
Making Add to Cart Only Display for Certain Criteria
Say, for example, you just want to display the buttons inside the collections, not on your home page. This can be done easily by adding a conditional to your liquid template file.
Open your template and add the following conditional where you would like the add to cart button to appear, for example inside your product list layout where we appended the quantity. Add the {% if collection.title %} conditional as in the following code:
{% if collection.title %}
    <form method="post" action="/cart/add">
        <input type="hidden" name="id" value="{{ product.variants.first.id }}" />
        <label for="quantity">Qty: </label>
<input min="1" type="number" id="quantity"name="quantity" value="1" />
    <input type="submit" value="Add to cart" class="btn" />
    </form>
{% endif %}
You can specify any criteria you like in place of the {% if collection.title %} if you'd rather check for another value such as whether the product is in stock or what category or tags it has applied.
Finalizing the Display
You can change the CSS of your theme to modify the ajax cart display and tweak it to your heart's content. Some useful classes to modify are .cart-count and #cart-count a:first.
To specify the value added to cart, you can also modify the link to view the cart with the classes #gocart p a, #cart, and .checkout em.
To alter the total count of items, look at the .item-count class.
Additionally, at the end of the ajaxify-cart.liquid snippet are the following colours you can edit.
.ajaxified-cart-feedback {
  display: block;
  line-height: 36px;
  font-size: 90%;
  vertical-align: middle;
}
.ajaxified-cart-feedback.success {
  color: #3D9970;
}
.ajaxified-cart-feedback.error {
  color: #FF4136;
}
.ajaxified-cart-feedback a {
  border-bottom: 1px solid;
}
Change the alignment, margins and padding to match your theme and get the best display you can for your end users.
Mobile Responsive Support
Remember to check on mobile resolutions to see how the ajax cart is working. You may need to add some media queries so that it will display nicely on all displays.
As mentioned earlier, you can use the following media conditionals to check for this:
@media (min-width: 1020px) {
 /* Classes go here for wide screen */
}

@media only screen
  and (min-device-width: 320px)
  and (max-device-width: 480px)
  and (-webkit-min-device-pixel-ratio: 2) {
    /* Classes go here for mobile devices */
}
Conclusion
So you now have an ajaxified shopping cart component on your shop, meaning the purchasing workflow is somewhat streamlined for the end user. Hopefully, this will result in more conversions. In combination with displaying your products in a list with the quantity setting, the probability for a larger order has increased somewhat.
For sites offering often purchased consumables and those trying to offer a wide range of multiple purchases in one checkout, the ajaxify cart works very well.
Going forward, you may want to add more ajax elements to your site. If so, your first point of reference would be the Shopify API—and taking apart the source provided for the shopping cart (ajaxify-cart.liquid) to look more closely into how the calls are made.
A basic understanding of JavaScript and AJAX would be required to do this, but don't worry if you are a newcomer—it's really very basic stuff indeed.
All the processing for an AJAX call can be found in the $.ajax section of the file, and more information on how this works can be found on the jQuery website.
I hope you enjoy modifying your stores and increasing your sales with these new concepts!
Original Link:
TutsPlus - Code
 Tuts+ is a site aimed at web developers and designers offering tutorials and articles on technologies, skills and techniques to improve how you design and build websites.
More About this Source Visit TutsPlus - Code