
An Interest In:
Web News this Week
- April 30, 2024
- April 29, 2024
- April 28, 2024
- April 27, 2024
- April 26, 2024
- April 25, 2024
- April 24, 2024
Some of Our Sources
- BoingBoing
- Technology Review
- Simplebits
- Smashing Apps
- Abduzeedo
- Fuel Your Creativity
- Crazy Leaf Design
- My Ink Blog
- Reencoded
- Android Dissected
Help Webnuz
Referal links:
How to Paint a Realistic Ear in Adobe Photoshop

Human anatomy can be pretty intimidating. But you can conquer your fear by tackling different parts of the human body in small digital painting studies.
In this quick tip, learn how to paint a realistic ear using Adobe Photoshop and a graphics tablet.
1. Sketch the Ear
Step 1
First things first, make sure you grab a reference with a nice clear shot of an ear. Here I'll be using this ear reference from Envato Market. Since I like the idea of this ear facing the opposite direction, I flip my reference by going to Edit > Transform > Flip Horizontal.

Step 2
Now use a Hard Round Brush to sketch the ear.
Break it down into simpler shapes if you need to, and try your best to create a clear sketch with all of the correct anatomical features.
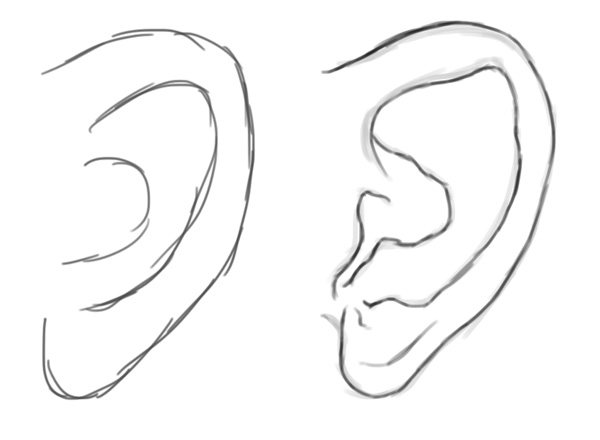
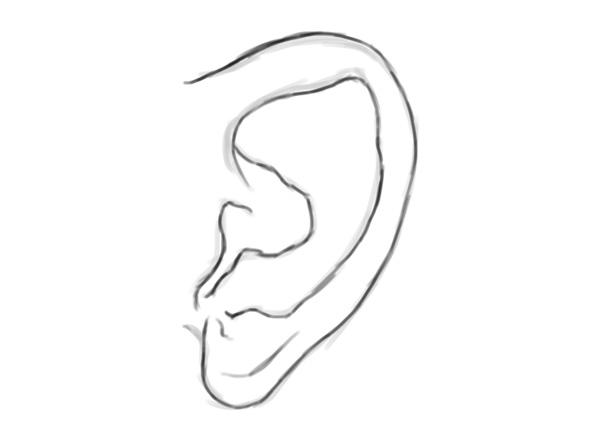
Here is the final sketch.
2. Paint the Base Colors
On a separate layer, paint a natural tan base color using a Hard Round Brush with 100% Hardness.
Now let's get rid of that harsh black sketch. First change the Layer Blend Mode of the sketch to Soft Light, and then set it as a Clipping Mask.

3. Paint the Shadows
Step 1
To avoid picking colors manually, just clip a New Layer and set it to Multiply. Select the tan color already on the canvas using the Eyedropper Tool (I) so that it becomes the new Foreground Color.
Begin painting the shadows for the inside and outside of the ear using a Soft Round Brush. Because the original color is multiplied, it'll appear darker for the perfect shadow.

Step 2
Deepen the shadows by using the Eyedropper Tool (I) to pick up the darker brown that was created during the first round of shadow.

4. Create Realistic Skin Colors
It makes me very unhappy when the colors are off. Notice how the original colors look totally different from the reference?
Fix this problem easily by setting a layer to Overlay, andthen use the same natural color to create more warmth.

Now the colors look so much better!
5. Paint the Highlights
The easiest way to immediately step up the realism in any piece is to paint highlights. Just like before, set a New Layer to Overlay. This time, use the color white to paint soft highlights all over the ear.

Pay attention to the reference to notice changes in the ear's bone structure as well as the general lighting setup. Any area that appears as though it's jutting out towards you should receive a nice highlight.

6. Create Realistic Texture
Creating realistic skin texture is very simple. Select the Chalk Brush from the Brush Presets panel. If you like experimenting with brushes, I recommend you pick a nice grainy brush from this Grunge set.

Paint a dark tan texture all over the ear. Soften any harsh areas with the Eraser Tool (E).

Then set a New Layer to Overlay and paint warmer textures onto the areas that naturally flush due to blood circulation.

Lastly, create a third layer of texture with white. This will help represent the pores.

7. Clean Up the Painting
Step 1
As we draw closer to the completion of this study, we'll need some background color.Select the background layer and Right-click to go to the Blending Options. Create a Gradient Overlay of dark gray to light gray colors with the following settings:
- Blend Mode: Normal
- Style: Radial
- Opacity: 100%
- Angle: 90 Degrees
- Scale: 100%

Here's the new background for this study.

Step 2
Continue to refine your painting by blending out the skin with a Soft Round Brush. Then use a Hard Round Brush with 100% Hardness and 100% Opacity to make sure your edges are perfect.

Don't be afraid to correct the anatomy by shaving off parts of the ear. And to make the ear appear more 3D, paint a soft gray shadow beneath it.

If it seems as though the texture appears harsh at any time, simply smooth out the skin with a Soft Round Brush.
And for even more realism, study the small hairs from the reference and try to emulate them with tiny white strokes to show that this study could easily be the real thing! When you're finished, the final study will look like this.

See! That wasn't so bad!
Now It's Your Turn!
Small exercises like this help to improve your digital painting skills dramatically. By taking on these anatomy studies as challenges, you'll work your way up to remarkable realism.
Have fun trying out this exercise, and apply these same techniques to other areas of the human anatomy. And for more digital painting tips, check out these tutorials below:
- How to Correct Anatomy Issues in a Digital Painting in Adobe Photoshop
- How to Paint Realistic Skin in Adobe Photoshop
- How to Digitally Paint Faces With Incredible Likeness
Original Link:
TutsPlus - Design
More About this Source Visit TutsPlus - Design