
An Interest In:
Web News this Week
- April 30, 2024
- April 29, 2024
- April 28, 2024
- April 27, 2024
- April 26, 2024
- April 25, 2024
- April 24, 2024
Some of Our Sources
- Slashdot
- Engadget
- Techcrunch
- TutsPlus - Code
- Joshua Blankenship
- Pearsonified
- Fuel Your Creativity
- CSS Tricks
- Spyre Studios
- Codrops
Help Webnuz
Referal links:
Animation for Beginners: How to Animate a Character Walking From the Front View

In this tutorial, I will be taking you through the steps of how to animate a character walking in place from the front view.
I will be incorporating some terms into this tutorial that I learned in the animation industry. This helped me avoid confusion big time. When I first started in animation, I used to say "the left leg is moving" or "the leg on the right is moving" but that became so confusing! Are we talking about his right or our right? Confusing, right?
I don't want to confuse the wonderful visitors to Envato Tuts+! So I will share something with you: I was taught to start calling it the west leg and the east leg. This is especially good for animation that is facing us. There is no mistaking what is east and what is west!

Animating characters walking is fun and dynamic. Animating a walk from the front view is challenging, but with practice you can do it with ease. Let's get started!
1.Draw Our Main Walking Poses
Step 1
Let's start by drawing a floor guideline to indicate more or less where the feet are grounded and a top line to indicate where the top of the character's head is.We are animating a simple front view walk, but the foot that is farthest from us will be slightly further back than the foot that is closest to us.

Step 2
Draw our first pose/extreme.
I like to start with the character in mid-step. The west leg is making contact with the ground. We are working rough, and our walking character is a simple automaton with a round head, so I’ve only indicated the eyes with dots.
Notice how I sketched in a light vertical line to indicate where the middle of the torso is. As we animate, I use the line to show how the body favors the direction of the outstretched leg. In this pose, the body favors the west.
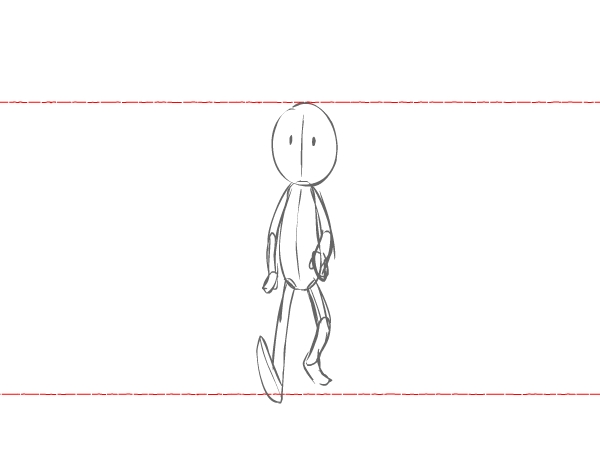
Let's compare it to the side-view animation that I did. Notice how the character is in the same position as in the first frame of my original side-view walk. The west foot is coming towards us, therefore slightly larger. The east foot is further back, so that foot is smaller. The east arm is swinging towards us, so I foreshortened the arm a little.

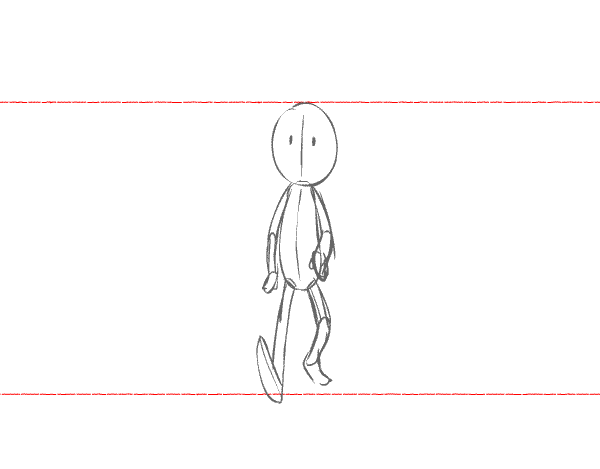
Step 3
Draw our second extreme. The west foot is flat and grounded and is "sliding" back.To give the illusion of walking in place, the feet "slide".Notice how I foreshortened the foot since the foot is flat and facing us. Don't be afraid to work rough, because we'll clean it up later. I foreshortened the calf on the east leg since the leg is bent slightly away from us as the leg swings forward. The foot is smaller too, since it's farther away from us.

Let's do a quick comparison to the walk side view. Notice how I am working rough and drawing through the figure to work out how the leg attaches. Let's make sure the leg “attaches” correctly to his hip.

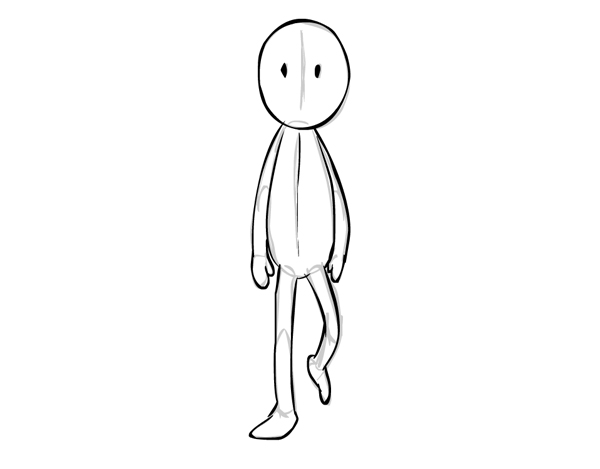
Step 4
Let's draw our thirdextreme pose. As the eastleg is now forward, the foot gets bigger as it is closer to us.
The top of the character’s body should be at the same level as the first extreme. It's pretty much the same pose as our first extreme, except the legs are reversed.

Step 5
Let’s draw our fourthextreme.Now the character’s body is higher up because the front leg is passing the back leg. The body is at the same level as our second extreme.

Let's see how our walk looks so far! Looking good! Now let's sweeten it and add some in-betweens!

2.In-Between Our Poses
Step 1
Let's add an in-between between pose 1 and 2.
The west foot is already in contact with the ground and starting to "slide" back. As the east leg lifts forward, I still have the foot slightly in contact with the ground. I don't want the east foot to completely leave contact with the ground before the west foot is grounded or it would look as if the character could fall on his face. No matter what you aredrawing, in-between or extreme, the character should always be balanced!

That looks good! Keep going!

Step 2
Now add an in-between between our second and third extreme.
Keep checking that the feet are not floating and that the character looks grounded. Notice how the east foot is swinging towards us. As the foot swings towards us, it starts to get a little bigger as it gets closer to us. I am showing you this zoomed in so that you can see how the character lines up.

That's looking good! Notice how our foot is foreshortened.

Step 3
Now let's add an in-between between our thirdand fourthextreme. The east foot has made contact with the floor and it's sliding back.

Looking good!! Almost there!

Step 4
Finally, let's add an in-between between our fourthextreme and our firstextreme. This makes our first drawing our last drawing, making it a true animation cycle that loops infinitely. Notice how the west foot is swinging toward us.

Looking good! Notice how even though the arm is in front of the body and moving towards us, I drew through the body to sketch in the position of the arm and how it attaches to the shoulder.

Let's see how it looks so far.
That looks really good! A walk cycle from the front view is simple yet challenging.

3.Tighten Up Our Animation Drawings
Now that we have our animation looking sweet, we can lose the red floor guidelines and start tightening up the line for our walking character. I'm still working loose with an ink line, but making things neater such as neatening up the roundness of the head, making sure the eye looks good in all frames, fixing the thickness of the arms and legs, etc.
I left my rough line in light grey and am inking my final line in black so we can see the line against the grey.

Keep cleaning up your animation frames. Make sure those feet still look grounded!

Keep going—we're almost done! Looks great!


Looks great! You animated a great walk!

4.Fun With Walks, Bonus Round!
What we animated was basically a generic walk. But have fun with walks and give our character more attitude if you want! Puff out the character's chest out a little. Raise the character's arms at the elbows a bit and we have a very confident walk.


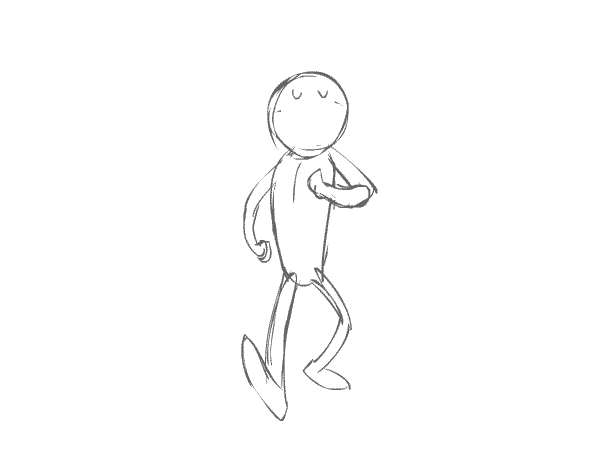
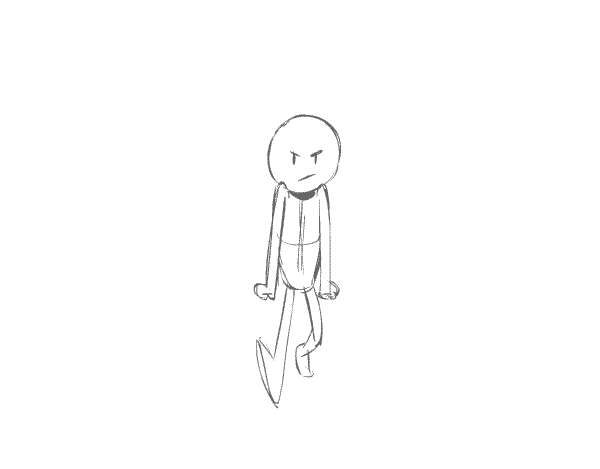
How about we give the character rigid arms, hands balled into fists, and a lowered head. You have a perfect angry or tough walk!


Walks are fun! What can you come up with?
Congrats! Great Job!
Walks are one of the most common and fun actions to animate. Have fun with it! Just by making small changes here and there in animated walks, you can create an almost infinite number of personalities and attitudes. The sky's the limit! And remember, practice makes perfect, so keep animating!

Original Link:
TutsPlus - Design
More About this Source Visit TutsPlus - Design