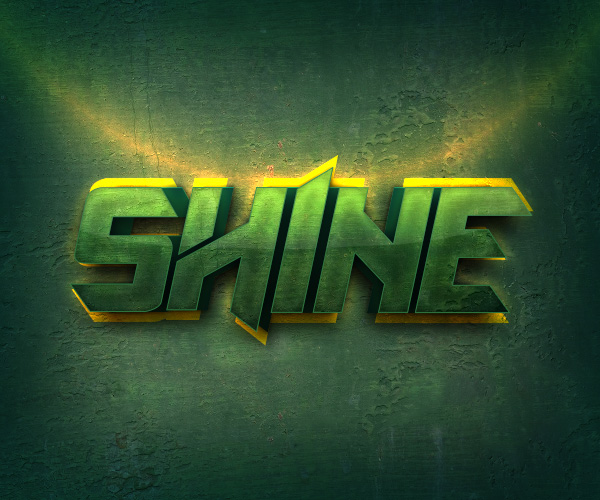
How to Create a Shiny Summer Text Effect in Adobe Photoshop

In this tutorial, I will explain how to create a shiny summer text effect using layer styles in Adobe Photoshop. Let's get started!
Tutorial
Assets
The following assets were used during
the production of this tutorial.
1.Create the Background
Step 1
First of all you have to install the
pattern file named ‘green_metal_pattern’. You can do this by double-clicking the
icon.
Step 2
Create a new document (File > New). SetWidthto600 pxandHeightto500 px. Resolution must be72 ppi.

Step 3
Select the background and duplicate it (go toLayer > Duplicate Layer > OK).
Rename the new layer asBackground
Pattern.

Step 4
To add the texture we are going to use a layer style.
Go
toLayer
> Layer Style > Pattern Overlay, select 'green_metal_pattern'
from the list, and set theScalevalue to50%.Click onSnap to Origineach time you apply this pattern.


Step 5
To obtain a center light look, go to
Layer > Layer Style > Inner Shadow and set the following values.


Step 6
Now we are going to add a
reflection. Go to Layer Style > Bevel & Embossand set these values.
You have to
create a custom Gloss Contour, so follow the images carefully to reach the
desired effect.


2.Create the Text
Step 1
Type the wordShineor some text of your choice using theAmaz Obitaem Ostrov Italicfont. Set theFontSizeto180 pt. For best quality, change the anti-aliasing mode toSharp.Rename the layer asShine Top.
Step 2
Duplicate the text twice and rename the
new layers as Shine Mid and Shine
Bot as shown below. Hide both layers to work more comfortably, because we
are not going to use these layersyet.


3.Style the Top Layer
Step 1
Select the Shine Top layer and go
toLayer
> Layer Style > Pattern Overlay. Click on thePatternbox,
choosegreen_metal_patternfrom
the list (we are using the same background pattern), and set theScaleto50%. Don’t forget to click on Snap to Origin.


Step2
We have to add a Drop Shadow to separate the text from the background. Go toLayer Style >Drop Shadowand use the settings shown below.


Step3
Go to Layer Style >Gradient
Overlay and set the following values.


Step 4
To add a glossy look, go to theLayer
Stylewindow
andmodify
the settings ofBevel
& Emboss as shown below.
You’ll need to create a custom contour
curve. Follow the images carefully and use the values shown in the right
column.


Step 5
Go toLayer
Style > Satinand
use the following settings to brighten up the text.
The Contour is a default curve namedCove
– Deep.


Step 6
Now we’re going to improve the shiny
metal effect by adding glow.Go
toLayer
Style > Inner Glowand
set the following values.
The Contour is a default curve namedCone.


Step 7
Go toLayer Style > Strokeand use the settings shown below to brighten up the edges.


Step 8
We are going to add a backlight. Go toLayer Style >Outer Glowand use these settings.
The Contour is a default curve namedCone.


4.Style the Mid Layer
Step 1
Now we’re going to work with the secondlayer namedShine Mid, so make sure you turn it on! We have to achieve a perspective with a central vanishing point.Go to the Character window and modify theTrackingvalue to-60as shown below.

Step 2
To match the colors of both layers. Go
toLayer
> Layer Style > Gradient Overlayand
use the settings shown below.


Step 3
Go toLayer
Styleand
modifyInner
Shadowusing
the following values.


Step 4
We are going to add some shadows to separate the text from the background. Go toLayer Styleand modify the values ofDrop ShadowandOuter Glowas shown in the images below.


5.Style the Bottom Layer
This final step will give a special touch to the effect. SelectShine Botand open the character window. Modifyvertically scaleto 115% andbaseline shiftto -10 pt. Then change the color as shown below.


Great
Job, You’re Done!
In this tutorial I showed you how to
create a striking text effect using three layers to achieve a central
vanishing point.
I hope that you enjoyed this tutorial
and can use what you’ve learned for your own projects. Please feel free to
comment and show me your results.
Original Link:
TutsPlus - Design
 TutsPlus+ is a blog/Photoshop site made to house and showcase some of the best Photoshop tutorials around.
More About this Source Visit TutsPlus - Design

