
An Interest In:
Web News this Week
- March 27, 2024
- March 26, 2024
- March 25, 2024
- March 24, 2024
- March 23, 2024
- March 22, 2024
- March 21, 2024
Some of Our Sources
- Just Creative
- Spoon Graphics
- Smashing Magazine
- Web Designer Depot
- Naldz Graphics
- Noupe
- CSS Globe
- CSS Tricks
- Android Headlines
- Dev To
Help Webnuz
Referal links:
A First Look at the HTML5 History API
HTML5 introduces a variety of new goodies for front-end developers, such as the additions to the browser’s history object. Let’s take a look at its new features in this lesson.
Introduction
Always present the same information when the user refreshes the page.
The history object isn’t new; in fact, you can trace its beginnings to the early browsers from the 1990s. While it has never been based on a public standard, until HTML5 that is, every browser has supported its meager, yet sometimes useful, functionality. Since its inception, the history object has provided a means to work with the history of a particular tab in the browser (or a window before tabbed browsing became the norm). This is sometimes referred to as session history.
The old history object gave us the ability to programmatically navigate backwards and forwards, the equivalent of the user clicking the Back and Forward buttons. But HTML5 finally updates the history API by adding the ability to manipulate the browser’s URL and maintain state; although URL manipulation, to some extent, has been possible since the introduction of the location object. For example:
//On the URL: https://net.tutsplus.com///Get the full URLlocation.href //"https://net.tutsplus.com/"//Get the hash fragmentlocation.hash // "" (an empty string)//Set the hash fragmentlocation.hash = "hello"//Get the full URLlocation.href //"https://net.tutsplus.com/#hello"//Get the hash fragmentlocation.hash //"#hello"
The native API is easy enough to use…
It’s common for some web applications to use “hash-bangs” (#!). Not only can they prevent the browser from navigating to a different page (making dynamic web pages easier to manage), but they can also aid in search engine optimization (SEO) (until recently, Twitter made extensive use of hash-bangs).
Th hash-bang technique is useful when you have a lot of content that you want to display in the same page while allowing users to bookmark certain parts of a page. You can also use hash-bangs in conjunction with infinite scrolling scripts keep track of the user’s position by storing that information in the URL.
The technique is simple: store information in the URL, parse it, and then use Ajax to load content. It sounds wonderful, but there are many reasons not to use this technique. To summarize:
- A URL like
https://domain.com/#!1234may fail to load correctly if JavaScript is not enabled. - You may have two different URLs pointing to the exact same content (eg:
https://domain.com/#!1234andhttps://domain.com/1234)–a no-no for SEO. - The server is unaware of fragment identifiers.
Using the History API
The History API helps solve the aforementioned issues by giving us the ability to transform URLs, like https://domain.com to https://domain.com/hello, without triggering a page refresh. The following lists the history object’s members and their purposes:
history.back(): Navigates to the previous URL in the history stack.history.forward(): Navigates to the next URL in the history stack.history.go(): Navigates to the URL at the specified index in the history stack. e.g.history.go(-2)history.pushState(): Adds a URL to the history stack with a specified state. e.g.history.pushState({ foo : "bar"}, "New title", "new-url.html"), where the first argument is a state object.history.replaceState(): Updates (rather than adds) the current URL on the history stack with the provided state information. e.g.history.replaceState({ foo : "bar"}, "New title", location.href)history.length: Returns the amount of URLs in the history stack.history.state: Returns the state object at the top of the history stack.
The following example uses no external libraries:
<nav> <ul> <li><a href="/history/example/index.html">Home</a></li> <li><a href="/history/example/hello.html">hello</a></li> <li><a href="/history/example/about/index.html">About</a></li> </ul></nav>
// NodeLists do not have a forEach method[].forEach.call(document.querySelectorAll("nav a"),function(e) {e.addEventListener("click", function(evt) { var title = this.textContent; var url = this.href; //Change the URL history.pushState(null, title, url); //Do some ajax stuff //Prevent the browsers default behaviour of navigating to the hyperlink evt.preventDefault();})});The native API is easy enough to use, but you can find many libraries that greatly help with the common patterns of intercepting a link, loading data via Ajax, and inserting the data into the page. Two popular libraries are pjax and History.js.
With Great Power…
As with any technology or API, be mindful of best practices. Let’s look at a few best practices when using the history API.
Be Kind to URLs
Don’t change the URL just because you can; only change it when it makes sense to do so!
For example, let’s say your online shop resides at https://shop.domain.com/, and the homepage displays a list of popular items. Clicking on one of the items could open a modal window that contains the product’s information (retrieved via Ajax, of course). You wouldn’t need to change the URL when doing this; instead, you could provide a link to the product in the modal window that would take the user to the product’s page.
Another example would be to maintain the user’s scrolling position in an infinite scrolling situation. The user could refresh the page and continue where they left off.
The Chrome Web Store changes its URL when showing different items. No page refresh occurs when going from /webstore/category/popular to /webstore/detail/pjkljhegncpnkpknbcohdijeoejaedia.

Ensure Compatibility
Only load what is necessary.
Unfortunately, older browsers do not support pushState() and replaceState(). Therefore, it is important to ensure that both your page and the user experience (UX) are not broken in those browsers. Use the tried and true concept of progressive enhancement.
A common use case might be to intercept a link’s click event and use Ajax to load the content in a new window while also changing the URL. Make sure that the links work normally without JavaScript; the anchor element should have a valid URL in the href attribute. Then for browsers that do support the new goodies, the JavaScript code would retrieve the URL’s content via Ajax. Here’s what that code might look like:
//Using jQuery (would work fine with raw javascript)if ("pushState" in history) { $("nav a").on("click", function() { history.pushState(null, this.textContent, this.href); return false; });}Don’t Download Unnecessary Markup
Ajax is wonderful, and it can be tempting to take the easy road and download an entire HTML document to display in a modal window. Don’t do that! Downloading unnecessary data can take its toll on the UX, especially on slow connections.
Take the extra time to ensure your application doesn’t waste bytes over the wire, even if it means spending extra time on your back-end code. You can send a custom HTTP header that indicates that the server should only serve minimal content (e.g. JSON, HTML fragments, etc).
/* Note server support for HTTP_X_REQUESTED_WITH may vary, also it may be worth sending your own custom header in the case that the JavaScript doesn't send the header you expected */if(isset($_SERVER['HTTP_X_REQUESTED_WITH']) && strtolower($_SERVER['HTTP_X_REQUESTED_WITH']) == 'xmlhttprequest') { //Ajax request echo "Content without lots of crazy markup";}else { //Non-ajax request include('header.php'); ...}The demo demonstrates this. Click on cat.php on Example 4, and you’ll notice only the necessary content is sent through in the response.

Maintain Continuity
Be mindful of best practices.
Always present the same information when the user refreshes the page. It might sound obvious, but it’s easy to forget when dealing with so much client-side code.
When you change a URL via pushState() from https://domain.com to https://domain.com/contact, your web server may look for a directory called contact or a file named contact.html. It’s important that URLs you use with the history API should be actual URLs that your server responds to.
There are many frameworks that can handle routing for you; it’s worth using one if you are able to.
- Ruby on Rails (Ruby) – Routing
- Play Framework (Java) – HTTP Routing
- CodeIgniter (PHP) – URI Routing
- Express (JavaScript on Node.js) – Routing
- django (Python) – URL Dispatcher
- ASP.NET (C#) – System.Web.Routing
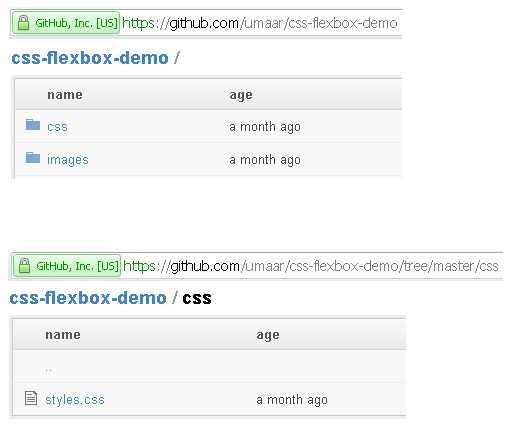
Github uses pushState() for semantically different portions of content; their content looks the same when you refresh the page.

 Tuts+ is a site aimed at web developers and designers offering tutorials and articles on technologies, skills and techniques to improve how you design and build websites.