
An Interest In:
Web News this Week
- April 19, 2024
- April 18, 2024
- April 17, 2024
- April 16, 2024
- April 15, 2024
- April 14, 2024
- April 13, 2024
Some of Our Sources
- TutsPlus - Code
- Abduzeedo
- TutsPlus - Design
- Vandelay Design
- Inspiredology
- FanExtra - PSD
- Crazy Leaf Design
- Android Dissected
- The Verge
- TechPowerUp
Help Webnuz
Referal links:
Build a Contacts Manager Using Backbone.js: Part 3
Welcome to part three of our series that focuses on building applications using Backbone. If you haven’t read parts one and two, I strongly recommend that you do — just so you know where we’re at and what we’ve covered so far.
In part one, we took a basic look and models, views and collections. In part two, we looked at routers, events and the history modules. In this part, we’re going to look further at interactions and see how we can add or remove models from a collection.
Adding Models to a Collection
If you cast your mind back to part one, you’ll remember how we added all of our models to the collection when the collection was initialised. But how can we add individual models to a collection after the collection has already been initialised? It’s actually really easy.
We’ll add the ability for new contacts to be added which will involve an update to the underlying HTML and our master view. First, the HTML; add the following mark-up to the contacts container:
<form id="addContact" action="#"> <label for="photo">photo:</label><input id="photo" type="file" /> <label for="type">Type:</label><input id="type" /> <label for="name">Name:</label><input id="name" /> <label for="address">Address:</label><input id="address" /> <label for="tel">Tel:</label><input id="tel" /> <label for="email">Email:</label><input id="email" /> <button id="add">Add</button></form>
This simple form will enable users to add a new contact. The main point is that the id attributess of the <input> elements match the attribute names used by our models, which makes it easier to get the data in the format we want.
Next, we can add an event handler to our master view so that the data into the form can be harvested; add the following code after the existing key:value pair in the events object:
"click #add": "addContact"
Don’t forget to add the trailing comma to the end of the existing binding! This time we specify the click event triggered by the element with an id of add, which is the button on our form. The handler we are binding to this event is addContact, which we can add next. Add the following code after the filterByType() method from part two:
addContact: function (e) { e.preventDefault(); var newModel = {}; $("#addContact").children("input").each(function (i, el) { if ($(el).val() !== "") { newModel[el.id] = $(el).val();} }); contacts.push(formData); if (_.indexOf(this.getTypes(), formData.type) === -1) { this.collection.add(new Contact(formData)); this.$el.find("#filter").find("select").remove().end().append(this.createSelect()); } else { this.collection.add(new Contact(formData)); }}As this is an event handler, it will automatically receive the event object, which we can use to prevent the default behaviour of the <button> element when it is clicked (which would be to submit the form and reload the page not what we want). We then create a new empty object, and use jQuery’s each() method to iterate over each <input> element in our addContact form.
In the callback function supplied to each(), we first check that the field has had text entered into it and if so, we add a new property to the object with a key equal to the id of the current element, and a value equal to its current value. If the field is empty, the property will not be set and the new model will inherit any defaults that may have been specified.
Next, we can update our local data store with the new contact. This is where we would probably save the new data to the server — if we had a server in place to receive such requests. At this point we don’t, so we’ll just update the original array for now so that if the view is filtered, the new data is not lost. All we need to do then is use the collection’s add() method to add the new data to the collection. We can create the new model to pass into the collection within the call to add().
Lastly, we need to update the <select> element so that if the new contact has a different type, that type is available for filtering. However, we only want to re-render the <select> if a new type has been added. We can use Underscore’s indexOf() method to search through an array for a particular value. Like the native JavaScript indexOf() method for strings, this method will return -1 if the value is not found. We pass the array to search as the first argument to indexOf(), and the value to look for as the second.
If the value is not found, the type specified must be new so we find the existing select box and remove it before appending a new one generated by our createSelect() method. If the type is found, we can just add the new model without needing to re-render the select.
Rendering the New Model
Now that we’ve added a new model to the collection, we should render it on the page. To do this we can bind another handler, this time to listen for the add event. Add the following line of code to the initialize() method of the collection:
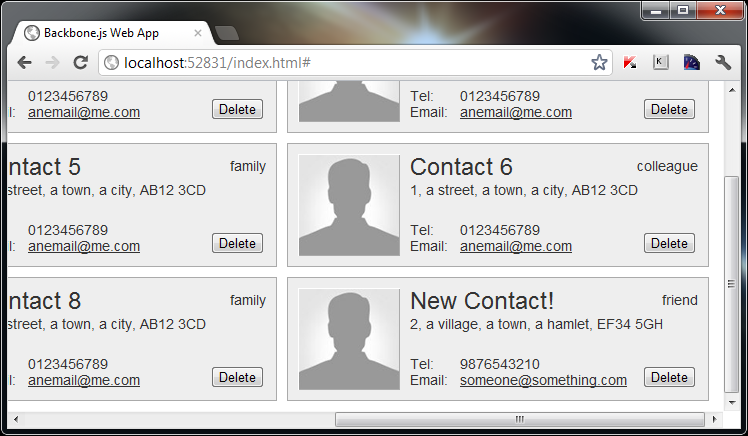
this.collection.on("add", this.renderContact, this);We use the on() method once more to attach the event listener and as we already have a method that creates and displays individual views, we just specify that function as the handler. We also set the master view as the this object within the handler as we did with previous handlers. At this point, we should now be able to complete the form, and have the new contact rendered to the page:
One thing to note is that if the addContact form fields are left completely blank, the resulting model will be almost entirely devoid of attributes, which will cause problems when we try to manipulate the model later on. One way to avoid this is to provide defaults for the majority of model attributes, just like we provided the default photo attribute. If there are no sensible defaults we can use, like for a contact’s name for example, we can just supply an empty string. Update the defaults object in the Contact class to include defaults for our other attributes:
name: "",address: "",tel: "",email: "",type: ""
Deleting Models From the Collection
Now that we know how to add models to the collection, we should look at how they can be removed as well. One way that we could enable deleting of individual models is by adding a delete button to each contact, so this is what we’ll do; first we need to update the template for each individual view so that it contains a delete button. Add a new button to the end of the template:
<button class="delete">Delete</button>
That’s all we’ll need for this example. The logic to remove an individual model can be added to the view class that represents an individual contact, since the view instance will be associated with a particular model instance. We’ll need to add an event binding and an event handler to remove the model when the button is clicked; add the following code to the end of the ContactView class:
events: { "click button.delete": "deleteContact"},deleteContact: function () {var removedType = this.model.get("type").toLowerCase(); this.model.destroy(); this.remove(); if (_.indexOf(directory.getTypes(), removedType) === -1) { directory.$el.find("#filter select").children("[value='" + removedType + "']").remove(); }}We use the events object to specify our event binding, as we did before with our master view. This time we are listening for click events triggered by a <button> that has the class name delete. The handler bound to this event is deleteContact, which we add after the events object.
First we store the type of the contact that we just deleted. We should make this value lowercase as we did before to ensure there are no case issues when the contacts viewer is in use.
We then call the destroy() method on the model associated with this, the instance of the view. We can also remove the HTML representation of the view from the page by calling jQuery’s remove() method, which has the added bonus of cleaning up any event handlers attached to the view.
Finally, we get all of the types of the models in the directory collection and check to see if the type of the contact that was just removed is still contained within the resulting array. If it isn’t, there are no more contacts of that type and we should therefore remove that option from the select.
We select the element to remove by first finding the select box, then using an attribute selector to select the <option> with a value attribute that matches the removedType variable that we saved at the start of the method. If we remove all of the contacts of a certain type and then check the <select> element, we should find that the type is no longer in the drop-down:

Removing the Model’s Data
Ok, that subheading is a bit misleading; what I mean is that as well as removing the model and the view, we should also remove the original data in our contacts array that the model was originally built from. If we dont do this, the model that was removed will come back whenever it is filtered. In a real-world application this is probably where we would sync with a sever in order to persist the data.
The functionality to remove the item from the original array can reside within our master view; the collection will fire a remove event when any of the models are removed from the collection, so we can simply bind a handler for this event to the collection in the master view. Add the following line of code directly after the existing bindings:
this.collection.on("remove", this.removeContact, this);You should be quite familiar with this statement by now, but as a reminder, the first argument of the on() method is the event we are listening for, the second is the handler to execute when the event occurs, and the third is the context to use as this when the handler is executed. Next we can add the removeContact() method; after the addContact() method add the following code:
removeContact: function (removedModel) { var removed = removedModel.attributes; if (removed.photo === "/img/placeholder.png") { delete removed.photo; } _.each(contacts, function (contact) { if (_.isEqual(contact, removed)) { contacts.splice(_.indexOf(contacts, contact), 1); } });}Backbone helpfully passes our handler the model that has just been removed from the collection. We store a reference to the collection of attributes so that we can compare the model that has been removed with the items in our original contacts array. The original items in the contacts array didn’t have the photo property defined, but as this is specified as a default property, all of our models will inherit the property and will therefore fail any comparison with the objects in the contacts array.
In this example, we need to check whether the photo property of the model is the same as the default value, and if it is, we remove the photo property.
Once this is done we can iterate over each item in the contacts array and test it to see if it is the same as the model that was removed from the collection. We can compare each item with the object we store in the removed variable using Underscore’s isEqual() method.
If the isEqual() method returns true, we then call the native JavaScript splice() method on the contacts array, passing in the index of the item to be removed, and the number of items to remove. The index is obtained using Underscore’s indexOf() method that we used earlier on.
Now when a delete button is clicked, the view, model and original data will be erased from existence. We can also filter the view then go back to the view of all contacts, and the contact that was removed will still not be displayed.
Doing Something With the Form
So, we kinda just dumped the addContact form onto the page there didn’t we? To close off this part of the tutorial, we can do something to keep it hidden until a link is clicked. We can add the following link to the <header> element:
<a id="showForm" href="#">Add new contact</a>
To make the link show the form, we’ll need to hide it first and then use a UI event handler to show it. The binding can be added to the events object in the DirectoryView class:
"click #showForm": "showForm"
Our showForm() method can be as simple as follows (although you’ll probably want to do a bit more with it than we do here!):
showForm: function () { this.$el.find("#addContact").slideToggle();}Summary
In this tutorial, we looked solely at how new models can be added to a collection and how models can be removed from a collection. We saw that the Backbone methods used to add and remove models are, unsurprisingly, the add() and remove() methods.
We also saw how we can bind handlers to the events that are fired automatically when these methods are used in order to update the UI and collection as necessary.
We also looked at some more helpful Underscore utility functions that we can use to work with our data, including _indexOf() which returns that index of an item in an array, and isEqual() which can be used to deep-compare two objects to see if they are identical.
Like in the last part of this tutorial, we also saw how can write our classes in such a way in that their functionality can be shared and reused whenever possible. When we added a new model for example, we made use of the existing renderContact() method defined in our DirectoryView class to handle rendering the HTML for the new contact.
So we’ve seen how to add models and remove them, join me in the next part of this series where we’ll look at how to edit existing model data.
Original Link: http://feedproxy.google.com/~r/nettuts/~3/L_aXBhGbI7M/
TutsPlus - Code
 Tuts+ is a site aimed at web developers and designers offering tutorials and articles on technologies, skills and techniques to improve how you design and build websites.
More About this Source Visit TutsPlus - Code