
An Interest In:
Web News this Week
- April 29, 2024
- April 28, 2024
- April 27, 2024
- April 26, 2024
- April 25, 2024
- April 24, 2024
- April 23, 2024
Some of Our Sources
- TutsPlus - Code
- The Logo Smith
- Smashing Magazine
- You The Designer
- Noupe
- Crazy Leaf Design
- Line 25
- Wal You
- Freelance Switch
- Dev To
Help Webnuz
Referal links:
The Ins and Outs of WebMatrix: .NET Programming Using the Razor Syntax
This tutorial gives you an overview of programming with ASP.NET Web Pages using the Razor syntax. ASP.NET is Microsoft's technology for running dynamic web pages on web servers.
What You'll Learn:
- The top 8 programming tips for getting started with programming ASP.NET Web Pages using Razor syntax.
- Basic programming concepts you'll need for this session.
- What ASP.NET server code and the Razor syntax is all about.
The Top 8 Programming Tips
This section lists a few tips that you absolutely need to know as you start writing ASP.NET server code using the Razor syntax.
Note:The Razor syntax is based on the C# programming language, and that's the language used throughout this session. However, the Razor syntax also supports the Visual Basic language, and everything you see in this session you can also do in Visual Basic.
1. You add code to a page using the
@character.
The @ character starts inline expressions, single statement blocks, and multi-statement blocks:
<!-- Single statement blocks -->@{ var total = 7; }@{ var myMessage = "Hello World"; }<!-- Inline expressions --><p>The value of your account is: @total </p><p>The value of myMessage is: @myMessage</p><!-- Multi-statement block -->@{ var greeting = "Welcome to our site!"; var weekDay = DateTime.Now.DayOfWeek; var greetingMessage = greeting + " Today is: " + weekDay;}<p>The greeting is: @greetingMessage</p>This is what these statements look like when the page runs in a browser:

HTML Encoding
When you display content in a page using the @ character, as in the preceding examples, ASP.NET HTML-encodes the output. This replaces reserved HTML characters (such as < and > and &) with codes that enable the characters to be displayed as characters in a web page instead of being interpreted as HTML tags or entities. Without HTML encoding, the output from your server code might not display correctly, and could expose a page to security risks.
If your goal is to output HTML markup that renders tags as markup (for example <p></p> for a paragraph or <em></em> to emphasize text), see the section Combining Text, Markup, and Code in Code Blocks later in this article.
2. You enclose code blocks in braces.
A code block includes one or more code statements and is enclosed in braces.
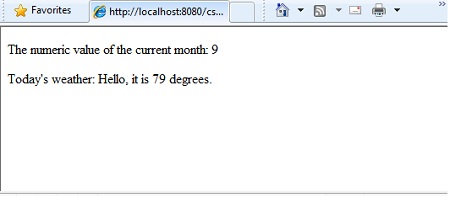
<!-- Single statement block. -->@{ var theMonth = DateTime.Now.Month; }<p>The numeric value of the current month: @theMonth</p><!-- Multi-statement block. -->@{ var outsideTemp = 79; var weatherMessage = "Hello, it is " + outsideTemp + " degrees.";}<p>Today's weather: @weatherMessage</p>The result displayed in a browser:
3. Inside a block, you end each code statement with a semicolon.
Inside a code block, each complete code statement must end with a semicolon. Inline expressions don’t end with a semicolon.
<!-- Single-statement block -->@{ var theMonth = DateTime.Now.Month; }<!-- Multi-statement block -->@{ var outsideTemp = 79; var weatherMessage = "Hello, it is " + outsideTemp + " degrees.";}<!-- Inline expression, so no semicolon --><p>Today's weather: @weatherMessage</p>4. You use variables to store values.
You can store values in a variable, including strings, numbers, and dates, etc. You create a new variable using the var keyword. You can insert variable values directly in a page using @.
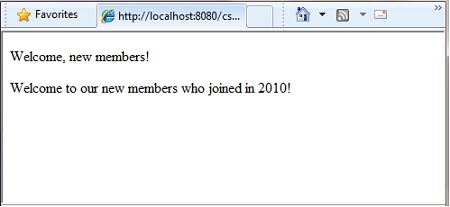
<!-- Storing a string -->@{ var welcomeMessage = "Welcome, new members!"; }<p>@welcomeMessage</p><!-- Storing a date -->@{ var year = DateTime.Now.Year; }<!-- Displaying a variable --><p>Welcome to our new members who joined in @year!</p>The result displayed in a browser:
5. You enclose literal string values in double quotation marks.
A string is a sequence of characters that are treated as text. To specify a string, you enclose it in double quotation marks:
@{ var myString = "This is a string literal"; }If the string that you want to display contains a backslash character (\) or double quotation marks, use a verbatim string literal that’s prefixed with the @ operator. (In C#, the \ character has special meaning unless you use a verbatim string literal.)
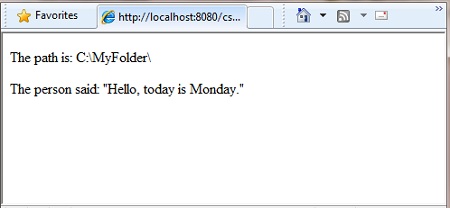
<!-- Embedding a backslash in a string -->@{ var myFilePath = @"C:\MyFolder\"; }<p>The path is: @myFilePath</p>To embed double quotation marks, use a verbatim string literal and repeat the quotation marks:
<!-- Embedding double quotation marks in a string -->@{ var myQuote = @"The person said: ""Hello, today is Monday."""; }<p>@myQuote</p>The result displayed in a browser:
Note: The @ character is used both to mark verbatim string literals in C# and to mark code in ASP.NET pages.
6. Code is case sensitive.
In C#, keywords (like var, true, and if) and variable names are case sensitive. The following lines of code create two different variables, lastName and LastName.
@{ var lastName = "Smith"; var LastName = "Jones";}If you declare a variable as var lastName="Smith"; and if you try to reference that variable in your page as @LastName, an error results because LastName won't be recognized.
Note:In Visual Basic, keywords and variables are not case sensitive.
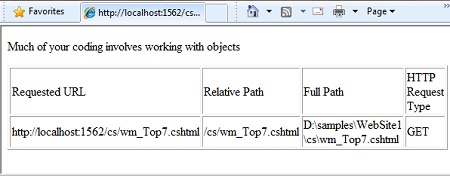
7. Much of your coding involves objects.
An object represents a thing that you can program with — a page, a text box, a file, an image, a web request, an email message, a customer record (database row), etc. Objects have properties that describe their characteristics — a text box object has a Text property (among others), a request object has a Url property, an email message has a From property, and a customer object has a FirstName property. Objects also have methods that are the "verbs" they can perform. Examples include a file object's Save method, an image object's Rotate method, and an email object's Send method.
You'll often work with the Request object, which gives you information like the values of form fields on the page (text boxes, etc.), what type of browser made the request, the URL of the page, the user identity, etc. This example shows how to access properties of the Request object and how to call the MapPath method of the Request object, which gives you the absolute path of the page on the server:
<table border="1"><tr> <td>Requested URL</td> <td>Relative Path</td> <td>Full Path</td> <td>HTTP Request Type</td></tr><tr> <td>@Request.Url</td> <td>@Request.FilePath</td> <td>@Request.MapPath(Request.FilePath)</td> <td>@Request.RequestType</td></tr></table>
The result displayed in a browser:
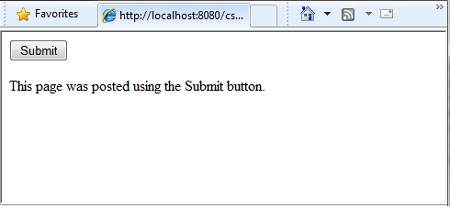
8. You can write code that makes decisions.
A key feature of dynamic web pages is that you can determine what to do based on conditions. The most common way to do this is with the if statement (and optional else statement).
@{ var result = ""; if(IsPost) { result = "This page was posted using the Submit button."; } else { result = "This was the first request for this page."; }}<!DOCTYPE html><html> <head> <title></title> </head><body><form method="POST" action="" > <input type="Submit" name="Submit" value="Submit"/> <p>@result</p></form></body></html> </body></html>The statement if(IsPost) is a shorthand way of writing if(IsPost==true). Along with if statements, there are a variety of ways to test conditions, repeat blocks of code, and so on, which are described later in this tutorial.
The result displayed in a browser (after clicking Submit):
HTTP GET and POST Methods and the IsPost Property
The protocol used for web pages (HTTP) supports a very limited number of methods (verbs) that are used to make requests to the server. The two most common ones are GET, which is used to read a page, and POST, which is used to submit a page. In general, the first time a user requests a page, the page is requested using GET. If the user fills in a form and then clicks Submit, the browser makes a POST request to the server.
In web programming, it's often useful to know whether a page is being requested as a GET or as a POST so that you know how to process the page.
In ASP.NET Web Pages, you can use the
IsPostproperty to see whether a request is a GET or a POST.
If the request is a POST, the IsPost property will return true, and you can do things like read the values of text boxes on a form. Many examples in this session show you how to process the page differently depending on the value of IsPost.
A Simple Code Example
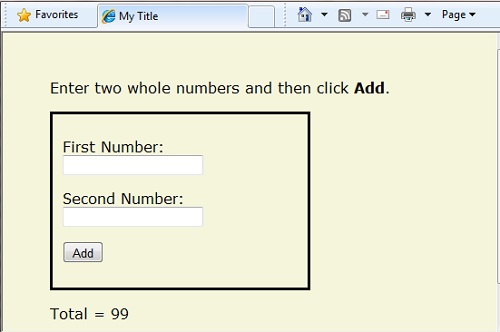
This procedure shows you how to create a page that illustrates basic programming techniques. In the example, you create a page that lets users enter two numbers, then it adds them and displays the result.
- In your editor, create a new file and name it AddNumbers.cshtml.
- Copy the following code and markup into the page, replacing anything already in the page.
@{ var total = 0; var totalMessage = ""; if(IsPost) { // Retrieve the numbers that the user entered. var num1 = Request["text1"]; var num2 = Request["text2"]; // Convert the entered strings into integers numbers and add. total = num1.AsInt() + num2.AsInt(); totalMessage = "Total = " + total; }}<!DOCTYPE html><html lang="en"> <head> <title>Add Numbers</title> <meta charset="utf-8" /> <style type="text/css"> body {background-color: beige; font-family: Verdana, Arial; margin: 50px; } form {padding: 10px; border-style: solid; width: 250px;} </style> </head><body> <p>Enter two whole numbers and then click <strong>Add</strong>.</p> <form action="" method="post"> <p><label for="text1">First Number:</label> <input type="text" name="text1" /> </p> <p><label for="text2">Second Number:</label> <input type="text" name="text2" /> </p> <p><input type="submit" value="Add" /></p> </form> <p>@totalMessage</p></body></html>Here are some things for you to note:
The
@character starts the first block of code in the page, and it precedes thetotalMessagevariable that's embedded near the bottom of the page.The block at the top of the page is enclosed in braces.
In the block at the top, all lines end with a semicolon.
The variables
total,num1,num2, andtotalMessagestore several numbers and a string.The literal string value assigned to the
totalMessagevariable is in double quotation marks.Because the code is case-sensitive, when the
totalMessagevariable is used near the bottom of the page, its name must match the variable at the top exactly.The expression
num1.AsInt()+num2.AsInt()shows how to work with objects and methods. TheAsIntmethod on each variable converts the string entered by a user to a number (an integer) so that you can perform arithmetic on it.The
<form>tag includes amethod="post"attribute. This specifies that when the user clicks Add, the page will be sent to the server using the HTTP POST method. When the page is submitted, theif(IsPost)test evaluates to true and the conditional code runs, displaying the result of adding the numbers.
- Save the page and run it in a browser. (Make sure the page is selected in the Files workspace before you run it.) Enter two whole numbers and then click the Add button.
Basic Programming Concepts
As you saw in lesson one of this series and in the previous example, even if you’ve never programmed before, with WebMatrix, ASP.NET web pages, and the Razor syntax, you can quickly create dynamic web pages with sophisticated features, and it won't take much code to get things done.
This tutorial provides you with an overview of ASP.NET web programming. It isn’t an exhaustive examination, just a quick tour through the programming concepts you’ll use most often. Even so, it covers almost everything you’ll need for the rest of the session.
But first, a little technical background.
The Razor Syntax, Server Code, and ASP.NET
Razor syntax is a simple programming syntax for embedding server-based code in a web page.
Razor syntax is a simple programming syntax for embedding server-based code in a web page. In a web page that uses the Razor syntax, there are two kinds of content: client content and server code. Client content is the stuff you're used to in web pages: HTML markup (elements), style information such as CSS, client script such as JavaScript, and plain text.
Razor syntax lets you add server code to this client content. If there's server code in the page, the server runs that code first, before it sends the page to the browser. By running on the server, the code can perform tasks that can be a lot more complex to do using client content alone, like accessing server-based databases. Most importantly, server code can dynamically create client content — it can generate HTML markup or other content on the fly and then send it to the browser along with any static HTML that the page might contain. From the browser's perspective, client content that's generated by your server code is no different than any other client content. As you've already seen, the server code that's required is quite simple.
ASP.NET web pages that include the Razor syntax have a special file extension (.cshtml or .vbhtml). The server recognizes these extensions, runs the code that's marked with Razor syntax, and then sends the page to the browser.
Where does ASP.NET fit in?
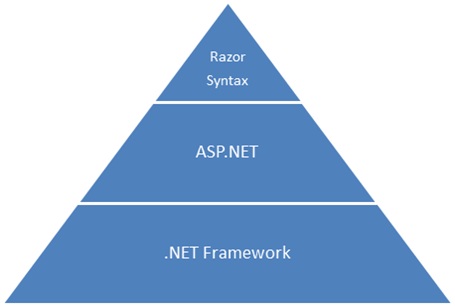
Razor syntax is based on a technology from Microsoft called ASP.NET, which in turn is based on the Microsoft .NET Framework. The.NET Framework is a big, comprehensive programming framework from Microsoft for developing virtually any type of computer application. ASP.NET is the part of the .NET Framework that's specifically designed for creating web applications. Developers have used ASP.NET to create many of the largest and highest-traffic websites in the world. (Any time you see the file-name extension .aspx as part of the URL in a site, you'll know that the site was written using ASP.NET.)
The Razor syntax gives you all the power of ASP.NET, but using a simplified syntax that's easier to learn if you're a beginner and that makes you more productive if you're an expert. Even though this syntax is simple to use, its family relationship to ASP.NET and the .NET Framework means that as your websites become more sophisticated, you have the power of the larger frameworks available to you.
Classes and Instances
ASP.NET server code uses objects, which are in turn built on the idea of classes. The class is the definition or template for an object. For example, an application might contain a Customer class that defines the properties and methods that any customer object needs.
When the application needs to work with actual customer information, it creates an instance of (or instantiates) a customer object. Each individual customer is a separate instance of the Customer class. Every instance supports the same properties and methods, but the property values for each instance are typically different, because each customer object is unique. In one customer object, the LastName property might be “Smith”; in another customer object, the LastName property might be “Jones.”
Similarly, any individual web page in your site is a Page object that’s an instance of the Page class. A button on the page is a Button object that is an instance of the Button class, and so on. Each instance has its own characteristics, but they all are based on what’s specified in the object's class definition.
Language and Syntax
Earlier you saw a basic example of how to create an ASP.NET Web Pages page, and how you can add server code to HTML markup. Here you'll learn the basics of writing ASP.NET server code using the Razor syntax — that is, the programming language rules.
If you're experienced with programming (especially if you've used C, C++, C#, Visual Basic, or JavaScript), much of what you read here will be familiar. You’ll probably need to familiarize yourself only with how server code is added to markup in .cshtml files.
Basic Syntax
Combining Text, Markup, and Code in Code Blocks
In server code blocks, you'll often want to output text or markup (or both) to the page. If a server code block contains text that’s not code and that instead should be rendered as is, ASP.NET needs to be able to distinguish that text from code. There are several ways to do this.
<p></p> or <em></em>. @if(IsPost) { // This line has all content between matched tags.Hello, the time is @DateTime.Now and this page is a postback!} else { // All content between matched tags, followed by server code.Hello stranger, today is: @DateTime.Now}The HTML element can include text, additional HTML elements, and server-code expressions. When ASP.NET sees the opening HTML tag, it renders everything including the element and its content as is to the browser (and resolves the server-code expressions).
@: operator or the <text> element. The @: outputs a single line of content containing plain text or unmatched HTML tags; the <text> element encloses multiple lines to output. These options are useful when you don’t want to render an HTML element as part of the output.@if(IsPost) { // Plain text followed by an unmatched HTML tag and server code. @: The time is: @DateTime.Now // Server code and then plain text, matched tags, and more text. @DateTime.Now @:is the current time.}If you want to output multiple lines of text or unmatched HTML tags, you can precede each line with @:, or you can enclose the line in a <text> element. Like the @: operator, <text> tags are used by ASP.NET to identify text content and are never rendered in the page output.
@if(IsPost) { // Repeat the previous example, but use tags. The time is: @DateTime.Now @DateTime.Now is the current time. }@{ var minTemp = 75; It is the month of @DateTime.Now.ToString("MMMM"), and it's a great day! You can go swimming if it's at least @minTemp degrees. } The first example repeats the previous example but uses a single pair of <text> tags to enclose the text to render. In the second example, the <text> and </text> tags enclose three lines, all of which have some uncontained text and unmatched HTML tags (<br />), along with server code and matched HTML tags. Again, you could also precede each line individually with the @: operator; either way works.
Note: When you output text as shown in this section — using an HTML element, the
@:operator, or the<text>element — ASP.NET doesn't HTML-encode the output. (As noted earlier, ASP.NET does encode the output of server code expressions and server code blocks that are preceded by@, except in the special cases noted in this section.)
Whitespace
Extra spaces in a statement (and outside of a string literal) don’t affect the statement:
@{ var lastName = "Smith"; }A line break in a statement has no effect on the statement, and you can wrap statements for readability. The following statements are the same:
@{ var theName ="Smith"; }@{ var personName = "Smith" ;}However, you can't wrap a line in the middle of a string literal. The following example doesn't work:
@{ var test = "This is a long string"; } // Does not work!To combine a long string that wraps to multiple lines like the above code, there are two options. You can use the concatenation operator (+), which you'll see later in this tutorial. You can also use the @ character to create a verbatim string literal, as you saw earlier in this tutorial. You can break verbatim string literals across lines:
@{ var longString = @"This is a long string";}Code (and Markup) Comments
Comments let you leave notes for yourself or others. They also allow you to disable ("comment out") a section of code or markup that you don't want to run but want to keep in your page for the time being.
There’s different commenting syntax for Razor code and for HTML markup. As with all Razor code, Razor comments are processed (and then removed) on the server before the page is sent to the browser. Therefore, the Razor commenting syntax lets you put comments into the code (or even into the markup) that you can see when you edit the file, but that users don't see, even in the page source.
For ASP.NET Razor comments, you start the comment with @* and end it with *@. The comment can be on one line or multiple lines:
@* A one-line code comment. *@@* This is a multiline code comment. It can continue for any number of lines.*@
Here is a comment within a code block:
@{ @* This is a comment. *@ var theVar = 17;}Here is the same block of code, with the line of code commented out so that it won’t run:
@{ @* This is a comment. *@ @* var theVar = 17; *@}Inside a code block, as an alternative to using Razor comment syntax, you can use the commenting syntax of the programming language you’re using, such as C#:
@{ // This is a comment. var myVar = 17; /* This is a multi-line comment that uses C# commenting syntax. */}In C#, single-line comments are preceded by the // characters, and multi-line comments begin with /* and end with */. (As with Razor comments, C# comments are not rendered to the browser.)
For markup, as you probably know, you can create an HTML comment:
<!-- This is a comment. -->
HTML comments start with <!-- characters and end with -->. You can use HTML comments to surround not only text, but also any HTML markup that you may want to keep in the page but don't want to render. This HTML comment will hide the entire content of the tags and the text they contain:
<!-- <p>This is my paragraph.</p> -->
Unlike Razor comments, HTML comments are rendered to the page and the user can see them by viewing the page source.
Variables
A variable is a named object that you use to store data. You can name variables anything, but the name must begin with an alphabetic character and it cannot contain whitespace or reserved characters.
Variables and Data Types
A variable can have a specific data type, which indicates what kind of data is stored in the variable. You can have string variables that store string values (like "Hello world"), integer variables that store whole-number values (like 3 or 79), and date variables that store date values in a variety of formats (like 4/12/2010 or March 2009). And there are many other data types you can use.
However, you generally don’t have to specify a type for a variable. Most of the time, ASP.NET can figure out the type based on how the data in the variable is being used. (Occasionally you must specify a type; you’ll see examples in this session where this is true.)
You declare a variable using the var keyword (if you don’t want to specify a type) or by using the name of the type:
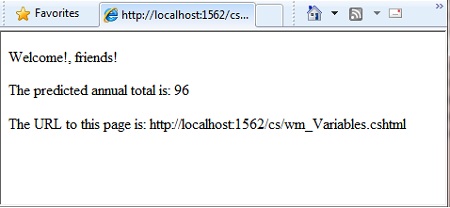
@{ // Assigning a string to a variable. var greeting = "Welcome!"; // Assigning a number to a variable. var theCount = 3; // Assigning an expression to a variable. var monthlyTotal = theCount + 5; // Assigning a date value to a variable. var today = DateTime.Today; // Assigning the current page's URL to a variable. var myPath = this.Request.Url; // Declaring variables using explicit data types. string name = "Joe"; int count = 5; DateTime tomorrow = DateTime.Now.AddDays(1);The following example shows some typical uses of variables in a web page:
@{ // Embedding the value of a variable into HTML markup. <p>@greeting, friends!</p> // Using variables as part of an inline expression. <p>The predicted annual total is: @( monthlyTotal * 12)</p> // Displaying the page URL with a variable. <p>The URL to this page is: @myPath</p>}The result displayed in a browser:
Converting and Testing Data Types
Although ASP.NET can usually determine a data type automatically, sometimes it can’t. Therefore, you might need to help ASP.NET out by performing an explicit conversion. Even if you don’t have to convert types, sometimes it’s helpful to test to see what type of data you might be working with.
The most common case is that you have to convert a string to another type, such as to an integer or date. The following example shows a typical case where you must convert a string to a number.
@{ var total = 0; if(IsPost) { // Retrieve the numbers that the user entered. var num1 = Request["text1"]; var num2 = Request["text2"]; // Convert the entered strings into integers numbers and add. total = num1.AsInt() + num2.AsInt(); }}As a rule, user input comes to you as strings. Even if you’ve prompted users to enter a number, and even if they’ve entered a digit, when user input is submitted and you read it in code, the data is in string format. Therefore, you must convert the string to a number. In the example, if you try to perform arithmetic on the values without converting them, the following error results, because ASP.NET cannot add two strings:
Cannot implicitly convert type 'string' to 'int'.
To convert the values to integers, you call the AsInt method. If the conversion is successful, you can then add the numbers.
The following table lists some common conversion and test methods for variables.
Method | Description | Example |
| Converts a string that represents a whole number (like “593″) to an integer. | var myIntNumber = 0;var myStringNum = "539";if(myStringNum.IsInt()==true) { myIntNumber = myStringNum.AsInt();} |
| Converts a string like "true" or "false" to a Boolean type. | var myStringBool = "True";var myVar = myStringBool.AsBool(); |
| Converts a string that has a decimal value like "1.3" or "7.439" to a floating-point number. | var myStringFloat = "41.432895";var myFloatNum = myStringFloat.AsFloat(); |
| Converts a string that has a decimal value like "1.3" or "7.439" to a decimal number. (In ASP.NET, a decimal number is more precise than a floating-point number.) | var myStringDec = "10317.425";var myDecNum = myStringDec.AsDecimal(); |
| Converts a string that represents a date and time value to the ASP.NET | var myDateString = "12/27/2010";var newDate = myDateString.AsDateTime(); |
| Converts any other data type to a string. | int num1 = 17;int num2 = 76;// myString is set to 1776string myString = num1.ToString() + num2.ToString(); |
Operators
An operator is a keyword or character that tells ASP.NET what kind of command to perform in an expression. The C# language (and the Razor syntax that’s based on it) supports many operators, but you only need to recognize a few to get started. The following table summarizes the most common operators.
Operator | Description | Examples |
| Math operators used in numerical expressions. | @(5 + 13)@{ var netWorth = 150000; }@{ var newTotal = netWorth * 2; }@(newTotal / 2) |
| Assignment. Assigns the value on the right side of a statement to the object on the left side. | var age = 17; |
| Equality. Returns | var myNum = 15;if (myNum == 15) { // Do something. } |
| Inequality. Returns | var theNum = 13;if (theNum != 15) { // Do something. } |
| Less-than, | if (2 < 3) { // Do something. }var currentCount = 12;if(currentCount >= 12) { // Do something. } |
| Concatenation, which is used to join strings. ASP.NET knows the difference between this operator and the addition operator based on the data type of the expression. | // The displayed result is "abcdef".@("abc" + "def") |
| The increment and decrement operators, which add and subtract 1 (respectively) from a variable. | int theCount = 0;theCount += 1; // Adds 1 to count |
| Dot. Used to distinguish objects and their properties and methods. | var myUrl = Request.Url;var count = Request["Count"].AsInt(); |
| Parentheses. Used to group expressions and to pass parameters to methods. | @(3 + 7)@Request.MapPath(Request.FilePath); |
| Brackets. Used for accessing values in arrays or collections. | var income = Request["AnnualIncome"]; |
| Not. Reverses a | bool taskCompleted = false;// Processing.if(!taskCompleted) { // Continue processing} |
| Logical AND and OR, which are used to link conditions together. | bool myTaskCompleted = false;int totalCount = 0;// Processing.if(!myTaskCompleted && totalCount < 12) { // Continue processing.} |
Working with File and Folder Paths in Code
You'll often work with file and folder paths in your code. Here is an example of physical folder structure for a website as it might appear on your development computer:
C:\WebSites\MyWebSite
 default.cshtml
 datafile.txt
 \images
 Logo.jpg
 \styles
 Styles.css
Here are some essential details about URLs and paths:
- A URL begins with either a domain name (https://www.example.com) or a server name (https://localhost, https://mycomputer).
- A URL corresponds to a physical path on a host computer. For example, https://myserver might correspond to the folder C:\websites\mywebsite on the server.
- A virtual path is shorthand to represent paths in code without having to specify the full path. It includes the portion of a URL that follows the domain or server name. When you use virtual paths, you can move your code to a different domain or server without having to update the paths.
Here's an example to help you understand the differences:
| Complete URL | https://mycompanyserver/humanresources/CompanyPolicy.htm |
| Server name | mycompanyserver |
| Virtual path | /humanresources/CompanyPolicy.htm |
| Physical path | C:\mywebsites\humanresources\CompanyPolicy.htm |
The virtual root is /, just like the root of your C: drive is \. (Virtual folder paths always use forward slashes.) The virtual path of a folder doesn't have to have the same name as the physical folder; it can be an alias. (On production servers, the virtual path rarely matches an exact physical path.)
When you work with files and folders in code, sometimes you need to reference the physical path and sometimes a virtual path, depending on what objects you're working with. ASP.NET gives you these tools for working with file and folder paths in code: the ~ operator, the Server.MapPath method, and the Href method.
The ~ operator: Getting the virtual root
In server code, to specify the virtual root path to folders or files, use the ~ operator. This is useful because you can move your website to a different folder or location without breaking the paths in your code.
@{ var myImagesFolder = "~/images"; var myStyleSheet = "~/styles/StyleSheet.css";}The Server.MapPath method: Converting virtual to physical paths
The Server.MapPath method converts a virtual path (like /default.cshtml) to an absolute physical path (like C:\WebSites\MyWebSiteFolder\default.cshtml). You use this method for tasks that require a complete physical path, like reading or writing a text file on the web server. (You typically don't know the absolute physical path of your site on a hosting site's server.) You pass the virtual path to a file or folder to the method, and it returns the physical path:
@{ var dataFilePath = "~/dataFile.txt";}<!-- Displays a physical path C:\Websites\MyWebSite\datafile.txt --><p>@Server.MapPath(dataFilePath)</p>The Href method: Creating paths to site resources
The Href method of the WebPage object converts paths that you create in server code (which can include the ~ operator) to paths that the browser understands. (The browser can't understand the ~ operator, because that's strictly an ASP.NET operator.) You use the Href method to create paths to resources like image files, other web pages, and CSS files. For example, you can use this method in HTML markup for attributes of <img> elements, <link> elements, and <a> elements.
@{ var myImagesFolder = "~/images"; var myStyleSheet = "~/styles/StyleSheet.css";}<!-- This code creates the path "../images/Logo.jpg" in the src attribute. --><img src="@Href(myImagesFolder)/Logo.jpg" /><!-- This produces the same result, using a path with ~ --><img src="@Href("~/images")/Logo.jpg" /><!-- This creates a link to the CSS file. --><link rel="stylesheet" type="text/css" href="@Href(myStyleSheet)" />Conditional Logic and Loops
ASP.NET server code lets you perform tasks based on conditions and write code that repeats statements a specific number of times (that is, code that runs a loop).
Testing Conditions
To test a simple condition you use the if statement, which returns true or false based on a test you specify:
@{ var showToday = true; if(showToday) { @DateTime.Today; }}The if keyword starts a block. The actual test (condition) is in parentheses and returns true or false. The statements that run if the test is true are enclosed in braces. An if statement can include an else block that specifies statements to run if the condition is false:
@{ var showToday = false; if(showToday) { @DateTime.Today; } else { <text>Sorry!</text> }}You can add multiple conditions using an else if block:
@{ var theBalance = 4.99; if(theBalance == 0) { <p>You have a zero balance.</p> } else if (theBalance > 0 && theBalance <= 5) { <p>Your balance of $@theBalance is very low.</p> } else { <p>Your balance is: $@theBalance</p> }}In this example, if the first condition in the if block is not true, the else if condition is checked. If that condition is met, the statements in the else if block are executed. If none of the conditions are met, the statements in the else block are executed. You can add any number of else if blocks, and then close with an else block as the "everything else" condition.
To test a large number of conditions, use a switch block:
@{ var weekday = "Wednesday"; var greeting = ""; switch(weekday) { case "Monday": greeting = "Ok, it's a marvelous Monday"; break; case "Tuesday": greeting = "It's a tremendous Tuesday"; break; case "Wednesday": greeting = "Wild Wednesday is here!"; break; default: greeting = "It's some other day, oh well."; break; } <p>Since it is @weekday, the message for today is: @greeting</p>}The value to test is in parentheses (in the example, the weekday variable). Each individual test uses a case statement that ends with a colon (:). If the value of a case statement matches the test value, the code in that case block is executed. You close each case statement with a break statement. (If you forget to include break in each case block, the code from the next case statement will run also.) A switch block often has a default statement as the last case for an "everything else" option that runs if none of the other cases are true.
The result of the last two conditional blocks displayed in a browser:

Looping Code
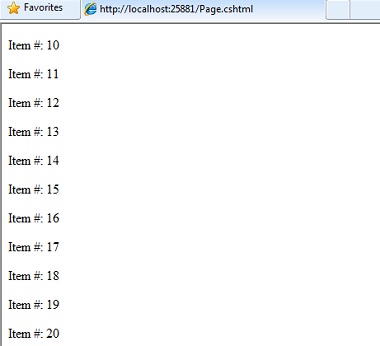
You often need to run the same statements repeatedly. You do this by looping. For example, you often run the same statements for each item in a collection of data. If you know exactly how many times you want to loop, you can use a for loop. This kind of loop is especially useful for counting up or counting down:
@for(var i = 10; i < 21; i++){ <p>Line #: @i</p>}The loop begins with the for keyword, followed by three statements in parentheses, each terminated with a semicolon.
- Inside the parentheses, the first statement (
vari=10;) creates a counter and initializes it to 10. You don’t have to name the counteri— you can use any legal variable name. When theforloop runs, the counter is automatically incremented. - The second statement (
i<21;) sets the condition for how far you want to count. In this case, you want it to go to a maximum of 20 (that is, keep going while the counter is less than 21). - The third statement (
i++) uses an increment operator, which simply specifies that the counter should have 1 added to it each time the loop runs.
Inside the braces is the code that will run for each iteration of the loop. The markup creates a new paragraph (<p> element) each time and adds a line to the output, displaying the value of i (the counter). When you run this page, the example creates 11 lines displaying the output, with the text in each line indicating the item number.
If you’re working with a collection or array, you often use a foreach loop. A collection is a group of similar objects, and the foreach loop lets you carry out a task on each item in the collection. This type of loop is convenient for collections, because unlike a for loop, you don't have to increment the counter or set a limit. Instead, the foreach loop code simply proceeds through the collection until it’s finished.
This example returns the items in the Request.ServerVariables collection that (which is an object that contains information about your web server). It uses a foreach loop to display the name of each item by creating a new <li> element in an HTML bullete
Original Link: http://feedproxy.google.com/~r/nettuts/~3/u7utYumbNsU/
TutsPlus - Code
 Tuts+ is a site aimed at web developers and designers offering tutorials and articles on technologies, skills and techniques to improve how you design and build websites.
More About this Source Visit TutsPlus - Code