
An Interest In:
Web News this Week
- April 3, 2024
- April 2, 2024
- April 1, 2024
- March 31, 2024
- March 30, 2024
- March 29, 2024
- March 28, 2024
Some of Our Sources
- Techcrunch
- Simplebits
- Web Designer Wall
- Pearsonified
- Vandelay Design
- Fudge Graphics
- Web Design Ledger
- Design Modo
- Web Resource Source
- Android Headlines
Help Webnuz
Referal links:
Getting Started with Docker, Kubernetes, and Istio on Windows
Objective
To provide a comprehensive guide for beginners on how to Set up a local development environment using Docker, Kubernetes, and Istio. This article will cover the necessary steps to install and familiarize oneself with these technologies.
This guide is istio-1.17.2
1. Installing Docker on Windows
Docker is a containerization platform used to build, ship, and run applications.
Go to the Docker website (https://www.docker.com/products/docker-desktop) and click on the "Download for Windows" button.
Once the download is complete, double-click the downloaded file to start the installation process.

Follow the on-screen instructions to install Docker Desktop on your Windows machine.
During the installation process, you may be prompted to enable Hyper-V and Containers features on your system. Follow the prompts to enable these features.
Once the installation is complete, Docker Desktop should launch automatically.

2. Enabling Kubernetes in Docker Desktop
Open Docker Desktop and click on the settings icon (gear icon) in the top-right corner of the window.
Click on the "Kubernetes" tab in the settings window.

Check "Enable Kubernetes" and "Show system containers" to enable the Kubernetes feature in Docker Desktop.
After Kubernetes is enabled, you can use the "kubectl" command-line tool to manage your Kubernetes clusters.
3. Installing Istio on Windows
Go to the Istio release page (https://github.com/istio/istio/releases) to download the installation file for window

<!-- The installation directory contains:
/samples - Sample applications, will be used in this tutorial/bin - The istioctl client binaryAdd istioctl to Path Environment Variable
For example, if the package is istio-1.17.2, then add \istio-1.17.2\bin Directory to Path Environment Variable
Run the following command to check if Istioctl is in the system PATH or not.
istioctl versionOutput
client version: 1.17.2control plane version: 1.17.2data plane version: 1.17.2 (8 proxies)Run the following command to install Istio.
$ istioctl install --set profile=demoThe "demo" profile is intended for evaluating a broad set of Istio features. For development purposes, it is a good option to start with.
4. Enable Kiali (Optional)
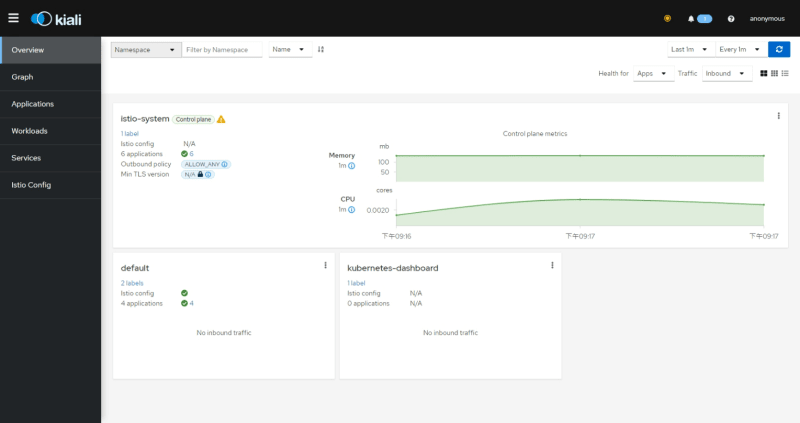
Kiali is a web-based dashboard that provides an overview of the microservices within an Istio service mesh. It allows you to view the topology of your microservices, see the traffic flow between them, and monitor the health of the services.
Istio provides a basic sample installation to quickly get Kiali up and running:
$ kubectl apply -f /samples/addons/kiali.yamlThis will deploy Kiali into your cluster. This is intended for demonstration only, and is not tuned for performance or security.
Once the installation is complete, run the following command to open Kiali web UI:
istioctl dashboard kialiOpen a web browser and navigate to the Kiali dashboard by entering the following URL: http://localhost:20001/kiali.
Reference: https://istio.io/latest/docs/ops/integrations/kiali/#installation
5. Creating a sample application
The default Istio installation uses automatic sidecar injection. Label the namespace that will host the application with istio-injection=enabled:
kubectl label namespace default istio-injection=enabledDeploy the sample "bookinfo" project using the kubectl command:
kubectl apply -f /samples/bookinfo/platform/kube/bookinfo.yamlConfirm all services and pods are correctly defined and running:
kubectl get podsOutput
NAME READY STATUS RESTARTS AGEdetails-v1-5ffd6b64f7-czr7w 2/2 Running 2 (6h40m ago) 10hproductpage-v1-979d4d9fc-lc59r 2/2 Running 2 (6h40m ago) 10hratings-v1-5f9699cfdf-ppf74 2/2 Running 2 (6h40m ago) 10hreviews-v1-569db879f5-cj2xr 2/2 Running 2 (6h40m ago) 10hreviews-v2-65c4dc6fdc-kjmnm 2/2 Running 2 (6h40m ago) 10hreviews-v3-c9c4fb987-2hg5x 2/2 Running 2 (6h40m ago) 10hIf you previously installed Kiali, you can also click on the "Workloads" tab in the Kiali dashboard to see a list of all the workloads, including Pods, and their status.

To confirm that the Bookinfo application is running, send a request to it by a curl command from some pod, for example from ratings:
kubectl exec "$(kubectl get pod -l app=ratings -o jsonpath='{.items[0].metadata.name}')" -c ratings -- curl -sS productpage:9080/productpage | findstr /r "<title>.*</title>"Output
<title>Simple Bookstore App</title>6. Using a Gateway to Expose Your App
Now that the Bookinfo services are up and running, you need to make the application accessible from outside of your Kubernetes cluster, e.g., from a browser.
Run the following command to apply a gateway used for this purpose.
kubectl apply -f /samples/bookinfo/networking/bookinfo-gateway.yamlRun the following command to get the external IP address of the Istio ingress gateway:
kubectl get svc istio-ingressgateway -n istio-systemNote the "EXTERNAL-IP" value for the "istio-ingressgateway" service. This is the IP address that you will use to access the Bookinfo application externally.
For example, if the external IP address is 192.168.99.100, you would enter the following URL: http://192.168.99.100/productpage

Visit the Istio documentation website (https://istio.io/latest/docs/) to learn more about Istio's powerful features and best practices. Happy hacking!
Original Link: https://dev.to/wn/getting-started-with-docker-kubernetes-and-istio-on-windows-3b2m
Dev To
More About this Source Visit Dev To