
An Interest In:
Web News this Week
- April 2, 2024
- April 1, 2024
- March 31, 2024
- March 30, 2024
- March 29, 2024
- March 28, 2024
- March 27, 2024
Some of Our Sources
- BoingBoing
- Technology Review
- Simplebits
- Six Revisions
- TutsPlus - Design
- Fuel Your Creativity
- Reencoded
- Spyre Studios
- Android Headlines
- Dev To
Help Webnuz
Referal links:
The joy of validating with Joi
Validation is a crucial step. But one look at the lines of IFs spawning from endless checks could send us over to NPM, hoping to find the perfect library.
And one of the validation libraries you would find is Joi. And like its name, its a joy to use.
With Joi, you can
Describe your data using a simple, intuitive and readable language.
So to ensure some user input contains a name and a valid email, its simply
const schema = Joi.object({name: Joi.string() .min(3) .max(30) .required(),email: Joi.string() .email({ minDomainSegments: 2, tlds: { allow: ['com', 'net'] } })})This code block validates an input to have a name property with a number of characters between 3 and 30, and an email with two domain parts (sample.com) and a top level domain (TLD) of either .com or .net.
But to get a better view of what Joi has to offer, lets see how we could build a simple form that validates a users input according to a schema.
A Simple Form Validation
Installing Joi is as easy as running:
npm i joiAfter importing Joi at the top of your file with,
const Joi = require("joi");Joi can be used by first constructing a schema, then validating a value against the constructed schema.
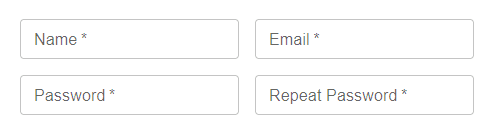
For this example lets assume that we already have four text fields taking in a users name and email and asks to enter a password twice.
Now to create the schema that Joi will validate against. Since a schema is designed to resemble the object we expect as an input, the schema for our four property form data object will look like this:
const objectSchema = { name: Joi.string().alphanum().min(3).max(30).required(), email: Joi.string().email({ minDomainSegments: 2, tlds: { allow: ["com", "net"] }, }), password: Joi.string() .pattern(new RegExp("^[a-zA-Z0-9]{3,30}$")) .required() .messages({ "string.pattern.base": `Password should be between 3 to 30 characters and contain letters or numbers only`, "string.empty": `Password cannot be empty`, "any.required": `Password is required`, }), repeatPassword: Joi.valid(userData.password).messages({ "any.only": "The two passwords do not match", "any.required": "Please re-enter the password", }), };According to this schema:
nameis validated to be:- an alphanumeric string
- between 3 to 30 characters
- a required field
emailis checked to have :- two domain parts (sample.com)
- a top level domain (TLD) of either .com or .net
Custom Error Messages
The fields name and email use default error messages:

But the fields password and repeatPassword use .messages() to return a custom error message for a set of specific error types.
For example, the custom error messages for the password field are:
.messages({ string.pattern.base: `Password should be between 3 to 30 characters and contain letters or numbers only`, string.empty: `Password cannot be empty`, any.required: `Password is required`,}),The first one is a custom message for an error of type string.pattern.base, if the entered value does not match the RegExp string (since the password field is validated with a RegExp).
Likewise, if a an error of type string.empty is returned (the field is left blank) the custom error message Password cannot be empty is shown instead of the default.
Moving on to repeatPassword, Joi.valid() makes sure that the only valid value allowed for the repeatPassword field is whatever the user data is for the password field. The custom error message shown for an any.only error type is shown when the entered value does not match the provided allowed value, which is userData.password in this case.
The full list of possible errors in Joi can be viewed here:
https://github.com/hapijs/joi/blob/master/API.md#list-of-errors
Validating the Form Field on an onChange event
In this example, each form field will have its own error message. So to make updating the state of each error message cleaner, an object was created to hold the values of error messages for all form fields with a useReducer hook to manage its state.
//INITIAL VALUE OF ALL ERROR MESSAGES IN THE FORM//Each property denotes an error message for each form fieldconst initialFormErrorState = { nameError: , emailError: , pwdError: , rpwdError: ,};const reducer = (state, action) => { return { state, [action.name]: action.value, };};const [state, dispatch] = useReducer(reducer,initialFormErrorState);The reducer function returns an updated state object according to the action passed in, in this case the name of the error message passed in.
For a detailed explanation on the useReducer hook with an example to try out, feel free to check out my article on using the useReducer hook in forms.

Moving on to handling the onChange events of the form fields, a function can be created to take in the entered value and the name of the error message property that should show the error message (to be used by the dispatch function of the useReducer hook).
const handleChange = (e, errorFieldName) => { setUserData((currentData) => { return { ...currentData, [e.target.id]: e.target.value, }; }); const propertySchema = Joi.object({ [e.target.id]: objectSchema[e.target.id], }); const result = propertySchema.validate({ [e.target.id]: e.target.value }); result.error == null ? dispatch({ name: errorFieldName, value: "", }) : dispatch({ name: errorFieldName, value: result.error.details[0].message, }); };Line 2 to line 7 updates the state of the userData object with the form fields input. For simplicity, each form form fields id is named its corresponding property on the userData object.
propertySchema on line 8 is the object that holds the schema of the form field thats calling the handleChange function. The object objectSchema contained properties that were named after each form fields id, therefore, to call a fields respective schema and to convert it into a Joi object, Joi.object({[e.target.id] :objectSchema[e.target.id],}) is used and the resulting schema object is stored in propertySchema.
Next, the input data is converted to an object and validated against the schema in propertySchema with .validate().
This returns an object with a property called error, this property contains useful values like the error type (useful when creating custom messages) and the error message.
But, if the error property is not present in result, a validation error has not occurred, which is what we are checking in line 13.
If a error is present, the dispatch function is invoked with the name of the form error objects field that should be updated in name, and the error message that it should be updated to in value.
This will make more sense when we look at how handleChange is called in a form field. Given below is how the form field Name calls handleChange.
<TextField //TextField component properties ... onChange={(value) => handleChange(value, nameError)} value={userData.name}/>handleChange accepts the value of the field as the first parameter and then the name of the respective error objects field that the dispatch function in handleChange is supposed to update, nameError.
The object, initialFormErrorState had one property for each form fields error message. In this case, any validation error in the Name field will change the nameError property of initialFormErrorState which will in turn be displayed in the respective alert box under the form field.
Heres a look at the finished form:
Hope this simple example helped show how joyful validation with Joi can be.
Till next time, happy coding!
Happy emoji vector created by freepik - www.freepik.com
Original Link: https://dev.to/methmi/the-joy-of-validating-with-joi-51ej
Dev To
More About this Source Visit Dev To