
An Interest In:
Web News this Week
- April 26, 2024
- April 25, 2024
- April 24, 2024
- April 23, 2024
- April 22, 2024
- April 21, 2024
- April 20, 2024
Some of Our Sources
- Slashdot
- BoingBoing
- TutsPlus - Code
- Abduzeedo
- Naldz Graphics
- FanExtra - PSD
- 24 Ways
- Codrops
- Dev To
- TechPowerUp
Help Webnuz
Referal links:
Bearcam Companion: GitHub, User Groups and Rekognition
By the end of my previous post, I had reached a good baseline for the Bearcam Companion app. It was past time to start tracking the code in a version control system. Since we already have the BearID Project on GitHub, I decided to use the same for this project.
GitHub Desktop
I'm no expert when it comes to using git on the command line. Instead, I decided to use GitHub Desktop to manage this project. It was simple to add a new repository from my bearcam-companion directory. Apparently I had initialized a git project when I started, but my first real commit had quite a lot of changes.

Once I had everything checked in, I was able to clone the repo on another machine. I had to install the prerequisites, such as npm and the Amplify CLI, on the new machine. I wasn't able to start the server right away. I had to remove the package-lock.json and run amplify pull with the correct appId and envName. Once I did that, everything was working on the new machine. Perhaps package-lock.json should be in the .gitignore.
User Groups with Amplify Studio
I want to be able to add images and other content through the application rather than using the Content page in Amplify Studio. However, I don't want everyone to be able to add content yet. I decided to create a new user group called admin. I added this on the Groups tab in the User management page of Amplify Studio:

I added myself to this group. In my application code, I created a function, isAdmin(), to check if the currently logged in user is in the admin group:
function isAdmin() { const groups = user.signInUserSession.accessToken.payload["cognito:groups"]; if (groups && groups.includes('admin')) { return true; } return false; }I use this to conditionally display the some of the forms and content described below only when the user is an admin.
Add Image
The first admin capability I created is to add a new photo. In Figma, I modified a form to have two input fields, URL and Date, and a Save button. After a doing a Sync with Figma in Amplify Studio, I could see the new component in the UI Library. I configured the component to Create a new Images entry with the button onClick event. I connected the input fields to Images.url and Images.date:

I only needed to add the following to the FrameView.js return code:
{isAdmin() ? <AddImage/> : <div/> }Now I can fill in the form with a URL and data, and I get a new image in my feed:
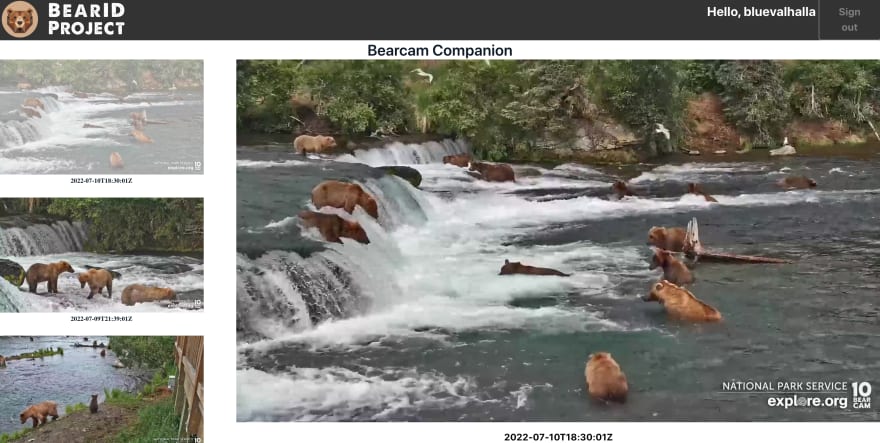
However, the are no boxes yet!
Amazon Rekognition for Detecting Bears
In my second blog of this series, I used the Amazon Rekognition demo page to find bears in my test images. Now I want to do this programmatically from the app. This is actually a two step process:
- Upload image to Rekognition
- Store results in Objects data model
Add Amazon Rekognition
First, I added Rekognition to the project with the CLI command: amplify add predictions. I followed the instructions in Label objects in image to set up object detection. I did an "amplify push" to update the backend. Now I'm ready to add this functionality to the app.
Upload Image to Rekognition
The Amplify interface to Rekognition uses Predictions.identify(). As far as I could tell, the function requires an image or an S3 resource for the input. I didn't find a way to simply send the URL I already have. I tried fetching the image from the URL, but I got a Cross-Origin Resource Sharing (CORS) error. I looked into resolving the CORS issue, but decided not to spend any time on it now. Instead, I would upload the images from local storage.
I created a new component, BoxDetection, which I wrapped in the isAdmin() function to hide from non-admins. Inside BoxDetection, I instantiated a file selector like this:
<input type="file" onChange={identifyFromFile}></input>The identifyFromFile function gets invoked when a file is selected. This function first checks that a file has been provided, then makes the appropriate call to Predictions.identify() (Predictions is imported from aws-amplify). The return result is set to a state variable, Response. Here's the full function:
function identifyFromFile(event) { const { target: { files } } = event; const [file,] = files || []; if (!file) { return; } Predictions.identify({ labels: { source: { file, }, type: "LABELS" } }) .then((result) => { setResponse(result) }) .catch(err => setResponse(JSON.stringify(err, null, 2))) }Store Results to Objects
The response from Predictions.identify() is a JSON object. I need to parse the object to find the detected object name and boundingBoxes. Unfortunately, the JSON result from Predictions.identify() is different from the Amazon Rekognition demo and documentation.
In the demo response, LabelModelVersion is set to 2.0. In the Predictions.identify() response, LabelModelVersion is not set. The JSON structure is different, and required some reverse engineering to figure out. The biggest disappointment with the Predictions.identify() response is that only one confidence is returned for all boundingBoxes of a specific name. Each of the boundingBoxes should have their own confidence, as is the case in LabelModelVersion 2.0. I did not find an easy way to switch the response version, so for now I'm using the Predictions.identify() response as is. Here's an (unformatted) example response:
{ "labels": [ { "name": "Mammal", "boundingBoxes": [], "metadata": { "confidence": 91.53262329101562, "parents": [ { "name": "Animal" } ] } }, { "name": "Animal", "boundingBoxes": [], "metadata": { "confidence": 91.53262329101562, "parents": [] } }, { "name": "Brown Bear", "boundingBoxes": [], "metadata": { "confidence": 87.50741577148438, "parents": [ { "name": "Bear" }, { "name": "Wildlife" }, { "name": "Mammal" }, { "name": "Animal" } ] } }, { "name": "Wildlife", "boundingBoxes": [], "metadata": { "confidence": 87.50741577148438, "parents": [ { "name": "Animal" } ] } }, { "name": "Bear", "boundingBoxes": [ { "height": 0.31082990765571594, "left": 0.30625173449516296, "top": 0.4327436685562134, "width": 0.16304358839988708 }, { "height": 0.27813971042633057, "left": 0.6130136847496033, "top": 0.3633682429790497, "width": 0.26234132051467896 } ], "metadata": { "confidence": 87.50741577148438, "parents": [ { "name": "Wildlife" }, { "name": "Mammal" }, { "name": "Animal" } ] } }, { "name": "Nature", "boundingBoxes": [], "metadata": { "confidence": 82.90247344970703, "parents": [] } }, { "name": "Elephant", "boundingBoxes": [ { "height": 0.3217243254184723, "left": 0.07372771948575974, "top": 0.39511731266975403, "width": 0.21218346059322357 } ], "metadata": { "confidence": 82.64056396484375, "parents": [ { "name": "Wildlife" }, { "name": "Mammal" }, { "name": "Animal" } ] } }, { "name": "Outdoors", "boundingBoxes": [], "metadata": { "confidence": 79.14771270751953, "parents": [] } }, { "name": "Water", "boundingBoxes": [], "metadata": { "confidence": 72.9056396484375, "parents": [] } }, { "name": "Sea", "boundingBoxes": [], "metadata": { "confidence": 70.29981231689453, "parents": [ { "name": "Outdoors" }, { "name": "Water" }, { "name": "Nature" } ] } }, { "name": "Ocean", "boundingBoxes": [], "metadata": { "confidence": 70.29981231689453, "parents": [ { "name": "Outdoors" }, { "name": "Water" }, { "name": "Nature" } ] } }, { "name": "River", "boundingBoxes": [], "metadata": { "confidence": 60.10761260986328, "parents": [ { "name": "Outdoors" }, { "name": "Water" }, { "name": "Nature" } ] } } ] }Once I figured out the response format, it was straightforward to map the details to the Objects model. For the associated imagesID, I grabbed the id of the currently displayed image. Then it was a simple call to DataStore.save() to the Objects model. Once the Objects are saved, they appear in the application:
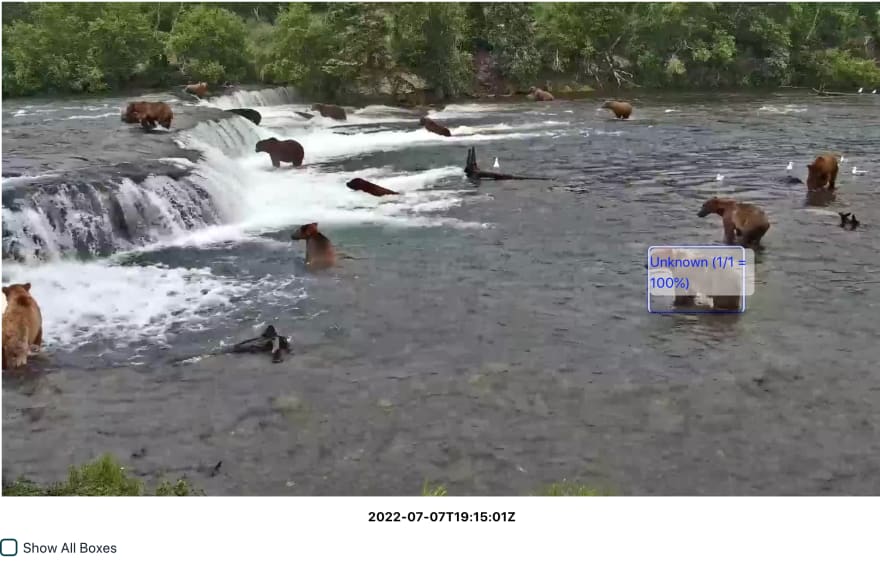
Initially, I was only saving the objects detected as Bear. While Rekognition is pretty good at identifying a bear when the webcam is zoomed in, it was missing a lot when the webcam was zoomed out. I decided to log all the detections and noticed that many bears were being detected, only with the wrong labels (dog, elephant, ...). By default, the app only shows bounding boxes for the bears, but I added CheckboxField to Show All Boxes:

I eventually hope to utilize the bearcam viewers to help correct the labels and use AWS services retrain a more accurate model for detecting bears in the bearcam images.
Conclusion
In this post I talked about how I used GitHub and GitHub Desktop to provide version control for the Bearcam Companion app. I added a user group in Amplify Studio to enable admin functionality. A user logged in as an admin can upload new images to the Images model. Finally, I used Amplify Predictions as an interface to Amazon Rekognition to find objects in the image and save them to the Objects model.
I need to implement a more automated mechanism for getting new images from Explore.org Snapshots page and running the object predictions. I will be looking into services like Lambda and EventBridge. Once I get that implemented, I need to publish this site and recruit some users!
Follow me here and on Twitter (bluevalhalla) to see how this project is coming along...
Original Link: https://dev.to/aws-builders/bearcam-companion-github-user-groups-and-rekognition-3kdk
Dev To
More About this Source Visit Dev To