
An Interest In:
Web News this Week
- April 21, 2024
- April 20, 2024
- April 19, 2024
- April 18, 2024
- April 17, 2024
- April 16, 2024
- April 15, 2024
Some of Our Sources
- TutsPlus - Code
- Team Treehouse
- Smashing Apps
- Six Revisions
- Abduzeedo
- Inspiredology
- Web Designer Depot
- Naldz Graphics
- Crazy Leaf Design
- TechPowerUp
Help Webnuz
Referal links:
Deploy a React App on AWS Lightsail: Testing, Docker, Docker Compose, Nginx & Github Actions
So you have written your React Application and you are ready to deploy it?
Although there are already existing solutions like Netlify, Vercel, to help you deploy your application easily and quickly, it's always good for a developer to know how to deploy an application on a private server.
Today, we'll learn how to deploy a React App on AWS Lightsail. This can also be applied to other VPS providers.
Table of content
- Setup
- Prepare the React application for deployment
- Environment variables
- Testing
- Docker Configuration
- Github Actions (testing)
- Preparing the server
- Github Actions (Deployment)
1 - Setup
For this project, we'll be using an already configured React application. It's a project made for this article about FullStack React & React Authentication: React REST, TypeScript, Axios, Redux & React Router.
You can directly clone the repo here.
Once it's done, make sure to install the dependencies.
cd django-react-auth-appyarn install2 - Prepare application for deployment
Here, we'll configure the application to use env variables but also configure Docker as well.
Env variables
It's important to keep sensitive bits of code like API keys, passwords, and secret keys away from prying eyes.
The best way to do it? Use environment variables. Here's how to do it in our application.
Create two files :
- a
.envfile which will contain all environment variables - and a
env.examplefile which will contain the same content as.env.
Actually, the .env file is ignored by git. The env.example file here represents a skeleton we can use to create our .env file in another machine.
It'll be visible, so make sure to not include sensitive information.
# ./.envREACT_APP_API_URL=YOUR_BACKEND_HOSTNow, let's copy the content and paste it in .env.example, but make sure to delete the values.
./env.exampleREACT_APP_API_URL=Testing
Testing in an application is the first assurance of maintainability and reliability of our React server.
We'll be implementing testing to make sure everything is green before pushing for deployment.
To write tests here, we'll be using the react testing library.
We'll basically test the values in the inputs of your Login component.
// src/pages/Login.test.tsximport React from "react";import '@testing-library/jest-dom'import {fireEvent, render, screen} from "@testing-library/react";import Login from "./Login";import store from '../store'import {Provider} from "react-redux";const renderLogin = () => { render( <Provider store={store}> <Login/> </Provider> )}test('Login Test', () => { renderLogin(); expect(screen.getByTestId('Login')).toBeInTheDocument(); const emailInput = screen.getByTestId('email-input'); expect(emailInput).toBeInTheDocument(); fireEvent.change(emailInput, {target: {value: '[email protected]'}}) expect(emailInput).toHaveValue('[email protected]'); const passwordInput = screen.getByTestId('password-input'); expect(passwordInput).toBeInTheDocument(); fireEvent.change(passwordInput, {target: {value: '12345678'}}) expect(passwordInput).toHaveValue('12345678');})Now run the tests.
yarn testNow let's move to the Docker configuration.
Dockerizing our app
Docker is an open platform for developing, shipping, and running applications inside containers.
Why use Docker?
It helps you separate your applications from your infrastructure and helps in delivering code faster.
If it's your first time working with Docker, I highly recommend you go through a quick tutorial and read some documentation about it.
Here are some great resources that helped me:
Dockerfile
The Dockerfile represents a text document containing all the commands that could call on the command line to create an image.
Add a Dockerfile.dev to the project root. It'll represent the development environment.
# Dockerfile.devFROM node:14-alpineWORKDIR /appCOPY package.json ./COPY yarn.lock ./RUN yarn install --frozen-lockfileCOPY . .Here, we started with an Alpine-based Docker Image for JavaScript. It's a lightweight Linux distribution designed for security and resource efficiency.
Also, let's add a .dockerignore file.
node_modulesnpm-debug.logDockerfile.devDockerfile.prod.dockerignoreyarn-error.logDocker Compose
Docker Compose is a great tool (<3). You can use it to define and run multi-container Docker applications.
What do we need? Well, just a YAML file containing all the configuration of our application's services.
Then, with the docker-compose command, we can create and start all those services.
Here, the docker-compose.dev.yml file will contain three services that make our app: nginx and web.
This file will be used for development.
As you guessed :
version: "3"services: nginx: container_name: core_web restart: on-failure image: nginx:stable volumes: - ./nginx/nginx.dev.conf:/etc/nginx/conf.d/default.conf ports: - "80:80" depends_on: - web web: container_name: react_app restart: on-failure build: context: . dockerfile: Dockerfile.dev volumes: - ./src:/app/src ports: - "3000:3000" command: > sh -c "yarn start" env_file: - .envnginx: NGINX is open-source software for web serving, reverse proxying, caching, load balancing, media streaming, and more.web: We'll run and serve the endpoint of the React application.
And the next step, let's create the NGINX configuration file to proxy requests to our backend application.
In the root directory, create a nginx directory and create a nginx.dev.conf file.
upstream webapp { server react_app:3000;}server { listen 80; server_name localhost; location / { proxy_pass http://webapp; proxy_set_header X-Forwarded-For $proxy_add_x_forwarded_for; proxy_set_header Host $host; proxy_redirect off; }}Docker Build
The setup is completed. Let's build our containers and test if everything works locally.
docker-compose -f docker-compose.dev.yml up -d --build Once it's done, hit localhost/ to see if your application is working.
You should get a similar page.

Great! Our React application is successfully running inside a container.
Let's move to the Github Actions to run tests every time there is a push on the main branch.
Github Actions (Testing)
GitHub actions are one of the greatest features of Github. it helps you build, test or deploy your application and more.
Here, we'll create a YAML file named main.yml to run some React tests.
In the root project, create a directory named .github. Inside that directory, create another directory named workflows and create the main.yml file.
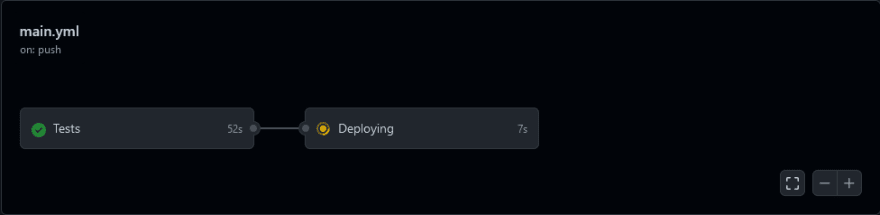
name: React Testing and Deployingon: push: branches: [ main ] pull_request: branches: [ main ]jobs: test: name: Tests runs-on: ubuntu-20.04 steps: - uses: actions/checkout@v2 - name: Installing dependencies run: yarn install - name: Running Test run: yarn testBasically, what we are doing here is setting rules for the GitHub action workflow, installing dependencies, and running the tests.
- Make sure that this workflow is triggered only when there is a push or pull_request on the main branch
- Choose
ubuntu-latestas the OS and precise the Python version on which this workflow will run. - After that as we install the javascript dependencies and just run the tests.
If you push the code in your repository, you'll see something similar when you go to your repository page.

After a moment, the yellow colors will turn to green, meaning that the checks have successfully completed.
Setting up the AWS server
I'll be using a Lightsail server here. Note that these configurations can work with any VPS provider.
If you want to set up a Lightsail instance, refer to the AWS documentation.
Personally, I am my VPS is running on Ubuntu 20.04.3 LTS.
Also, you'll need Docker and docker-compose installed on the machine.
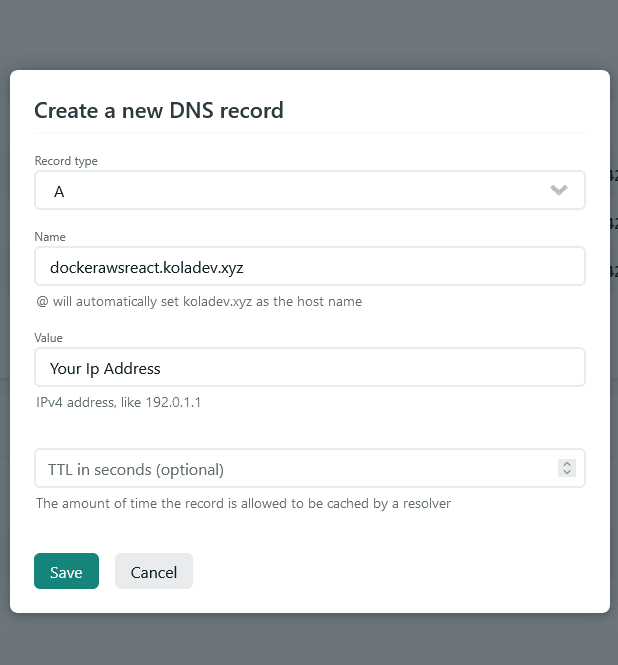
After that, if you want to link your server to a domain name, make sure to add it to your DNS configuration panel.
Once you are done, we can start working on the deployment process.
Docker build script
To automate things here, we'll write a bash script to pull changes from the repo and also build the docker image and run the containers.
We'll also be checking if there are any coming changes before pulling and re-building the containers again.
#!/usr/bin/env bashTARGET='main'cd ~/app || exitACTION='\033[1;90m'NOCOLOR='\033[0m'# Checking if we are on the main branchecho -e ${ACTION}Checking Git repoBRANCH=$(git rev-parse --abbrev-ref HEAD)if [ "$BRANCH" != ${TARGET} ]then exit 0fi# Checking if the repository is up to date.git fetchHEADHASH=$(git rev-parse HEAD)UPSTREAMHASH=$(git rev-parse ${TARGET}@{upstream})if [ "$HEADHASH" == "$UPSTREAMHASH" ]then echo -e "${FINISHED}"Current branch is up to date with origin/${TARGET}."${NOCOLOR}" exit 0fi# If that's not the case, we pull the latest changes and we build a new imagegit pull origin main;# Dockerdocker-compose -f docker-compose.prod.yml up -d --buildexit 0;Good! Login on your server using SSH. We'll be creating some new directories: one for the repo and another one for our scripts.
mkdir app .scriptscd .scriptsvim docker-deploy.shAnd just paste the content of the precedent script and modify it if necessary.
cd ~/appgit clone <your_repository> .Don't forget to add the dot .. Using this, it will simply clone the content of the repository in the current directory.
Great! Now we need to write the docker-compose.prod.yml file which will be run on this server.
We'll be adding an SSL certificate, by the way, so we need to create another nginx.conf file.
Here's the docker-compose.prod.yml file.
version: "3.7"services: nginx: container_name: core_web restart: on-failure image: jonasal/nginx-certbot:latest env_file: - .env.nginx volumes: - nginx_secrets:/etc/letsencrypt - ./nginx/user_conf.d:/etc/nginx/user_conf.d ports: - "80:80" - "443:443" depends_on: - web web: container_name: react_app restart: on-failure build: context: . dockerfile: Dockerfile.prod volumes: - ./src:/app/src ports: - "5000:5000" command: > sh -c "yarn build && serve -s build" env_file: - .envvolumes: nginx_secrets:If you noticed, we've changed the nginx service. Now, we are using the docker-nginx-certbot image. It'll automatically create and renew SSL certificates using the Let's Encrypt free CA (Certificate authority) and its client certbot.
And our React server is running the build app. Using yarn build, it'll create a production optimized app which we'll serve.
And finally, we'll add the Dockerfile.prod file
FROM node:14-alpine AS builderWORKDIR /appCOPY package.json ./COPY yarn.lock ./RUN yarn install --frozen-lockfileCOPY . .Create a new directory user_conf.d inside the nginx directory and create a new file nginx.conf.
upstream webapp { server react_app:5000;}server { listen 443 default_server reuseport; listen [::]:443 ssl default_server reuseport; server_name dockerawsreact.koladev.xyz; server_tokens off; client_max_body_size 20M; ssl_certificate /etc/letsencrypt/live/dockerawsreact.koladev.xyz/fullchain.pem; ssl_certificate_key /etc/letsencrypt/live/dockerawsreact.koladev.xyz/privkey.pem; ssl_trusted_certificate /etc/letsencrypt/live/dockerawsreact.koladev.xyz/chain.pem; ssl_dhparam /etc/letsencrypt/dhparams/dhparam.pem; location / { proxy_pass http://webapp; proxy_set_header X-Forwarded-For $proxy_add_x_forwarded_for; proxy_set_header Host $host; proxy_redirect off; }}Make sure to replace dockerawsreact.koladev.xyz with your own domain name...
And no troubles! I'll explain what I've done.
server { listen 443 default_server reuseport; listen [::]:443 ssl default_server reuseport; server_name dockerawsreact.koladev.xyz; server_tokens off; client_max_body_size 20M;So as usual, we are listening on port 443 for HTTPS.
We've added a server_name which is the domain name. We set the server_tokens to off to not show the server version on error pages.
And the last thing, we set the request size to a max of 20MB. It means that requests larger than 20MB will result in errors with HTTP 413 (Request Entity Too Large).
Now, let's write the job for deployment in the Github Action.
... deploy: name: Deploying needs: [test] runs-on: ubuntu-20.04 steps: - name: SSH & Deploy uses: appleboy/ssh-action@master with: host: ${{ secrets.SSH_AWS_SERVER_IP }} username: ${{ secrets.SSH_SERVER_USER }} key: ${{ secrets.SSH_PRIVATE_KEY }} passphrase: ${{ secrets.SSH_PASSPHRASE }} script: | cd ~/.scripts ./docker-deploy.shNotice the usage of Github Secrets here. It allows the storage of sensitive information in your repository. Check this documentation for more information.
We also using here a GitHub action that requires the name of the host, the username, the key, and the passphrase. You can also use this action with a password but it'll require some configurations.
Feel free to check the documentation of this action for more detail.
Also, notice the needs: [build] line. It helps us make sure that the precedent job is successful before deploying the new version of the app.
Once it's done, log via ssh in your server and create a .env file.
cd app/vim .env # or nano or whateverAnd finally, create a .env.nginx file. This will contain the required configurations to create an SSL certificate.
# RequiredCERTBOT_EMAIL=# Optional (Defaults)STAGING=1DHPARAM_SIZE=2048RSA_KEY_SIZE=2048ELLIPTIC_CURVE=secp256r1USE_ECDSA=0RENEWAL_INTERVAL=8dAdd your email address. Notice here that STAGING is set to 1. We will test the configuration first with Lets encrypt staging environment! It is important to not set staging=0 before you are 100% sure that your configuration is correct.
This is because there is a limited number of retries to issue the certificate and you dont want to wait till they are reset (once a week).
Declare the environment variables your project will need.
And we're nearly done. :)
Make a push to the repository and just wait for the actions to pass successfully.
And voil. We're done with the configuration.

if your browser shows an error like this, the configuration is clean! We can issue a production-ready certificate now.
On your server, stop the containers.
docker-compose down -vedit your .env.nginx file and set STAGING=0.
Then, start the containers again.
sudo docker-compose up -d --buildAnd we're done. :)
Conclusion
In this article, we've learned how to use Github Actions to deploy a dockerized React application on an AWS Lightsail server. Note that you can use these steps on any VPS.
And as every article can be made better so your suggestion or questions are welcome in the comment section.
Check the code of this tutorial here.
Original Link: https://dev.to/koladev/deploy-a-react-app-on-aws-lightsail-testing-docker-docker-compose-nginx-github-actions-4lb5
Dev To
More About this Source Visit Dev To